Are you tired of generic cabinet hardware that doesn’t match your style? Imagine adding a personal touch to every door in your home with custom cabinet door hardware you create yourself.
It’s easier than you think, and you don’t need to be an expert to get professional-looking results. In this guide, you’ll discover simple steps and insider tips to make your own unique cabinet hardware that perfectly fits your space. Get ready to transform your cabinets and impress everyone who sees them.
Keep reading—you’re about to unlock a creative skill that will change the way you see your home.
Choosing Materials
Choosing the right materials is key to making custom cabinet door hardware chief. The material affects both the look and the durability. It also impacts how easy the hardware is to clean and maintain. Picking the right material helps match your cabinet style and personal taste.
Metal Options
Metals offer strength and a modern feel. Stainless steel resists rust and lasts long. Brass adds a warm, classic look. Aluminum is light and easy to work with. Each metal has different finishes like matte or shiny. Pick one that fits your cabinet design and use.
Wood Variations
Wood gives a natural and warm touch. Oak is strong and has a visible grain. Cherry wood has a smooth texture and rich color. Pine is softer and easier to shape. Wood can be stained or painted to match any style. Choose a wood type that blends well with your cabinet.
Combining Materials
Mixing metal and wood brings a unique style. Metal handles with wooden bases look stylish and sturdy. Wood can soften metal’s cold feel. Combine materials to create contrast and interest. This mix works well in modern and rustic kitchens.
Tools Needed
Making custom cabinet door hardware requires specific tools. Having the right tools helps you work safely and get good results. Some tools are simple hand tools. Others are power tools that save time and effort. Safety gear is also important to protect yourself during the process.
Basic Hand Tools
Start with a good set of screwdrivers. You will need both flathead and Phillips types. A measuring tape is essential to get exact sizes. Use a pencil to mark cuts and holes. A small hammer helps with light tapping and fitting pieces. Pliers are useful for gripping and bending wires or small parts.
Power Tools
A drill is necessary for making holes and driving screws quickly. Use a drill with different drill bit sizes for accuracy. A jigsaw or rotary tool helps cut shapes from metal or wood. Sandpaper or a power sander smooths rough edges. A Dremel tool adds fine detail work to your hardware.
Safety Gear
Wear safety glasses to protect your eyes from dust and sparks. Use gloves to keep your hands safe from cuts and splinters. Hearing protection is important when using loud power tools. A dust mask prevents inhaling fine particles while sanding or drilling. Always keep your workspace clean and well-lit for safety.
Designing Your Hardware
Designing your custom cabinet door hardware is the first step. It sets the style and function for your space. Focus on simple, clear ideas that match your cabinets.
Think about the look you want. Classic, modern, or rustic? Your hardware should fit that style well.
Sketching Ideas
Start by drawing rough sketches on paper. Use basic shapes like circles, squares, and rectangles. Try different sizes and styles. This helps you see what looks best.
Keep your sketches simple and clear. Don’t worry about details yet. Focus on the overall shape and feel. These sketches will guide your next steps.
Measuring For Fit
Measure your cabinet doors carefully. Use a tape measure for accuracy. Note the width, height, and thickness of each door.
Check the space where hardware will go. Ensure your design fits without blocking edges. Proper fit makes hardware easy to use and strong.
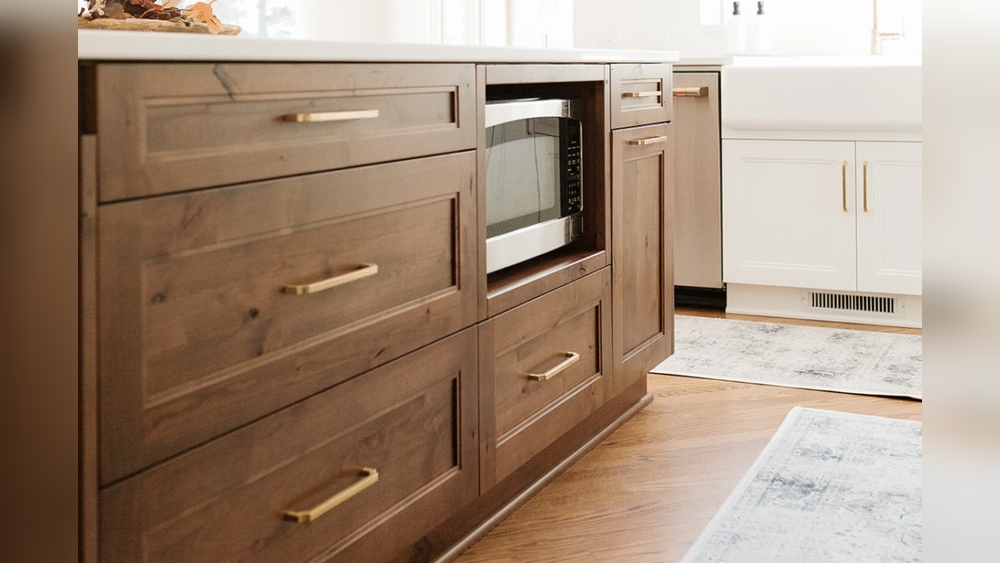
Selecting Finishes
Choose finishes that match your kitchen or room. Popular options include brushed nickel, bronze, or matte black. Each finish changes the look and feel.
Think about durability too. Some finishes resist fingerprints and scratches better. Pick one that stays beautiful with daily use.

Credit: www.chiefarchitect.com
Cutting And Shaping
Cutting and shaping are crucial steps in making custom cabinet door hardware. These steps define the final look and fit of the hardware. Precise cutting and careful shaping ensure that each piece fits perfectly and looks professional. This process involves working with different materials like metal and wood. Each material needs special tools and techniques to shape it properly.
Metal Cutting Techniques
Metal cutting requires sharp tools and steady hands. Use a hacksaw or metal cutting saw for straight cuts. For curves, a metal jigsaw blade works well. Mark the metal clearly before cutting to avoid mistakes. Always wear safety glasses and gloves to protect yourself. Take your time and cut slowly for clean edges.
Wood Carving Tips
Wood carving adds character to your cabinet hardware. Start with soft wood for easier carving. Use carving knives or small chisels to shape the wood. Work in small sections to control the shape better. Keep your tools sharp for smooth cuts. Carve away small layers gradually to avoid mistakes.
Sanding And Smoothing
Sanding prepares the hardware for finishing. Use medium-grit sandpaper to remove rough edges. Follow with fine-grit sandpaper for a smooth surface. Sand in the direction of the grain for wood. For metal, use a sanding block or steel wool. Clean the dust before painting or sealing the hardware.
Assembly And Attachment
Assembling and attaching custom cabinet door hardware is key to making your cabinets look great and last long. This step ensures the hardware fits well and works smoothly. Proper assembly also keeps the hardware secure during daily use.
Drilling Holes
Mark the exact spots for holes on your cabinet doors. Use a drill bit that matches the screw size. Drill slowly to avoid splitting the wood. Check the holes to make sure they are straight and clean.
Fastening Methods
Choose screws that fit your hardware and cabinet material. Use a screwdriver to attach the hardware firmly but gently. Avoid overtightening as it can damage the door or hardware. For extra hold, consider using small washers with screws.
Ensuring Durability
Test the hardware by opening and closing the doors several times. Tighten any loose screws to keep the hardware stable. Use protective finishes to prevent rust or wear. Regularly check the hardware and fix problems early to extend its life.

Credit: www.amazon.com
Painting And Finishing
Painting and finishing are key steps in making custom cabinet door hardware look great and last long. A smooth, even finish protects the material and adds style. Taking time to prime, paint or stain, and seal will improve the final result. Each step matters for a strong and beautiful surface.
Priming Surfaces
Start by cleaning the hardware thoroughly. Remove dust and grease to help primer stick. Apply a thin, even coat of primer over all surfaces. Primer creates a smooth base and improves paint adhesion. Let the primer dry fully before painting. Sand lightly if needed for a smooth finish.
Applying Paint Or Stain
Choose paint or stain that suits your desired look. Use a brush or spray for even coverage. Apply thin layers to avoid drips and uneven spots. Allow each coat to dry before applying the next. Multiple coats build color depth and durability. Light sanding between coats can create a smooth feel.
Sealing For Protection
Seal the painted or stained surface to protect it from wear. Use a clear polyurethane or varnish for a hard finish. Apply with a clean brush in thin, even layers. Let each coat dry fully before adding another. Sealing adds shine and guards against scratches and moisture. Proper sealing keeps your hardware looking new longer.
Installation Tips
Installing custom cabinet door hardware is a key step to ensure your cabinets look great and work well. Proper installation helps the hardware last longer and makes doors easy to open and close. Follow these simple tips to install your hardware with care and precision.
Aligning Hardware
Start by marking where the hardware will go. Use a ruler or measuring tape for accuracy. Make small pencil marks on the cabinet door. Check that the marks are even and level. Proper alignment keeps the hardware looking neat and balanced.
Securing To Doors
Use the right screws for your hardware and door type. Avoid screws that are too long or short. Drill pilot holes to prevent wood from splitting. Tighten screws firmly but do not over-tighten. This keeps the hardware stable without damaging the door.
Adjusting For Functionality
Open and close the door after installing the hardware. Check for smooth movement and proper fit. Adjust screws slightly if the hardware feels loose or tight. Make sure the door closes fully without rubbing or sticking. This ensures your cabinet hardware works perfectly.

Credit: www.chiefarchitect.com
Maintenance And Care
Custom cabinet door hardware adds a special touch to your space. Keeping it in good shape helps it last longer. Regular care and maintenance prevent damage and keep the look fresh. Simple steps can protect your hardware from wear and tear.
Cleaning Methods
Use a soft cloth to clean the hardware. Avoid harsh chemicals that can damage the finish. Warm water mixed with mild soap works well. Gently wipe off dirt and fingerprints. Dry the hardware with a clean towel to stop water spots.
Touch-up Techniques
Small scratches can be fixed easily at home. Use a matching paint or marker for touch-ups. Apply carefully to cover blemishes. Let it dry completely before using the hardware. This keeps the hardware looking new and neat.
Preventing Wear
Avoid using sharp or abrasive tools on the hardware. Tighten screws regularly to keep parts secure. Use soft cloths or pads when cleaning around the hardware. Handle doors gently to reduce stress on the hardware. These steps help maintain the hardware’s beauty and function.
Frequently Asked Questions
What Materials Are Best For Custom Cabinet Door Hardware?
Metal alloys like brass, stainless steel, and aluminum are ideal. They offer durability, rust resistance, and aesthetic appeal for custom hardware.
How Do I Measure For Custom Cabinet Door Hardware?
Measure the hole spacing or door edge thickness accurately. Use a ruler or caliper to ensure precise fitting and alignment.
Can I Design Custom Hardware Without Professional Tools?
Yes, basic hand tools like screwdrivers, drills, and sandpaper suffice for simple custom hardware projects at home.
How To Finish And Protect Custom Cabinet Hardware?
Apply clear lacquer or paint for protection. This prevents rust, enhances look, and extends hardware lifespan effectively.
Conclusion
Creating custom cabinet door hardware adds a personal touch to any space. You control the design, size, and finish. This helps match your cabinets perfectly. The process is simple and rewarding. Use the right tools and take your time. Small details make a big difference in style and function.
Enjoy the satisfaction of crafting something unique. Your cabinets will stand out with custom hardware. Try it yourself and see the change. Custom hardware can bring new life to old cabinets. A little effort leads to great results.