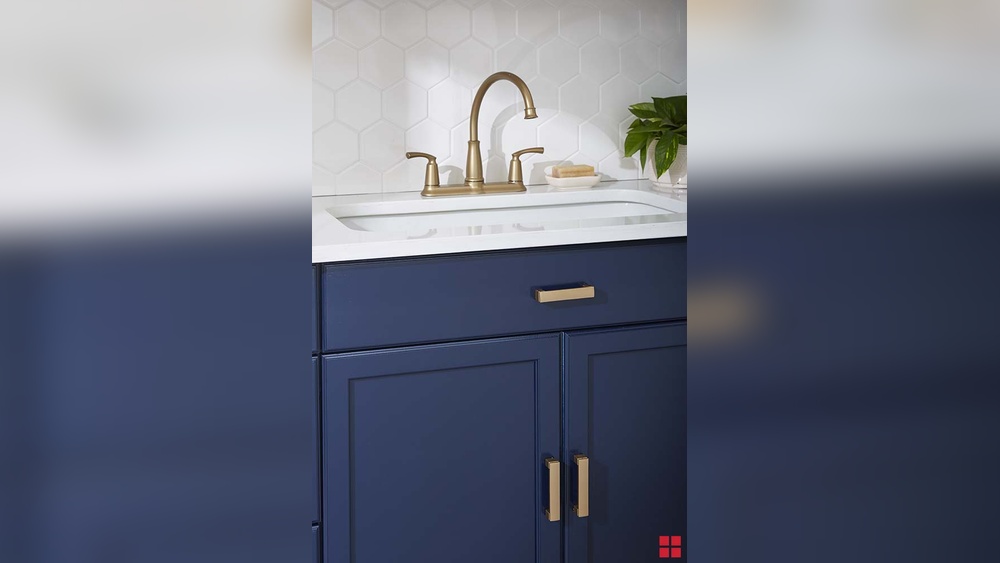
Your cabinets are more than just storage—they’re a key part of your home’s style. Over time, cabinet hardware like knobs and handles can lose their shine, look worn, or even get tarnished.
But before you think about replacing them, what if you could bring that old hardware back to life? Restoring your cabinet hardware is easier than you might think, and it can instantly refresh the look of your entire space. In this guide, you’ll discover simple, effective steps to clean, polish, and protect your hardware, making it look as good as new.
Ready to transform your cabinets without breaking the bank? Let’s dive in and restore your cabinet hardware to its original beauty.
Gathering Supplies
Before starting to restore cabinet hardware, gather all needed supplies. Having the right tools and cleaning agents saves time and effort. Prepare a clean workspace with good lighting. Organize your materials for easy access. This step ensures a smooth restoration process and better results.
Essential Cleaning Tools
Collect soft cloths to wipe and polish hardware. Use toothbrushes to reach small crevices. Steel wool or fine sandpaper helps remove rust and grime. Gloves protect your hands from harsh cleaners. A small container or bowl is useful for soaking pieces. Keep a soft-bristle brush handy for delicate cleaning jobs.
Cleaning Agents And Polishes
Choose gentle cleaners like dish soap for basic dirt removal. Baking soda mixed with water forms a mild abrasive paste. Vinegar helps dissolve mineral deposits and tarnish. Lemon juice works well on brass and copper. For tough stains, use specialized metal polishes carefully. Always test cleaners on a small area first to avoid damage.
Removing Hardware
Removing cabinet hardware is the first step in restoring its original beauty. Doing this carefully protects both the hardware and the cabinet. Rushing the process can cause damage that is hard to fix.
Take your time and prepare the right tools before starting. This will make the task smoother and safer for your cabinets.
Safe Detachment Techniques
Use a screwdriver that fits the screws exactly to avoid stripping them. Turn screws slowly and steadily to loosen them.
If screws are stuck, apply a little penetrating oil and wait a few minutes. Gently wiggle the hardware to loosen it without forcing.
Lift handles and knobs straight off to prevent bending or breaking. Keep the hardware flat on a soft surface to avoid scratches.
Labeling For Reinstallation
Label each piece of hardware as you remove it. Use small bags or containers to hold screws and parts together.
Mark the cabinet doors or drawers with a number or letter that matches the hardware label. This helps you know exactly where each piece goes.
Keep all labels and hardware in a safe place during cleaning and repair. This saves time and avoids confusion later.
Initial Soaking
Initial soaking is the first step to restore your cabinet hardware effectively. It loosens dirt, grime, and old finishes. This step makes cleaning easier and prepares the surface for polishing. Different hardware materials need different soaking methods. Knowing which method fits your hardware type saves time and prevents damage.
Soaking Methods For Different Materials
For brass or bronze hardware, soak in warm water mixed with mild dish soap. Let it sit for 15-30 minutes to soften dirt and tarnish.
Steel or iron pieces benefit from a soak in white vinegar for 10-15 minutes. Vinegar removes rust and brightens metal.
Aluminum hardware should soak in a solution of water and baking soda. Avoid harsh acids that can damage the metal.
Plastic or painted hardware needs gentle soaking in warm, soapy water only. Avoid abrasive cleaners that can strip paint or finish.
Alternatives For Non-removable Hardware
Hardware that cannot be removed requires a different approach. Create a paste of baking soda and water or vinegar. Apply the paste directly to the hardware surface.
Cover the paste with plastic wrap to keep it moist. Let it sit overnight to break down grime and corrosion.
Use a soft toothbrush to scrub gently after soaking. Wipe clean with a damp cloth and dry thoroughly.
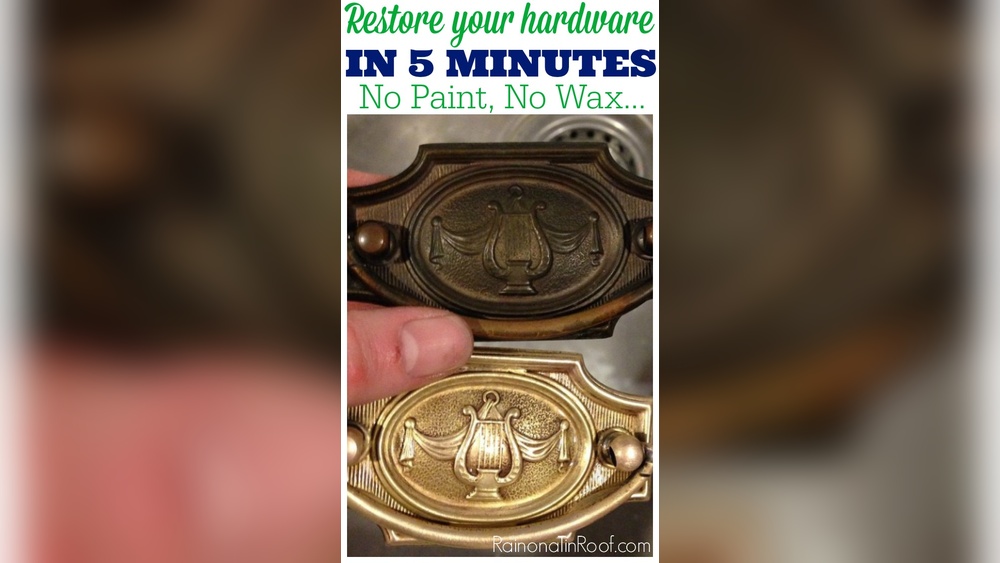
Credit: cabinethdw.com
Scrubbing And Cleaning
Scrubbing and cleaning cabinet hardware is key to restoring its original shine. Dirt, grime, and old polish build up over time. Cleaning removes these layers and prepares the hardware for further restoration. This process takes patience and the right tools. Focus on gentle but thorough scrubbing to avoid damage. Small details and crevices need special attention to bring out the best results.
Using Brushes And Scrapers
Start with soft brushes to remove dust and loose dirt. Toothbrushes work well for small crevices. Avoid hard bristles that may scratch the surface. Plastic scrapers help remove stubborn grime without harming the metal. Use gentle pressure to avoid dents or scratches. Clean each piece carefully, paying attention to corners and edges. Rinse the hardware after scrubbing to wash away loosened dirt.
Dealing With Stubborn Tarnish And Rust
Tarnish and rust need stronger treatment. Use a mild abrasive cleaner or a paste made from baking soda and water. Apply it gently with a soft cloth or brush. For heavy rust, steel wool or fine sandpaper may be needed. Work carefully to avoid removing too much metal. Rinse hardware well after cleaning rust or tarnish. Dry each piece completely to stop rust from returning. Repeat the process if necessary until the hardware looks clean.
Rinsing And Drying
Rinsing and drying cabinet hardware correctly is crucial after cleaning. It removes leftover cleaning agents that can cause damage or tarnish. Proper rinsing and drying help preserve the hardware’s shine and prevent rust. This step ensures your hardware looks fresh and lasts longer.
Thorough Rinse Techniques
Use warm water to rinse the hardware thoroughly. Hold each piece under running water to wash away all cleaning residues. For small crevices, use a soft brush to reach hidden areas. Avoid using harsh water pressure that could damage delicate finishes. Rinse until the water runs clear and no suds remain.
Proper Drying Methods
Dry each piece immediately after rinsing to stop water spots and rust. Use a soft, clean cloth to gently pat the hardware dry. Air drying can leave spots, so avoid leaving hardware to dry on its own. For best results, place hardware on a towel in a dry area. Ensure all moisture is removed before reattaching the hardware.

Credit: www.amazon.com
Polishing Hardware
Polishing cabinet hardware brings life back to old pieces. It removes dullness and small scratches. A good polish makes metal shine and look new again. This step is key to restoring hardware without replacing it. Proper polishing protects the finish and improves appearance.
Choosing The Right Polish
Select a polish made for your hardware’s metal type. Brass, chrome, and nickel need different products. Use gentle polishes for delicate finishes. Avoid harsh chemicals that can damage metal or remove plating. Always test polish on a small area first. This prevents unwanted discoloration or harm.
Buffing For Shine
After applying polish, use a soft cloth to buff. Circular motions work best for even shine. Buff until the metal gleams and feels smooth. For tough spots, a microfiber cloth or old t-shirt works well. Avoid abrasive materials that can scratch surfaces. Regular buffing keeps hardware looking bright longer.
Protecting The Finish
Protecting the finish on your cabinet hardware keeps it looking fresh and new longer. After restoration, the hardware is vulnerable to scratches, rust, and dulling. A good protective layer guards against these issues. This step helps maintain shine and prevents damage from daily use and moisture. Take time to apply coatings and follow rust prevention tips for best results.
Applying Protective Coatings
Start with clean, dry hardware before applying any coating. Use clear lacquer or a metal sealant designed for hardware. Apply thin, even coats with a soft brush or spray. Let each coat dry completely before adding another. This builds a strong shield over the metal surface. Avoid thick layers to prevent drips and uneven finish. Protective coatings lock in shine and stop air from causing rust or tarnish. For brass or bronze, use wax polish for a softer finish and extra protection.
Rust Prevention Tips
Rust forms quickly on bare metal, especially in humid areas like kitchens. Keep hardware dry by wiping off water or spills immediately. Use silica gel packets in drawers or cabinets to reduce moisture. Avoid harsh cleaners that strip protective layers. Lightly oil metal parts occasionally with mineral oil to repel moisture. Store spare hardware in a dry place wrapped in soft cloth. Regularly inspect hardware for signs of rust and treat spots early. Prevention keeps your hardware looking great and lasting longer.
Optional Enhancements
Optional enhancements offer ways to improve the look and feel of your restored cabinet hardware. These small touches can add character and help match your hardware to your room’s style. They also protect the metal and keep it looking fresh longer.
Using Wax Or Antique Finishes
Wax adds a soft shine and protects metal surfaces. Apply a thin layer with a cloth. Buff gently for a smooth finish. Antique finishes create a vintage look. Use patinas or glaze to darken or age the metal. These finishes highlight details and add depth. Let each coat dry fully before applying another.
Customizing Hardware Appearance
Change hardware color with spray paint made for metal. Choose a finish like matte, satin, or glossy. Use painter’s tape to protect areas you want to keep clean. Add texture by lightly sanding or sponging paint. You can also mix metals, such as bronze handles with brass knobs. Customizing helps your hardware fit your design perfectly.
Reinstalling Hardware
Reinstalling hardware is the final step in restoring cabinet pieces. It requires care to ensure the hardware fits well and looks great. Proper reinstallation improves the cabinet’s function and style. Taking time here prevents damage and future repairs.
Proper Alignment And Attachment
Start by matching each piece to its original spot. Check the holes and screws for a perfect fit. Use a level or ruler to align handles and knobs evenly. Insert screws gently to avoid stripping the wood. Tighten screws just enough to hold hardware firmly. Avoid over-tightening, which can crack the cabinet surface.
Ensuring Durability
Use quality screws or bolts for strong attachment. Replace old or rusty screws to prevent loosening. Add small washers if needed to spread pressure. Test the hardware by opening and closing the cabinet doors. Make sure pieces do not wiggle or feel loose. Regularly check and tighten screws to keep hardware secure.

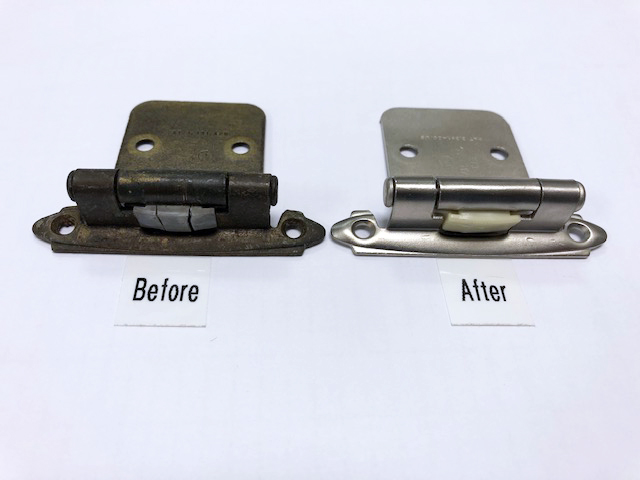
Credit: www.youtube.com
Maintenance Tips
Maintaining your cabinet hardware keeps it looking fresh and working well. Small efforts prevent wear and tear. Simple routines help avoid costly repairs and replacements. Follow these tips to extend the life of your hardware.
Regular Cleaning Routines
Dust and dirt can dull cabinet hardware quickly. Clean hardware weekly using a soft cloth. Avoid harsh chemicals that can damage finishes. A mild soap solution works well for most materials. Use a soft toothbrush for crevices and detailed areas. Dry hardware thoroughly to prevent water spots and rust.
Polish metal hardware with a gentle metal cleaner. Test cleaners on a small area first. Regular cleaning prevents buildup and keeps hardware shiny. This simple habit keeps cabinets attractive and functional.
Preventing Future Damage
Avoid exposing hardware to moisture and harsh environments. Wipe spills immediately to stop corrosion. Use cabinet liners to protect hardware from oils and grime. Tighten loose screws regularly to maintain stability. Replace worn or damaged parts promptly to avoid bigger problems.
Consider applying a clear protective coating for extra defense. Handle cabinets gently to reduce stress on hardware. These steps help your cabinet hardware last longer and look better every day.
Frequently Asked Questions
How Do I Make My Cabinet Hardware Look New?
Clean cabinet hardware by soaking in warm, soapy water. Scrub with a toothbrush and baking soda paste. Rinse, dry thoroughly, then polish with a soft cloth. Apply protective oil or clear lacquer to prevent rust and maintain shine. Repeat regularly for lasting new appearance.
How To Bring Old Hardware Back To Life?
Soak hardware in hot, soapy water or vinegar paste. Scrub with a toothbrush or steel wool. Rinse, dry, and polish well. Apply protective oil or clear lacquer to prevent rust. Use gentle methods for brass-plated pieces to avoid damage.
How To Remove Tarnish From Hardware?
Remove tarnish by scrubbing hardware with baking soda and lemon juice paste or Barkeeper’s Friend. Rinse, dry, and polish with a soft cloth. For tough spots, use a toothbrush or steel wool gently. Apply protective oil or clear lacquer to prevent rust.
What To Soak Old Hardware In?
Soak old hardware in a mixture of warm water and mild dish soap for 1-2 hours. For tougher grime, use vinegar or a baking soda paste. Avoid harsh chemicals on plated pieces to prevent damage. Always rinse and dry thoroughly after soaking.
Conclusion
Restoring cabinet hardware takes time but improves your space. Clean each piece gently using simple household items. Remove rust and dirt carefully to avoid damage. Dry and polish hardware to bring back its shine. Small efforts make old hardware look fresh and new.
Enjoy the satisfaction of a well-restored kitchen or room. Keep your tools handy for future touch-ups or projects. Restored hardware adds charm without costly replacements. Try these steps and see your cabinets transform today.