Have you ever admired the intricate beauty of a Chinese knot and wondered how to make one yourself? Chinese knot fastening is more than just a decorative touch—it’s a symbol of luck, harmony, and tradition.
You’ll discover simple, step-by-step instructions to create your own stunning Chinese knot quickly and easily. Whether you want to add a unique charm to your home, gifts, or accessories, mastering this skill will give you a sense of accomplishment and creativity.
Keep reading, and you’ll be tying perfect knots in no time!

Credit: www.youtube.com
Materials Needed
Starting a Chinese knot project needs some basic materials. The right tools and cords make your work easier and more beautiful. Prepare well to enjoy the process and get great results.
Choosing The Right Cord
Select a cord that is smooth and flexible. Nylon or satin cords work well for Chinese knots. They hold shape and shine nicely. Avoid cords that are too stiff or thin. Thickness around 2-3mm is perfect for beginners. Colors depend on your design. Red and gold are traditional choices with good luck meaning.
Additional Tools
Besides cord, gather a pair of sharp scissors for clean cuts. A lighter helps to seal cord ends and avoid fraying. Use a flat surface or a knot board to keep your work steady. Pins or clips can hold loops in place. A ruler or measuring tape ensures accurate cord lengths. These tools keep your knot neat and easy to make.

Credit: battledental.com
Basic Knot Types
Chinese knot fastening uses simple knots to create beautiful designs. These knots are the base for more complex patterns. Learning the basic knot types helps you start your knotting journey. These knots are easy to make and look elegant.
Single Knot
The single knot is the simplest type of Chinese knot. It forms the foundation for many other knots. To make it, cross the cord ends once and pull tight. This knot is small and neat. It holds well and looks clean. Use it to fasten clothes or add decoration.
Double Knot
The double knot is a step up from the single knot. It adds strength and thickness to the fastening. To create it, cross the cords twice before pulling tight. This knot looks fuller and more secure. It works well for larger garments or heavier fabrics. The double knot adds a classic touch to your designs.
Preparing The Cord
Preparing the cord is the first step in making a Chinese knot fastening. This step sets the foundation for a neat and strong knot. Proper preparation makes the tying process easier and the final knot more durable.
Choose a cord that fits your project. The cord should be smooth and flexible. Avoid cords that are too thick or too stiff. The right cord helps create tight and even knots.
Measuring And Cutting
Measure the cord length carefully. Each knot needs extra cord for weaving and finishing. Add about 30% more cord than the knot size. Cutting too short will cause trouble while tying.
Use sharp scissors to cut the cord cleanly. A clean cut prevents fraying. Cut slowly and steadily for a straight edge.
Sealing The Ends
Sealing the ends stops the cord from fraying. Frayed ends are hard to work with and look messy.
Use a lighter or match to melt synthetic cord ends gently. Hold the flame close but do not burn the cord. Let the melted end cool down naturally.
For natural fiber cords, apply clear nail polish or glue to the ends. This method keeps the fibers together. Let the seal dry before starting your knot.
Step-by-step Knotting
Creating a Chinese knot fastening is a fun and creative process. This step-by-step guide helps you learn each part clearly. Follow each step carefully to make a neat and strong knot. Enjoy the art of Chinese knotting with simple instructions below.
Forming The Loop
Start with a cord of your choice. Make a small loop by folding the cord back. Hold the loop steady with your fingers. The size of the loop depends on your design. Keep the loop flat and smooth for best results.
Weaving The Cord
Take the free end of the cord. Weave it over and under the loop carefully. Follow a simple pattern to keep it even. Make sure the cord stays flat without twists. Keep weaving until the design looks balanced and tight.
Tightening The Knot
Gently pull the ends of the cord. Tighten the knot slowly and evenly. Check the shape as you tighten it. Adjust the loops to keep the knot neat. Finish by securing the ends to hold the knot firm.
Finishing Touches
Finishing touches give your Chinese knot a clean, polished look. These final steps improve the knot’s shape and style. Small adjustments make a big difference. Personalizing the knot adds charm and uniqueness.
Adjusting The Knot Shape
Check the knot for any loose loops or uneven parts. Gently pull on the cords to tighten or loosen sections. Shape the knot so it looks balanced and neat. Use your fingers to smooth out bumps or twists. A well-shaped knot holds better and looks beautiful.
Adding Decorative Elements
Decorations add flair and character to your knot. Attach beads, tassels, or small charms to the ends of the cords. Choose colors that match or contrast with the knot for a striking effect. Secure decorations firmly to prevent slipping. These elements make your knot stand out and feel special.
Common Mistakes To Avoid
Making a Chinese knot fastening can be fun and rewarding. Avoiding common mistakes helps you create a neat, strong knot. These errors often cause frustration and weak knots. Focus on these key points to improve your skills and results.
Uneven Tension
Uneven tension makes the knot look messy and weak. Pull the cords gently but firmly. Keep the tension steady throughout the process. Tighten each part of the knot evenly. Uneven tension causes some parts to be loose and others too tight. This problem can make the knot lose its shape quickly.
Incorrect Cord Length
Using the wrong cord length can ruin your project. Too short cords leave you no room to finish the knot. Too long cords waste material and become hard to handle. Measure the cord carefully before starting. Always add extra length to avoid running out. This simple step saves time and frustration.
Creative Uses For Chinese Knot Fastenings
Chinese knot fastenings are more than just practical closures. They bring beauty and culture to many items. Their intricate patterns and bright colors make them perfect for many creative projects. These knots add a unique touch to everyday objects. They combine art with function in a simple way.
Jewelry Making
Chinese knots shine in jewelry designs. They work well as bracelet closures or necklace pendants. Their shapes can be simple or complex. Each knot adds a handmade charm. Use different colors for a playful look. These fastenings make jewelry stand out. They also carry symbolic meanings, adding depth to designs.
Home Decor
Use Chinese knot fastenings in home decor to add elegance. Attach them to curtains as tiebacks or hang them as wall art. Small knots can decorate cushions or lampshades. Their patterns bring a cozy, cultural feel to any room. These knots blend tradition with modern style easily.
Fashion Accessories
Fashion accessories become special with Chinese knot fastenings. They fit well on bags, belts, or hairbands. These knots add color and texture. They turn simple accessories into eye-catching pieces. Their sturdy design ensures they last long. Fashion items with these knots look unique and stylish.

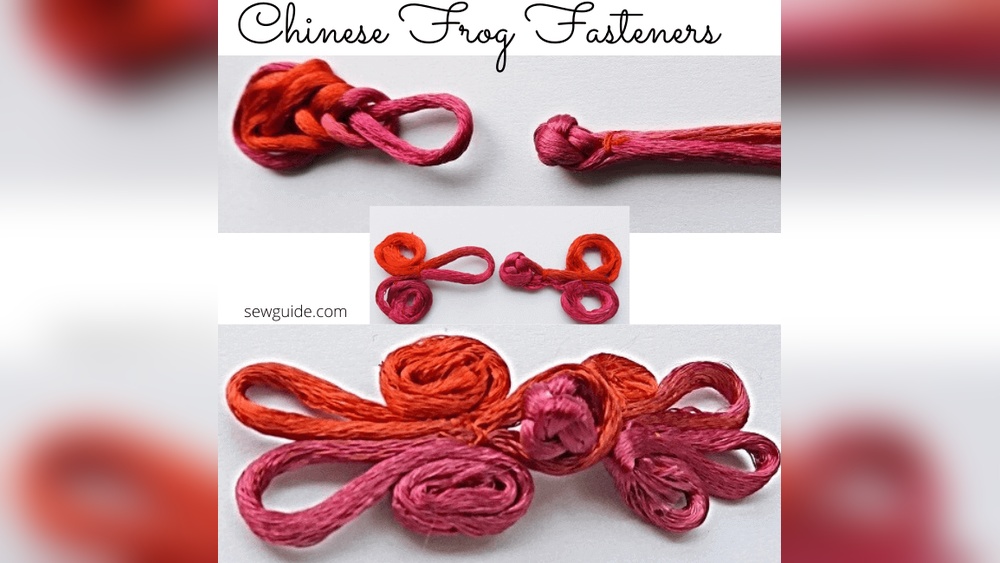
Credit: sewguide.com
Frequently Asked Questions
What Materials Are Needed For Chinese Knot Fastening?
You need nylon or silk cord, scissors, and a ruler. Optional items include a lighter for sealing ends. These materials help create strong, decorative knots for garments or accessories.
How Do You Start Making A Chinese Knot Fastening?
Begin by cutting the cord to the desired length. Fold and loop the cord to form the base knot. Follow step-by-step instructions carefully to ensure symmetry and tightness.
What Are The Common Types Of Chinese Knot Fastenings?
Popular types include the button knot, double coin knot, and butterfly knot. Each has a unique shape and fastening style. Choose based on your design and fastening needs.
How Can I Secure The Chinese Knot Fastening Firmly?
Tighten each loop evenly and trim excess cord. Use glue or a lighter to seal ends if needed. This prevents unraveling and ensures durability.
Conclusion
Creating a Chinese knot fastening is simple and fun. Practice a few times to get better. Each knot adds a special touch to your crafts. You can use it for gifts, clothes, or decorations. Keep trying different styles and sizes for variety.
This skill brings beauty and meaning to your work. Enjoy the process and share your creations with friends. Making knots connects you to a rich tradition. Start today and see how small knots create big smiles.