Are you tired of struggling with loose or sagging screens? Installing screen clip fasteners can be the simple fix you need to keep your screens secure and looking neat.
In this guide, you’ll discover easy-to-follow steps that anyone can handle, even if you’ve never done this before. By the end, you’ll have the confidence to install these fasteners quickly and effectively, saving you time and frustration. Ready to make your screens stay put without hassle?
Let’s dive in!
Credit: www.amazon.com
Tools And Materials Needed
Installing screen clip fasteners needs the right tools and materials. This ensures a strong hold and smooth installation. Preparing these items before starting saves time and avoids frustration. Understanding the types of fasteners and essential tools helps you work with confidence.
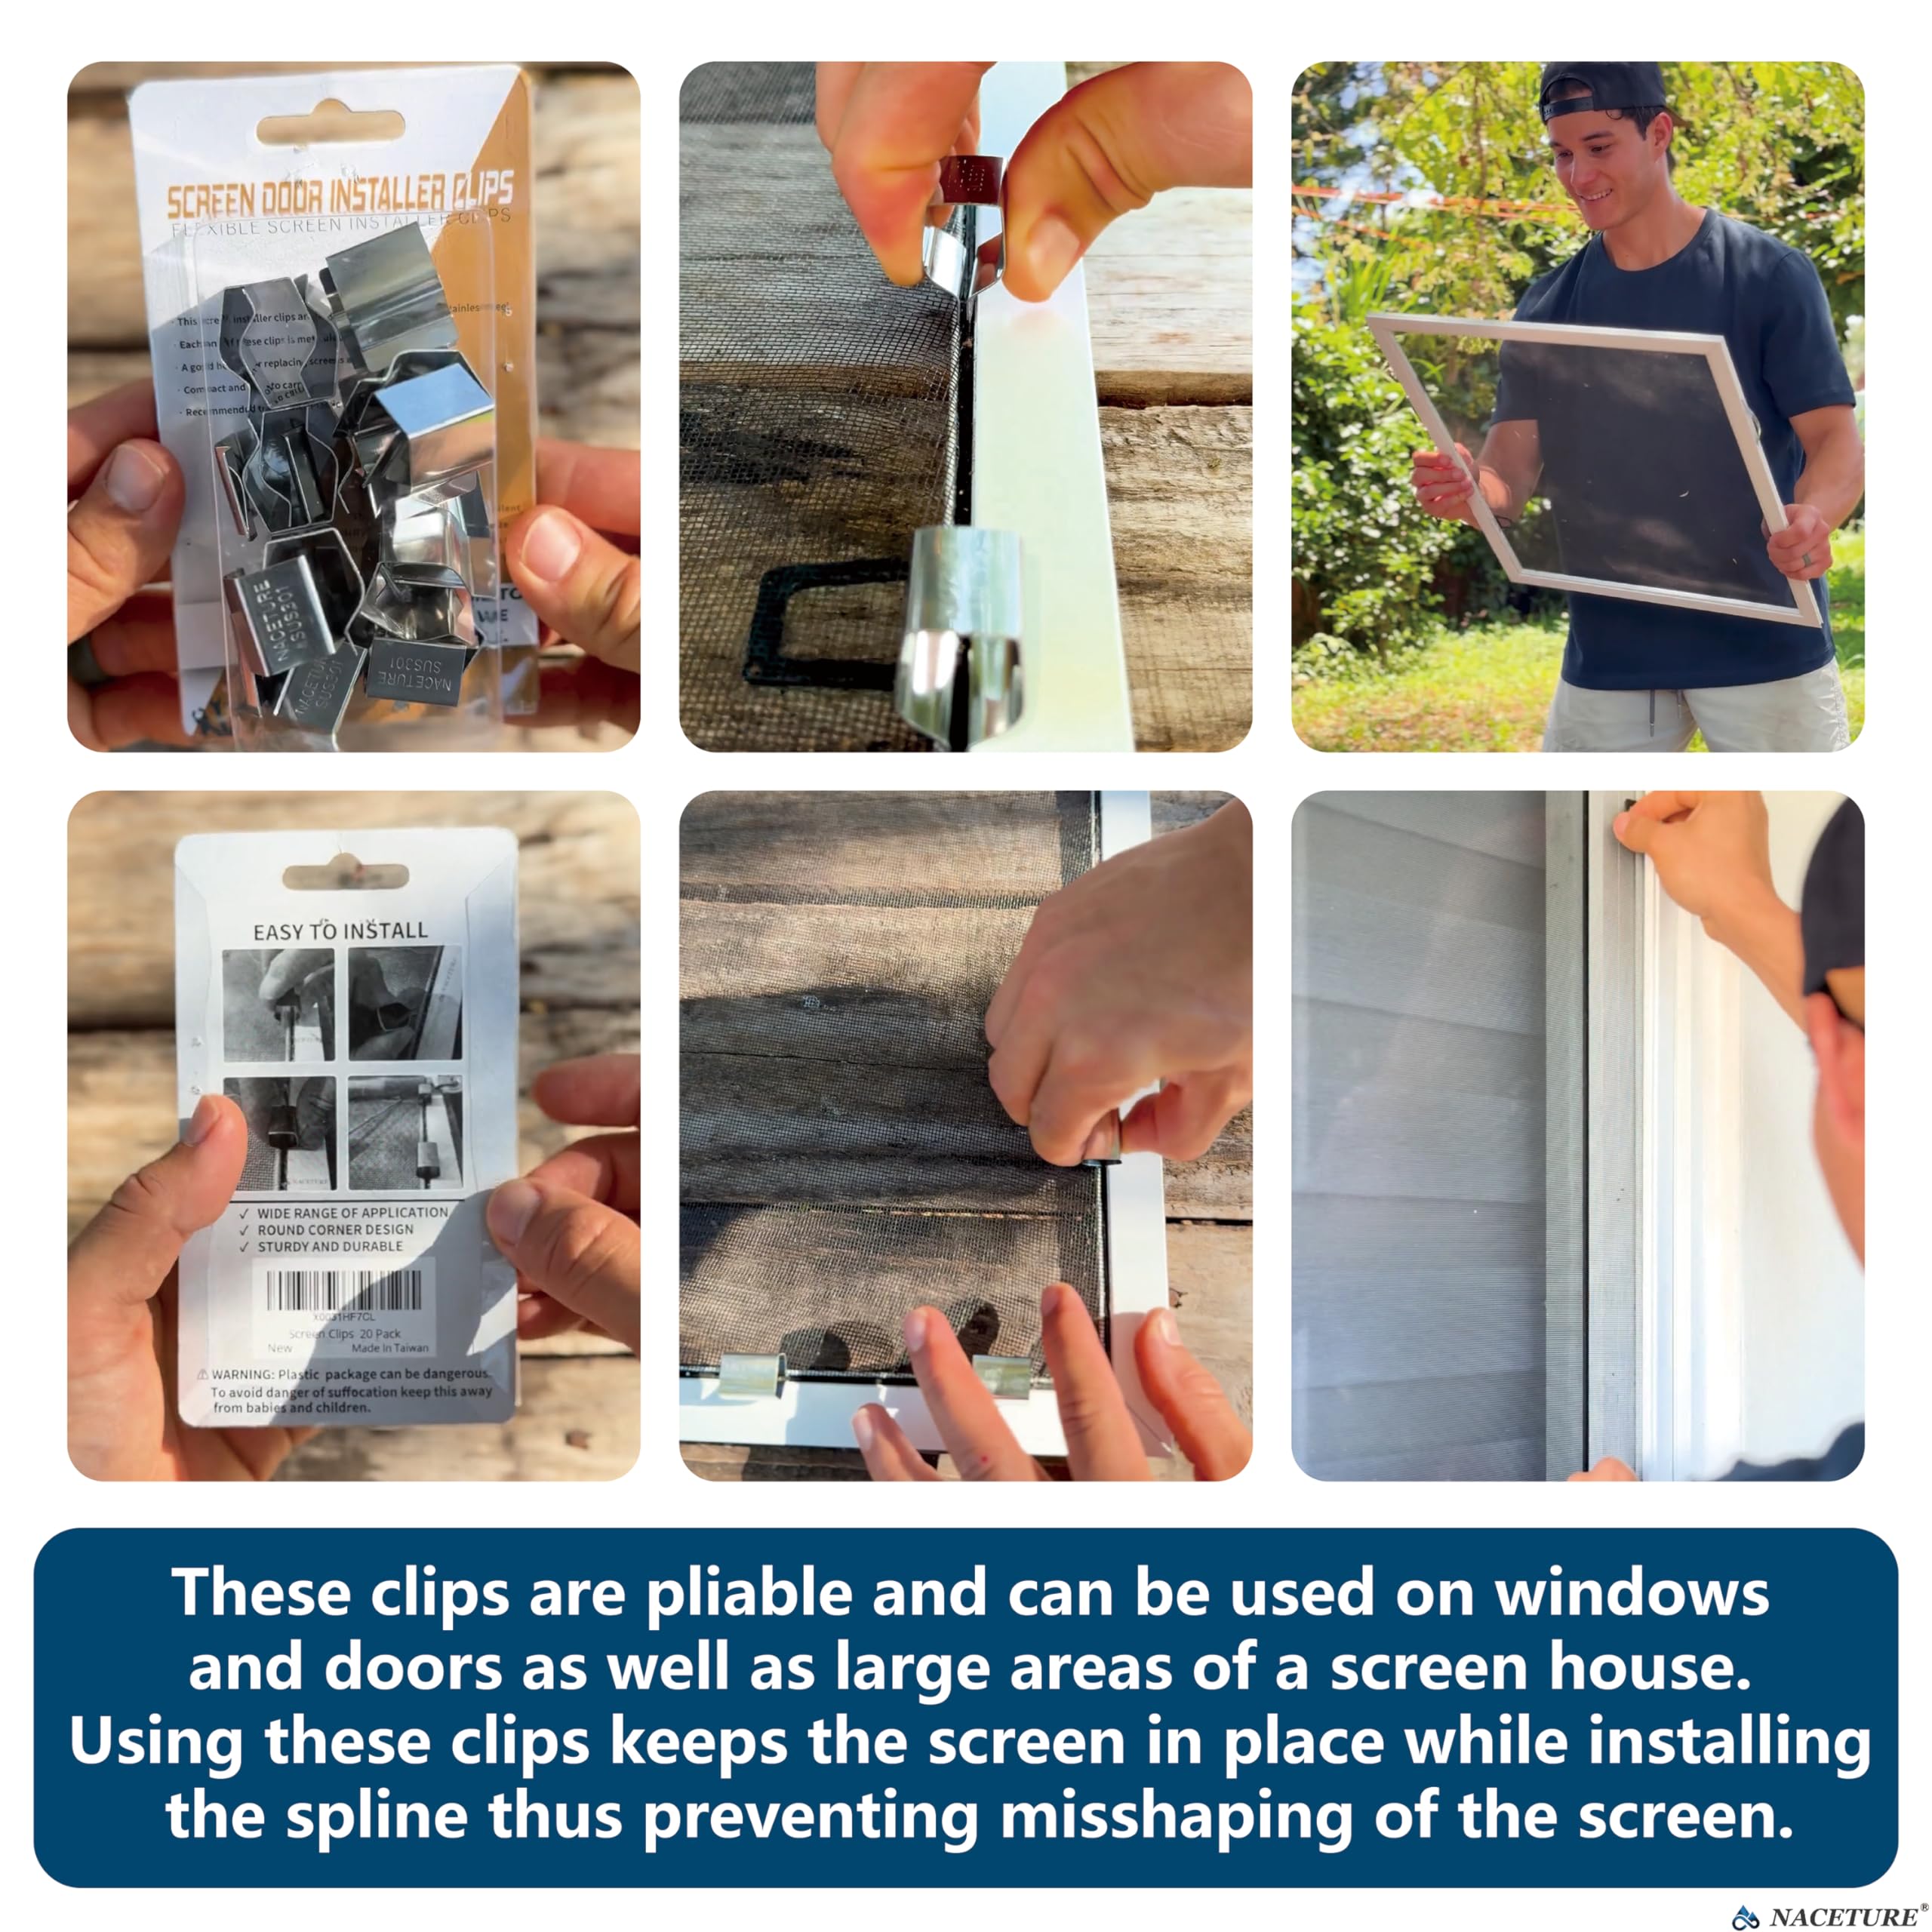
Types Of Screen Clip Fasteners
Screen clip fasteners come in different styles. Some clips snap into place easily. Others require screws for a tighter grip. Plastic clips suit lightweight screens. Metal clips offer more strength and durability. Choose clips based on your screen type and frame material. The right clip type ensures a secure fit and long-lasting hold.
Essential Installation Tools
Basic tools make screen clip fastener installation easier. A screwdriver or drill fits most clip screws. Measuring tape helps place clips evenly. A pencil marks clip positions on the frame. Needle-nose pliers assist with tough clips. A utility knife trims excess screen material. Having these tools ready speeds up the process and reduces mistakes.

Credit: www.youtube.com
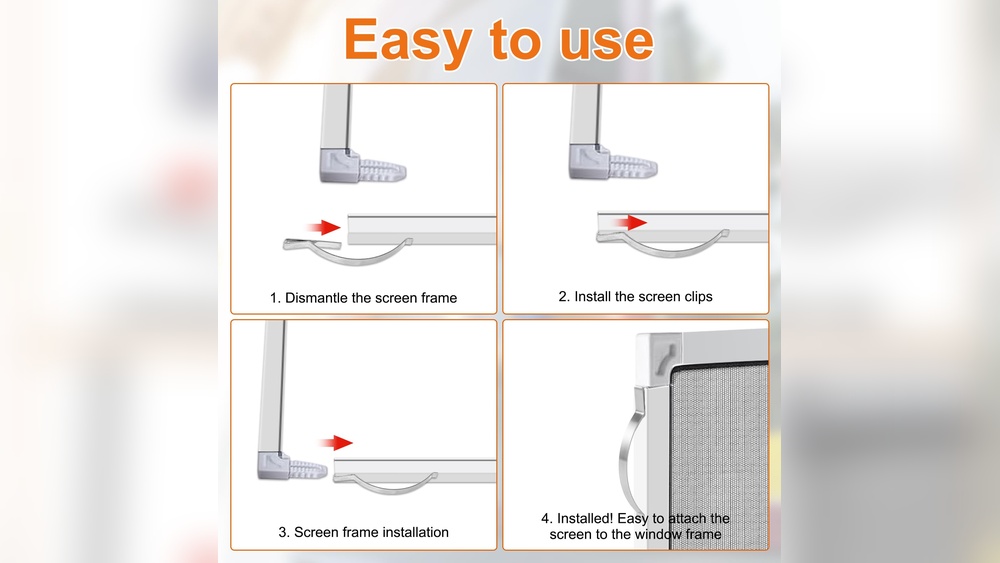
Preparing The Screen Frame
Preparing the screen frame is an important step before installing screen clip fasteners. A well-prepared frame helps the clips hold firmly and keeps the screen tight. Careful preparation saves time and avoids problems later.
Measuring And Marking Clip Positions
Start by measuring the length of each side of the screen frame. Divide the length by the number of clips you plan to use. This helps place clips evenly along the frame. Mark the exact spots lightly with a pencil. Make sure the marks are clear but easy to erase later. Correct placement ensures the screen stays tight and secure.
Cleaning The Frame Surface
Clean the frame surface where the clips will attach. Use a cloth and mild soap to remove dirt and grease. Dirt can stop clips from sticking well or cause rust. Let the frame dry completely before you move to the next step. A clean frame gives the clips a strong hold and lasts longer.
Attaching The Screen Clips
Attaching the screen clips is a key step in securing your screen properly. This process ensures the screen stays tight and does not sag or fall out. Careful placement and fixing of the clips will hold the screen firmly in place.
Aligning Clips For Secure Hold
Place the clips evenly along the frame edge. Start by putting one clip at each corner. Then add clips in the middle of each side. Keep equal spacing between clips for balanced support. Make sure clips face the screen edge correctly. This alignment prevents gaps and loose areas.
Fixing Clips With Screws Or Adhesive
Choose screws for a strong, lasting hold. Use a drill or screwdriver to fasten clips tightly. Do not overtighten to avoid damaging the frame. For adhesive, clean the surface well before sticking. Press clips firmly and hold for a few seconds. Let the glue dry fully before fitting the screen. Both methods keep clips stable and the screen secure.

Credit: www.zillarules.com
Installing The Screen Mesh
Installing the screen mesh is a key step in fitting screen clip fasteners. It keeps insects out and lets air in. Proper placement and secure fixing ensure the mesh stays tight and lasts long.
Positioning The Mesh Correctly
Start by laying the mesh over the frame. Make sure it covers the entire opening. Leave some extra mesh around the edges. This extra will help when attaching the clips. Check that the mesh is flat and smooth. Avoid wrinkles or folds. Adjust the mesh so it fits evenly on all sides.
Securing Mesh With Clips
Place the screen clip fasteners along the frame edges. Space clips evenly, about every 4 to 6 inches. Press each clip firmly to hold the mesh in place. The clips should grip the mesh without tearing it. Work your way around the frame. Check the mesh tension as you go. Tight mesh stops sagging and keeps bugs out.
Final Adjustments And Checks
After installing screen clip fasteners, final adjustments and checks ensure they work well. This step helps avoid loose clips or damage to the screen. Careful inspection and small tweaks make the installation strong and neat.
Ensuring A Tight Fit
Check each fastener to confirm it holds the screen firmly. Press on the clips gently but firmly. The screen should not move or sag. If the clip feels loose, try pushing it deeper into the frame. Make sure clips sit evenly around the screen edge. Tight clips keep the screen secure and prevent gaps.
Troubleshooting Common Issues
If a clip won’t fit, check for obstructions or bent parts. Straighten any bent clips with pliers carefully. For stubborn clips, clean the frame edge of dirt or paint. Replace damaged clips with new ones to avoid failure. Loose fasteners may need repositioning or extra clips added. Test the screen after fixes to confirm stability.
Frequently Asked Questions
What Tools Are Needed To Install Screen Clip Fasteners?
You need a screwdriver, drill, and the screen clip fasteners themselves. A measuring tape and pencil help with precise placement. These tools ensure a secure and accurate installation for your screen clips.
How Do You Position Screen Clip Fasteners Correctly?
Measure and mark the frame evenly before installation. Place clips where the screen edges will sit securely. Proper positioning prevents screen sagging and ensures a tight fit.
Can Screen Clip Fasteners Be Used On All Window Types?
Screen clip fasteners work on most window frames, including wood, aluminum, and vinyl. Always check compatibility with your specific frame type for best results and durability.
How Long Does It Take To Install Screen Clip Fasteners?
Installation usually takes 15 to 30 minutes per window, depending on size and experience. Proper preparation and tools can speed up the process significantly.
Conclusion
Installing screen clip fasteners is simple with the right steps. Follow the guide carefully and take your time. Use the correct tools and check each clip fits snugly. This helps keep screens secure and lasts longer. Practice makes the process easier and quicker.
Soon, you will handle repairs or new installations confidently. Keep your home or workspace neat by using these fasteners well. Small efforts lead to big improvements in screen stability. Keep this guide handy for future projects.