Are you planning to install cedar siding on your home and wondering how to fasten it properly? One common question homeowners face is whether cedar siding needs to be nailed directly into the studs.
Getting this right is crucial because it affects your siding’s strength, durability, and overall look. You’ll discover the best fastening methods that will keep your cedar siding secure and looking great for years. Keep reading to learn the insider tips that can save you time, money, and headaches on your next project.
Benefits Of Cedar Siding
Cedar siding offers many benefits that make it a popular choice for home exteriors. It blends beauty with strength, providing long-lasting protection. Its natural qualities help homes stay comfortable and reduce energy costs. Understanding these benefits helps in making the right siding choice.
Durability And Weather Resistance
Cedar siding stands strong against harsh weather. It resists rot, decay, and insect damage naturally. This wood handles rain, snow, and sun well. It lasts longer than many other siding materials. Proper installation and care extend its life even more.
Aesthetic Appeal
Cedar has a warm, rich color that ages gracefully. Its natural grain adds texture and charm to any home. This siding can be stained or painted in many shades. It enhances curb appeal and increases home value. Homeowners love its timeless and classic look.
Natural Insulation Properties
Cedar provides natural insulation, helping keep homes warm in winter. It also cools the house during hot summer days. This reduces the need for extra heating or cooling. The wood’s breathability helps control moisture inside walls. It supports a healthier indoor environment.
Credit: bearcreeklumber.com
Types Of Fasteners For Cedar Siding
Choosing the right fasteners for cedar siding is key for a strong, lasting installation. The fasteners hold the wood firmly and prevent damage over time. Different types of fasteners work better for various siding projects. Understanding the options helps to pick the best fit.
Nails Vs. Screws
Nails are traditional for cedar siding. They are quick to install and offer some flexibility as wood expands. Screws provide a tighter hold and resist pulling out. Screws are harder to install but offer better long-term strength. Many builders prefer nails for ease and screws for durability.
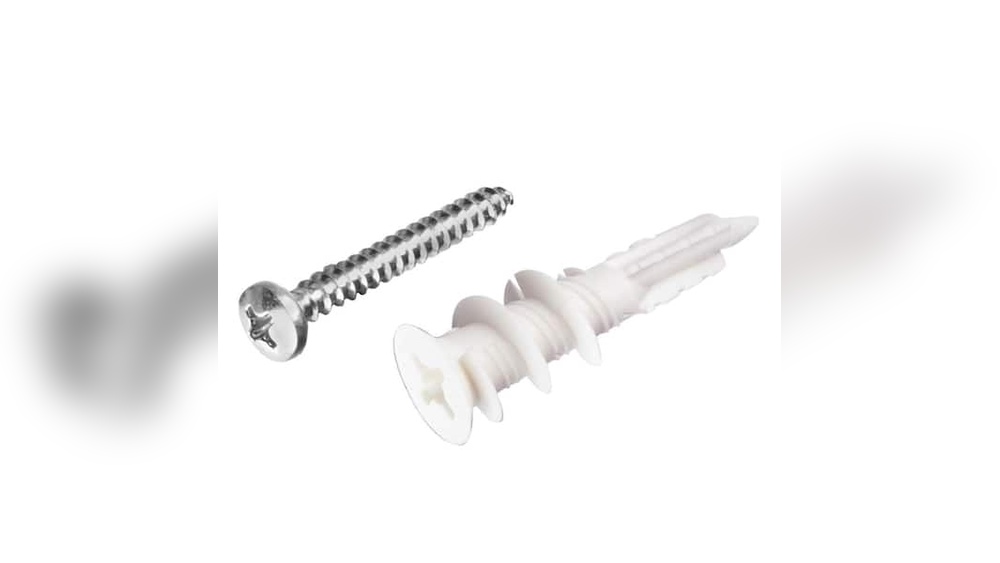
Material Choices
Fasteners come in steel, stainless steel, and aluminum. Steel nails or screws are strong but can rust. Stainless steel is the best for cedar siding. It resists rust and lasts longer outdoors. Aluminum fasteners do not rust but are softer and may bend. The choice depends on budget and climate.
Fastener Coating And Corrosion Resistance
Coated fasteners help prevent corrosion. Galvanized nails have a zinc layer for rust protection. Hot-dipped galvanized nails offer better resistance than electro-galvanized. Some screws have ceramic or epoxy coatings. These coatings keep fasteners safe from moisture. Corrosion resistance extends the siding’s life.
Studs And Wall Structure Basics
Understanding the basics of studs and wall structure helps in proper siding installation. Studs form the frame that holds the walls together. Knowing their role and placement guides how to fasten cedar siding securely.
Role Of Wall Studs
Wall studs are vertical wooden beams inside walls. They provide strength and support for the house. Studs hold drywall, insulation, and siding materials in place. Without studs, walls would lack stability and strength.
Spacing And Layout
Studs are usually spaced 16 or 24 inches apart. This spacing creates a strong frame for walls. The layout must be consistent to support all wall materials. Proper spacing makes fastening siding easier and more secure.
Importance For Siding Installation
Fastening cedar siding into studs ensures a firm hold. Nails or screws driven into studs prevent siding from loosening. Attaching siding only to drywall or sheathing can cause damage. Studs provide a solid anchor for long-lasting siding.
Fastening Cedar Siding To Studs
Fastening cedar siding to studs is a key step in siding installation. It helps keep the siding strong and stable. Attaching directly to studs makes the siding last longer and resist wind and weather better.
Choosing the right fastening method affects the siding’s performance. Proper techniques prevent damage and improve the home’s appearance. Understanding how to fasten cedar siding correctly is important for any project.
Advantages Of Fastening Into Studs
Fastening cedar siding into studs provides a solid base. It stops siding from bending or warping over time. The siding stays in place during storms or strong winds. This method also reduces noise and vibration. It helps the siding hold paint or stain better. Overall, it improves the durability and look of the siding.
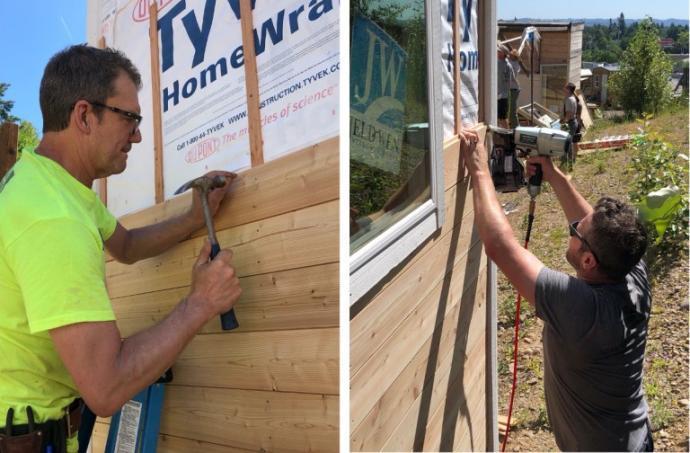
Techniques For Securing To Studs
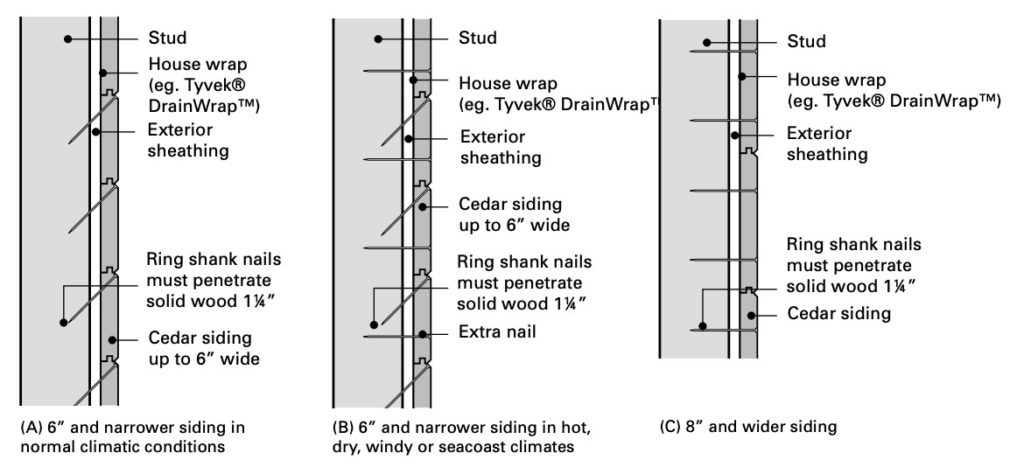
Use long nails or screws that reach the studs. Place fasteners every 16 to 24 inches along each board. Start fastening near the bottom and work upward. Make sure nails go straight into the wood. Avoid over-driving fasteners, which can damage the siding. Using a level helps keep boards straight and even.
Common Mistakes To Avoid
Do not fasten only to the sheathing or plywood. This can cause siding to loosen or fall off. Avoid using nails that are too short or thin. Missing studs leads to weak attachment and damage. Do not place fasteners too close to board edges. Over-driving nails can crack or split the wood. These errors reduce siding’s lifespan and look.
Alternatives To Fastening Into Studs
Fastening cedar siding directly into studs is common. Yet, there are other ways to install cedar siding. These alternatives can save time and adapt to different wall structures. They also help with ventilation and moisture control. Understanding these options helps choose the best method for your project.
Using Furring Strips
Furring strips are thin wood strips attached to the wall. They create a gap between siding and wall. This gap improves air flow and moisture drainage behind the siding. Nails or screws fasten the cedar siding to the furring strips. This method works well on uneven surfaces or over old siding.
Fastening To Sheathing
Sheathing is the layer under the siding, usually plywood or OSB. You can attach cedar siding directly to the sheathing. This method is faster but requires the sheathing to be strong and in good shape. Nails must be long enough to hold the siding firmly. It may not work well if insulation or vapor barriers are present.
Pros And Cons Of Alternative Methods
Furring strips offer better ventilation and protect the wall from moisture. They add a small cost and extra labor to install. Fastening to sheathing saves time and materials. It may reduce air flow and trap moisture if not done carefully. Both methods can work well but depend on wall condition and climate.
Credit: pioneermillworks.com
Impact On Siding Longevity
The way cedar siding is fastened has a big effect on how long it lasts. Proper fastening helps the siding stay strong against wind, rain, and temperature changes. Poor fastening can cause damage that reduces the siding’s lifespan. Understanding how fastener placement impacts durability is key to keeping cedar siding in good shape.
Effect Of Fastener Placement On Durability
Fastening cedar siding directly into studs gives it a solid hold. This prevents the siding from moving or shifting over time. Nails or screws set in the right spots reduce stress on the wood. They also help the siding resist wind pressure better. Fasteners placed too far from studs may loosen or pull out. This can cause gaps and allow water to seep in. Proper placement extends the siding’s life by keeping it secure.
Preventing Warping And Loosening
Wood expands and contracts with weather changes. Fasteners into studs limit this movement and reduce warping. Loose or weak fasteners allow siding to bend or bow. This damages the wood and creates openings for moisture. Correct fastening helps keep the siding flat and tight. It also stops nails from backing out. This prevents siding panels from becoming loose or falling off.
Maintenance Tips
Check fasteners regularly for rust or loosening. Replace any nails or screws that are damaged. Use corrosion-resistant fasteners for longer protection. Clean siding to prevent dirt and moisture buildup. Inspect for signs of warping or gaps between boards. Tighten fasteners if the siding feels loose. Proper care keeps cedar siding strong and durable.
Building Codes And Manufacturer Guidelines
Building codes and manufacturer guidelines play a key role in installing cedar siding properly. They provide clear rules to ensure safety and durability. Following these rules helps avoid future problems and keeps the siding secure. Understanding both local codes and manufacturer advice is important for a strong, lasting siding job.
Local Code Requirements
Local building codes set standards for fastening siding. These codes may require nails to go into wall studs for strength. Some areas allow fastening into sheathing if it meets specific rules. Check your city or county codes before starting. Codes can vary widely by location and climate.
Manufacturer Recommendations
Cedar siding makers give clear instructions on fastening. Most suggest nailing into studs to avoid movement and warping. Some recommend special fasteners or spacing for best results. Following these guidelines keeps the siding warranty valid. Skipping these steps may cause damage or void coverage.
Ensuring Compliance
To ensure compliance, review local codes and product manuals carefully. Use the correct nails and fix them where required. Inspect the wall structure to find studs before nailing. Consult a professional if unsure about rules or installation. Proper fastening protects your home and investment.
Tools And Best Practices For Installation
Installing cedar siding requires the right tools and proper techniques. These help secure the siding well and make the process smoother. Understanding the best practices ensures the siding lasts longer and looks great.
Essential Tools
Start with a quality hammer or a nail gun for fasteners. Use a tape measure to get exact lengths and spacing. A level helps keep siding straight and even. A saw is necessary to cut cedar to fit your walls. Safety glasses protect your eyes from wood chips. A chalk line marks straight lines on the wall. A pry bar helps remove old siding or make adjustments.
Fastening Techniques
Fasten cedar siding into studs for strong support. Use corrosion-resistant nails or screws made for outdoor use. Drive nails straight and flush with the wood surface. Leave a small gap between boards to allow for wood expansion. Avoid overdriving fasteners, which can damage the siding. Space fasteners about 16 inches apart along each board. Check alignment often with a level to keep boards even.
Safety Considerations
Wear safety glasses and gloves during installation. Use a stable ladder or scaffolding to reach high areas. Keep your work area clean to prevent trips and falls. Handle tools carefully to avoid injuries. Follow manufacturer instructions for power tools. Take breaks to stay alert and avoid mistakes. Dispose of wood scraps and nails properly to keep the site safe.
Credit: www.realcedar.com
Frequently Asked Questions
Does Cedar Siding Require Fastening Into Wall Studs?
Yes, cedar siding should be fastened into wall studs for proper support. This ensures stability and prevents warping or detachment over time. Fastening into studs also improves the siding’s resistance to wind and weather damage, enhancing its durability.
Can Cedar Siding Be Attached Without Hitting Studs?
While possible, attaching cedar siding without hitting studs is not recommended. Fastening directly into studs ensures secure attachment and prevents siding damage. Using proper fasteners and techniques enhances siding longevity and structural integrity.
What Type Of Nails Should Be Used For Cedar Siding?
Galvanized or stainless steel nails are best for cedar siding. They resist rust and corrosion, which protects the wood and maintains siding appearance. Use ring-shank nails for extra holding power and to prevent siding movement.
How Far Apart Should Cedar Siding Nails Be Spaced?
Nails for cedar siding should be spaced about 16 to 24 inches apart. This spacing aligns with typical stud placement and ensures even fastening. Proper nail spacing prevents siding from loosening or warping over time.
Conclusion
Cedar siding performs best when fastened directly into studs. This method keeps the siding secure and stable over time. Nails or screws hold the wood tightly, preventing warping or gaps. Avoiding stud fastening can cause siding to loosen or shift.
Proper installation also helps protect your home from weather damage. Always check stud placement before nailing cedar boards. Doing this ensures a strong and lasting exterior finish. Your home’s look and protection depend on correct siding attachment. Simple steps make a big difference in siding durability.