Are you struggling to hang something heavy on your drywall or hollow walls? You’re not alone.
Using the right wall anchors can make all the difference between a secure hold and a messy repair job. Hollow wall anchors are designed to grip tightly behind the wall, giving your shelves, mirrors, or frames the support they need.
But how do you use them correctly? Keep reading, and you’ll discover simple, step-by-step tips that will help you install hollow wall anchors like a pro—no guesswork, no frustration. Your walls will thank you.

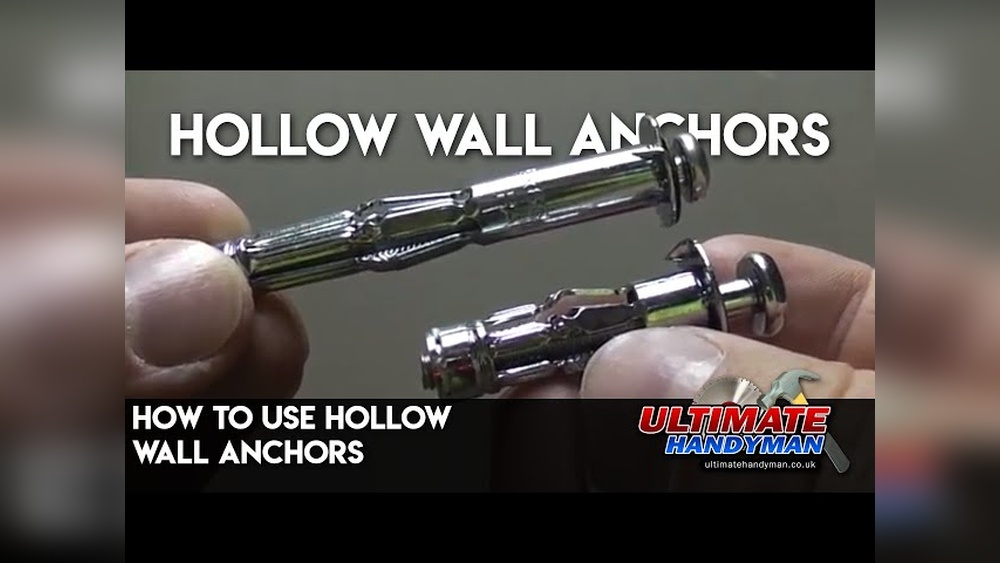
Credit: www.youtube.com
Types Of Hollow Wall Anchors
Hollow wall anchors come in various types. Each type fits different wall materials and weight needs. Knowing these types helps you pick the right anchor for your project.
Plastic Expansion Anchors
Plastic expansion anchors are common and easy to use. They work well in drywall and light plaster. The anchor expands when you insert a screw, holding it in place. These anchors suit light objects like small shelves or picture frames.
Metal Toggle Bolts
Metal toggle bolts have wings that open inside the wall. The wings spread the load over a larger area. They hold heavier items like mirrors or curtain rods. These bolts need a larger hole for insertion.
Spring Toggle Anchors
Spring toggle anchors use a spring mechanism to open inside the wall. They fit tight spaces and hold heavy loads. These anchors are great for securing cabinets and large fixtures. They provide strong support and easy installation.
Molly Bolts
Molly bolts are metal anchors that expand behind the wall. They work well in hollow walls and plaster. These bolts provide good holding power for medium-weight items. Installation requires drilling a hole and tightening the bolt.
Tools Required
Using hollow wall anchors requires a few basic tools. These tools help you install the anchors securely. Knowing what tools to have ready makes the job easier and faster.
Drill And Drill Bits
A drill is essential for making holes in the wall. Choose the right size drill bit that matches the anchor size. The hole must be clean and the correct diameter for a tight fit.
Screwdriver
A screwdriver helps to insert and tighten screws into the anchors. Use the correct type, either flathead or Phillips, based on your screw’s head. This tool ensures the anchor holds firmly.
Measuring Tape
Measuring tape lets you mark the exact spot for drilling. Accurate measurements prevent mistakes and ensure anchors are spaced well. Measure twice, drill once.
Hammer
A hammer is useful for gently tapping the anchor into the wall. It helps seat the anchor flush with the surface. Use soft taps to avoid damage.
Choosing The Right Anchor
Choosing the right hollow wall anchor is key to a secure hold. Different anchors work best for different tasks. Picking the right type helps avoid damage and ensures safety. Consider the weight, wall type, and size before buying anchors.
Weight Capacity Considerations
Check the weight of the item you want to hang. Each anchor has a weight limit. Use an anchor that can hold more than the item’s weight. This prevents accidents and keeps the wall safe. Overloading anchors can cause them to fail.
Wall Material Compatibility
Walls come in many types like drywall, plaster, or hollow blocks. Some anchors work well with drywall but not with plaster. Choose anchors made for your wall’s material. This ensures a tight fit and strong support. Using the wrong anchor can damage the wall.
Anchor Size Selection
Anchors come in different sizes and lengths. Match the anchor size to your wall’s thickness. Bigger anchors offer more support but need larger holes. Small anchors fit thin walls but hold less weight. Measure the wall and item before picking the size.

Credit: www.lowes.com
Preparing The Wall
Preparing the wall is the first step when using hollow wall anchors. It helps make sure your anchor fits securely. Proper preparation prevents damage and keeps your fixture safe. Follow these simple steps to get the wall ready.
Marking The Fixing Point
Start by choosing the exact spot for the anchor. Use a pencil to mark the point clearly. Check twice to avoid mistakes. A clear mark guides your drilling and keeps the hole straight.
Drilling The Hole
Pick a drill bit that matches the anchor size. Drill gently through the wall at the marked spot. Keep the drill steady and straight. Stop drilling once you reach the right depth for the anchor.
Cleaning The Hole
Remove dust and loose pieces from the hole. Use a brush or blow air inside it. Cleaning helps the anchor grip the wall better. A clean hole ensures a strong hold for your fixture.
Installing Hollow Wall Anchors
Installing hollow wall anchors is a simple way to hang items securely on drywall or plaster walls. These anchors spread the load inside the wall, preventing damage. Each type of anchor has a unique installation method. Following the right steps ensures a strong hold and lasting support.
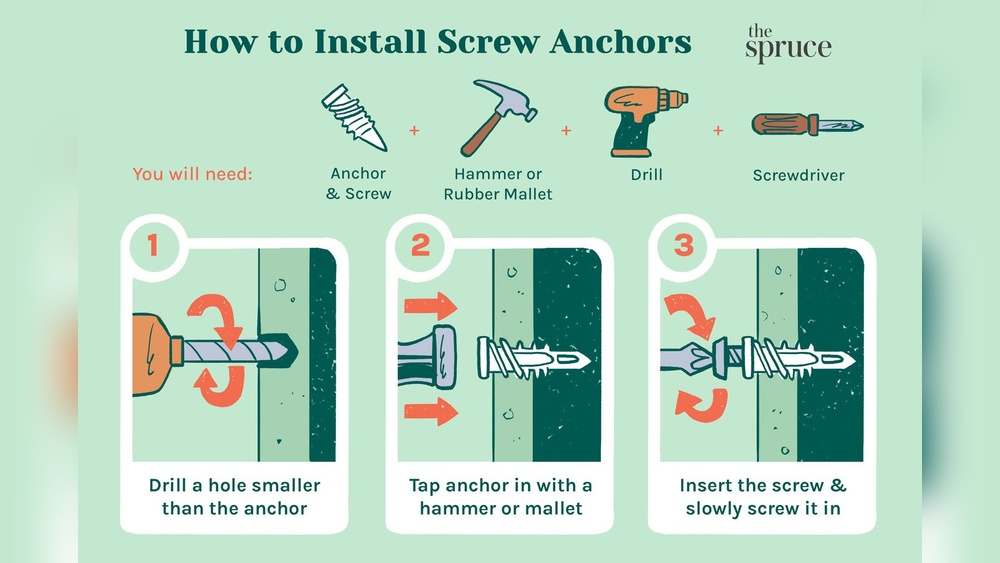
Inserting Plastic Expansion Anchors
Start by drilling a hole slightly smaller than the anchor. Push the plastic anchor into the hole until flush with the wall. Use a screwdriver to insert the screw into the anchor. The anchor expands inside the wall, gripping firmly. Avoid overtightening to prevent damage.
Fitting Metal Toggle Bolts
First, drill a hole large enough for the toggle wings to fit folded. Thread the bolt through your item’s mounting hole. Squeeze the toggle wings closed and push them through the hole. Once inside, the wings open and brace against the wall. Tighten the bolt carefully to secure the item.
Using Spring Toggle Anchors
Drill a hole matching the anchor’s size. Fold the spring toggle and insert it through the hole. The springs open inside the wall, creating a strong grip. Pull back gently while tightening the screw to lock the anchor in place. This type handles heavier loads well.
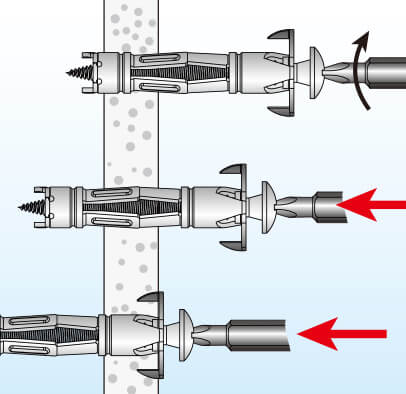
Securing Molly Bolts
Drill a hole to fit the molly bolt’s sleeve. Insert the sleeve and tap it flush with the wall. Tighten the screw slowly to expand the sleeve inside the wall. This expansion locks the anchor firmly. Remove the screw, mount your item, then replace the screw.
Securing Fixtures
Securing fixtures with hollow wall anchors ensures they stay firmly in place. Proper installation prevents damage to walls and keeps items safe. Follow clear steps to align, tighten, and check stability for strong support.
Aligning Fixtures Properly
Start by marking the exact spot on the wall for your fixture. Hold the fixture against the wall to check its position. Make sure it is level and straight before drilling holes. Proper alignment helps the anchor work effectively.
Tightening Screws
Insert the hollow wall anchor into the hole carefully. Place the fixture over the anchor and insert the screw. Turn the screw slowly to expand the anchor inside the wall. Tighten the screw until the fixture feels secure but avoid over-tightening.
Checking Stability
After tightening, gently wiggle the fixture to test its hold. It should feel firm without any movement. If it moves, tighten the screw a bit more or check the anchor placement. A stable fixture prevents accidents and wall damage.
Common Mistakes To Avoid
Using hollow wall anchors can be easy, but many make mistakes. These errors cause weak holds or damage walls. Avoiding common mistakes helps your project last longer and stay safe.
Overdrilling The Hole
Drilling a hole too big is a frequent error. The anchor may not grip well inside a large hole. Always drill the exact size recommended by the anchor instructions. This keeps the anchor tight and secure.
Using Incorrect Anchor Types
Different anchors fit different wall types. Using a plastic anchor on drywall only can cause failure. Metal anchors suit heavier loads and some wall materials. Choose the right anchor for your wall and load type. This ensures proper support and safety.
Ignoring Weight Limits
Every anchor has a maximum weight it can hold. Overloading an anchor risks it pulling out or breaking. Check the weight rating before use. Use multiple anchors if you need to hang heavy items. This prevents accidents and damage.
Maintenance And Removal
Maintaining and removing hollow wall anchors is important for safety and wall care. Regular checks help catch problems early. Proper removal prevents damage. Fixing any wall damage keeps your space neat and strong.
Inspecting Fixings Regularly
Check anchors often to ensure they hold well. Look for cracks or wobbling around the anchor. Tighten any loose screws gently. Early checks prevent bigger issues later. Keep an eye on weight changes on the anchor.
Safely Removing Anchors
Remove anchors carefully to avoid wall damage. Start by unscrewing the bolt slowly. If the anchor stays inside, use pliers to pull it out. Push the anchor into the wall if removal is too hard. Always wear safety glasses during removal.
Repairing Wall Damage
Fill holes left by anchors with wall filler or putty. Smooth the surface with a putty knife. Let it dry fully before sanding. Paint over the repair to match your wall color. Small repairs keep walls looking clean and fresh.
Credit: www.jcyscrews.com
Frequently Asked Questions
What Are Hollow Wall Anchors Used For?
Hollow wall anchors secure objects to drywall or hollow walls. They provide strong support where studs are absent. These anchors prevent damage and ensure stability for fixtures like shelves and mirrors.
How Do You Install Hollow Wall Anchors Correctly?
First, drill a hole matching the anchor size. Insert the anchor into the hole until flush. Tighten the screw to expand the anchor behind the wall for a secure hold.
Can Hollow Wall Anchors Support Heavy Items?
Yes, certain types of hollow wall anchors can support medium to heavy loads. Always check the weight rating on the packaging. For very heavy items, use anchors designed specifically for high weight capacity.
What Tools Do I Need For Hollow Wall Anchors?
You need a drill with the right bit size, a screwdriver, and the hollow wall anchors. Optionally, a stud finder helps avoid drilling into studs. Proper tools ensure easy and safe installation.
Conclusion
Hollow wall anchors hold items firmly on drywall or hollow walls. Choose the right anchor size for your project. Drill a hole, insert the anchor, then tighten the screw. Avoid using anchors on very thin or weak walls. These anchors save time and effort in hanging objects.
With practice, installation becomes quick and easy. Use them for shelves, mirrors, or light fixtures. They provide strong support without wall damage. Simple steps make your walls ready for many tasks. Hollow wall anchors are practical tools for home projects.