Are you ready to hang your IKEA shelves or cabinets securely, but unsure how to use the wall anchors that come with them? Installing IKEA wall anchors might seem tricky at first, but with the right steps, you can do it quickly and confidently.
In this guide, you’ll discover simple, clear instructions that make the process easy—no confusing jargon or special tools needed. Keep reading, and you’ll have your walls ready to hold your favorite IKEA pieces safely in no time.
Choosing The Right Wall Anchors
Choosing the right wall anchors is key for a safe and secure Ikea installation. Different walls need different anchors. Picking the correct type prevents damage and holds your items firmly. This section explains the types of Ikea wall anchors and how to match them to your wall.
Types Of Ikea Wall Anchors
Ikea offers several types of wall anchors. Plastic expansion anchors work well for light loads. They expand inside the wall to hold tight. Metal anchors offer more strength and are good for medium loads. For heavy items, toggle bolts are the best choice. They open behind the wall, creating strong support. Each anchor type has a unique design. Choose the right one based on what you want to hang.
Matching Anchors To Wall Materials
Different walls need different anchors. Drywall requires plastic or metal anchors for most Ikea items. Hollow walls often need toggle bolts for extra hold. Concrete or brick walls need special masonry anchors. Using the wrong anchor can cause damage or failure. Check your wall type before buying anchors. This step ensures safety and durability. Match your anchor to the wall material for the best results.

Credit: www.youtube.com
Tools Needed For Installation
Installing Ikea wall anchors requires a few basic tools. Using the right tools makes the job easier and safer. You can complete the installation faster with proper preparation. Below are the tools you need for a smooth process.
Essential Tools List
- Drill with drill bits
- Phillips screwdriver
- Hammer
- Measuring tape
- Level
- Pencil for marking
- Wall anchors and screws (from Ikea)
Each tool plays a key role. The drill creates holes in the wall. The screwdriver tightens the screws. The hammer helps to tap anchors if needed. The measuring tape and level ensure correct placement. Marking with a pencil guides your drilling.
Safety Gear Recommendations
- Safety goggles to protect your eyes
- Dust mask to avoid inhaling debris
- Work gloves for hand protection
Safety gear keeps you safe during installation. Goggles shield your eyes from dust and debris. A dust mask prevents breathing in small particles. Gloves protect your hands from sharp edges and tools. Always wear safety gear before starting.
Preparing The Wall
Preparing the wall is the first step before installing Ikea wall anchors. Proper preparation makes the installation easier and safer. It helps ensure the anchors hold well and support the weight of your items. Taking time to prepare avoids mistakes and damage to the wall.
Locating Studs And Marking Spots
Use a stud finder to locate wooden studs behind the wall. Studs provide strong support for heavy items. Mark the stud edges lightly with a pencil. If no stud is available, choose a spot for the anchor carefully. Mark the exact spot where you will drill. Accuracy here keeps the anchor secure and stable.
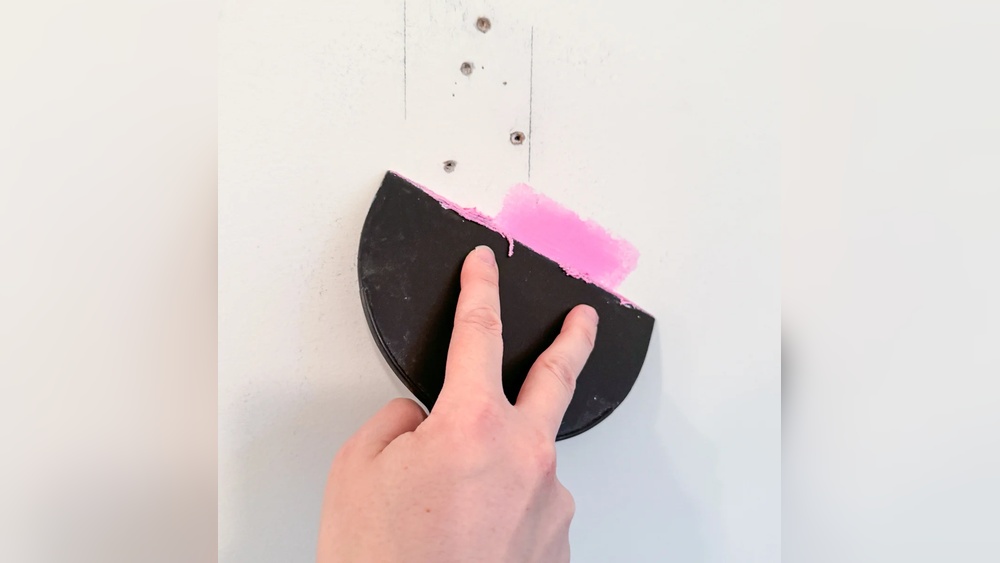
Cleaning And Measuring
Clean the wall surface to remove dust and dirt. A clean wall helps the anchors stick better. Use a damp cloth and let the wall dry. Measure the height and distance between marks carefully. Use a tape measure for exact spacing. Double-check your measurements before drilling any holes.

Credit: ourhomefromscratch.com
Step-by-step Installation Guide
Installing Ikea wall anchors is simple with the right steps. Follow this guide to ensure your anchors hold firmly. Each step is clear and easy to follow.
Drilling Pilot Holes
Start by marking the spot on the wall. Use a pencil to make a small mark. Choose a drill bit that matches the anchor size. Drill straight into the wall at the mark. Drill only as deep as the anchor length. Clean any dust from the hole after drilling.
Inserting The Anchors
Take the Ikea wall anchor and gently push it into the hole. Use your fingers or a small hammer for help. Make sure the anchor sits flush with the wall. Do not force it too hard to avoid damage. The anchor should fit snugly inside the hole.
Securing Screws And Fixtures
Place the screw into the anchor hole. Use a screwdriver to tighten the screw slowly. Stop when the screw feels secure, not too tight. Attach your fixture or shelf to the screw. Check stability by gently pulling on the fixture.
Tips For Heavy Or Fragile Items
Heavy or fragile items need strong support on your walls. Using Ikea wall anchors correctly helps keep these items safe. Taking extra care ensures your items stay secure without damage. Follow simple tips for best results.
Using Multiple Anchors
Heavy items need more than one anchor. Spread anchors evenly across the item’s width. This spreads the weight and reduces pressure on each anchor. Use at least two anchors for medium weight items. Larger items may need three or more anchors. Check the weight limit on each anchor before installation.
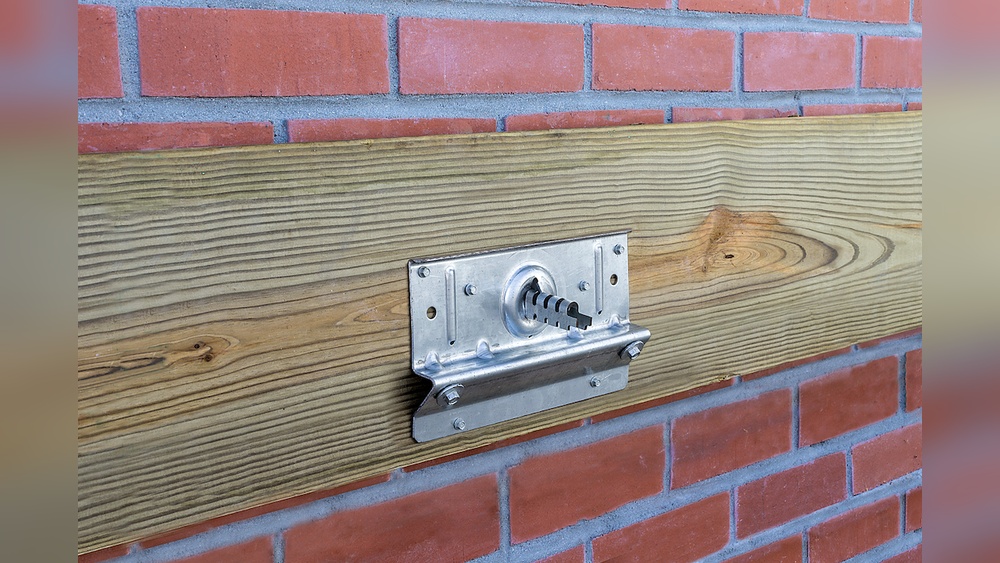
Alternative Support Methods
Sometimes anchors alone are not enough. Use wall studs for stronger support. Find studs with a stud finder and screw directly into them. Consider a French cleat system for heavy or fragile items. It distributes weight evenly and offers better stability. Another option is mounting brackets or rails for extra security.

Credit: www.youtube.com
Common Mistakes To Avoid
Installing Ikea wall anchors seems easy but can go wrong fast. Many make simple mistakes that weaken the hold or damage the wall. Avoid these errors to keep your anchors strong and safe.
Overtightening Screws
Too much force on screws can break the anchor or strip the hole. Tighten screws just enough to hold the item firmly. Stop as soon as you feel resistance. This keeps the anchor secure without damage.
Ignoring Wall Material Differences
Not all walls are the same. Drywall, plaster, and concrete need different anchors and tools. Using the wrong anchor weakens the hold or ruins the wall. Always check the wall type before picking anchors. This ensures a safe, lasting fit.
Maintaining Secure Wall Hangings
Keeping your wall hangings secure is very important. Proper maintenance helps prevent accidents and damage. With Ikea wall anchors, regular care ensures long-lasting support. Simple checks and timely actions keep your items safe on the wall.
Regular Checks And Adjustments
Check your wall hangings every few months. Look for any wobbling or looseness. Tighten screws gently if needed. Dust and dirt can affect anchor grip. Wipe the area carefully to keep it clean. Small adjustments prevent bigger problems later.
When To Replace Anchors
Replace anchors if they show signs of wear. Cracks, bending, or rust mean they are weak. Also, change anchors if wall hangings become heavier. Old anchors may not hold new weight well. Using fresh anchors keeps your walls safe and strong.
Frequently Asked Questions
What Tools Do I Need To Install Ikea Wall Anchors?
You need a drill, screwdriver, pencil, level, and measuring tape. These tools help ensure accurate and secure anchor placement on your wall.
How Do I Choose The Right Ikea Wall Anchors?
Select anchors based on wall type and weight of the item. Ikea anchors come for drywall, masonry, and plaster walls to provide proper support.
Can I Install Ikea Wall Anchors Without A Drill?
While possible, using a drill is recommended for secure installation. Drilling ensures precise holes and stronger anchor hold on the wall.
How Deep Should I Drill For Ikea Wall Anchors?
Drill a hole slightly deeper than the anchor length. This allows the anchor to fit fully and grip the wall firmly.
Conclusion
Installing Ikea wall anchors is simple and effective. Follow the steps carefully for a secure hold. Choose the right anchor for your wall type. Use the correct tools to avoid mistakes. Check the anchor’s fit before hanging heavy items. Doing this ensures safety and durability.
Enjoy your neatly hung decorations or shelves. A little effort brings strong results. Keep these tips handy for future projects. You can handle this task with confidence.