If your camper floor is damaged or worn out, you might be wondering how to fix it yourself. The first and most important step is to safely jack up your camper.
Doing this the right way protects you, your camper, and makes the floor replacement much easier. In this guide, you’ll learn simple, clear steps to lift your camper securely. Whether you’re new to this or want to avoid costly mistakes, keep reading—because the right technique can save you time, money, and frustration.
Your camper deserves the best care, and you deserve to feel confident doing it yourself.
Tools And Materials Needed
Replacing the floor of your camper requires the right tools and materials. Using proper equipment makes the job safer and easier. Prepare everything before you start to avoid delays and frustration.
Each tool and material has a specific role. Knowing what you need helps you work efficiently. Below are the essential items for jacking up your camper and changing its floor.
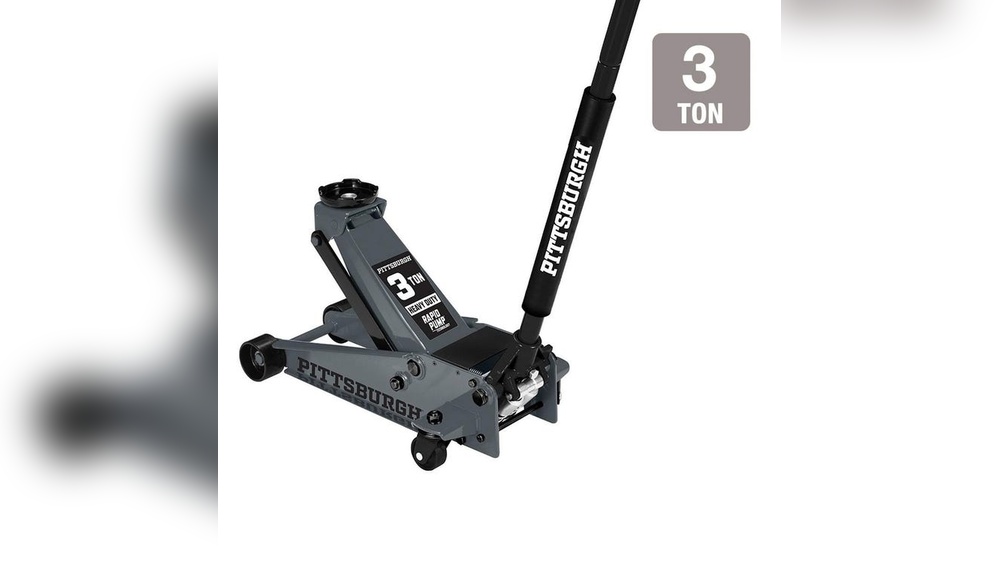
Hydraulic Floor Jack
A strong hydraulic floor jack lifts the camper safely. Choose one with enough weight capacity for your camper’s size. This tool raises the camper off the ground for easy access underneath.
Jack Stands
Jack stands hold the camper securely once it is lifted. Never rely on the jack alone for support. Place stands under the frame to keep the camper stable during the work.
Wooden Blocks
Wooden blocks provide extra support and protect the camper’s frame. Use sturdy, thick blocks to place between the jack or stands and the camper. They help spread the weight and prevent damage.
Safety Wheel Chocks
Wheel chocks stop the camper from rolling. Place them firmly against the tires on both sides. This simple step keeps the camper steady while you work underneath.
Replacement Flooring Materials
Choose the right flooring materials based on your camper model. Common options include plywood, vinyl, or laminate. Have enough material ready to cover the entire floor area.
Power Drill And Screwdriver
A power drill speeds up removing and installing screws. Use the right drill bits for your screws. A screwdriver is handy for tight spots where the drill won’t fit.
Measuring Tape And Pencil
Accurate measurements are key to a perfect floor fit. Use a tape measure and pencil to mark cuts on the new flooring. Double-check measurements to avoid mistakes.
Protective Gear
Wear gloves and safety glasses to protect your hands and eyes. A dust mask helps when cutting or sanding materials. Safety gear keeps you safe during the entire process.

Credit: www.youtube.com
Preparing The Camper
Preparing your camper for jacking up is an important step. It makes the job safer and easier. You need to clear the inside, secure the camper, and find the right jack points. Each task helps protect you and your camper.
Emptying The Interior
Remove all items inside the camper. Take out furniture, appliances, and loose objects. This lowers weight and stops things from falling. It also gives you more space to work comfortably.
Securing The Camper
Place wheel chocks on both sides of the tires. This prevents the camper from rolling. Engage the parking brake for extra safety. Make sure the ground is flat and stable before jacking up.
Locating Jack Points
Check the camper’s manual for recommended jack points. These spots are strong and designed to hold weight. Avoid jacking under weak areas or near tanks and wires. Use jack pads to protect the camper’s frame.
Choosing The Right Jack
Choosing the right jack is key to safely lifting your camper. It helps avoid damage and keeps you secure. Picking the wrong jack can cause accidents or harm the camper.
Consider the type and weight capacity before buying. These factors affect how easy and safe the job will be.
Types Of Jacks
Hydraulic jacks use fluid pressure to lift heavy loads smoothly. They are strong and easy to operate but can be heavy to carry.
Scissor jacks are compact and lightweight. They work well for small to medium campers but need more effort to raise the load.
Floor jacks have a wide base and long handles. They provide good stability and fast lifting but can be bulky.
Bottle jacks are tall and use hydraulic power. They fit in tight spaces but may not be stable on soft ground.
Weight Capacity Considerations
Check your camper’s weight before choosing a jack. The jack must hold more than this weight for safety.
Always pick a jack with a higher capacity than your camper’s weight. This prevents jack failure and accidents.
Consider the floor replacement weight too. Extra tools and parts add to the total load.
Review the jack’s maximum lift height. It should be tall enough to raise your camper off the ground.

Credit: www.ebay.com
Positioning The Jack
Positioning the jack correctly is crucial when raising your camper. This step ensures safety and stability during the floor replacement. A poorly placed jack can cause damage or accidents. Take time to find the best spot and align the jack properly. These actions help keep the camper steady and prevent any unwanted movement.
Finding Stable Ground
Start by choosing firm, level ground for the jack. Avoid soft dirt, gravel, or uneven surfaces. These can cause the jack to sink or tip over. Clear away any debris or loose materials. Use wooden boards or a metal plate under the jack for extra support. This prevents it from digging into the ground. Stable ground keeps the camper balanced and safe while lifted.
Aligning The Jack Properly
Place the jack under the camper’s frame or designated lifting point. Check your camper manual for exact locations. Make sure the jack sits flat and straight. Avoid tilting or leaning the jack. Keep the handle easy to reach and operate. Proper alignment helps the jack lift the camper evenly. This reduces stress on the frame and avoids damage.
Lifting The Camper Safely
Lifting your camper safely is the first step to replace the floor without accidents. You must follow clear, careful steps to keep the camper stable. Use the right tools and methods to avoid damage or injury. Safety is the key throughout the process.
Operating The Jack
Start by placing the jack under a strong frame point. Check your camper manual for the exact spot. Slowly pump the jack handle to lift the camper. Lift it just enough to work under safely. Avoid sudden movements or fast lifting. Always keep your hands and feet clear of the jack.
Using Jack Stands
Once the camper is lifted, place jack stands under solid frame points. Lower the camper slowly onto the stands. The stands hold the camper securely while you work. Never rely on the jack alone to support the camper. Use stands on both sides for balance and safety.
Ensuring Stability
Check that the camper is steady on the stands. Try pushing gently on the camper to test stability. Use wheel chocks to block the wheels and prevent rolling. Work on level ground to avoid tipping. Stability keeps you safe and protects your camper from damage.
Removing The Old Floor
Removing the old floor is the first big step in replacing your camper’s floor. It needs care and patience. Start by clearing out everything on the floor. This makes the process easier and safer. Take your time to avoid damage to other parts of the camper.
Detaching Fixtures
First, remove all fixtures attached to the floor. This includes seats, cabinets, and appliances. Use the right tools to unscrew bolts and nails. Keep screws and small parts in a container to avoid loss. Be gentle to avoid breaking fixtures that you want to reuse later.
Lifting Out Floor Panels
After fixtures are gone, focus on the floor panels. Check for screws, nails, or glue holding them down. Use a pry bar to lift panels carefully. Work slowly to prevent splintering the wood. Remove panels one by one until the floor base is clear and ready for inspection.
Installing The New Floor
Installing the new floor in your camper is an important step after jacking it up. This process gives your camper a fresh, sturdy base. It helps keep the camper safe and comfortable for your trips. Focus on precise measuring and secure fitting. These details make the floor last longer and prevent future problems.
Measuring And Cutting
Start by measuring the space where the new floor will go. Use a tape measure for accuracy. Mark the measurements clearly on the floor panels. Double-check the marks to avoid mistakes. Cut the panels carefully with a saw. Smooth the edges with sandpaper to prevent splinters. Take your time. Precise cutting ensures the panels fit well.
Securing The Floor Panels
Place the cut panels into the camper frame. Make sure they sit flat and fit tightly. Use screws or nails to fix the panels in place. Space the fasteners evenly for strong support. Check that there are no gaps or loose spots. Tighten all screws well. This step keeps the floor steady and safe. A secure floor means a safer camper for your travels.
Lowering The Camper
Lowering the camper safely is a key step after replacing the floor. It takes care and focus. Rushing can cause damage or injury. Follow each step closely to bring your camper down smoothly and securely.
Removing Jack Stands
Before lowering, remove the jack stands carefully. Check that the camper is fully supported by the jack. Slowly lift the camper a little to take weight off the stands. Then, slide the stands out from under the camper. Keep your hands clear of pinch points. Place the stands away from your work area.
Lowering The Jack Slowly
Turn the jack handle to lower the camper gently. Do this in small steps. Stop often to check the camper’s position. Make sure the camper stays stable during lowering. Lower until the camper rests fully on the ground. Remove the jack last to finish the job safely.
Final Checks
Final checks are key after jacking up your camper to replace the floor. They ensure safety and quality before moving on. Take your time with these steps. Doing them right protects your camper and you.
Inspecting The Floor
Look closely at the new floor installation. Check for gaps or uneven spots. Make sure the floor fits tightly with no loose edges. Confirm all screws and nails are secure. A solid floor prevents future problems and keeps your camper strong.
Testing Camper Stability
Gently shake the camper to test its stability. Watch for any wobbling or movement. Make sure the jacks hold firm and the camper sits level. Stability means your camper is safe to use and drive. Do not rush this step. Safety first.

Credit: www.youtube.com
Frequently Asked Questions
How Do I Safely Jack Up My Camper?
Use a sturdy, flat surface and engage the parking brake. Place wheel chocks on opposite wheels. Use a high-quality jack under the camper’s frame. Lift slowly and steadily, checking stability frequently to avoid accidents or damage.
What Type Of Jack Is Best For Campers?
A hydraulic bottle jack or floor jack is ideal. They offer strong lifting power and stability. Choose one rated for your camper’s weight. Avoid using scissor jacks unless specified by the manufacturer.
Where Should I Place The Jack On My Camper?
Place the jack under the camper’s main frame or designated jack points. Avoid placing it on the floor or thin panels. Proper placement ensures stability and prevents damage during lifting.
How High Should I Jack Up My Camper?
Lift the camper just enough to remove and replace the floor safely. Typically, 6 to 12 inches is sufficient. Avoid over-lifting, which can cause instability and make the camper unsafe.
Conclusion
Jacking up your camper safely is key to replacing the floor. Take your time and follow each step carefully. Use the right tools and check stability before working underneath. Small mistakes can cause big problems. Stay focused and work patiently to avoid accidents.
With care, you can fix your camper floor yourself. This saves money and gives you confidence in your skills. Remember, safety always comes first during this project. Now, you are ready to start your floor replacement with more knowledge and care.