Are you struggling to connect your Kasa Light Switch to a new WiFi network? Changing the WiFi on your Kasa Light Switch might seem tricky, but it doesn’t have to be.
Whether you’ve upgraded your router or moved to a new home, updating your switch’s WiFi is simple when you know the right steps. In this guide, you’ll discover exactly how to change your WiFi settings quickly and without any hassle.
Stick with me, and you’ll have your smart switch running smoothly in no time. Ready to get started? Let’s dive in!

Credit: community.smartthings.com
Prepare Your Kasa Light Switch
Preparing your Kasa Light Switch is the first step before changing its WiFi. This ensures a smooth transition to the new network. Proper preparation helps avoid connection errors and setup problems.
Start by checking the current connection and then reset the device if needed. These steps get your switch ready for the new WiFi settings.
Check Current Connection
Verify the current WiFi network connected to your Kasa Light Switch. Open the Kasa app on your phone. Find your light switch in the device list. Check the network name shown in the device details. Confirm it matches your current WiFi.
This step helps you know what network the switch uses now. It also shows if the device is online or offline. If the device is offline, prepare to reset it.
Reset The Device
Resetting the Kasa Light Switch clears old WiFi settings. This allows you to connect to a new network easily. Find the physical reset button on the switch. Hold the button for about 5 seconds until the LED blinks rapidly.
The blinking LED means the switch is in setup mode. You can now add the device to the Kasa app with the new WiFi details. Resetting fixes connection issues and prepares the switch for a fresh setup.
Credit: www.tp-link.com
Access The Kasa App
Accessing the Kasa app is the first step to change the WiFi on your Kasa light switch. The app controls your device and settings from your phone. It connects your switch to the new WiFi network easily.
Make sure you have the app ready before starting the WiFi change process. The app is available for both Android and iOS devices. Follow simple steps to download, install, and log in to the app.
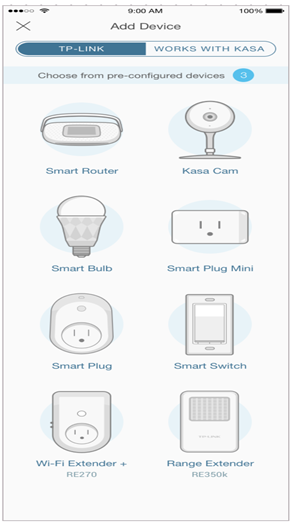
Download And Install
Open the Google Play Store or Apple App Store on your phone. Search for “Kasa Smart” using the search bar. Find the official app by TP-Link and tap “Install” or “Get.” Wait for the app to download and install fully. After installation, open the app to start setting up.
Sign In Or Create Account
To use the app, sign in with your Kasa account. Enter your email and password if you already have an account. New users can tap “Create Account” to register. Follow the on-screen instructions to complete registration. Signing in lets you manage your light switch settings securely.
Connect To New Wifi Network
Changing the WiFi on your Kasa Light Switch is simple. Connecting to a new WiFi network lets your switch work with your current internet. Follow clear steps to set up the new connection quickly. This guide helps you connect your device to a new network without trouble.
Navigate To Device Settings
Open the Kasa app on your smartphone. Find your light switch in the device list. Tap on the switch to open its settings. Look for the network or WiFi option in the menu. This section controls the WiFi connection.
Select New Wifi Network
In the WiFi settings, you will see a list of available networks. Scroll through the list to find your new WiFi network name. Tap on the new network to select it. This action prepares the switch to connect to the new WiFi.
Enter Wifi Password
After selecting the new network, the app asks for the password. Enter the correct password carefully. Make sure there are no typos or extra spaces. Tap connect or save to confirm your entry. Your Kasa Light Switch will now join the new network.
Troubleshoot Connection Issues
Connection problems can stop your Kasa light switch from working right. These issues often cause frustration and confusion. Fixing connection problems is key to using your device smoothly. Troubleshooting helps find the cause and solves it fast.
Common Problems
WiFi signal too weak or unstable. Router placed too far from the switch. Wrong WiFi password entered during setup. Device not updated with the latest firmware. Network settings changed without updating the switch. Interference from other electronics near the switch. Using 5 GHz WiFi instead of 2.4 GHz, which Kasa requires.
Tips For Stable Connection
Place your router close to the light switch. Use 2.4 GHz WiFi for better compatibility. Restart your router and the light switch. Update the Kasa app and switch firmware. Remove devices or electronics causing interference. Check that the WiFi password is correct. Avoid WiFi networks with many connected devices. Reset the switch and reconnect to WiFi if needed.
Verify Connection And Control
After changing the WiFi on your Kasa light switch, verifying the connection is important. This step ensures your switch works correctly with the new network. Checking the connection also confirms that you can control the switch remotely. It helps avoid any issues before you fully rely on the device.
Test The Switch
Start by turning the switch on and off manually. Watch the light to see if it reacts instantly. Next, use the Kasa app to control the switch from your phone. If the switch responds quickly, the connection is good. If not, check your WiFi settings and try again.
Use Voice Assistants
Connect your Kasa switch to voice assistants like Alexa or Google Assistant. Give simple voice commands to turn the switch on or off. If the switch follows your commands, the WiFi setup is successful. Voice control adds convenience and confirms the device is online.

Credit: www.youtube.com
Frequently Asked Questions
How Do I Change Wifi On My Kasa Light Switch?
Open the Kasa app, select your device, go to Settings, then WiFi. Follow prompts to connect to new WiFi.
Can I Change Wifi Without Resetting The Kasa Switch?
No, changing WiFi requires resetting the Kasa switch to reconnect it to the new network.
Why Won’t My Kasa Switch Connect To New Wifi?
Ensure your new WiFi is 2. 4 GHz, stable, and correct password is entered. Reset and try again.
How To Reset Kasa Light Switch For Wifi Change?
Hold the switch button for 5-10 seconds until it blinks. This resets settings for WiFi setup.
Conclusion
Changing the WiFi on your Kasa Light Switch is simple and quick. Follow the steps carefully to avoid any issues. Make sure your new network details are ready before starting. This keeps your smart switch connected and working well. Stay patient and double-check each step.
Enjoy the convenience of controlling your lights anytime, anywhere. Keep this guide handy for future changes. Easy to do. Easy to live with.