Your brake lights are one of the most important safety features on your vehicle. But how do you know if the brake light switch is working properly?
If it fails, your brake lights won’t turn on, putting you and others at risk. You will learn simple, step-by-step ways to check your brake light switch yourself. By the end, you’ll have the confidence to spot any problems early and keep your car safe on the road.
Let’s dive in and make sure your brake lights are always ready when you need them.

Credit: www.youtube.com
Signs Of A Faulty Brake Light Switch
The brake light switch plays a key role in vehicle safety. It signals to other drivers when you press the brake pedal. A faulty brake light switch can cause problems that affect driving safety. Recognizing the signs early helps prevent accidents and costly repairs.
Common Symptoms
Brake lights that do not turn on are a clear sign. Sometimes, brake lights stay on even when the pedal is not pressed. The cruise control may not work properly. The brake pedal might feel different or loose. Dashboard warning lights can also appear without clear reason.
Safety Risks
Failing brake lights increase the chance of rear-end collisions. Other drivers cannot see when you slow down or stop. This can lead to serious accidents, especially at night or in bad weather. Faulty switches may also affect vehicle systems like cruise control. This can make driving less safe and harder to control.
Tools Needed For Testing
Testing a brake light switch needs some basic tools. These tools help you check if the switch works properly. Having the right tools saves time and effort. It also ensures you get accurate results during the test.
Some tools are necessary for any brake light switch check. Other tools are optional but can make the process easier and faster. Below is a list to guide you through what you need.
Basic Tools List
- Multimeter – measures electrical current and voltage.
- Test light – checks if power reaches the switch.
- Screwdrivers – remove panels or covers around the switch.
- Pliers – help disconnect or adjust the switch.
- Flashlight – provides light in dark spaces.
- Owner’s manual – shows the switch location and wiring details.
Optional Diagnostic Devices
- OBD-II scanner – reads error codes related to brake lights.
- Brake light tester – a tool specifically for brake switch checks.
- Digital voltmeter – gives precise voltage readings.
- Wire connectors – for safe electrical testing.
- Automotive wiring diagram – helps understand switch circuits.
Locating The Brake Light Switch
Locating the brake light switch is the first step in checking its condition. This small part controls your brake lights, which are important for safety. Finding it can be easy if you know where to look. It usually sits near the brake pedal inside your car. Understanding its position helps you inspect and test it properly.
Typical Switch Position
The brake light switch is often mounted on the brake pedal arm. It sits just above where your foot presses the pedal. This position allows it to detect when the pedal moves. In many cars, the switch looks like a small button or sensor. It may have wires connected to it for electrical signals.
Access Tips
Accessing the brake light switch can be tricky in some cars. You might need to sit in the driver’s seat and look under the dashboard. Use a flashlight to see better in dark spaces. Sometimes, removing a panel or cover helps you reach the switch. Be gentle to avoid breaking clips or fasteners.
Credit: www.howacarworks.com
Step-by-step Testing Process
Checking a brake light switch is simple with the right steps. Follow this process to find any problems fast. The test uses easy tools and clear actions. This helps keep your brake lights working well and your car safe.
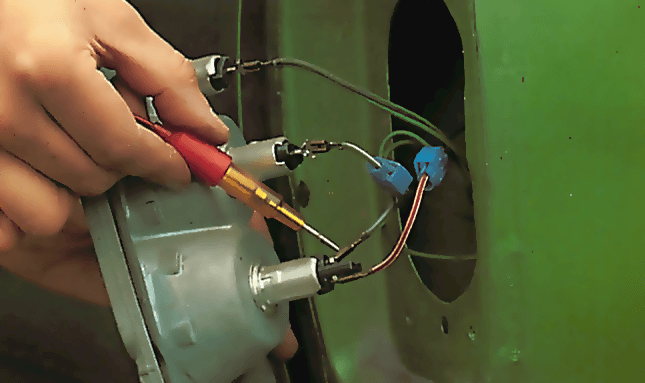
Visual Inspection
Start with a close look at the brake light switch. Check for cracks, dirt, or loose parts. Look at the wires connected to the switch. Make sure they are not broken or frayed. Clean any dirt or rust you find. This step often shows obvious damage quickly.
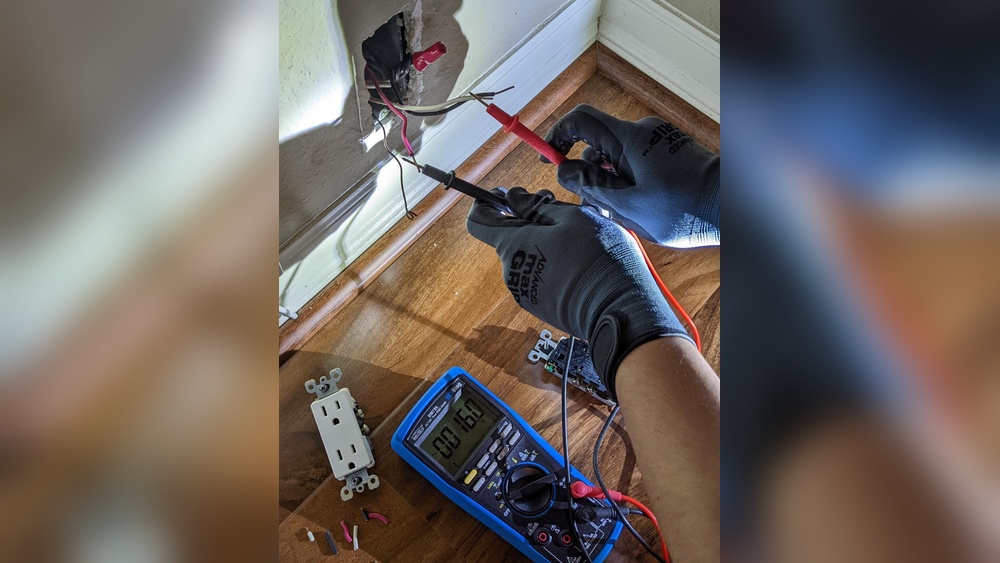
Electrical Testing
Use a multimeter to test the switch’s electrical function. Set the multimeter to measure continuity or resistance. Connect the probes to the switch terminals. Press the brake pedal and watch the meter. The meter should show a change when pressed. No change means the switch might be faulty.
Mechanical Check
Press the brake pedal slowly. Notice how the switch moves with the pedal. It should click or move easily without sticking. If the switch does not move smoothly, it may need replacing. Also, check if the switch stays in place firmly.
Common Fixes And Adjustments
Common fixes and adjustments can solve many brake light switch issues. These fixes often restore proper function without expensive repairs. Simple steps like resetting or repositioning the switch help the brake lights work correctly again.
Understanding these adjustments saves time and money. The process is easy and requires basic tools. Let’s explore two main fixes: resetting the switch and adjusting its position.
Resetting The Switch
Resetting the brake light switch can clear minor faults. Start by turning off the car. Disconnect the battery for safety. Locate the brake light switch near the brake pedal.
Press the switch button manually to check if it moves smoothly. If stuck, gently push and release it several times. Reconnect the battery and test the brake lights. This reset often fixes electrical glitches.
Adjusting The Position
Incorrect switch position stops brake lights from working. The switch must touch the brake pedal arm when released. Loosen the switch mounting nut carefully. Move the switch up or down to align it with the pedal.
Press the brake pedal to check if the switch activates correctly. Tighten the mounting nut once the position is right. Test the brake lights again. Proper switch alignment ensures reliable brake light operation.

Credit: www.agcoauto.com
When To Replace The Brake Light Switch
The brake light switch is a small but vital part of your vehicle. It tells the brake lights when to turn on. Over time, this switch can wear out or break. Knowing when to replace it helps keep your car safe. It also prevents problems with your brake lights and other systems.
Signs Replacement Is Needed
Brake lights not turning on is a clear sign. Press the brake pedal. No light? The switch may be faulty. Lights staying on all the time is another sign. It can drain the car battery. Sometimes, the cruise control stops working. This can also mean the switch is bad. Strange noises or difficulty in shifting gears can appear. These issues suggest a failing brake light switch.
Choosing The Right Replacement Part
Use the exact switch made for your car model. Check the car manual or ask a mechanic. Quality matters for safety and durability. Avoid cheap, generic parts that may fail quickly. Original equipment manufacturer (OEM) parts fit perfectly. They last longer and work better. Make sure the new switch matches the electrical connectors. Proper fit ensures correct brake light function and safety.
Safety Tips During Repair
Safety is very important when checking or fixing a brake light switch. The brake system helps keep you and others safe on the road. A wrong move can cause injury or damage. Follow safety tips to protect yourself and your vehicle. Stay careful and focused during the repair.
Precautions To Take
Always disconnect the car battery before starting any work. This stops electric shocks or short circuits. Use gloves to protect your hands from sharp parts. Work in a well-lit area to see everything clearly. Keep tools organized to avoid accidents. Make sure the car is parked on a flat surface and the parking brake is on.
Avoiding Common Mistakes
Do not rush the repair process. Take your time to check each step. Avoid touching the brake light switch with dirty hands. Dirt can cause poor connections or damage. Never force parts to fit; they should move smoothly. Double-check all connections before reconnecting the battery. Test the brake lights only after completing the repair fully.
Frequently Asked Questions
How Can I Test A Brake Light Switch At Home?
To test a brake light switch, first locate it near the brake pedal. Press the pedal and check if the brake lights turn on. Use a multimeter to measure continuity. If no light or continuity appears, the switch may need replacement.
What Tools Are Needed To Check A Brake Light Switch?
You need a multimeter, a flashlight, and a basic wrench set. The multimeter tests electrical continuity. The flashlight helps locate the switch. Wrenches help remove or adjust the switch if necessary. These tools make the process simple and effective.
Where Is The Brake Light Switch Located?
The brake light switch is usually found near the top of the brake pedal arm. It connects to the brake pedal bracket. Its position allows it to activate when the pedal is pressed. Location may vary slightly by car model.
Why Is My Brake Light Switch Not Working?
A brake light switch may fail due to wear, damage, or misalignment. Electrical faults or blown fuses can also cause failure. If the switch does not activate the brake lights, it may need inspection or replacement.
Conclusion
Checking a brake light switch helps keep your car safe. It only takes a few steps to test it. A working brake light switch ensures others see when you stop. Faulty switches can cause accidents or trouble passing inspections. Regular checks save money and prevent problems on the road.
Take a moment to check it today. Simple actions like this protect you and everyone around. Stay safe by keeping your brake light switch in good shape.