Are your cabinet handles looking dull or outdated? Imagine giving them a fresh, luxurious look without spending a fortune on replacements.
Painting your cabinet hardware gold is an easy and affordable way to transform your space instantly. In this guide, you’ll discover simple steps to achieve a professional, long-lasting finish that makes your cabinets stand out. Ready to add a touch of elegance to your home?
Keep reading, and you’ll learn exactly how to do it yourself.
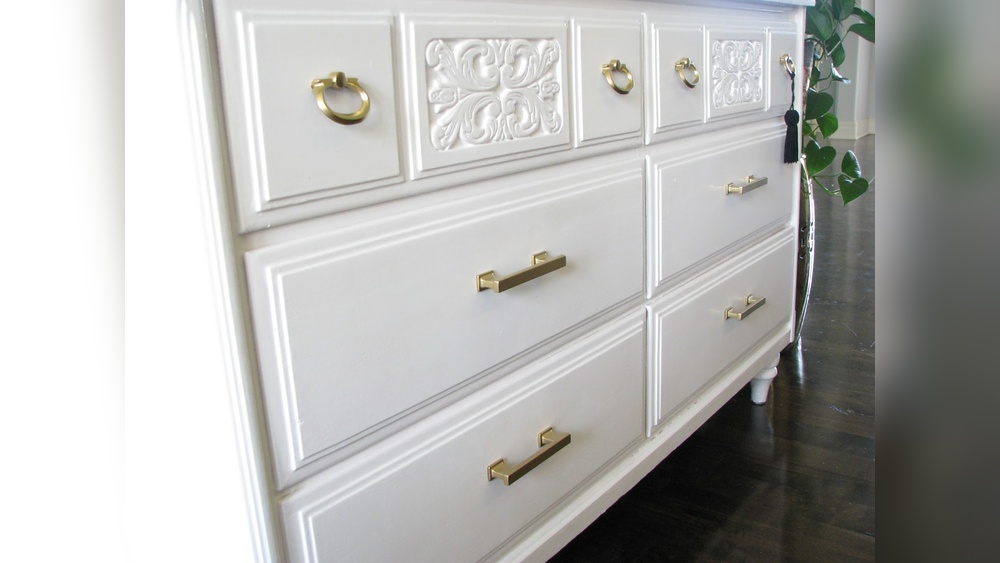
Credit: www.polishedhabitat.com
Choosing The Right Gold Paint
Choosing the right gold paint is key for painting cabinet hardware. The paint’s type and quality affect how shiny and lasting the finish looks. The right paint also makes the job easier. Understanding different options helps you pick the best gold paint for your project.
Types Of Gold Paint Finishes
Gold paint comes in several finishes. Metallic finishes give a bright, shiny look. Satin finishes offer a soft glow with less shine. Matte finishes show little to no shine and look smooth. Choose a finish that fits your style and the room’s look. Metallic is best for a classic gold shine.
Selecting Quality Paint Brands
High-quality brands give better coverage and longer wear. They also resist chipping and fading. Choose paints made for metal or multi-surface use. Read labels carefully to ensure the paint works on hardware. Investing in a good brand saves time and effort later.
Preparing Your Cabinet Hardware
Preparing your cabinet hardware is the first step to a smooth painting process. Proper preparation helps the paint stick better and last longer. It also ensures a clean, professional look. Take your time with each step. This will save effort later and improve results.
Removing Hardware Safely
Use the right tools, like a screwdriver, to remove knobs and handles. Turn screws slowly to avoid damage. Keep screws and small parts in a container. Label them if needed to avoid confusion. Handle each piece carefully to prevent scratches or dents.
Cleaning And Sanding Surfaces
Clean each piece with warm, soapy water. Remove grease, dirt, and dust completely. Dry the hardware with a soft cloth. Lightly sand surfaces with fine-grit sandpaper. This creates a rough texture for paint to hold on. Wipe away sanding dust with a clean cloth. Proper cleaning and sanding improve paint adhesion and finish.
Setting Up Your Workspace
Setting up your workspace is the first step to a successful cabinet hardware painting project. A clean, organized area helps you work faster and avoid mistakes. Preparing your space also protects your home from paint splashes and dust. Take time to get everything ready before starting to paint.
Protecting Surrounding Areas
Cover surfaces near your workspace with drop cloths or old newspapers. Use painter’s tape to shield edges and nearby walls. This prevents paint from staining counters, floors, or cabinets. Make sure to secure coverings well to avoid slipping. Protecting areas saves time on cleanup later.
Gathering Necessary Tools And Materials
Collect all tools before you begin painting. You will need sandpaper, primer, paint, and a clear sealant. Also, have small brushes or spray paint ready. Wear gloves to keep your hands clean. Having everything on hand keeps the process smooth and stress-free.
Applying The Gold Paint
Applying gold paint to cabinet hardware transforms ordinary pieces into stunning accents. This step requires care and the right approach. Proper painting helps the gold finish look smooth and last longer. Follow these tips for a beautiful result.
Priming The Hardware
Start by cleaning the hardware. Remove dirt and grease with soap and water. Let it dry completely. Next, apply a primer made for metal surfaces. Priming helps the paint stick better and prevents peeling. Use a thin, even coat. Allow the primer to dry fully before painting. This step is key for a shiny, even finish.
Techniques For Smooth Painting
Use a small brush or spray paint for best results. Apply light, even strokes. Avoid heavy layers to prevent drips. Paint in a well-ventilated area for safety. Hold the hardware steady or place it on a clean surface. Keep your hand steady and move slowly. Thin coats help create a smooth, professional look.
Number Of Coats And Drying Times
Apply two or three thin coats of gold paint. Let each coat dry before adding the next. Drying usually takes 20 to 30 minutes. Check the paint label for exact times. More coats give a richer, deeper gold color. Patience ensures the paint does not smudge or peel. After the final coat, let the hardware dry for at least one hour.
Sealing And Finishing Touches
Sealing and finishing touches protect your gold-painted cabinet hardware. These steps keep the shine bright and stop the paint from chipping. Proper sealing makes the hardware last longer and look better every day.
Choosing The Right Sealer
Pick a sealer made for metal surfaces. Clear acrylic sealers work well. They dry fast and do not yellow over time. Look for a sealer that is water-resistant. This will keep the gold finish safe from moisture and fingerprints. Matte, satin, or glossy finishes offer different looks. Choose one that matches your style.
Applying Protective Coats
Apply thin, even coats of sealer. Use a soft brush or spray for smooth coverage. Let each coat dry fully before adding the next. Usually, two to three coats are enough. Avoid thick layers that can drip or peel. After sealing, wait at least 24 hours before using the hardware. This helps the sealer cure and harden well.
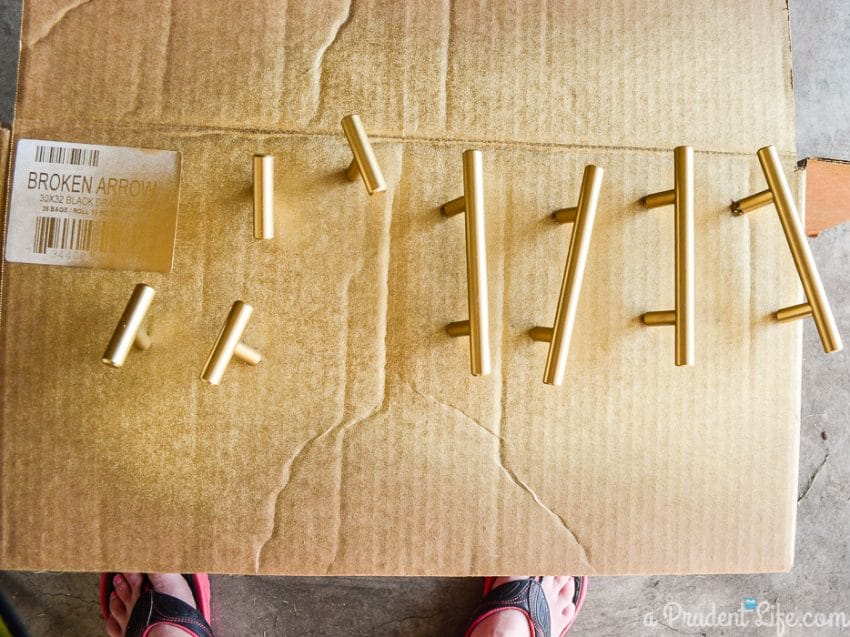
Credit: www.rustoleum.com
Reinstalling And Caring For Hardware
Reinstalling and caring for your newly painted gold cabinet hardware is important. Proper care keeps the shine bright and the finish lasting longer. Taking your time during reattachment prevents damage and ensures a smooth look. Regular maintenance protects the gold finish from wear and tear.
Proper Reattachment Tips
Start by aligning the hardware with the screw holes. Use the original screws or new ones of the same size. Tighten screws gently to avoid stripping the holes. Avoid overtightening, which can crack the paint. Check that the hardware sits flat and does not wobble. Clean the hardware before reinstalling to remove dust and grease.
Maintaining The Gold Finish
Use a soft cloth to clean the hardware regularly. Avoid harsh chemicals that can dull or damage the paint. Wipe off fingerprints and spills quickly to prevent stains. Dry the hardware after cleaning to stop water spots. Apply a thin layer of clear wax for extra protection. Handle the hardware with clean hands to keep it looking fresh.
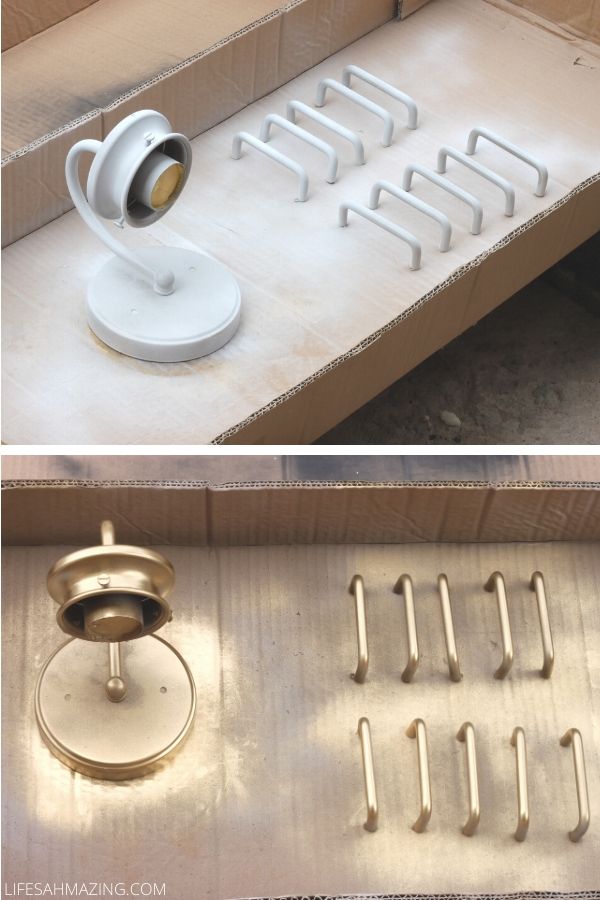
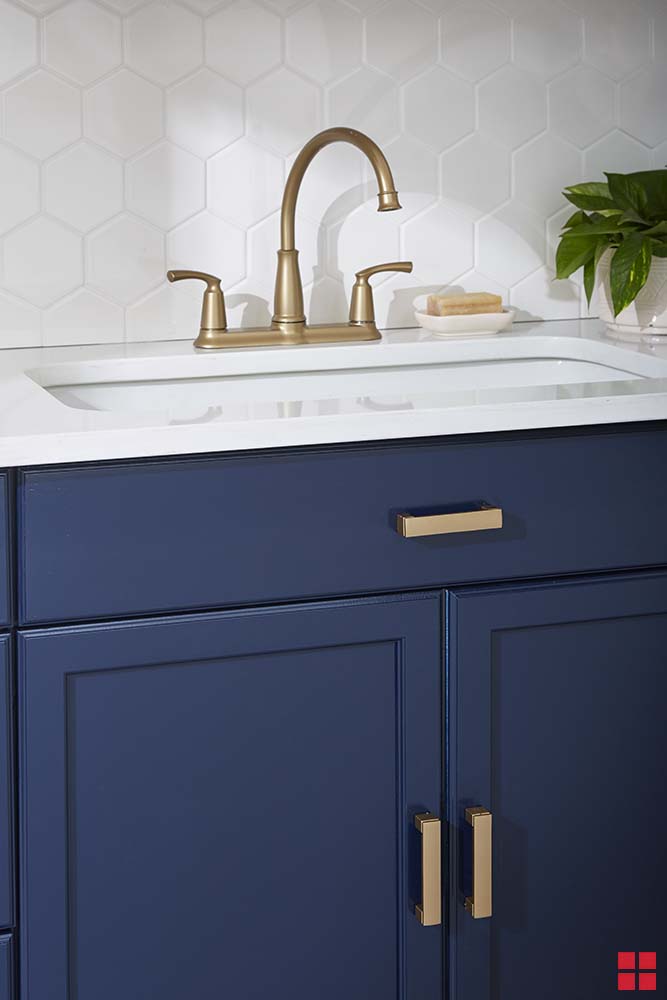
Credit: www.lifesahmazing.com
Frequently Asked Questions
How Do I Prepare Cabinet Hardware For Gold Paint?
Clean the hardware thoroughly to remove dirt and grease. Lightly sand the surface to help the paint adhere better. Wipe with a tack cloth to remove dust before painting.
What Type Of Paint Works Best For Cabinet Hardware?
Use spray paint designed for metal surfaces. Choose a high-quality metallic gold spray paint for a smooth, durable finish. Avoid regular acrylic paints that may chip easily.
Can I Paint Cabinet Hardware Without Removing It?
It’s best to remove hardware before painting for even coverage. Painting in place risks uneven paint and mess on cabinets. Removing allows for better control and a professional look.
How Long Does Gold Paint Take To Dry On Hardware?
Gold spray paint typically dries to touch in 15-30 minutes. Full curing can take up to 24 hours. Allow sufficient drying time to avoid smudging or damage.
Conclusion
Painting cabinet hardware gold adds a fresh, stylish look to any room. It costs less than buying new pieces. The process is simple and fun to do. Just follow the steps carefully for best results. You can change the style anytime with a new color.
This small project makes a big difference. Try it and enjoy your beautiful, updated cabinets.