Have you ever looked at your old, worn-out light switch button and wondered how easy it would be to replace it yourself? Changing a light switch button might seem tricky, but with the right steps, you can do it quickly and safely.
Imagine saving money on an electrician and giving your room a fresh, updated look in just a few minutes. In this guide, you’ll discover exactly how to change your light switch button step-by-step, even if you’ve never done it before.
Keep reading—you’re just a few simple moves away from mastering this handy skill.
Tools And Materials Needed
Changing a light switch button requires a few simple tools and materials. Having the right items ready makes the job faster and safer. This section lists everything needed for a smooth switch replacement.
Basic Tools
Start with a screwdriver set. A flathead and a Phillips screwdriver are essential. These help remove the switch cover and screws.
A voltage tester is critical. It ensures the power is off before touching wires. Safety first.
Materials Needed
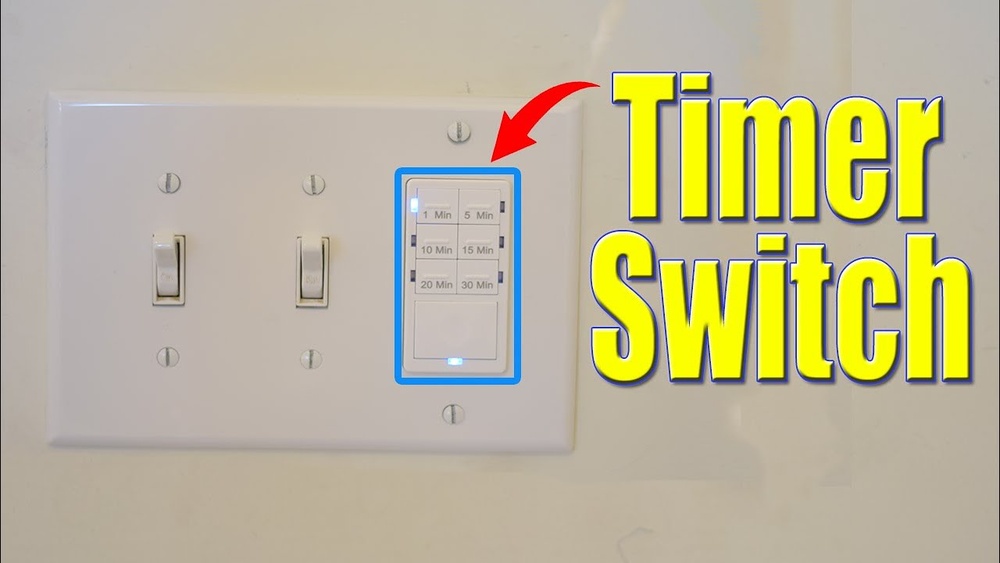
Get the new light switch button that matches your old one. Check the amperage and type before buying.
Wire strippers are useful if you need to trim or expose wires. They make clean cuts without damage.
Optional Supplies
Electrical tape helps secure wire connections. It adds an extra layer of safety.
A small flashlight can be handy. It improves visibility inside the switch box, especially in dark areas.

Credit: www.reddit.com
Safety Precautions
Changing a light switch button involves handling electricity. Safety comes first. Taking the right precautions protects you from shocks and injuries. Always prepare before starting any electrical work.
Turn Off The Power
Switch off the power at the circuit breaker. Do not rely on the wall switch alone. Use a voltage tester to confirm no electricity flows to the switch. This step stops electric shocks while working.
Use Insulated Tools
Pick tools with insulated handles. These tools reduce the risk of electric shock. Avoid metal tools without insulation. Safety gear helps keep your hands safe during the job.
Wear Protective Gear
Wear rubber-soled shoes to avoid grounding. Use safety goggles to protect your eyes. Gloves can also help prevent shocks. Proper gear lowers the chance of accidents.
Work In A Dry Area
Never work near water or wet surfaces. Moisture increases the risk of electric shock. Ensure your hands and tools are dry before starting. Dry conditions make the task safer.
Double-check Connections
Before finishing, check all wires are secure. Loose wires can cause shorts or fires. Tight connections keep the switch working well and safe. Careful checks prevent future problems.
Turning Off Power
Turning off the power is the first step to safely change a light switch button. It stops electricity from flowing to the switch. This helps prevent shocks and accidents.
Always take time to turn off power before starting any electrical work. Safety comes first in every project.
Locate The Circuit Breaker
Find your home’s circuit breaker box. It is usually in the basement, garage, or utility room. Open the box to see the switches inside.
Identify The Correct Switch
Look for the breaker that controls the light switch. It may be labeled. If not, turn off the main breaker to cut power to the whole house.
Turn Off The Breaker
Flip the switch to the off position. This stops electricity from reaching the light switch. Double-check that the power is off before touching any wires.
Test The Light Switch
Use a voltage tester or try turning the light on. If the light stays off, the power is off. Never skip this step to avoid danger.
Removing The Old Switch
Removing the old light switch is the first step in changing it. This part needs care and attention to keep you safe. Follow the steps carefully to avoid any accidents.
Turn Off The Power
Find the circuit breaker for the light switch. Switch it off to stop electricity flow. Test the switch to make sure the power is off.
Remove The Switch Cover
Use a screwdriver to take out the screws on the cover plate. Keep the screws safe for later use. Gently pull the cover away from the wall.
Unscrew The Old Switch
Locate the screws holding the switch to the electrical box. Use a screwdriver to remove these screws. Carefully pull the switch out, exposing the wires.
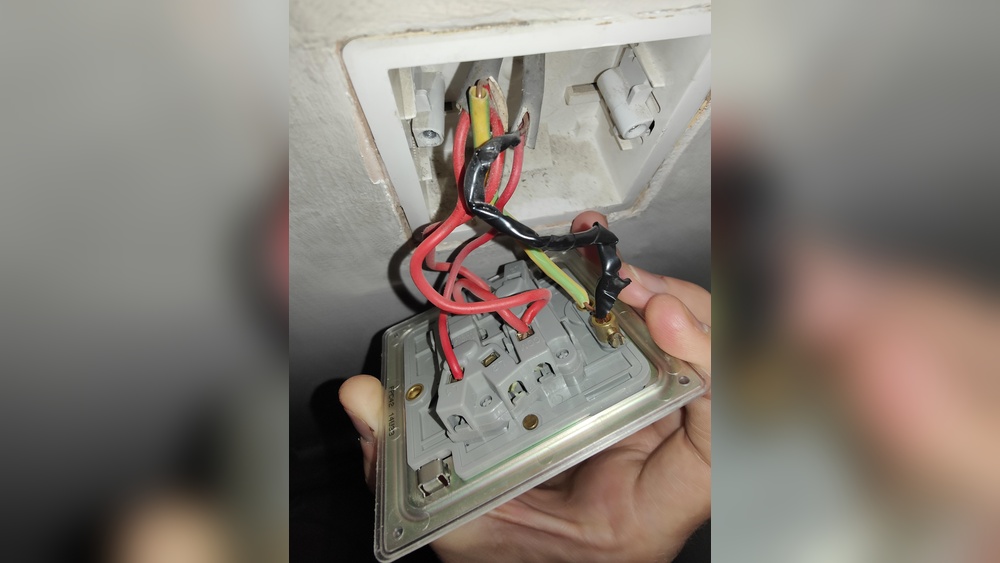
Note The Wire Connections
Look closely at how the wires connect to the switch. Take a photo or write down their positions. This helps in connecting the new switch correctly.
Disconnect The Wires
Use a screwdriver to loosen the terminal screws. Gently pull the wires away from the switch. Keep the wires straight and untangled for the next step.
Identifying Wiring
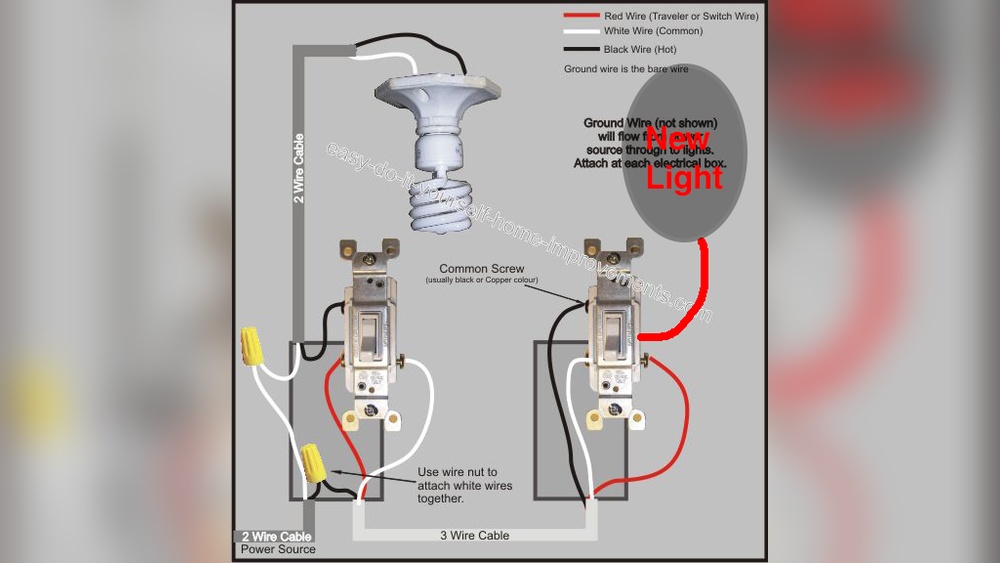
Identifying wiring is an important step before changing a light switch button. It helps to know which wire does what. This prevents mistakes and keeps you safe. Every wire has a role in the circuit. Understanding these roles makes the process easier and safer.
Wires come in different colors and types. These colors show their purpose. Knowing this helps you connect the new switch correctly. Always check the wires carefully before touching them.
Understanding Wire Colors
Most houses use standard wire colors. Black or red wires carry power to the switch. These are called “hot” wires. White wires are neutral. They complete the circuit by carrying current back. Green or bare wires are ground. They protect you from electric shocks.
Turning Off The Power
Before identifying wires, turn off the power at the breaker box. This stops electricity from flowing. Use a voltage tester to check if wires are live. Never touch wires unless you are sure power is off.
Using A Voltage Tester
A voltage tester tells if a wire has electricity. Touch the tester to each wire. If the tester lights up or beeps, that wire is live. Test all wires before you start work. This tool is simple but very helpful.
Labeling The Wires
After identifying wires, label them with tape or markers. Mark hot, neutral, and ground wires clearly. This makes reconnecting easier. It also prevents confusion during installation.
Installing The New Switch
Installing the new switch is the final step in changing a light switch button. This step involves connecting wires and fixing the switch in place. Proper installation ensures the switch works safely and correctly.
Preparing The New Switch For Installation
First, check the new switch for any damages. Compare it with the old switch to confirm it is the same type. Make sure the terminals are clean and ready for wiring. This prevents poor connections and electrical issues.
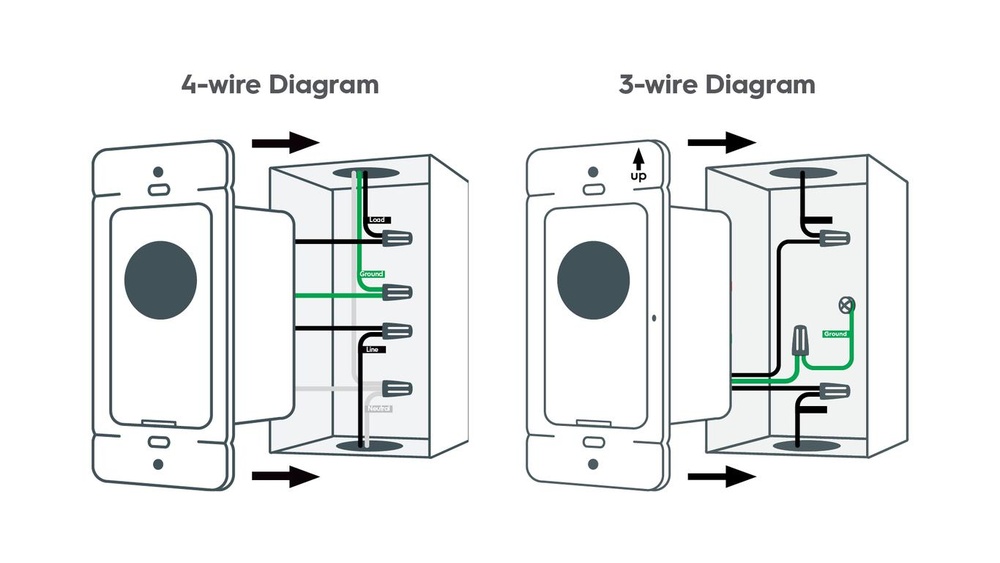
Connecting The Wires To The New Switch
Match each wire to the correct terminal on the switch. Usually, black or red wires connect to the brass screws. White wires connect to silver screws. Tighten screws firmly to hold wires in place. Loose wires can cause sparks or failure.
Securing The Switch To The Electrical Box
Push the wires gently back into the electrical box. Align the switch with the screw holes on the box. Use a screwdriver to fasten the screws. The switch should sit flush with the wall surface.
Testing The Installed Switch
Turn the power back on at the circuit breaker. Press the switch to check if the light turns on and off. If it does not work, turn off the power and recheck connections. Proper testing ensures safety and functionality.
Testing The Switch
Testing the switch is a key step after replacing a light switch button. It ensures the new switch works correctly and safely. This process helps avoid any electrical issues or damage.
Testing requires simple tools and careful attention. Follow these steps to confirm your switch functions as expected.
Turn The Power Back On
After installing the new switch, restore power at the breaker box. Make sure the area is dry and safe before turning power on. This step prepares the switch for testing.
Check The Switch Operation
Press the switch up and down. Notice if the light turns on and off smoothly. The switch should feel firm, not loose or stuck.
Use A Voltage Tester
A voltage tester shows if electricity flows correctly. Place the tester on the switch terminals. If the tester lights up when on, the switch works well.
Look For Any Issues
Listen for buzzing sounds or see sparks. These signs show a problem in wiring or the switch. Turn off power immediately and fix the issue before use.
Credit: www.youtube.com
Troubleshooting Common Issues
Troubleshooting common issues helps fix problems fast. It saves time and avoids extra costs. Knowing simple checks can make the process smooth.
Some problems are easy to spot. Others need careful inspection. This section covers the usual issues when changing a light switch button.
Checking Power Supply
Ensure the power is off before starting. Use a voltage tester to confirm no electricity flows. No light or switch reaction often means no power.
Check the circuit breaker or fuse box for tripped switches. Reset any tripped breaker carefully. Test the switch again after resetting.
Loose Or Disconnected Wires
Loose wires cause switches to fail or flicker. Turn off power before touching wires. Tighten any loose screws holding wires firmly.
Look for disconnected wires. Reattach them to the correct terminals. Match wire colors to the switch markings for safety.
Faulty Switch Button
Sometimes the switch itself is bad. Signs include clicking sounds without light change. Replace the switch if it feels stuck or broken.
Test with a new switch if unsure. This step often resolves persistent problems quickly.
Incorrect Wiring Setup
Wrong wiring causes switches not to work. Follow the wiring diagram carefully. Double-check connections before powering the switch.
Use labels or take photos before removing wires. This helps reconnect everything correctly.
Tips For Maintaining Switches
Maintaining light switches helps them last longer and work better. Clean switches avoid dust and dirt buildup. Regular checks stop small problems from becoming big ones. Here are some simple tips to keep your switches in good shape.
Keep Switches Clean
Turn off power before cleaning any switch. Use a soft, dry cloth to wipe the surface. Avoid water or liquid cleaners that can damage the switch. Clean switches prevent dirt from blocking contact points.
Check For Loose Connections
Loose wires can cause flickering or no power. Gently tighten screws on the switch terminals. Always switch off the main power before touching wires. Secure connections improve safety and performance.
Replace Worn Or Damaged Switches
Old switches may feel loose or not click properly. Replace any switch with cracks or discoloration. A damaged switch can cause electrical hazards. Use a new switch that matches your home’s style.
Avoid Overloading Switches
Do not connect too many devices to one switch. Overloading can cause heat and damage the switch. Spread electrical load evenly across different switches. Proper load prevents switch failure and fire risks.

Credit: www.wikihow.com
Frequently Asked Questions
How Do I Safely Turn Off Power Before Changing A Switch?
Always switch off the circuit breaker before starting. Use a voltage tester to confirm no power flows. Safety prevents shocks and injuries during replacement.
What Tools Do I Need To Change A Light Switch Button?
You need a screwdriver, voltage tester, wire stripper, and replacement switch. Having these ready speeds up the process and ensures safety.
Can I Replace A Light Switch Button Myself?
Yes, if you follow safety steps carefully. Turn off power, use proper tools, and handle wires correctly. Otherwise, consult a professional electrician.
How Long Does It Take To Change A Light Switch Button?
Typically, it takes 10 to 20 minutes. Time depends on your experience and switch type. Proper preparation ensures a quick, safe replacement.
Conclusion
Changing a light switch button is simple and safe when done right. Always turn off the power before starting. Use the right tools and follow each step carefully. Double-check your work before restoring power. This small task can improve your home’s look and function.
Now, you can replace switches with confidence and ease. Why wait? Give it a try today.