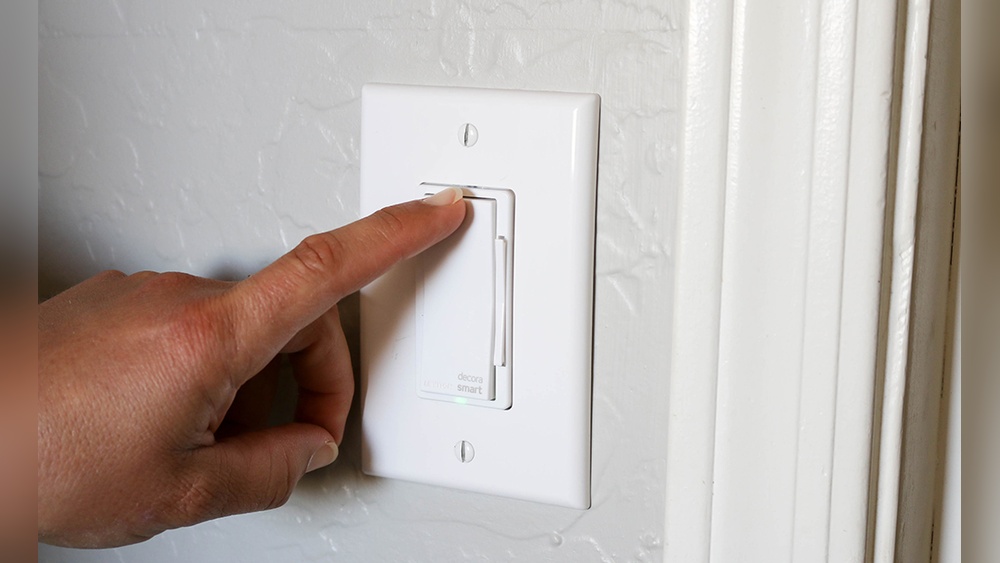
Have you ever wished you could set the perfect mood lighting in your room with just a simple twist? Changing your regular light switch to a dimmer switch can do just that.
It’s easier than you think, and you don’t need to be an expert to do it. Imagine controlling the brightness to suit every moment—whether it’s a cozy movie night or a bright, focused workspace. In this guide, you’ll learn exactly how to make the switch safely and quickly, step by step.
Ready to transform your lighting and add a touch of comfort to your home? Let’s get started!

Credit: www.youtube.com
Tools And Materials Needed
Changing a light switch to a dimmer switch requires specific tools and materials. Having these ready makes the job faster and safer. The right tools help you avoid mistakes and protect your home’s wiring.
Gather all items before starting. This preparation ensures smooth work and fewer interruptions.
Basic Tools Needed
- Screwdriver (flathead and Phillips)
- Voltage tester
- Wire stripper
- Needle-nose pliers
- Electrical tape
Materials Required
- Dimmer switch compatible with your light fixture
- Wire nuts
- Wall plate for dimmer switch
Safety Equipment
- Insulated gloves
- Safety glasses
Safety First
Safety is the top priority when changing a light switch to a dimmer switch. Working with electricity can be dangerous. Taking the right steps keeps you safe and avoids damage to your home. Follow these safety rules closely.
Turn Off The Power
Always switch off the power at the circuit breaker. Do not rely on the wall switch alone. Use a voltage tester to make sure the wires are not live. This step protects you from electric shocks.
Use The Right Tools
Select tools with insulated handles. Use a voltage tester, screwdriver, and wire stripper. Using proper tools lowers the risk of injury. It makes the job easier and safer.
Check The Dimmer Compatibility
Make sure the dimmer switch matches your light bulb type. Some dimmers only work with LED or incandescent bulbs. Using the wrong dimmer can cause flickering or damage. Always read the product instructions carefully.
Handle Wires Carefully
Do not touch wire ends directly. Keep wire connections tight but not too tight. Loose wires cause sparks and fires. Wear gloves if needed to avoid cuts and shocks.
Test After Installation
Turn the power back on slowly. Test the dimmer switch for smooth operation. Watch for unusual sounds or smells. If you notice problems, turn off power and recheck connections.
Turn Off Power
Turning off the power is the first and most important step before changing a light switch to a dimmer switch. It keeps you safe from electric shocks. Always take this step seriously to avoid accidents.
Electricity flows through the wires, so stopping it prevents harm. You will feel more confident working on the switch without power running through it.
Locate The Circuit Breaker Panel
Find the circuit breaker panel in your home. It is usually in the basement, garage, or utility room. The panel holds switches that control power to different areas of your home.
Identify The Correct Breaker
Look for the breaker that controls the switch’s circuit. It may be labeled with the room name or location. If not, turn off breakers one by one and test the switch until power is off.
Switch Off The Breaker
Flip the correct breaker to the “off” position. This stops electricity from flowing to the light switch. Check carefully to ensure the breaker is fully off.
Test The Power
Use a voltage tester or a simple device like a lamp. Turn on the switch to see if the light or device works. If it does not, the power is off and safe to work on.
Remove Existing Light Switch
Removing the existing light switch is the first step to install a dimmer switch. This process is simple but requires care to avoid electric shock. Always turn off the power at the circuit breaker before touching any wires. Verify the power is off by testing the switch with a voltage tester. Safety first.
Turn Off Power At Circuit Breaker
Find the correct breaker for the light switch. Flip the switch to the off position. This stops electricity flow to the switch. Use a voltage tester to double-check. No power means you can work safely.
Remove The Switch Cover Plate
Use a screwdriver to remove the screws holding the cover plate. Take off the plate gently. Set it aside for later use. This exposes the switch and wires.
Unscrew The Light Switch
Locate the screws securing the switch to the electrical box. Unscrew them carefully. Pull the switch out slowly, exposing the wires behind it. Keep the wires intact for easier installation of the dimmer switch.
Disconnect The Switch Wires
Note the wire positions before disconnecting. Loosen the screws or release the wires from the switch. Separate the wires gently. Avoid damaging the wire ends for reattachment later.
Identify Wiring
Identifying wiring is a key step before changing a light switch to a dimmer switch. It helps you know which wires do what. Correct identification keeps the work safe and easy. Take your time and follow simple steps to spot the wires.
First, switch off the power from the main circuit breaker. This prevents electric shock. Never work on wiring with power on. Use a voltage tester to confirm no power flows to the switch.
Remove Switch Cover Plate
Unscrew the cover plate of the existing switch. Take it off gently to avoid damage. This reveals the wires connected to the switch. Keep screws safe to reuse later.
Identify Wire Types
Look for three main wires: live, neutral, and ground. The live wire is usually black or red. The neutral wire is white. The ground wire is green or bare copper. Knowing these colors helps you connect the dimmer right.
Use A Voltage Tester
Test each wire with a voltage tester. The tester shows which wire carries current. This confirms the live wire. Mark the live wire with tape or a marker. This avoids confusion during installation.
Note Wire Connections
Observe how wires connect to the switch terminals. Take a picture or draw a diagram. This reference helps when wiring the dimmer switch. Make sure you remember wire positions clearly.

Credit: www.youtube.com
Connect Dimmer Switch
Connecting a dimmer switch is a key step to control light brightness. It changes the way your room feels. The process is simple but needs care and attention to safety. Follow these easy steps to connect your dimmer switch correctly.
Turn Off The Power
Start by turning off the power at the circuit breaker. This prevents electric shock. Use a tester to make sure the wires are not live. Safety first.
Remove The Old Switch
Unscrew the old switch from the wall box. Pull it out gently to see the wires. Note how the wires connect to the old switch. This helps with the new connection.
Identify The Wires
Look for the live, load, and ground wires. Live wire brings power in. Load wire goes to the light. Ground wire connects to safety.
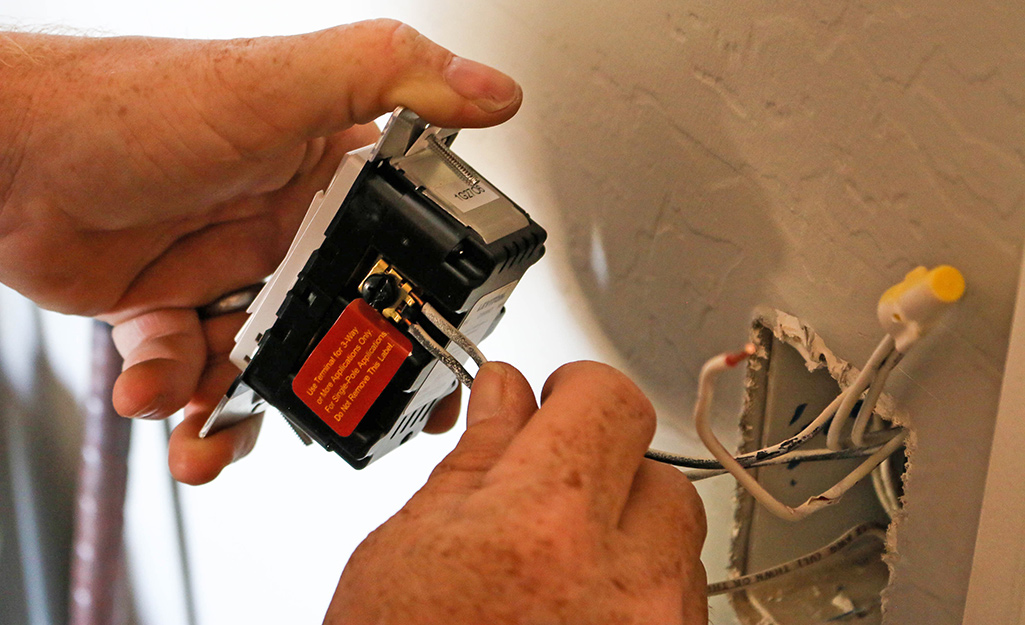
Connect The Dimmer Switch Wires
Match the dimmer wires to the house wires. Connect live to live, load to load, and ground to ground. Use wire nuts to secure connections. Tighten them well to avoid loose wires.
Push the wires back into the wall box. Screw the dimmer switch into place. Make sure it fits snugly and sits flat against the wall.
Turn the power back on at the breaker. Test the dimmer switch by turning the light on and dimming it. Check for smooth operation and no flickering.
Mount The Dimmer Switch
Mounting the dimmer switch is the next key step after wiring. It secures the switch in place and makes it ready for use. Follow these simple steps to mount your new dimmer switch safely and correctly.
Prepare The Switch Box
Check the switch box for any loose wires or debris. Make sure the wires are neatly folded inside. This prevents damage and allows the switch to fit properly.
Attach The Dimmer Switch
Align the dimmer switch with the screw holes in the box. Use a screwdriver to fasten the screws tightly. Avoid over-tightening to prevent damage to the switch.
Install The Wall Plate
Place the wall plate over the switch. Secure it with the screws provided. The wall plate protects the wiring and gives a clean look.
Credit: www.homedepot.com
Restore Power And Test
After installing the dimmer switch, restoring power safely is the next step. Testing the switch ensures it works correctly. This process confirms the dimmer controls the light brightness smoothly.
Turn On The Circuit Breaker
Go back to your electrical panel. Flip the switch for the circuit you turned off earlier. This action restores power to the room.
Wait a few seconds for the electricity to stabilize. Then, move to the dimmer switch location.
Test The Dimmer Switch Function
Press the dimmer switch to turn on the light. Rotate the dimmer knob or slide the control slowly. Notice if the light brightness changes smoothly.
The light should dim and brighten without flickering. If it does, the installation is successful.
Check For Any Issues
Watch for flickering or buzzing sounds. These signs may indicate wiring problems. Turn off the power again and review your connections if issues appear.
Make sure the dimmer switch matches your light bulb type. Using incompatible bulbs can cause poor performance.
Troubleshooting Tips
Troubleshooting helps fix problems when changing a light switch to a dimmer switch. Small issues can stop the dimmer from working right. Knowing common problems saves time and effort.
Try these tips to find and solve issues quickly. They keep the dimmer switch working well and your room lighting just right.
Check Power Supply
Make sure the power is off before starting. Use a tester to confirm no electricity flows. If the dimmer does not work, check if power reaches the switch box.
Sometimes a tripped breaker or blown fuse cuts power. Reset breakers or replace fuses if needed. Without power, the dimmer switch will not function.
Inspect Wiring Connections
Loose wires cause flickering or no light at all. Turn off power and open the switch box. Tighten all wire nuts and screws firmly.
Match wires by color: black to black, white to white, and ground to ground. Wrong connections can damage the dimmer or create hazards.
Use Compatible Bulbs
Dimmer switches work best with dimmable bulbs. Check if your bulbs say “dimmable” on the package. Using regular bulbs may cause buzzing or flickering.
LED and CFL bulbs need special dimmers. Check the dimmer’s label for bulb compatibility. Replace bulbs if they do not match the dimmer type.
Test The Dimmer Switch
Try the dimmer switch in another socket or circuit. If it still does not work, the dimmer might be faulty. Replace it with a new, good-quality dimmer switch.
Sometimes switches have internal defects. Testing helps avoid wasting time on other fixes.
Check For Overloaded Circuits
Too many devices on one circuit can cause dimmer problems. Unplug other devices on the same circuit. See if the dimmer works better alone.
Overload causes dimmer overheating or flickering lights. Spread devices across different circuits to prevent this issue.
Choosing The Right Dimmer Switch
Choosing the right dimmer switch is important for a smooth lighting upgrade. The right switch matches your bulbs and your room’s needs. This ensures the dimmer works well and lasts long. It also helps save energy and create the perfect mood.
Types Of Dimmer Switches
There are several types of dimmer switches. Some work with incandescent bulbs only. Others support LED or CFL bulbs. Choose a dimmer that fits your bulb type. This avoids flickering or buzzing sounds.
Check The Wattage Rating
Each dimmer switch supports a maximum wattage. Add up the wattage of all bulbs on the switch. Pick a dimmer with a wattage rating higher than that total. This prevents overload and damage.
Single-pole Vs. Three-way Dimmer
A single-pole dimmer controls one light from one spot. A three-way dimmer works with two switches for one light. Know your current switch setup. Buy a dimmer that matches it.
Compatibility With Smart Home Systems
Some dimmers connect to smart home devices. They allow remote control by phone or voice. Choose a smart dimmer if you want this feature. Otherwise, a standard dimmer works fine.
Frequently Asked Questions
How Do I Install A Dimmer Switch Safely?
Turn off power at the circuit breaker before starting. Remove the old switch carefully. Connect wires to the dimmer switch terminals. Secure the switch and restore power. Test the dimmer to ensure proper function.
Can I Use A Dimmer Switch With Led Bulbs?
Yes, but ensure the dimmer switch is compatible with LED bulbs. Using the wrong dimmer may cause flickering or buzzing.
What Tools Are Needed To Change To A Dimmer Switch?
You will need a screwdriver, wire stripper, voltage tester, and possibly pliers. Always use insulated tools for electrical safety.
Will A Dimmer Switch Save Energy?
Yes, dimming lights reduces electricity use. This can extend bulb life and lower energy bills.
Conclusion
Changing a light switch to a dimmer switch is simple and helpful. It lets you control the light brightness easily. Always turn off the power before starting work. Follow the steps carefully for safety and success. A dimmer switch can save energy and create a nice mood.
Take your time and check your work. Soon, you will enjoy softer or brighter lights with just a slide or turn. This small change makes a big difference in your home lighting.


