If you’re staring at your Weiser deadbolt and wondering how to remove it without damaging your door, you’re in the right place. Whether you’re upgrading your lock, fixing a jam, or replacing a lost key, knowing the right steps can save you time and frustration.
This guide will walk you through each easy-to-follow step, so you can confidently handle the job yourself. Keep reading to unlock the simple process that anyone can do!
Tools Needed
Removing a Weiser deadbolt requires some basic tools. Having the right tools helps complete the job quickly. It also prevents damage to the lock or door.
Gather these tools before starting. Each one plays a key role in the removal process.
Phillips Head Screwdriver
This tool removes the screws holding the deadbolt together. Most Weiser deadbolts use Phillips screws. A good screwdriver fits well to avoid stripping screws.
Flat Head Screwdriver
Use this to pry parts gently. It helps separate the lock components without breaking them. Keep it handy for tight spots.
Allen Wrench
Some Weiser deadbolts have small hex screws. An Allen wrench fits these screws perfectly. Check your lock to see if one is needed.
Pliers
These grip and twist small parts. Pliers help remove stubborn screws or pins. Use them carefully to avoid damage.
Tape
Applying tape protects the door’s surface. It prevents scratches while working on the lock. Simple but useful.
Locate The Screws
Locating the screws is the first key step to remove a Weiser deadbolt. Without finding the screws, you cannot take the lock apart. This step is simple but needs careful observation.
Most Weiser deadbolts have screws hidden under the faceplate or cover. You need to check both the inside and outside parts of the lock. These screws hold the lock together.
Check The Interior Side Of The Deadbolt
Start by looking at the interior side of the deadbolt. This is the side inside your door. The screws that hold the lock usually sit here. Sometimes, a small cover hides them. Remove this cover gently.
Remove The Cover Plate
The cover plate hides the screws. It snaps or screws in place. Use a flathead screwdriver or your fingernail to lift the cover. Be careful not to damage the door or lock. Once removed, the screws become visible.
Identify The Type Of Screws
Look at the screws closely. Most Weiser deadbolts use Phillips head screws. They have a cross shape. Having the right screwdriver makes removal easier. Avoid stripping the screws by using the correct tool.
Locate Screws On The Exterior Side
Some models have screws on the outside too. Check near the keyhole. If you see screws here, note their position. Removing both inside and outside screws is often necessary to take off the deadbolt.
Remove The Interior Plate
Detaching the exterior cylinder of a Weiser deadbolt is a key step in removing the lock. This part holds the keyhole and connects to the inside mechanism. Removing it carefully prevents damage and makes further steps easier.
Start by preparing your tools and workspace. You need a screwdriver and a steady hand. Clear the area around the door for easy access.
Locate The Retaining Screw
Find the small screw on the edge of the door. This screw keeps the exterior cylinder in place. Usually, it sits near the deadbolt latch. Removing this screw lets you pull out the cylinder.
Unscrew The Retaining Screw
Use a screwdriver to turn the retaining screw counterclockwise. Keep the screw safe for reassembly or replacement. Do not force it; turn slowly to avoid stripping the head.
Pull Out The Exterior Cylinder
Grasp the cylinder firmly from the outside. Gently pull it straight out of the door. If it feels stuck, wiggle it slightly to loosen. Avoid twisting or bending to prevent damage.
Check For Additional Fasteners
Some models have extra screws or clips holding the cylinder. Look closely around the cylinder area. Remove any additional fasteners before pulling the cylinder out fully.

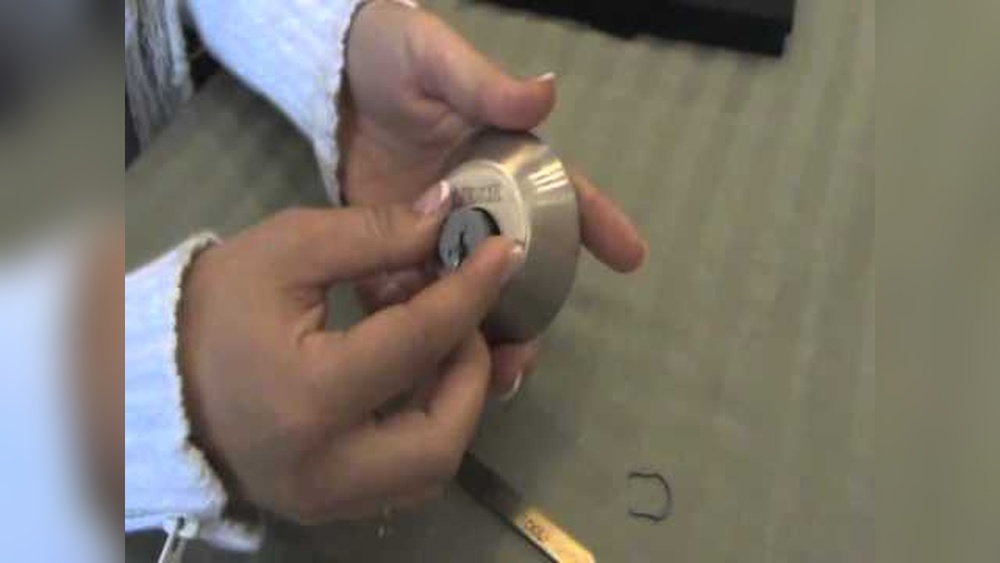
Credit: www.youtube.com
Detach The Exterior Cylinder
Start by unscrewing the screws holding the exterior cylinder in place. Gently pull the cylinder away from the door to detach it. This step clears the way to remove the deadbolt easily.
Locate The Mounting Screws
Start by finding the screws on the interior side of the door. These screws hold the deadbolt in place. Use a screwdriver to remove them carefully. Keep the screws safe for later use.
Remove The Interior Thumb Turn
After unscrewing, gently pull the interior thumb turn away from the door. This part controls the locking mechanism. Take your time to avoid damage.
Pull Out The Deadbolt Mechanism
With the thumb turn off, the deadbolt mechanism should slide out easily. Hold the exterior side of the lock and pull the bolt out straight. If it sticks, wiggle it gently.
Take Out The Deadbolt Mechanism
Troubleshooting common issues can make removing a Weiser deadbolt easier. Some problems may slow you down or cause frustration. Knowing how to solve these issues helps you finish the job faster. This section covers typical problems and simple fixes.
Deadbolt Not TurningThe deadbolt might not turn due to a stuck mechanism. Try spraying a small amount of lubricant into the keyhole. Turn the key gently to spread it inside. If it still won’t turn, check for debris blocking the lock. Clean out any dirt or dust carefully.
Missing or Stripped ScrewsSometimes screws are hard to remove because they are missing or stripped. Use a rubber band over the screw head for extra grip. A screwdriver with a better fit may help loosen it. If screws are missing, replace them with similar ones before removing the deadbolt.
Stuck Thumb TurnThe thumb turn might be stuck or hard to move. This happens if the lock is old or dirty. Apply lubricant to the thumb turn and move it back and forth gently. Avoid forcing it to prevent damage. If it remains stuck, the lock may need more cleaning.
Misaligned DeadboltMisalignment can make the deadbolt hard to remove. Check if the lock and door frame line up correctly. Tighten any loose screws on the strike plate. Adjust the strike plate slightly if the bolt doesn’t fit well. Proper alignment eases removal and reinstallation.

Credit: www.ifixit.com
Troubleshooting Common Issues
Replacing a Weiser deadbolt can be simple with the right approach. Careful steps ensure the new lock fits well and works smoothly. Follow these tips to make the process easier and safer.
Check The Deadbolt Size And Type
Measure the old deadbolt before buying a new one. Use a tape measure for length and width. Match the new deadbolt to the old one’s style. This prevents problems during installation.
Prepare Your Tools And Workspace
Gather screwdrivers, a drill, and a tape measure. Clear the area around the door for space. Good lighting helps you see small parts clearly. Keep all tools within reach before starting.
Remove The Old Deadbolt Carefully
Unscrew the faceplate and interior lock parts slowly. Hold the lock steady to avoid damage. Keep all screws and small parts together. This helps if you need to reuse or check them later.
Align The New Deadbolt Properly
Place the new deadbolt into the door hole gently. Check it fits flush with the door surface. Align the latch with the strike plate on the door frame. Proper alignment ensures smooth locking.
Tighten Screws Without Overdoing It
Screw the lock parts firmly but not too tight. Over-tightening may damage the lock or door. Tight screws keep the lock stable and secure. Test the lock’s movement before finishing.
Test The Deadbolt Several Times
Turn the key and thumb turn to check function. Lock and unlock the door multiple times. Look for smooth motion and no sticking. Fix any issues before completing the installation.

Credit: www.reddit.com
Frequently Asked Questions
How Do I Remove A Weiser Deadbolt Lock?
To remove a Weiser deadbolt, first unscrew the interior mounting screws. Then, gently pull both the interior and exterior lock parts apart. Finally, remove the latch from the door edge by unscrewing it.
What Tools Are Needed To Remove A Weiser Deadbolt?
You will need a Phillips screwdriver and possibly a flathead screwdriver. These tools help remove screws and gently pry lock components apart. Having a small flashlight can also assist in seeing screw placements clearly.
Can I Remove A Weiser Deadbolt Without Damaging The Door?
Yes, by carefully unscrewing and gently pulling the lock components, you avoid door damage. Avoid forcing parts or using excessive tools. Follow step-by-step removal instructions to ensure the door remains intact.
How Long Does It Take To Remove A Weiser Deadbolt?
Removing a Weiser deadbolt usually takes about 10 to 15 minutes. This depends on your familiarity with door locks and having the right tools ready. Taking your time prevents mistakes and damage.
Conclusion
Removing a Weiser deadbolt can be simple with the right steps. Follow each part carefully and take your time. Use common tools and focus on safety. This guide helps you handle the task without stress. Now, you can replace or fix your lock quickly.
Keep this method in mind for future needs. A little patience goes a long way. Your door will stay secure after the job is done.


