Are you struggling with a Titan deadbolt that just won’t budge? Whether it’s stuck, broken, or you simply want to upgrade your lock, knowing how to remove a Titan deadbolt can save you time, money, and frustration.
In this guide, you’ll find clear, step-by-step instructions that anyone can follow—even if you’re not a DIY expert. Keep reading, and you’ll unlock the secrets to safely and easily removing your Titan deadbolt. Your door will thank you.
Tools Needed
Removing a Titan deadbolt requires specific tools. Having the right tools makes the job easier and faster. Without proper tools, you may damage the lock or door. Gather all tools before starting the removal process.
Screwdrivers
Screwdrivers are essential for removing screws from the deadbolt. A Phillips head screwdriver fits most Titan deadbolt screws. A flathead screwdriver can help pry parts gently. Choose screwdrivers with comfortable grips for better control.
Drill And Bits
A drill speeds up screw removal, especially if screws are tight. Use drill bits that match screw size. A power drill reduces hand strain and saves time. Be careful not to drill too deep to avoid door damage.
Pry Bar
A pry bar helps loosen stubborn parts of the deadbolt. Use it carefully to avoid damaging the door frame. Small pry bars or crowbars work best for this task. Apply gentle pressure and work slowly around the lock.
Lubricant
Lubricant makes screws and moving parts easier to remove. Spray it on the screws and let it sit for a few minutes. It helps prevent stripping or breaking screws. Use a silicone-based lubricant for best results.

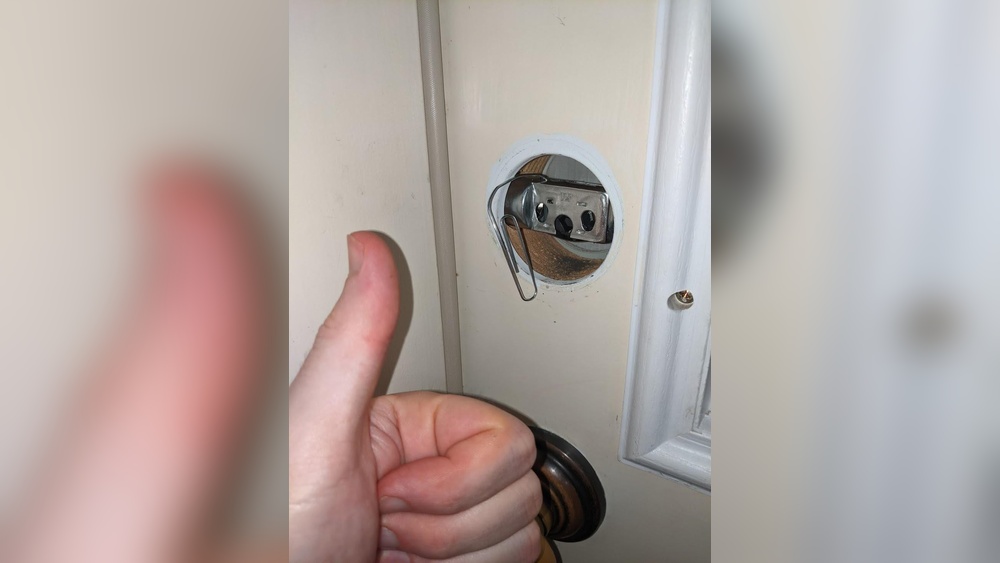
Credit: diy.stackexchange.com
Preparation Steps
Preparing before removing a Titan deadbolt saves time and avoids problems. It makes the task easier and safer. Follow these steps carefully to get ready for the job.
Clear The Work Area
Remove any objects near the door. This gives you space to work freely. A tidy area helps prevent accidents. It also keeps tools within reach.
Gather Safety Gear
Wear safety glasses to protect your eyes. Use gloves to avoid cuts from sharp edges. Dress in clothes that cover your arms. Safety gear keeps you safe during the removal process.
Inspect The Deadbolt
Look closely at the deadbolt and door. Check for screws, bolts, and other fasteners. Notice any damage or rust that may affect removal. Understanding the deadbolt helps you plan the next steps.
Removing The Exterior Plate
Removing the exterior plate of a Titan deadbolt is the first important step. This plate covers the lock mechanism on the outside of the door. Taking it off carefully helps avoid damage and makes the next steps easier.
Locate Screws
Look closely at the exterior plate. You will see several screws holding it in place. They are usually around the edges of the plate. Finding all screws is important before trying to remove the plate.
Unscrew Carefully
Use a screwdriver that fits the screws well. Turn each screw slowly to avoid stripping it. Keep the screws safe for reinstallation later. Do not force the screws out to prevent damage.
Handle The Plate
Once screws are removed, gently pull the plate away from the door. It may need a slight wiggle to come loose. Hold the plate firmly to avoid dropping it. Set the plate down on a soft surface to keep it safe.

Credit: www.youtube.com
Detaching The Interior Assembly
Detaching the interior assembly is a key step in removing a Titan deadbolt. This part holds the lock’s internal components. Removing it carefully prevents damage to the door or lock. Follow simple steps to access and remove the necessary pieces safely.
Access Interior Screws
Start by locating the screws on the interior side of the door. These screws hold the interior assembly in place. Use a screwdriver to remove all screws. Keep the screws in a safe spot for reassembly later. With screws out, the interior assembly will loosen easily.
Remove Interior Knob
Next, pull the interior knob gently away from the door. The knob might have a small slot or button to release it. Press or slide this release to detach the knob fully. Removing the knob gives clear access to the deadbolt mechanism inside.
Extract The Deadbolt Mechanism
After removing the knob, carefully pull out the deadbolt mechanism. It should slide out smoothly from the door edge. Avoid forcing it to prevent damage to the lock or door. Once removed, you can inspect or replace the deadbolt as needed.
Dealing With Stubborn Deadbolts
Stubborn deadbolts can make removing a Titan lock difficult. Rust, dirt, or tight screws cause resistance. Patience and the right tools help. Small efforts prevent damage to your door or lock.
Apply Lubricant
Start by spraying a lubricant on the deadbolt. WD-40 or a similar product works well. Spray where the bolt moves and around screws. Let it sit for a few minutes. This loosens rust and dirt. Try turning the key or knob gently afterward.
Use Drill For Stuck Screws
Some screws may not turn with a screwdriver. Use a drill with a screwdriver bit. Set the drill to low speed to avoid stripping screws. Apply steady pressure while drilling. This helps remove screws stuck due to rust or paint.
Pry Gently If Needed
If the lock still won’t budge, use a flat tool. A small pry bar or flathead screwdriver works. Insert the tool carefully between the lock and door. Apply gentle pressure to lift the lock. Avoid forcing it to prevent damage.

Credit: diy.stackexchange.com
Final Cleanup
After removing a Titan deadbolt, the final cleanup is essential. It prepares the door for a new lock and ensures smooth operation. Cleaning up prevents future problems and keeps your door looking good.
Remove Debris
Clear all small pieces and dust from the door and frame. Use a brush or vacuum to get rid of dirt. Check the hole where the deadbolt was for leftover parts. A clean area helps the new lock fit properly.
Check Door Alignment
Look at how the door fits in the frame. Make sure it opens and closes easily without sticking. Adjust hinges if the door is crooked or hard to move. Proper alignment helps the lock work well and last longer.
Prepare For New Lock Installation
Measure the hole and check if it matches the new lock size. Fill any gaps or damage with wood filler or putty. Sand the surface smooth to give a good base for the new lock. This step ensures a strong and secure fit.
Frequently Asked Questions
How Do I Remove A Titan Deadbolt Lock?
Start by unscrewing the interior screws using a screwdriver. Next, pull off the interior and exterior parts carefully. Finally, remove the latch mechanism from the door edge. This process ensures safe and complete removal of your Titan deadbolt lock.
What Tools Are Needed To Remove A Titan Deadbolt?
You will need a Phillips screwdriver, a flathead screwdriver, and possibly a drill. These tools help remove screws and pry off components gently. Having these on hand makes the removal process faster and more efficient.
Can I Remove A Titan Deadbolt Without Damaging The Door?
Yes, by carefully unscrewing and gently removing parts, you avoid damage. Avoid forcing components or using excessive force. Using the correct tools and technique protects your door’s finish and structure.
How Long Does It Take To Remove A Titan Deadbolt?
It typically takes 10 to 20 minutes depending on your experience. Being organized and having the right tools speeds up the process. Taking your time ensures you do not damage any parts or the door.
Conclusion
Removing a Titan deadbolt can be simple with the right steps. Take your time and follow each part carefully. Use basic tools and stay safe while working. Practice makes the task easier over time. Now, you can change or fix your lock without help.
This guide helps you save money and gain confidence. Keep these tips handy for future projects. Ready to try? You’ve got this!