Are you struggling to remove a deadbolt cover and don’t know where to start? You’re not alone.
Whether you need to fix a jammed lock or replace an old deadbolt, removing the cover is the first step—and it can be trickier than it looks. You’ll discover simple, clear instructions that anyone can follow. By the end, you’ll feel confident tackling the job yourself, saving time and money.
Ready to get started? Let’s dive in.
Tools Needed
Removing a deadbolt cover requires a few basic tools. These tools make the job easier and safer. Having the right tools helps prevent damage to the lock and door. Below are the essential tools you need to remove a deadbolt cover properly.
Screwdrivers
Screwdrivers are the main tools for this task. Most deadbolt covers have screws holding them in place. A Phillips or flathead screwdriver usually works best. Choose the correct size to avoid stripping screws. Using the right screwdriver makes removal smooth and quick.
Pry Bar
A pry bar helps gently lift the cover if screws are missing or stuck. Use it carefully to avoid scratching the door surface. A small, flat pry bar is ideal for this job. It provides leverage to remove tight or painted-over covers.
Lubricants
Lubricants help loosen stuck screws or parts. Spray a small amount on rusty or tight screws. This makes turning screws easier and prevents breakage. Choose a light oil or silicone spray for best results.
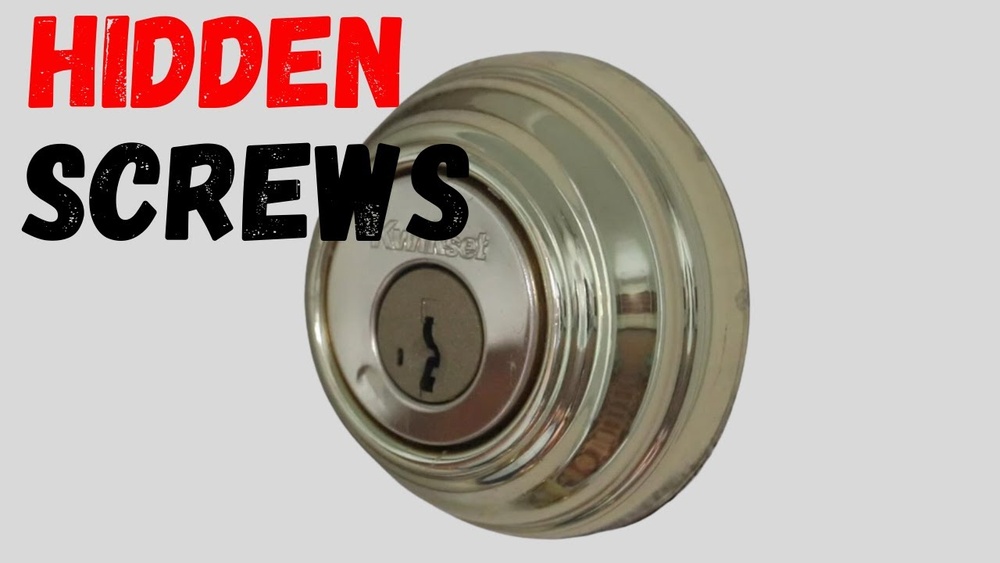
Identify Your Deadbolt Type
Identifying your deadbolt type is the first step in removing its cover safely. Different deadbolts have different designs and mechanisms. Knowing the type helps you choose the right tools and method. It also prevents damage to the lock or door.
Deadbolts mainly come in three types. Each type looks and works differently. Recognizing your deadbolt type makes the removal process easier and faster.
Single Cylinder
Single cylinder deadbolts have a keyhole on the outside. Inside, there is a thumb turn to lock and unlock. This type is common on residential doors. Removing the cover is usually straightforward. You can access screws on the inside or outside.
Double Cylinder
Double cylinder deadbolts have keyholes on both sides. You need a key to lock or unlock from inside and outside. This design adds extra security but makes removal trickier. You must handle both sides carefully to avoid damage.
Keyless Deadbolts
Keyless deadbolts work with codes or electronic keys. They often have a keypad or touch screen. Removing the cover may require removing batteries first. Some models hide screws under the keypad or faceplate. Understanding your model helps avoid mistakes.
Prepare The Door
Preparing the door is the first step to remove a deadbolt cover. Proper preparation makes the task easier and safer. Take time to get everything ready before starting work.
Cleaning the area and ensuring safety are important. These steps help avoid damage and injury during the process.
Clear Work Area
Remove objects near the door. Clear the floor space to avoid tripping. Make room for tools and parts. A tidy area helps you move freely and work faster.
Ensure Safety
Wear safety glasses to protect your eyes. Use gloves to avoid cuts and scratches. Check the door for loose parts. Secure the door so it does not move while you work.

Credit: www.reddit.com
Remove Screws
Removing the screws is the key step to take off the deadbolt cover. This part holds the cover in place. Without removing these screws, the cover cannot come off. Follow these simple steps to find and remove the screws safely.
Locate Screws
Look closely at the deadbolt cover. Screws are usually visible on the faceplate. Some covers hide screws under small caps. Check for tiny slots or holes. Use a flat tool to gently pry off caps if needed. Finding all screws is important before unscrewing.
Unscrew Carefully
Use the right screwdriver to avoid stripping screws. Turn screws counterclockwise to loosen. Keep steady pressure to prevent slipping. Remove screws one by one and place them safely. Avoid forcing screws out to protect the lock and door. Once all screws are out, the cover should come off easily.
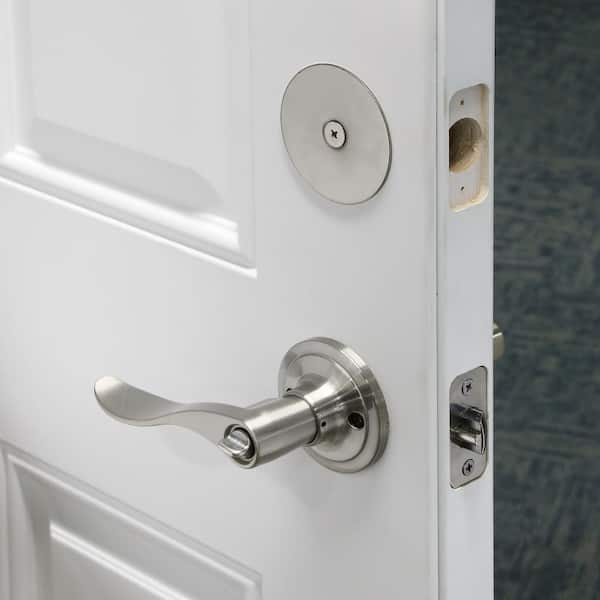
Pry Off The Cover
Prying off the deadbolt cover is the first step to access the lock mechanism. The cover protects the internal parts and keeps them secure. Removing it carefully helps avoid damage to the door or lock. Use the right tools and a gentle touch to make the process smooth and safe.
Use Pry Bar Gently
Choose a small pry bar or flathead screwdriver for this task. Insert the tool carefully under the edge of the cover. Apply slow, steady pressure to lift the cover. Avoid forcing the tool too hard, which can bend or break parts. Work around the cover evenly to loosen it without damage.
Avoid Door Damage
Protect the door surface by placing a thin cloth under the pry bar. This prevents scratches or dents during prying. Keep the tool angled away from the door to reduce stress on the wood or metal. Take your time and check progress often to avoid accidents. A careful approach ensures the door stays intact and looks good.

Credit: www.youtube.com
Handle Stubborn Covers
Deadbolt covers can be tough to remove. Sometimes, they stick tightly due to dirt, rust, or paint. Stubborn covers need gentle care. Using the right methods helps avoid damage to your door and lock. Try these simple steps to handle stubborn deadbolt covers safely.
Apply Lubricant
Spray a small amount of lubricant around the edges of the cover. WD-40 or a similar product works well. Let it sit for a few minutes. The lubricant loosens rust and dirt that hold the cover tight. Use a flat tool to gently pry the cover after applying lubricant. Repeat if it still feels stuck.
Use Heat If Needed
Heat can expand metal parts and loosen the cover. Use a hairdryer or heat gun on low setting. Warm the cover evenly for a few minutes. Avoid high heat to prevent damage. After heating, try removing the cover again. Heat and lubricant together often make removal easier.
Clean And Inspect
After removing the deadbolt cover, the next step is to clean and inspect it. This process helps keep the lock working smoothly. Dirt and damage can cause problems. Cleaning and checking the parts ensures the deadbolt stays secure and reliable.
Remove Debris
Use a soft brush to remove dust and dirt. Clear out small bits of debris from inside the lock area. Wipe the cover gently with a damp cloth. Avoid using water directly on metal parts. Removing grime helps the lock work better and last longer.
Check For Damage
Look closely for cracks or worn-out areas on the cover. Check the screws and moving parts for rust or bending. Damaged parts can stop the deadbolt from locking properly. Replace any broken pieces to keep your door safe. A careful inspection saves money and prevents bigger issues.
Tips For Reinstallation
Reinstalling the deadbolt cover correctly is important for security and smooth operation. Careful steps help avoid damage and ensure the lock works well. Follow these simple tips for a safe and easy reinstallation process.
Align Components
Start by lining up the deadbolt cover with the lock mechanism. Check that the holes for screws match perfectly. Misalignment can cause the lock to jam or not close properly. Take your time to position each part carefully before fixing it in place.
Secure Screws Properly
Use the right screwdriver for the screws to avoid slipping. Tighten screws firmly but do not over-tighten them. Too much force can strip the screw holes or crack the cover. Secure screws evenly to hold the cover steady and strong.
Credit: www.homedepot.com
Frequently Asked Questions
How Do I Safely Remove A Deadbolt Cover?
To remove a deadbolt cover safely, first locate and unscrew any visible screws. Use a flathead screwdriver to gently pry off the cover. Avoid forcing it to prevent damage to the door or lock mechanism.
What Tools Are Needed To Remove A Deadbolt Cover?
You need a flathead or Phillips screwdriver, depending on the screw type. Sometimes, a putty knife or pry tool helps gently lift the cover. Having a flashlight improves visibility around the lock area.
Can I Remove A Deadbolt Cover Without Damaging The Lock?
Yes, by carefully unscrewing and gently prying the cover, you avoid damage. Do not use excessive force or sharp tools that can scratch or harm the lock.
Why Would I Need To Remove A Deadbolt Cover?
Removing the cover is necessary for lock repair, replacement, or maintenance. It also helps in cleaning internal parts or troubleshooting lock issues.
Conclusion
Removing a deadbolt cover is easier than it seems. Follow each step with care and patience. Use the right tools to avoid damage. Take your time and stay safe throughout the process. Once done, check the lock works properly. This simple task can save time and money.
Now, you are ready to handle your deadbolt cover confidently. Keep practicing and learn more about basic home repairs. Small skills make a big difference in everyday life.


