Have you ever wished you could brighten up a room with just one flick of a switch? Adding another light to the same switch might seem tricky, but it’s easier than you think.
Imagine controlling multiple lights without the hassle of extra switches or complicated wiring. In this guide, you’ll discover simple steps to make your space more functional and inviting. Ready to transform your lighting setup and save time? Keep reading, and you’ll learn exactly how to do it safely and efficiently.

Credit: www.youtube.com
Tools And Materials Needed
Adding another light to the same switch is a useful way to brighten up a room. To do this safely and efficiently, gather the right tools and materials first. Having everything ready makes the job easier and faster.
Here is a list of the basic tools and materials needed to add a light to the same switch.
Tools Required
- Screwdriver set (flathead and Phillips)
- Wire stripper
- Voltage tester
- Drill with bits
- Measuring tape
- Flashlight or work light
- Electrical tape
- Wire nuts
- Utility knife
Materials Needed
- New light fixture
- Electrical wire (14/2 or 12/2 gauge, depending on circuit)
- Wire connectors
- Electrical box (if installing a new box)
- Light bulbs compatible with fixture
- Switch plate cover (optional)
Safety Precautions
Safety is the top priority when adding another light to the same switch. Electrical work can be dangerous without proper care. Taking the right safety steps protects you and your home from harm.
Before starting, make sure you understand the risks. Electricity can cause shocks or fires if handled incorrectly. Simple precautions reduce these risks and make the project safer.
Turn Off The Power
Always switch off the power at the circuit breaker. Do not rely on the wall switch alone. Use a voltage tester to confirm no electricity flows to the wires before touching them.
Wear Protective Gear
Wear insulated gloves and safety glasses. These protect your hands and eyes from electric shocks and debris. Keep a dry cloth nearby to handle wires safely.
Use Proper Tools
Use tools made for electrical work. Insulated screwdrivers and wire strippers reduce shock chances. Avoid using damaged or worn tools.
Follow Wiring Codes
Check local electrical codes before starting. Proper wiring protects against fires and electrical faults. Use the right wire size and connectors as required.
Do Not Work Alone
Have someone nearby during the project. They can help in case of an emergency. Keep a phone nearby for quick access to help.
Identify Existing Wiring Setup
Start by checking the current wiring connected to the switch. Look for wires running from the switch to the light fixture. Understanding this setup helps add a new light safely and correctly.
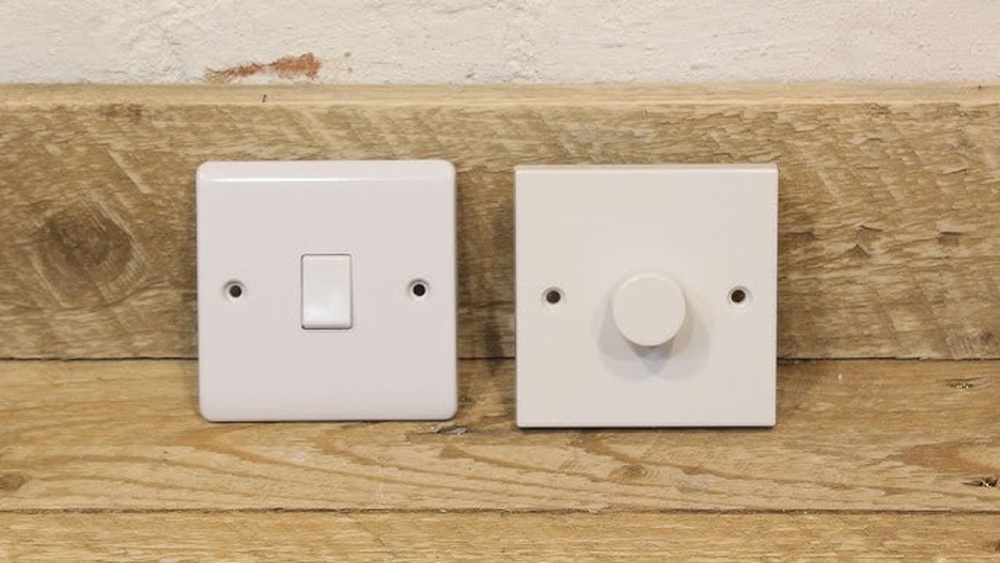
Understanding Your Current Switch Wiring
Before adding another light, check how your switch is wired. This helps avoid mistakes and keeps you safe. Most switches have three main wires: live, load, and ground.
The live wire brings power to the switch. The load wire sends power to the light. The ground wire is for safety.
Turn Off Power And Open The Switch Box
Always turn off the power at the breaker before touching wires. Use a tester to confirm no electricity flows. Then, carefully remove the switch cover and open the box.
Identify Wire Colors And Functions
Look at the wire colors inside the box. Black or red wires usually carry power. White wires often serve as neutral. Bare copper or green wires are ground wires.
Note which wire connects to each terminal on the switch. This helps plan where to add the new light.
Check For Existing Light Connections
Find the wires that go to the current light fixture. These usually connect to the load wire. Understanding this helps connect the new light in parallel.
Make A Simple Wiring Diagram
Draw a basic diagram of the wires and connections you see. This visual guide helps when installing the new light. Keep it handy for reference during work.
Turn Off Power
Turning off the power is the first step before adding another light to the same switch. It keeps you safe from electrical shocks. Working with electricity is risky without cutting the power. Always make sure the power is off to avoid accidents.
Locate The Circuit Breaker
Find the main electrical panel in your home. It usually has a metal door and is near the garage or basement. Open the panel to see the switches inside. Each switch controls power to a different part of your house.
Identify The Correct Switch
Look for the breaker switch that controls the light switch you want to work on. It might be labeled with room names or numbers. If not labeled, turn off switches one by one and check which light goes off.
Turn Off The Power
Flip the correct breaker switch to the “off” position. This stops electricity from flowing to that part of your home. Double-check by turning on the light switch; the light should not come on.
Use A Voltage Tester
Use a voltage tester to check if the power is really off. Touch the tester to the wires in the switch box. If the tester does not light up or beep, the power is off. This step ensures your safety before starting work.
Remove Existing Light Fixture
Removing the existing light fixture is the first step to add another light to the same switch. This process helps access the wiring behind the fixture. It also ensures safety before installing a new light.
Turn off the power to the light switch at the circuit breaker. This stops any electrical current and keeps you safe.
Gather The Right Tools
Prepare tools like a screwdriver, voltage tester, and wire nuts. These tools make the removal process easier and safer.
Test For Power
Use a voltage tester on the light fixture wires. Confirm the power is off before touching any wires.
Remove The Light Cover And Bulbs
Take off the light cover or shade carefully. Remove the bulbs and set them aside.
Unscrew The Light Fixture
Find screws holding the fixture to the ceiling or wall. Use a screwdriver to remove them and lower the fixture gently.
Disconnect The Wiring
Locate wire connectors or wire nuts joining the fixture wires to house wires. Unscrew them and separate the wires carefully.
Inspect The Wiring
Check the wires for damage or wear. Make sure the wires are ready for connecting the new light fixture.
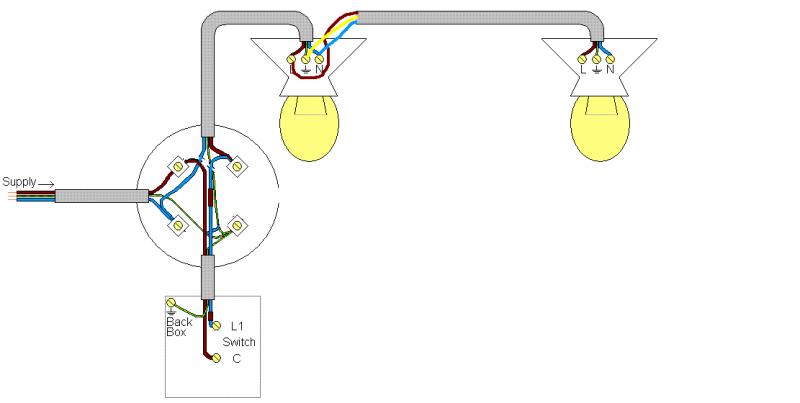
Credit: www.diynot.com
Run New Wiring To Additional Light
Running new wiring to an additional light lets you control both lights from one switch. This process needs careful planning and safety. It involves extending wires from your current switch or light fixture to the new light location. Safety gear and proper tools are essential before starting.
Understanding your home’s electrical setup helps avoid mistakes. Knowing where your circuit breaker and wiring paths are is important. This step ensures a smooth installation and reduces risks.
Turn Off Power At The Circuit Breaker
Always turn off power before working with electrical wires. Find the correct breaker and switch it off. Use a voltage tester to confirm no current flows. Safety must come first to prevent shocks or injury.
Plan The Wiring Route
Choose the shortest, safest path for new wires. Avoid sharp bends and hot surfaces. Use walls, ceilings, or attics to run cables. Keep wires away from water pipes and heating ducts.
Use The Right Wire Type And Size
Select wires that match your home’s electrical code. Most lighting circuits use 14-gauge wire. Check local rules for specific requirements. Proper wire size prevents overheating and fires.
Connect Wires At The Existing Light Or Switch
Open the existing light fixture or switch box carefully. Identify the hot, neutral, and ground wires. Attach new wires to matching terminals. Use wire nuts and electrical tape for secure connections.
Install The New Light Fixture
Mount the new fixture according to the manufacturer’s instructions. Connect the new wires to the light terminals. Ensure all connections are tight and safe. Test the setup before closing the fixture.
Restore Power And Test The Lights
Turn the breaker back on after all wiring is complete. Use the switch to test if both lights work together. Check for any flickering or unusual behavior. Fix issues before finishing the project.
Connect Wires Correctly
Connecting wires correctly is key to safely adding another light to the same switch. It ensures the new light works properly without causing electrical problems. Follow simple steps to make strong, safe connections that last.
Match Wire Colors
Start by matching the wire colors from the new light to the existing wires. Typically, black wires carry power, white wires are neutral, and green or bare wires are ground. Connect black to black, white to white, and ground to ground. This keeps the circuit consistent and safe.
Secure Wire Nuts
Use wire nuts to join wires together firmly. Twist wires clockwise before placing the wire nut on. Make sure the nut covers all exposed wire ends. Give a gentle tug to check the connection is tight. Loose wires can cause shorts or flickering lights.
Grounding The Circuit
Grounding protects against electrical shocks. Attach the green or bare ground wire from the new light to the ground wire in the switch box. If there is a grounding screw, wrap the wire around it tightly. Proper grounding ensures safety for you and your home.
Install New Light Fixture
Installing a new light fixture is a key step to add another light to the same switch. It requires careful planning and safety. The process involves choosing the right fixture and connecting it properly to the existing wiring.
This section explains how to install a new light fixture clearly. Follow each step to ensure the light works with the current switch.
Choose The Right Light Fixture
Select a fixture that fits your room style and lighting needs. Check the fixture’s voltage and wattage limits. Match these with your home’s electrical system for safety.
Turn Off The Power
Switch off the circuit breaker to cut power to the light switch. Use a voltage tester to confirm no electricity flows to the wires. Safety first.
Remove The Old Fixture
Unscrew the old light fixture carefully. Disconnect the wires by loosening the wire nuts. Keep the wires exposed for new connections.
Connect The New Fixture Wires
Match the wires from the new fixture to the existing wires. Connect black to black (hot), white to white (neutral), and green or bare copper to ground. Use wire nuts to secure connections tightly.
Secure The New Fixture
Attach the fixture base to the electrical box with screws. Make sure it fits snugly and does not hang loose. Install any covers or bulbs as needed.
Restore Power And Test
Turn the circuit breaker back on. Flip the light switch to test the new fixture. It should light up along with the other lights on the switch.
Test The Setup
Testing the setup is a key step after adding another light to the same switch. It ensures the wiring works correctly and the new light operates safely. Testing helps catch any mistakes early before finalizing the installation.
Always test with care. Safety is the priority. Use the right tools and follow safety rules.
Turn On The Power
Start by turning on the circuit breaker or fuse. This restores power to the switch and lights. Check that power is flowing to the switch box with a voltage tester. Do not touch wires until you confirm power is off.
Operate The Switch
Flip the switch to the ON position. Watch both lights closely. They should both turn on at the same time. Flip the switch OFF to confirm both lights go off. This proves the wiring is correct.
Check For Flickering Or Dim Lights
Look for flickering or dim lights. These can signal a loose connection or wrong wiring. Tighten any loose wire nuts or screws. Replace bulbs if dimness continues after fixing connections.
Test The New Light Independently
If possible, test the new light alone. Disconnect the other light temporarily. Turn the switch ON and OFF to see if the new light works by itself. This isolates any issues to one light or the wiring.
Use A Circuit Tester For Safety
Use a circuit tester to check for shorts or overloads. This tool helps ensure the circuit is safe. If the tester shows a problem, turn off power and re-check wiring.

Credit: diy.stackexchange.com
Troubleshooting Tips
Troubleshooting is key when adding another light to the same switch. Problems can arise from wiring mistakes or faulty parts. Taking time to check common issues helps avoid bigger troubles later.
Follow these tips to find and fix problems fast. Most fixes are simple and save time and effort.
Check The Power Supply
Make sure the power is off before starting. Use a voltage tester to verify no electricity flows. If the power is on, the switch or light may not work properly or cause shocks.
Inspect The Wiring Connections
Loose or wrong wiring causes most problems. Confirm all wires connect tightly to the switch and lights. Match wire colors correctly: usually black for hot, white for neutral, and green or bare for ground.
Test The Switch Functionality
Sometimes the switch itself is faulty. Replace it with a new one if the lights do not respond. A simple switch test can save time and effort.
Verify Light Bulb Condition
Check if the bulbs are working. Replace burnt-out bulbs before troubleshooting wiring. Faulty bulbs can mimic electrical issues.
Examine The Circuit Breaker
Look at the circuit breaker panel. A tripped breaker cuts power to the switch. Reset it if needed. Persistent trips indicate wiring or load problems.
Frequently Asked Questions
How Do I Add A Second Light To One Switch?
To add a second light, connect its wiring parallel to the first light’s wires at the switch or junction box. Ensure power is off before starting. Use proper wire connectors and follow electrical codes for safety and compliance.
Can I Control Two Lights From One Switch Safely?
Yes, controlling two lights with one switch is safe if wired correctly. Both lights share the same circuit, and wiring must comply with electrical standards to prevent overloads and hazards.
What Tools Are Needed To Add Another Light To A Switch?
You need a voltage tester, wire strippers, screwdrivers, wire nuts, electrical tape, and possibly a drill. These tools help ensure safe, efficient wiring and secure connections for adding the new light.
Is Rewiring Necessary To Add A Light To An Existing Switch?
Rewiring is often required to extend wires from the switch or junction box to the new light fixture. Proper planning ensures minimal disruption and maintains circuit integrity and safety.
Conclusion
Adding another light to the same switch is simple and useful. It helps brighten rooms without extra switches. Follow safety rules and turn off power first. Use the right tools and connect wires carefully. Test the new light to make sure it works.
Small projects like this save money and improve your home. Now, you can enjoy better lighting with one switch. Give it a try and see the difference yourself.