Are you struggling with loose or damaged wall anchor bolts? You’re not alone.
These small but important pieces hold up shelves, mirrors, and other heavy items on your walls. When they fail, it can be frustrating and even unsafe. But don’t worry—fixing wall anchor bolts is easier than you think. In this guide, you’ll learn simple, step-by-step methods to repair or replace them quickly.
Keep reading to regain the strength and stability your walls need, without calling a professional or spending a fortune. Your walls—and your peace of mind—will thank you.

Credit: www.forzagoal.com
Common Wall Anchor Bolt Issues
Wall anchor bolts hold objects on walls securely. Problems with these anchors can cause items to fall or become unstable. Knowing common issues helps fix them quickly and safely.
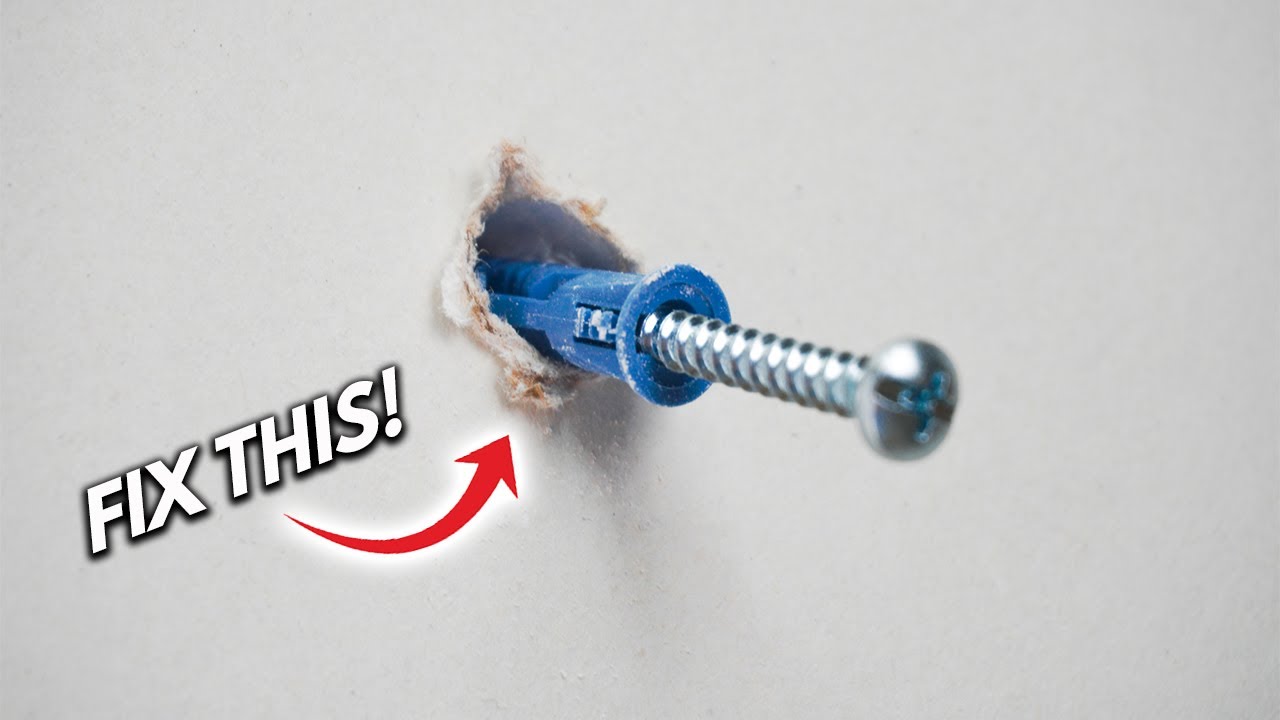
Loose Or Wobbly Anchors
Loose anchors do not hold tight in the wall. This happens when the hole is too big or the anchor is the wrong size. Wobbly anchors cause shelves or pictures to shake or tilt. Tighten the anchor or use a bigger one to fix this problem.
Stripped Threads
Stripped threads occur when the screw or anchor threads wear out. Screws will spin without gripping. This weakens the hold and can lead to falling objects. Replace damaged screws and anchors to restore strength.
Damaged Drywall Or Plaster
Drywall or plaster can crack or crumble around the anchor. This happens if the anchor is too heavy or the wall is weak. Damage reduces the anchor’s grip and stability. Repair the wall and use the right anchor type for best results.
Credit: www.youtube.com
Tools And Materials Needed
Fixing wall anchor bolts requires the right tools and materials. These help you complete the job quickly and safely. Having everything ready keeps the process smooth and avoids mistakes.
Below are the essential tools and materials you need. Each category plays a key role in the repair work.
Basic Hand Tools
Start with a drill and drill bits. They create holes for new anchors. A screwdriver or power driver tightens bolts firmly. Pliers help remove old anchors or debris. A hammer may be needed to tap anchors into place. Measuring tape ensures correct placement. A level keeps things straight and balanced.
Replacement Anchors And Bolts
Choose anchors that match the wall type. Plastic anchors work for drywall. Metal anchors are better for concrete or brick. Make sure bolts fit the anchors. Using the right size prevents damage and loosening. Keep extra anchors and bolts ready to avoid delays.
Patch Materials
Wall damage needs patching after anchor removal. Use spackling paste or wall filler to fill holes. A putty knife spreads the filler smoothly. Sandpaper smooths the surface once dry. Primer and paint restore the wall’s look. These materials help hide repairs and protect walls.
Removing Old Wall Anchors
Removing old wall anchors is a necessary step before installing new ones. It helps keep your walls smooth and ready for fresh hardware. This process can be simple or tricky, depending on the type of anchor used. Proper removal avoids damage and prepares the wall for a clean repair.
Techniques For Different Anchor Types
Plastic expansion anchors need a gentle pull. Use pliers to grip and slowly pull them out. For metal anchors, try unscrewing with a screwdriver first. If stuck, push the anchor into the wall cavity carefully.
Toggle bolts require opening the wall slightly. Unscrew the bolt to release the wings inside. Pull out the bolt and let the wings drop behind the wall. For molly bolts, unscrew to loosen the anchor and then pull it out.
Avoiding Wall Damage
Work slowly and gently to avoid wall damage. Use the right tools, such as pliers or screwdrivers. Avoid forceful yanking that can break drywall. Patch small holes with spackle after anchor removal. Sand and paint to restore the wall’s smooth finish.

Credit: yellowstoneraftzipline.com
Preparing The Wall For Repair
Preparing the wall for repair is a key step in fixing wall anchor bolts. A clean, stable surface helps the repair last longer and hold better. Take time to prepare the area carefully. This ensures the repair material bonds well and the wall stays strong.
Cleaning And Inspecting The Hole
Start by removing any loose debris from the hole. Use a brush or vacuum to clear dust and dirt. Check the hole for cracks or damage around its edges. Small cracks can weaken the repair. Make sure the hole is dry before moving to the next step. Clean and dry holes help repair compounds stick properly.
Patching Large Or Damaged Areas
Large holes or damaged areas need filling before fixing the anchor bolt. Use a patching compound designed for walls. Apply the compound in layers for better strength. Let each layer dry before adding the next. Smooth the surface to match the wall. This creates a flat, solid base for the anchor bolt. Wait until the patch is fully dry before drilling or inserting the bolt.
Choosing The Right Replacement Anchor
Choosing the right replacement anchor is key to fixing wall anchor bolts. The correct anchor keeps your items secure and prevents damage. Not all anchors work for every wall or weight. Selecting the proper type and size ensures strong support and safety.
Weight Capacity Considerations
Know the weight of the object you want to hang. Each anchor has a weight limit. Pick an anchor that can hold more than the item’s weight. This prevents the anchor from failing under pressure. Safety matters most with heavy items like shelves or mirrors.
Anchor Types For Different Walls
Different walls need different anchors. Drywall anchors work well for hollow walls. Masonry anchors suit brick, concrete, or stone walls. Plastic anchors fit light loads, while metal anchors handle heavier weight. Match the anchor to your wall type for a secure hold.
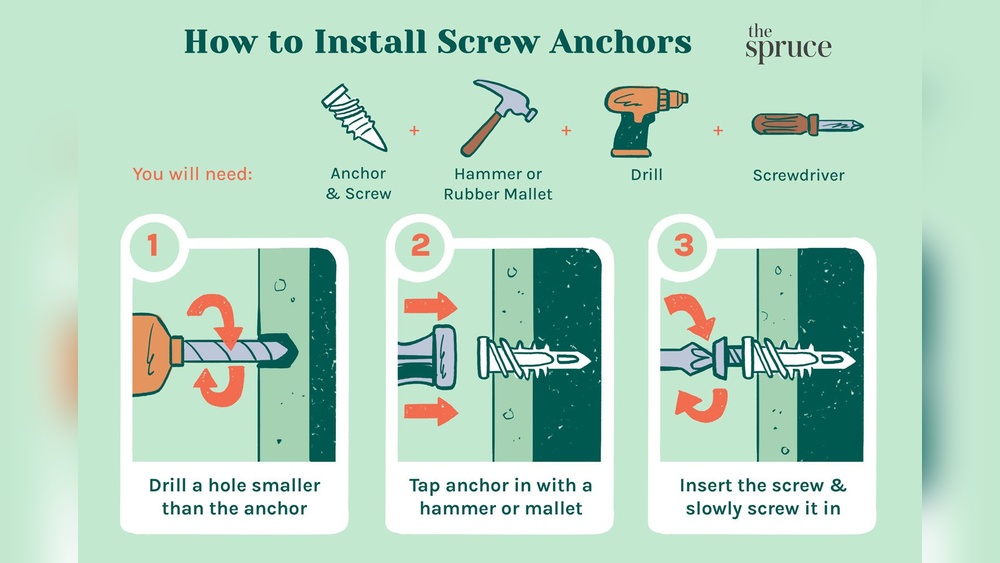
Installing New Wall Anchor Bolts
Installing new wall anchor bolts is a key step in securing heavy items to walls safely. Proper installation ensures strong support and prevents damage to the wall. Follow clear steps to mark, drill, and secure the anchors for the best results.
Marking And Drilling Holes
Start by measuring the exact spots for the anchor bolts. Use a pencil to mark these points clearly on the wall. Double-check the spacing to match your fixture’s mounting holes.
Choose a drill bit size that fits the anchor bolts perfectly. Drill straight holes at the marked points. Avoid drilling too deep or wide to keep the anchors tight and secure.
Securing Anchors Properly
Insert the wall anchors gently into the drilled holes. Tap them lightly with a hammer until flush with the wall. Do not force them hard to avoid cracking the wall surface.
Next, place the bolts through your fixture into the anchors. Tighten the bolts slowly and evenly. This ensures a firm grip without damaging the wall or the anchor.
Testing Repair Strength
Testing the strength of your wall anchor bolt repair is important. It ensures the fix holds well and stays safe. This step helps avoid future damage or accidents. Take time to test carefully after repair.
Applying Load Gradually
Start by adding a small weight or pressure to the anchor bolt. Do this slowly to avoid sudden stress. Watch how the bolt reacts to the load. Increase the load step by step if the bolt feels secure. This method shows if the repair is steady enough for use.
Signs Of A Secure Fix
Look for no movement or wobbling in the anchor bolt. The bolt should stay firmly in place under pressure. Check for cracks or damage around the wall area. A strong repair will not cause new cracks. If the anchor bolt holds firm, the fix is successful.
Tips For Long-lasting Repairs
Fixing wall anchor bolts is only part of the job. Ensuring the repair lasts matters more. Taking a few simple steps helps keep anchors strong and safe. These tips help avoid future problems and save time.
Regular Inspection
Check wall anchors often to spot any signs of wear or damage. Look for cracks, rust, or loose bolts. Early detection prevents bigger issues. Tighten any loose anchors to keep them secure. Regular checks keep repairs reliable over time.
Avoiding Overloading Anchors
Do not put too much weight on wall anchors. Every anchor has a weight limit. Exceeding it risks pulling the bolt out. Use anchors only for their intended load. Spread heavy items across multiple anchors for safety.
Frequently Asked Questions
How Do I Remove A Stuck Wall Anchor Bolt?
Use pliers to grip the bolt firmly. Twist and pull gently to avoid damaging the wall. If stuck, drill around the anchor carefully to loosen it before removal.
What Tools Are Needed To Fix Wall Anchor Bolts?
You need a drill, screwdriver, pliers, replacement anchors, and a level. These tools ensure proper removal and installation of new anchor bolts securely.
How To Choose The Right Wall Anchor Bolt Size?
Select anchors based on wall thickness and weight support. Check manufacturer guidelines for bolt size and load capacity to ensure safe and secure fixing.
Can Damaged Wall Anchor Bolts Be Repaired?
Damaged anchors should be removed and replaced. Repairing may weaken hold. Use new anchors designed for your wall type for best results.
Conclusion
Fixing wall anchor bolts is simple with the right steps. Start by removing the old bolt carefully. Choose the correct anchor for your wall type. Drill a proper hole and insert the new anchor firmly. Tighten the bolt without forcing it.
This keeps your items secure and the wall safe. Practice patience and attention to detail. Small fixes can prevent bigger problems later. Now, you can hang shelves, pictures, or mirrors with confidence. Keep these tips handy for future repairs. Your walls will stay strong and reliable.