If your motorcycle’s rear brake light isn’t working right, it can be frustrating—and even dangerous. You rely on that light to warn others when you’re slowing down or stopping.
The good news is, adjusting the rear brake light switch is something you can do yourself. With a few simple steps, you’ll have your brake light shining bright and working perfectly again. Keep reading, and you’ll learn exactly how to make this quick fix without any hassle.
Your safety—and your bike’s performance—depend on it.
Tools Needed
Adjusting the rear brake light switch on a motorcycle requires the right tools. Having these tools ready makes the process easier and faster. Each tool plays a specific role in the adjustment.
Gathering the tools before starting saves time. It also ensures you do the job safely and correctly. Here is a list of tools needed for this task.
Socket Wrench Set
A socket wrench set helps remove bolts and nuts around the brake light switch. Choose the correct size to avoid damage. This tool provides good grip and torque.
Screwdrivers
Both flathead and Phillips screwdrivers may be necessary. They help loosen or tighten screws on the switch or nearby panels. Use the right type to prevent stripping screws.
Adjustable Wrench
An adjustable wrench fits various bolt sizes. It helps hold or turn parts during the adjustment. This tool is versatile and handy for different tasks.
Pliers
Pliers help grip small parts or wires connected to the switch. Needle-nose pliers are best for tight spaces. They assist in making precise adjustments.
Multimeter
A multimeter checks electrical connections and switch operation. It ensures the switch works correctly after adjustment. Testing with a multimeter avoids guesswork.
Locate The Brake Light Switch
Locating the rear brake light switch is the first step in adjusting it. This switch controls the light that signals braking to other drivers. Finding it can be simple if you know where to look on your motorcycle.
The brake light switch is usually near the rear brake pedal. It connects the pedal to the brake light circuit. When you press the pedal, the switch activates the brake light.
Knowing the exact location helps you check if the switch works well. It also makes adjusting or replacing the switch easier. Take your time to find it carefully before starting any work.
Check Near The Rear Brake Pedal
Look closely around the rear brake pedal. The switch often mounts on the frame or near the pedal arm. It may look like a small button or a plunger.
Follow The Brake Light Wire
Trace the wire that leads to the rear brake light. The brake light switch will connect to this wire. This is a helpful clue to spot the switch quickly.
Consult Your Motorcycle Manual
The manual shows exact locations for your bike model. It may include pictures or diagrams. Use this as a guide to find the switch easily.
Use A Flashlight If Needed
Some switches hide in dark or tight spaces. A flashlight helps to see better and avoid missing the switch. Shine light under and around the brake pedal area.
Check Brake Light Operation
Adjusting the rear brake light switch ensures the brake light works properly. Test the light by pressing the brake pedal and fine-tune the switch for correct activation. This keeps you safe and visible on the road.
Why Check Brake Light Operation?
Checking the brake light operation is important for safety. It ensures other drivers see your signals.
A working brake light helps prevent accidents. It shows when you slow down or stop.
How To Test The Brake Light
Turn on your motorcycle’s ignition. Press the rear brake lever or pedal.
Look at the brake light at the back. It should light up immediately.
If the light stays off, there might be a problem with the switch or bulb.
Check For Consistent Light Activation
Press and release the brake lever several times. The brake light must turn on each time.
Any flickering or delay means the switch needs adjustment or replacement.
Inspect For Brake Light Brightness
The brake light must be bright and clear. Dim lights reduce visibility to other drivers.
Replace old bulbs if the light looks weak or uneven.
Identify Adjustment Mechanism
Start by locating the rear brake light switch near the brake pedal. Check for loose or worn parts that may need tightening or replacing. Adjust the switch so the brake light turns on immediately when the pedal is pressed.
Locate The Rear Brake Light Switch
The first step is to find the rear brake light switch on your motorcycle. It usually sits near the brake pedal or brake master cylinder. This small device controls the brake light when you press the brake pedal.
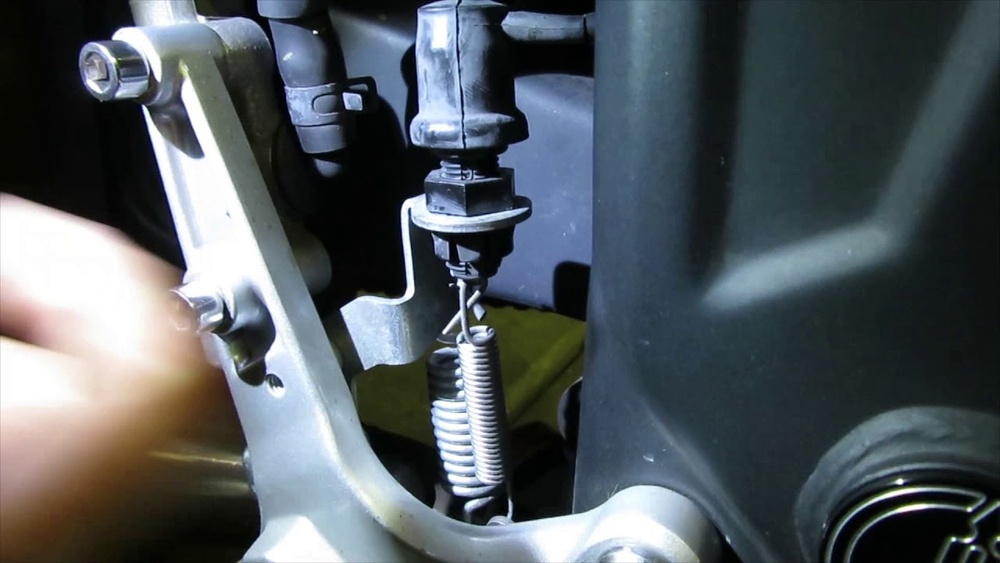
Look for a small plunger or a button connected to the brake pedal arm. It might have a wire attached leading to the tail light. This is the switch you need to adjust.
Understand The Switch Type
There are mainly two types of brake light switches: mechanical and hydraulic. Mechanical switches activate when the brake pedal moves. Hydraulic switches respond to brake fluid pressure.
Knowing the type helps you find the right adjustment method. Mechanical switches often have a screw or nut to change the position. Hydraulic switches may need a different approach, like adjusting fluid pressure or switch sensitivity.
Identify The Adjustment Points
Look for screws, nuts, or bolts near the switch. These parts control how far the switch moves or its trigger point. Some switches have a threaded plunger that you can turn to adjust.
Check if the switch moves freely when the brake pedal is pressed. The right adjustment point will let you fine-tune when the brake light turns on or off.
Adjusting The Switch
Adjusting the rear brake light switch is key for safe riding. This switch controls the brake light, showing other drivers when you slow down. A wrongly set switch can cause the brake light to stay on or not light at all. Follow these steps to adjust the switch correctly and keep your bike safe.
Loosen The Mounting Bolt
Start by finding the mounting bolt that holds the brake light switch. Use the right size wrench or socket to loosen this bolt. Do not remove it completely; just loosen it enough to move the switch. This step lets you adjust the switch position smoothly.
Set The Correct Position
Press the brake pedal gently while moving the switch. The goal is for the brake light to turn on right as you press the pedal. Adjust the switch so the brake light comes on without delay. Make small moves and test the brake light each time.
Tighten The Bolt
Once the switch is in the right place, tighten the mounting bolt. Secure it firmly but avoid over-tightening to prevent damage. Check the brake pedal and light one more time. The light should turn on and off perfectly with the brake pedal.

Credit: www.youtube.com
Test The Brake Light
Testing the brake light is a key step after adjusting the rear brake light switch. It confirms the light works correctly and safely. This step helps avoid accidents caused by faulty signals. Follow these simple checks to ensure your brake light shines bright and steady.
Prepare For Testing
Turn the motorcycle ignition on but do not start the engine. Sit on the bike to press the rear brake pedal. Make sure the area behind the bike is clear and safe.
Check Brake Light Response
Press the rear brake pedal gently. Watch the brake light at the back of the bike. The light should turn on immediately and stay on while pressing the pedal.
Inspect Light Brightness And Stability
The brake light must be bright and steady. Flickering or dim light means adjustment is needed. A weak light might not warn others properly.
Test Multiple Times
Press and release the brake pedal several times. The brake light should respond each time without delay. Consistent lighting shows the switch is working well.
Get Help For Final Check
Ask a friend to watch the brake light as you press the pedal. This helps confirm the light works from different angles. Two pairs of eyes catch more details.
Troubleshooting Tips
Troubleshooting your motorcycle’s rear brake light switch helps keep you safe on the road. Problems with the brake light switch can cause the light to not work properly. This section covers common issues and how to fix them. Follow these tips to spot and solve problems quickly.
Switch Not Responding
The brake light switch may not respond due to dirt or wear. Check if the switch moves freely when pressing the brake. Clean the switch with a dry cloth to remove dirt. Test the switch by pressing the brake pedal and watching the light. Replace the switch if it stays unresponsive after cleaning.
Brake Light Stays On
If the brake light stays on even when not braking, the switch might be stuck. Look for dirt or corrosion on the switch or its plunger. Gently press and release the switch several times to free it. Adjust the switch position so it fully releases when the brake is off. Replace the switch if the light stays on after adjustment.
Loose Connections
Loose wires or connectors can cause brake light issues. Inspect the wiring near the switch for loose or broken connections. Tighten any loose connectors and repair damaged wires. Use electrical tape to secure connections and prevent moisture. Test the brake light after fixing connections to ensure proper function.

Credit: baanarjor.com

Credit: www.cartestsoftware.com
Frequently Asked Questions
How Do I Know If My Rear Brake Light Switch Needs Adjustment?
If your rear brake light stays on or doesn’t light up when braking, the switch likely needs adjustment. Check for inconsistent light behavior while pressing the brake pedal.
What Tools Are Required To Adjust The Rear Brake Light Switch?
Typically, you need a screwdriver or wrench to loosen the switch. A socket set may be useful for some models. Always consult your motorcycle manual first.
Can I Adjust The Brake Light Switch Myself Safely?
Yes, adjusting the switch is a simple DIY task. Ensure the motorcycle is off and stable before making adjustments. Follow safety guidelines to avoid injury.
How Do I Adjust The Rear Brake Light Switch Properly?
Loosen the switch mounting bolt, move the switch to align with the brake pedal, then tighten the bolt. Test the brake light for proper function afterward.
Conclusion
Adjusting the rear brake light switch keeps your motorcycle safe. It ensures the brake light works every time you stop. Check the switch often for proper function. Small tweaks can prevent accidents on the road. Follow the steps carefully to avoid mistakes.
A well-set brake light switch gives peace of mind. Ride with confidence knowing your brake signals are clear. Maintenance like this takes little time but helps a lot. Stay safe and enjoy your motorcycle rides more.