Are you tired of your old, worn-out paddle light switch? Maybe it’s flickering, sticking, or just doesn’t look right anymore.
Changing a paddle light switch might sound tricky, but it’s easier than you think—and you can do it yourself! Imagine how good it will feel to update your room’s look and fix that annoying switch without calling an electrician. In this guide, you’ll learn simple steps to safely and quickly replace your paddle light switch.
Keep reading, and you’ll have the power to brighten your space in no time!
Tools And Materials Needed
Changing a paddle light switch requires specific tools and materials. Using the right items makes the job easier and safer. Prepare everything before starting to avoid delays or mistakes.
Basic Tools
Start with simple tools. A flathead screwdriver helps remove the switch cover. A Phillips screwdriver is needed to unscrew the switch from the wall box. A voltage tester checks if the power is off. Needle-nose pliers help twist wires together.
Materials Needed
Get a new paddle light switch that matches your current one. Use electrical tape to secure wire connections. Wire nuts keep wires safe and connected. Have a flashlight handy for dark areas.
Safety Gear
Wear insulated gloves to protect from electric shock. Safety glasses keep debris out of your eyes. Use a sturdy ladder if the switch is high on the wall.
Credit: www.reddit.com
Safety Precautions
Safety is the top priority when changing a paddle light switch. Electrical work can be risky if you do not take the right steps. Follow these safety tips to protect yourself and your home.
Turn Off The Power
Switch off the circuit breaker for the room you will work in. Do not trust the wall switch alone. Double-check that the power is off using a voltage tester.
Use The Right Tools
Choose insulated tools made for electrical work. Avoid using damaged or cheap tools. Proper tools reduce the chance of electric shock.
Wear Safety Gear
Wear rubber-soled shoes and safety glasses. Avoid loose clothing or jewelry. These items can catch on wires or cause accidents.
Work In A Dry Area
Ensure your hands and the floor are dry. Water conducts electricity and increases shock risk. Keep the workspace safe and dry at all times.
Handle Wires Carefully
Do not touch exposed wire ends. Use wire nuts or electrical tape for safety. Keep wires organized to avoid confusion and mistakes.
Turning Off Power
Turning off the power is the first and most important step before changing a paddle light switch. It keeps you safe from electric shocks. Always make sure no electricity flows to the switch you want to replace.
Take your time and follow the steps carefully. Safety should be your top priority throughout the process.
Locate The Circuit Breaker
Find your home’s circuit breaker box. It is usually in the basement, garage, or utility room. Open the box to see all the switches inside. Each switch controls power to a different part of your home.
Turn Off The Correct Breaker
Look for the breaker labeled for the room or area with the paddle light switch. Flip the switch to the OFF position. This stops electricity from reaching the light switch.
Verify Power Is Off
Go back to the light switch and test it. Use a voltage tester or try turning the switch on. The light should not turn on. This confirms the power is off and safe to work on.
Removing The Old Switch
Removing the old paddle light switch is the first step in installing a new one. It is important to do this safely and carefully to avoid damage or injury. Follow these clear steps to take out the old switch without trouble.
Turn Off The Power
Before starting, switch off the power at the circuit breaker. This stops electricity from flowing to the switch. Use a tester to check the switch is off. Safety comes first.
Remove The Switch Cover Plate
Unscrew the cover plate with a screwdriver. Keep the screws in a safe place. Gently pull the cover plate away from the wall. This reveals the switch and wiring.
Unscrew The Old Switch
Remove the screws holding the switch to the electrical box. Pull the switch out carefully. Do not force it to avoid wire damage. The wires will now be visible.
Disconnect The Wires
Note how the wires connect to the switch. Loosen the terminal screws or release the wire clips. Carefully pull the wires free. Keep the wires separate to avoid confusion later.
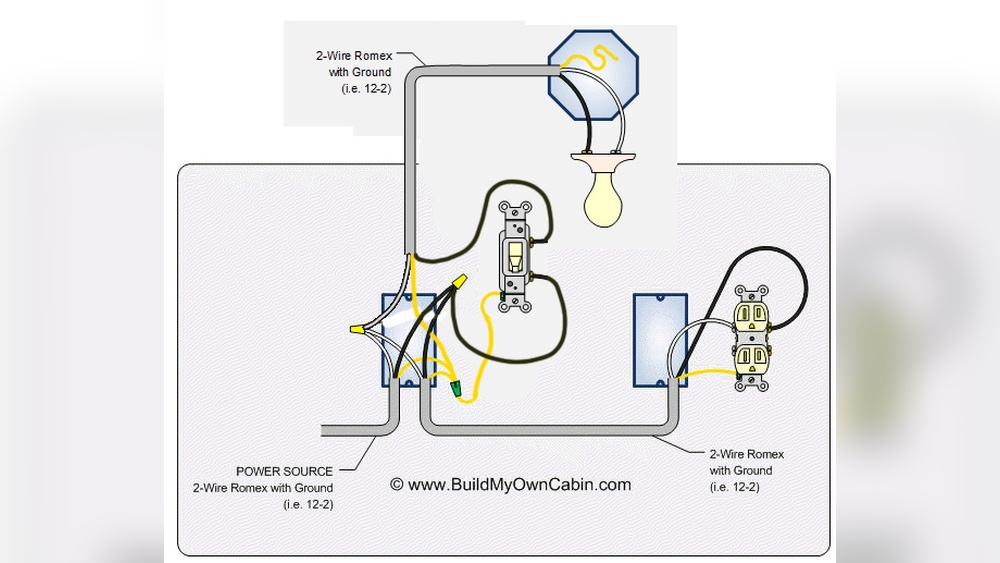
Identifying Wiring Connections
Identifying wiring connections is the first step in changing a paddle light switch. It helps you know which wire goes where. This makes the installation safe and correct. Understanding the wiring prevents mistakes that could cause damage or shocks.
Each paddle switch has wires that connect to power and the light. These wires come in different colors. Knowing what each color means makes the job easier. It also helps when you buy a new switch to match your wiring.
Turn Off The Power
Before touching any wires, turn off the power at the circuit breaker. This stops electricity from flowing. It keeps you safe from electric shock. Use a tester to check if the wires are dead.
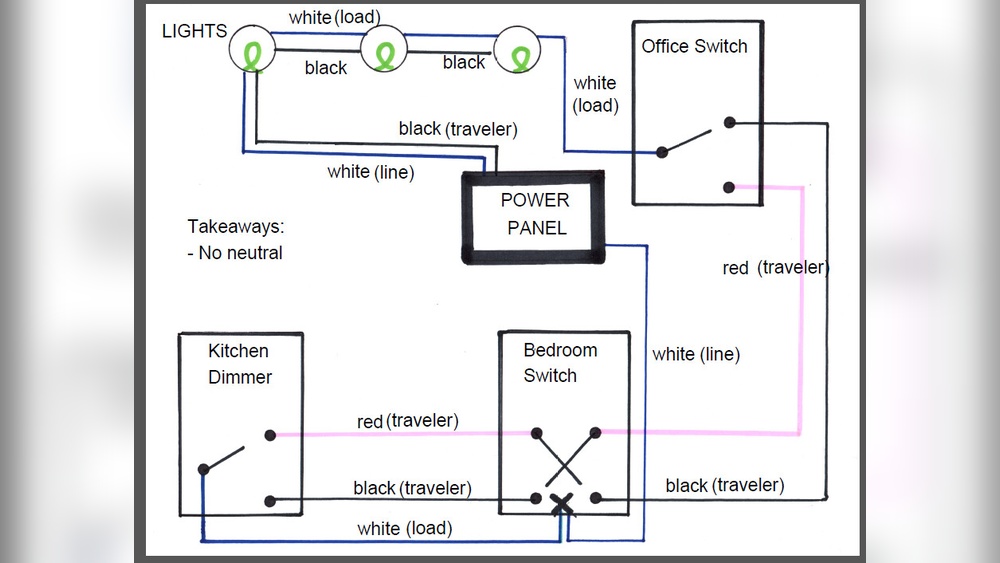
Identify The Common Wire
The common wire usually carries power to the switch. It often has a black or dark color. Look for the wire connected to the switch’s common terminal. This wire is key to the switch’s function.
Locate The Traveler Wires
Traveler wires connect the switch to the light or other switches. They are often red or another color. These wires move current between switches in a multi-switch setup. Mark these wires for easy recognition.
Find The Ground Wire
The ground wire is a safety wire. It is usually green or bare copper. This wire connects the switch to the electrical box or ground. Grounding prevents electrical shocks and fires.
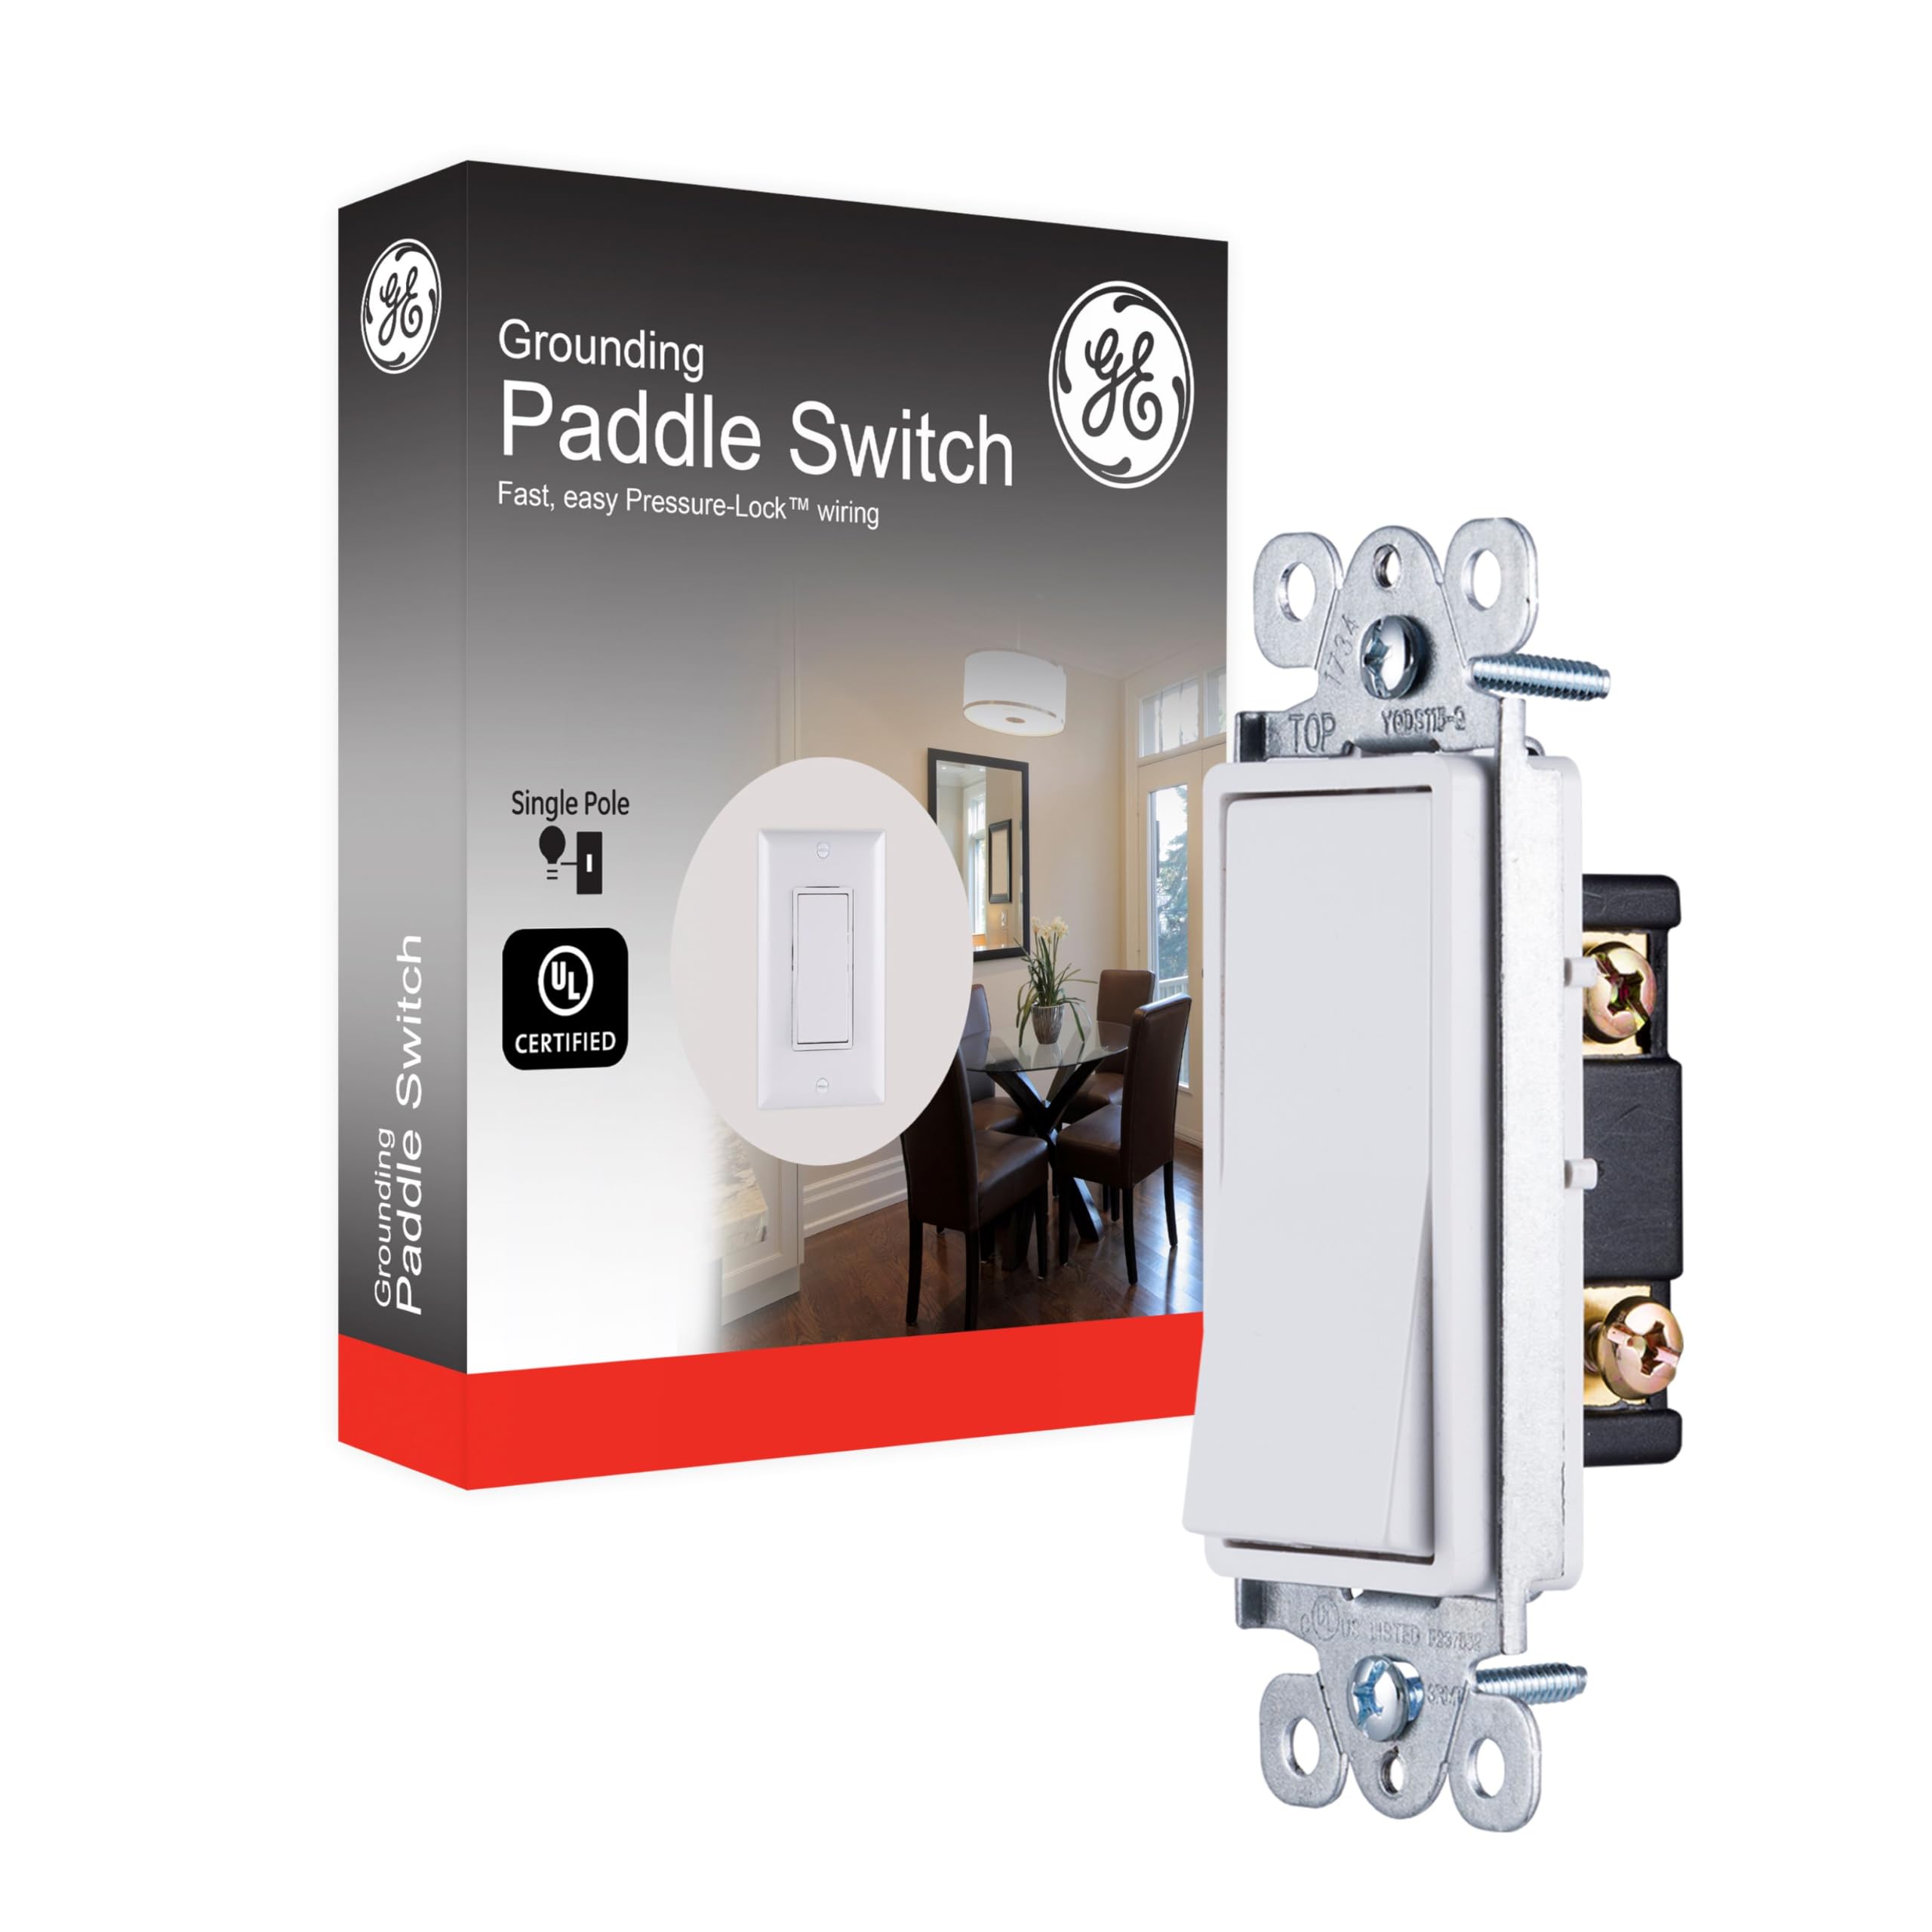
Credit: www.amazon.com
Installing The New Paddle Switch
Installing the new paddle switch is the key step in changing your light switch. This part ensures your light will work safely and correctly. Follow each step carefully to fit the switch right. Take your time and stay safe while working with electricity.
Prepare The Switch Box
First, check the wires inside the box. Make sure they are clean and not damaged. If needed, trim the wire ends to expose fresh copper. This helps the new switch connect well. Keep the wires separated to avoid shorts.
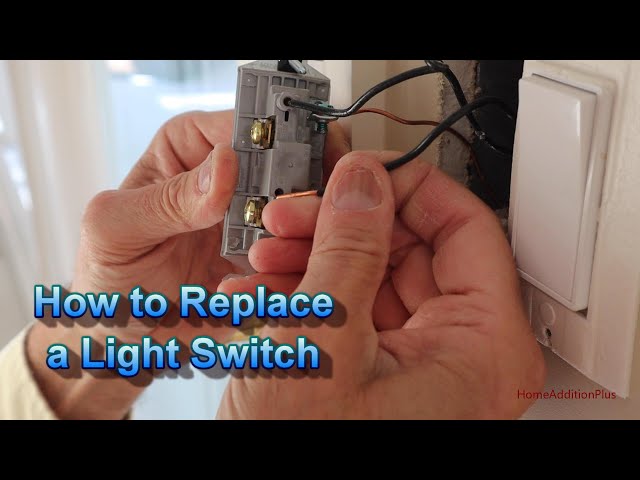
Connect The Wires To The Switch
Look at the new switch’s terminals. Attach each wire to the correct terminal. Usually, black wires go to brass screws. White wires are not connected to the switch but may be in the box. Tighten screws firmly to hold wires in place. Loose wires can cause problems.
Secure The Switch In The Box
Push the wires back gently into the box. Place the switch flat against the wall. Use the screws that came with the switch to fix it in place. Tighten screws evenly so the switch sits straight. Avoid over-tightening to prevent damage.
Attach The Switch Cover Plate
Put the cover plate over the switch. Align it with the screw holes. Screw it in place carefully. The cover plate should be snug but not too tight. This gives a neat, finished look to your installation.
Testing The New Switch
Testing the new paddle light switch is a key step after installation. It ensures the switch works safely and correctly. You want to confirm the light turns on and off without issues. This part is simple but must be done carefully.
Turn The Power Back On
Start by restoring power at the circuit breaker. This step reactivates electricity to the switch. Make sure the breaker is fully on before testing the switch.
Check The Switch Operation
Flip the paddle switch up and down slowly. The light should respond immediately. If the light flickers or stays off, the switch may not be wired correctly.
Inspect For Unusual Signs
Look for sparks, buzzing sounds, or a burning smell. These signs indicate a problem. Turn off the power right away if you see any of these.
Use A Voltage Tester
A voltage tester can confirm proper current flow. Touch the tester to the switch terminals. It should show voltage only when the switch is on.
Test The Light Fixture
Ensure the light bulb is good and seated well. Sometimes the issue lies in the bulb, not the switch. Replace the bulb if needed and test again.
Credit: www.youtube.com
Troubleshooting Common Issues
Troubleshooting common issues helps fix problems with paddle light switches fast. Simple checks often solve the problem without extra tools.
Understanding what causes the switch to fail helps find quick solutions. This saves time and keeps your home safe.
Check For Loose Wires
Loose wires cause the switch to stop working or flicker. Turn off power before touching wires. Tighten any loose connections carefully.
Test The Switch With A Voltage Tester
A voltage tester shows if power reaches the switch. No power means a wiring or breaker problem. Replace the switch if power is present but it does not work.
Look For Signs Of Wear Or Damage
Cracks, burns, or discoloration on the switch mean it needs replacement. Damaged switches can be unsafe and cause sparks.
Check The Circuit Breaker
A tripped breaker cuts power to the switch. Reset the breaker and test the switch again. If it trips again, call an electrician.
Frequently Asked Questions
How Do I Safely Turn Off Power Before Changing A Paddle Switch?
Always switch off the circuit breaker controlling the light switch. Use a voltage tester to confirm no power is present before starting any work. This ensures safety and prevents electrical shocks during the replacement process.
What Tools Are Needed To Change A Paddle Light Switch?
You typically need a flathead and Phillips screwdriver, a voltage tester, and wire strippers. These tools help safely remove the old switch and install the new paddle switch efficiently.
Can I Replace A Paddle Switch Without An Electrician?
Yes, if you follow safety precautions and have basic electrical knowledge. Turn off power, use proper tools, and carefully handle wiring. If unsure, consult a professional to avoid hazards.
How Do I Connect Wires To A New Paddle Switch?
Attach the wires to the corresponding terminals on the switch: usually black (hot) wire to brass, white (neutral) to silver, and ground to green. Tighten screws securely to ensure a good electrical connection.
Conclusion
Changing a paddle light switch can be simple and safe. Always turn off the power first. Use the right tools and follow each step carefully. Double-check your work before restoring power. This small task can improve your home’s look and function.
Take your time and stay cautious. Soon, you will have a new switch working perfectly. Enjoy the satisfaction of doing it yourself.