Are you looking to add a receptacle to your light switch but don’t know where to start? You’re not alone.
Many homeowners want the convenience of an extra outlet right where their switch is but worry about the complexity or safety. What if you could learn a simple, step-by-step way to do this yourself? You’ll discover exactly how to add a receptacle to your light switch safely and efficiently.
By the end, you’ll have the confidence to upgrade your space without calling a pro. Keep reading, because this easy guide could save you time, money, and hassle.
Tools And Materials Needed
Adding a receptacle to a light switch requires some tools and materials. Having the right items helps the job go smoothly. Safety is important, so use tools made for electrical work. Prepare all materials before starting to save time and avoid mistakes.
Essential Tools
- Screwdriver set: flathead and Phillips
- Wire stripper and cutter
- Voltage tester for safety
- Needle-nose pliers
- Electrical tape
- Drill with bits (if new holes are needed)
- Flashlight or work light
- Level to align the receptacle
Required Materials
- Electrical receptacle (outlet)
- Switch box or device box
- Romex wire or similar electrical cable
- Wire nuts for connections
- Wall plate cover
- Grounding wire (usually green or bare copper)
- Wire connectors
- Mounting screws

Credit: diy.stackexchange.com
Safety Precautions
Working with electrical wiring can be risky. Safety is the top priority before adding a receptacle to a light switch. Following clear safety steps protects you from shocks and accidents. Small actions make a big difference in your safety.
Always take time to prepare. Avoid rushing or skipping safety checks. These simple precautions keep the project safe and smooth.
Turn Off Power
Start by switching off power at the circuit breaker. This stops electricity from flowing to the wires you will handle. Never trust the switch alone to cut power. Confirm the breaker for that specific circuit is off.
Use A Voltage Tester
Test the wires with a voltage tester before touching anything. This tool shows if electricity is still present. Check all wires carefully. If the tester shows power, do not continue. Wait or call a professional.
Wear Protective Gear
Wear rubber-soled shoes and insulated gloves. These reduce the chance of electric shock. Use safety glasses to protect your eyes from sparks or debris. Always dress to protect yourself fully during the work.
Locate The Switch Box
Locating the switch box is the first step to add a receptacle to a light switch. It holds the wiring and controls the electrical flow. Finding it correctly ensures safety and proper installation.
Start by identifying the switch that controls the light you want to add the receptacle near. The switch box is usually behind this switch. Knowing its exact position saves time and effort.
Identify Existing Wiring
Remove the switch cover carefully to see the wiring inside the box. Look for black, white, and ground wires. These wires supply power and connect to the switch. Check if there is enough wiring to extend to the new receptacle.
Notice how the wires connect to the switch terminals. Understanding the setup helps plan the new connections. Use a voltage tester to ensure the power is off before touching wires.
Check For Space
Switch boxes come in different sizes. Some have enough room for extra wires and devices. Others may be too small to add a receptacle safely. Look inside the box to see how much free space is available.
Adding a receptacle requires space for wires and the new device. If the box is crowded, consider replacing it with a larger one. This prevents overheating and keeps the installation safe.
Plan The Wiring
Planning the wiring is the first step to add a receptacle to a light switch. This step ensures safety and proper function. It helps avoid electrical problems later. Careful planning saves time and effort during installation.
Before starting, know the wiring setup in your home. Check the existing circuit and decide how to connect the new receptacle. Understanding the wiring plan is key to a smooth process.
Choose Receptacle Type
Select the right receptacle for your needs. Standard receptacles work for most rooms. GFCI receptacles add safety near water areas like kitchens or bathrooms. AFCI receptacles protect from electrical fires. Pick one that fits the location and use.
Understand Circuit Load
Know the total electrical load on the circuit. Each circuit has a limit on how much it can handle. Adding a receptacle adds more load. Make sure the circuit can support the extra device. Overloading can cause breakers to trip or wires to overheat.
Check the breaker rating and the devices already on the circuit. Calculate the total wattage to avoid problems. Proper load management keeps your home safe and your devices working well.
Turn Off The Circuit Breaker
Turning off the circuit breaker is the first and most important safety step. It stops electricity from flowing to the light switch and receptacle. This prevents electric shocks and accidents while working.
Always double-check that the power is off before starting any electrical work. It protects you and your home from damage.
Locate Your Circuit Breaker Panel
Find the main electrical panel in your home. It is usually in the basement, garage, or utility room. The panel has switches called breakers.
Identify The Correct Breaker
Look for the breaker that controls the room with the light switch. It may be labeled. If not, turn off breakers one by one.
Switch Off The Breaker
Flip the breaker to the OFF position. This stops power to the circuit. You may hear a click sound.
Test For Power
Use a voltage tester or a simple light to check the switch and receptacle. Make sure no electricity flows before you start work.
Remove The Switch Cover And Switch
Removing the switch cover and switch is the first step to add a receptacle to a light switch. This step lets you see the wiring behind the switch. It also makes room to install the new receptacle safely.
Turn off the power at the circuit breaker before starting. This prevents electric shock and keeps you safe during the work.
Turn Off The Power
Locate the correct circuit breaker for the switch. Flip it to the off position. Use a voltage tester to confirm the power is off.
Remove The Switch Cover Plate
Use a screwdriver to remove the screws holding the switch cover. Keep the screws safe for later. Gently pull the cover plate away from the wall.
Unscrew The Light Switch
Unscrew the switch from the electrical box. Pull the switch out slowly to expose the wires. Do not touch the wires yet.
Note The Wiring Setup
Take a photo or note how the wires connect to the switch. This will help when adding the receptacle. Identify the hot, neutral, and ground wires.
Install The Receptacle Box
Installing the receptacle box is the next step after planning your wiring. This box will hold the new outlet safely and securely inside the wall. Proper installation keeps the outlet stable and meets electrical codes.
Cut Wall Opening
Mark the spot on the wall where the box will go. Use a pencil to draw the outline of the box. Use a drywall saw to cut along the lines carefully. Cut slowly to avoid damaging wires or pipes behind the wall. Clear out the cut piece and smooth the edges with sandpaper.
Secure The Box
Insert the receptacle box into the opening. Use the box’s built-in clamps or tabs to hold it firmly in place. Tighten the screws to secure the box to the drywall. Check that the box does not move or wobble. Properly fastened boxes prevent outlet damage and keep wiring safe.
Run Electrical Wiring
Running electrical wiring is a key step in adding a receptacle to a light switch. It connects the new outlet to your home’s power supply safely. Proper wiring ensures the receptacle works well without risks. Follow these steps carefully to avoid mistakes and keep your home safe.
Route Cables
Start by planning the cable path from the switch box to the new receptacle location. Use a fish tape or wire puller to guide the cables through walls or ceilings. Avoid sharp bends or tight spaces to prevent wire damage. Secure cables with staples every 12 inches, but do not pinch the wire. Keep cables away from heat sources or water pipes. Proper routing helps maintain electrical safety and makes future repairs easier.
Strip Wire Ends
Use a wire stripper to remove about half an inch of insulation from each wire end. Be careful not to nick or cut the copper wire inside. Stripped wires allow good contact with terminals or wire nuts. Twist the exposed copper strands gently for a neat connection. Properly stripped wires reduce the chance of loose connections and electrical shorts. Always double-check before connecting wires to the receptacle or switch.
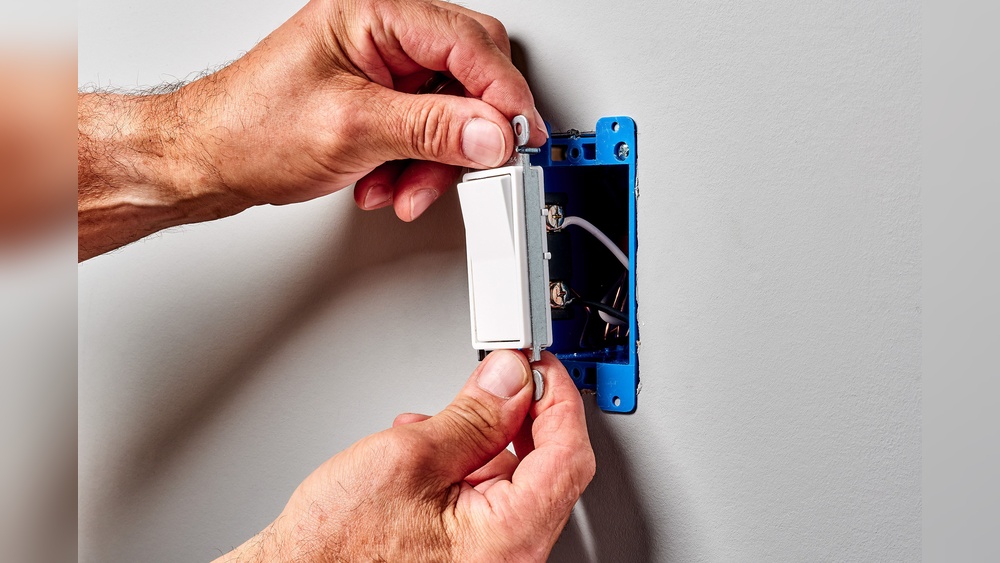
Connect Wires To Receptacle
Connecting wires to the receptacle is a key step in adding a receptacle to a light switch. This part needs care and focus. Proper connection ensures the receptacle works safely and correctly. Follow simple steps to connect wires with no confusion.
Match Wire Colors
Identify each wire by its color. Black or red wires carry power. White wires are neutral. Green or bare wires are ground. Connect black or red wires to brass terminals. White wires go to silver terminals. Attach green or bare wires to the green terminal. Matching colors keeps the circuit safe and clear.
Tighten Terminals
After placing wires on the correct terminals, tighten the screws firmly. Loose connections can cause sparks or failures. Use a screwdriver to secure each wire. Do not overtighten, which can damage wires or terminals. Check all screws for tightness before moving on. Good tightening means a reliable electrical connection.

Credit: www.do-it-yourself-help.com
Modify Switch Wiring
Modifying the switch wiring is a key step to add a receptacle alongside a light switch. This process involves adjusting the existing wires to safely power both the switch and the new outlet. Careful handling of each wire ensures a secure and functional setup.
Separate Switch And Receptacle Wires
Start by identifying the wires inside the switch box. Separate the wires that will power the switch from those that will serve the receptacle. Keep the wires organized to avoid confusion during connection. Use a voltage tester to confirm power is off before touching any wires.
Use Wire Nuts For Connections
Join the wires for the receptacle using wire nuts. Twist the wires together tightly, then screw on the wire nut firmly. This secures the connection and prevents wires from coming loose. Double-check each connection to ensure it is tight and safe.
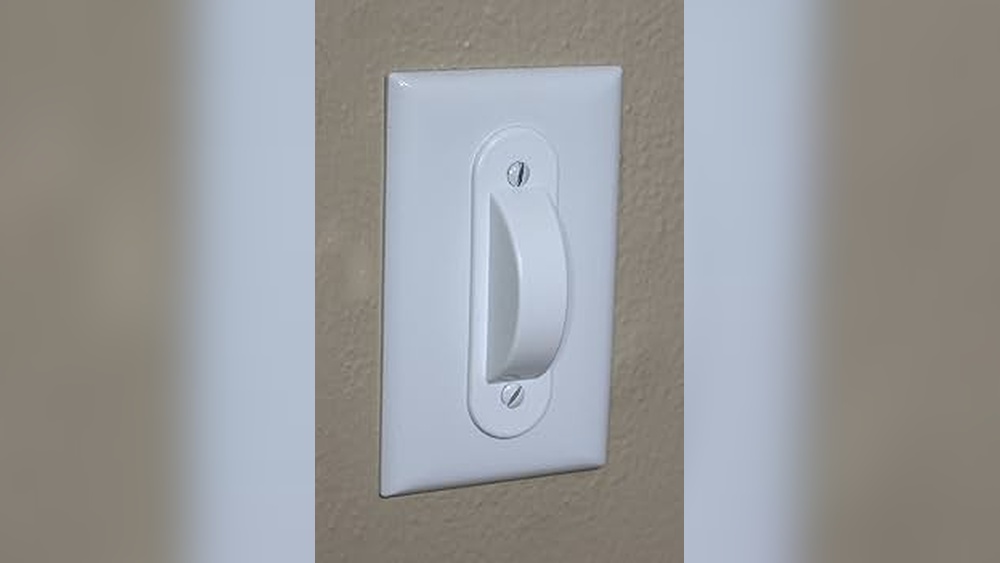
Install Devices And Covers
Installing devices and covers is the final step in adding a receptacle to a light switch. This step ensures everything stays safe and looks neat. It also protects the wiring inside the wall from damage and dust. Take your time to do this carefully for a clean finish.
Secure Receptacle
Start by pushing the receptacle gently into the electrical box. Align the screw holes with the box openings. Use a screwdriver to tighten the screws. Make sure the receptacle sits flush with the wall. Avoid over-tightening, which can crack the device.
Replace Switch
Next, place the light switch back into its spot. Align it with the box and secure it with screws. Tighten the screws evenly so the switch stays firm. Check that the switch moves smoothly. It should not feel loose or stuck.
Attach Cover Plates
Finally, position the cover plates over the switch and receptacle. Line up the screw holes. Insert the screws and tighten them gently. The plates should fit snugly against the wall. This step completes the installation and improves safety.
Restore Power And Test
Restoring power and testing your new receptacle is the final step. It confirms your work is safe and functional. Follow simple steps to turn on power and check the outlet.
Turn On Breaker
Locate the correct circuit breaker in your electrical panel. Switch it to the ON position carefully. Ensure the breaker stays firmly in place. This action restores electricity to the light switch and new receptacle.
Test Receptacle Function
Use a voltage tester or plug in a small device. Check if the receptacle powers the device properly. If the device works, your installation is successful. If not, turn off the breaker and recheck wiring connections.
Troubleshooting Tips
Adding a receptacle to a light switch can sometimes bring unexpected issues. Troubleshooting helps find and fix these problems fast. Knowing common issues saves time and keeps your project safe.
No Power At Receptacle
Check if the circuit breaker is on. Test the switch to see if it controls power correctly. Use a voltage tester on the receptacle terminals. A faulty switch or wiring can block power. Make sure the wires connect to the right terminals.
Breaker Trips
Breaker trips happen due to short circuits or overloads. Inspect wires for damage or exposed copper. Confirm no wires touch metal parts inside the box. Avoid overloading the circuit by adding too many devices. Replace damaged wires and secure all connections.
Loose Connections
Loose wires cause flickering or no power. Turn off power before checking connections. Tighten all screws on the receptacle and switch terminals. Look for wire strands that may be broken or out of the terminal. Secure wires firmly to ensure good contact.
Credit: www.reddit.com
Frequently Asked Questions
How Do I Add A Receptacle To A Light Switch Safely?
Turn off the power at the circuit breaker before starting. Use a voltage tester to confirm no electricity flows. Connect the receptacle wires to the switch box wiring properly. Follow electrical codes and use a GFCI outlet if required for safety.
Can I Use The Existing Switch Wiring For A Receptacle?
Yes, you can share the existing switch wiring if the circuit supports the additional load. Ensure the wiring gauge is sufficient. Connect the hot and neutral wires correctly. Always follow local electrical codes and consider consulting an electrician for complex setups.
What Tools Are Needed To Add A Receptacle To A Switch?
You will need a voltage tester, wire strippers, screwdrivers, wire nuts, electrical tape, and a receptacle outlet. A drill might be necessary for mounting. Safety gear like gloves and goggles is also recommended. Proper tools ensure a safe and efficient installation.
Is It Necessary To Get A Permit For This Electrical Work?
Permit requirements vary by location. Many areas require permits for electrical modifications. Check with your local building department before starting. Permits ensure work meets safety codes. Hiring a licensed electrician can help with permits and inspections.
Conclusion
Adding a receptacle to a light switch can save space and add convenience. Follow safety steps carefully to avoid accidents. Use the right tools and check your work as you go. Take your time and double-check connections. This small project can make your room more functional.
Keep learning and trying simple electrical tasks like this. Safety always comes first. You can do it!