Are you looking to control your lights from two different switches but don’t know where to start? Connecting a double switch light might sound tricky, but with the right steps, you can do it yourself and save time and money.
Imagine turning your lights on or off from either side of the room—how convenient would that be? In this guide, you’ll discover simple instructions that anyone can follow, even if you’re new to electrical work. Keep reading, and by the end, you’ll have the confidence to install a double switch light all on your own.
Tools And Materials Needed
Before starting, gather all tools and materials needed for the double switch light connection. Proper tools make the job safer and easier. Use materials that fit the project for best results.
Essential Tools
First, you need a screwdriver set. A flathead and a Phillips screwdriver work well. Wire strippers are necessary to remove insulation from wires cleanly. A voltage tester ensures no power runs through the wires. Pliers help twist wires together securely. Lastly, a drill might be needed to mount switches.
Materials Required
Choose a double switch that suits your setup. Copper electrical wires are best for durability. Use wire nuts to connect wires safely. Electrical tape adds extra protection to connections. Wall plates help cover and protect the switches. Always select materials rated for your electrical system’s voltage.
Safety Gear
Wear insulated gloves to protect your hands. Safety goggles prevent debris from entering your eyes. Use a flashlight if the workspace is dark. Keep a fire extinguisher nearby for emergencies. Safety is key when working with electricity.
Safety Precautions
Safety is the top priority when connecting a double switch light. Electricity can be dangerous and cause serious injuries. Taking the right safety steps protects you and your home.
Before starting, prepare your work area well. Make sure you have all the tools and materials ready. A clean and organized space helps avoid accidents and confusion.
Turn Off The Power
Always switch off the main power at the circuit breaker. Double-check by trying the light or using a voltage tester. This step stops electricity flow and keeps you safe.
Use Proper Tools
Use insulated tools made for electrical work. These tools prevent electric shocks. Avoid makeshift or damaged tools that can cause harm.
Wear Safety Gear
Wear rubber-soled shoes and safety gloves. This gear reduces the risk of electric shock. Avoid metal jewelry or watches while working.
Follow Wiring Codes
Check local electrical codes before starting. Proper wiring keeps your installation safe and legal. Incorrect wiring can lead to fires or damage.
Test Connections Carefully
After wiring, test the switches with the power on. Use a voltage tester to ensure no live wires are exposed. Fix any loose connections immediately.
Types Of Double Switches
Double switches control two different lights or devices from one place. They save space and add convenience in homes or offices. Knowing the types helps you choose the right switch for your needs.
Each type has a unique design and function. Some are simple, while others offer more control and features. Let’s explore the main types of double switches available.
Single Pole Double Switch
This switch controls two separate lights or devices. It has two separate switches in one unit. Each switch works independently to turn the connected light on or off. It is the most common type of double switch.
Double Pole Double Switch
This switch controls two circuits at the same time. It can handle higher voltage or current. Both switches work together or separately. It is useful for heavy-duty appliances or outdoor lighting.
Three-way Double Switch
This switch lets you control two lights from two different places. Each switch can turn the light on or off. This type is great for long hallways or large rooms. It adds flexibility and comfort in your lighting control.
Dimmer Double Switch
This switch lets you adjust the brightness of two lights. Each switch has a dimming knob or slider. It helps save energy and create mood lighting. Perfect for living rooms or bedrooms.
Wiring Basics
Connecting a double switch light requires a clear understanding of wiring basics. This knowledge helps ensure safety and proper function. Wiring involves different wires with specific roles. Each wire must be correctly identified and connected for the switch to work well.
Knowing how electricity flows through the circuit is also crucial. This helps in troubleshooting and avoids mistakes. Simple steps can make this process easier and safer.
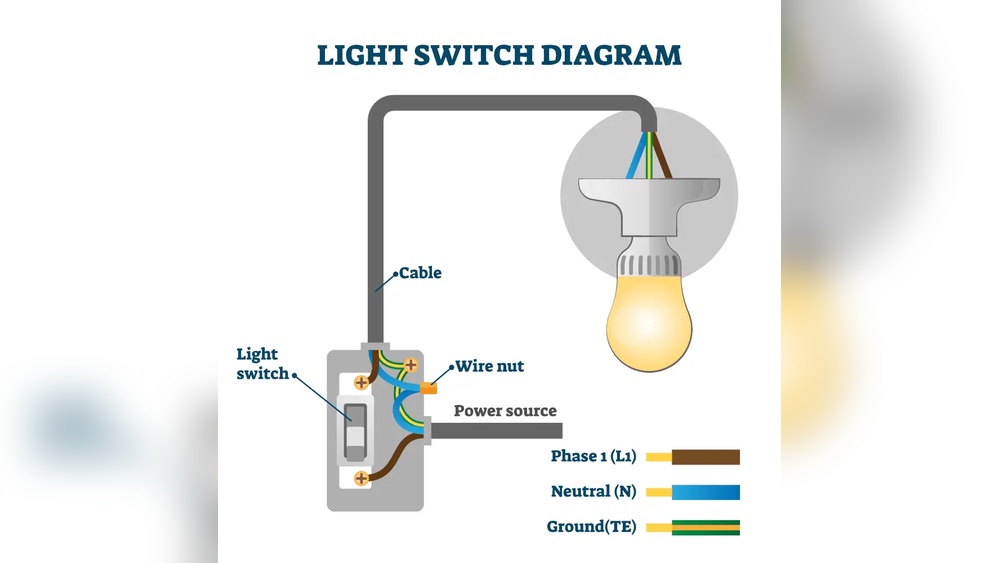
Identifying Wires
Wires in a double switch setup usually include live, neutral, and ground wires. The live wire carries electricity to the switch. It is often black or red. The neutral wire completes the circuit and is usually white. The ground wire is for safety and is green or bare copper.
Before connecting, check each wire carefully. Use a voltage tester to confirm the live wire. Labeling wires can help keep track of them during installation. Proper identification reduces the risk of errors and electric shocks.
Understanding Circuit Flow
Electricity flows from the power source through the live wire to the switch. The switch then controls the flow to one or two light fixtures. The neutral wire carries current back to the power source. The ground wire provides a path for electricity in case of a fault.
In a double switch, each switch controls a separate light. The circuit must allow electricity to flow independently to each light. Understanding this flow helps in wiring switches correctly. It also makes fixing problems easier if the lights do not work as expected.
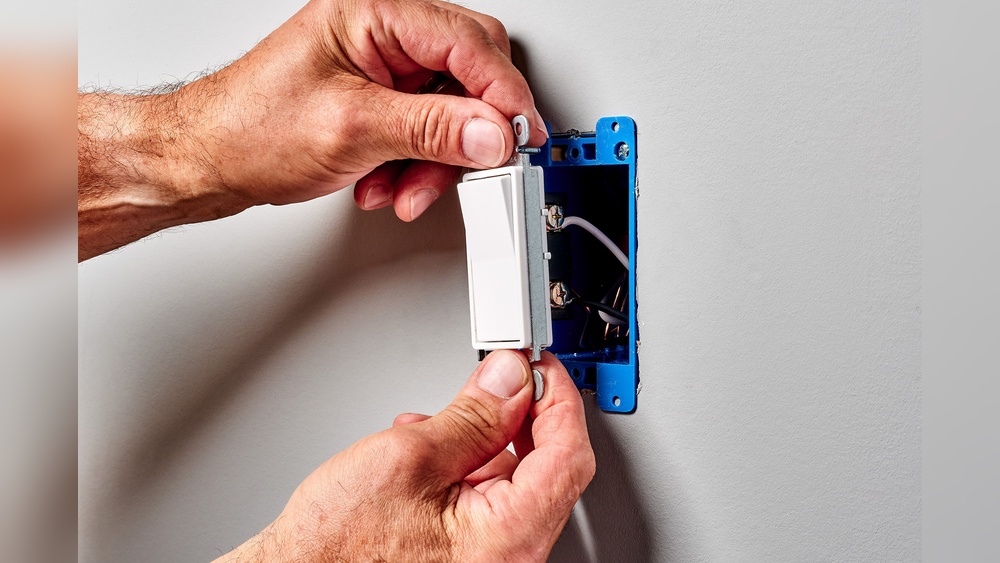
Preparing The Switch Box
Preparing the switch box is the first step in connecting a double switch light. This part is important for safety and smooth installation. A clean and organized switch box helps avoid problems later.
Before starting, make sure the power is off at the breaker. This protects you from electric shock. Use a voltage tester to confirm no electricity flows to the wires.
Gathering Necessary Tools And Materials
Collect all tools before opening the switch box. You will need a screwdriver, wire stripper, voltage tester, and electrical tape. Have the double switch and wire connectors ready.
Removing The Old Switch And Inspecting Wires
Unscrew the old switch from the box carefully. Pull it out gently to see the wires behind. Check if the wires are in good condition and long enough for the new switch.
Clearing And Organizing The Switch Box
Remove any debris, dust, or old wire nuts from the box. Straighten the wires inside for easy handling. Group wires by function: power, load, and ground.

Credit: diy.stackexchange.com
Connecting The Double Switch
Connecting a double switch allows you to control two light fixtures from one location. This setup is common in rooms with multiple lighting zones. Proper wiring is essential for safety and functionality. Follow the steps carefully to ensure a correct connection.
Connecting The Power Source
Start by turning off the main power at the breaker. Use a voltage tester to confirm no power flows. Connect the live wire from the power source to the common terminal on the double switch. The neutral wire usually bypasses the switch and goes directly to the light fixture. Make sure to strip the wires properly for a secure connection.
Wiring The Light Fixtures
Run wires from each switch terminal to its respective light fixture. Connect the live wire from the switch to the light’s live terminal. Attach the neutral wires together using a wire nut. The ground wire should connect to the switch’s ground terminal and the fixture’s ground point. Check that each wire is in place and not loose.
Securing The Connections
Twist wires tightly before adding wire nuts. Use electrical tape for extra safety around wire nuts. Push the wires neatly into the switch box to avoid damage. Screw the double switch firmly into the box. Restore power and test each switch to ensure proper operation.
Testing The Switch
Testing the switch is an important step after wiring a double switch light. It makes sure everything works safely and correctly. This step can help find wiring mistakes early. It also prevents damage to the light or switch.
Testing does not need special skills. Anyone can do it with simple tools. Following clear steps helps check each part of the switch.
Using A Voltage Tester
Start by turning off the power at the circuit breaker. Remove the switch cover carefully. Use a voltage tester to check wires. Touch the tester to each wire terminal. The tester should show power only on the live wire. No power should be on the neutral or ground wires. This step ensures the switch is wired correctly.
Checking The Switch Function
Turn the power back on. Flip each switch to the ON position. The corresponding light should turn on. Flip the switch OFF. The light should go off. Test both switches one by one. Both must work independently. If a light does not respond, check the wiring again.
Using A Continuity Tester
Turn off the power again. Remove the switch from the wall box. Set a continuity tester or multimeter to continuity mode. Touch the tester probes to the switch terminals. Flip the switch ON and OFF. The tester will beep when the switch is ON. No beep when it is OFF. This confirms the switch opens and closes the circuit correctly.

Credit: www.youtube.com
Troubleshooting Common Issues
Troubleshooting common issues helps fix problems with a double switch light. Simple mistakes can stop the light from working. Knowing what to check saves time and frustration.
Many problems come from wiring errors or faulty parts. Step-by-step checks find the source quickly. Follow each tip carefully for safe and effective repairs.
Check For Loose Or Wrong Wiring
Loose connections cause flickering or no light. Turn off power before touching wires. Make sure wires are tight in terminals. Match wires to the correct screws. White (neutral) and black (hot) wires must connect properly.
Test The Switches For Faults
Switches wear out and stop working. Use a tester or multimeter to check switch function. Replace any switch that does not show continuity. A faulty switch can block electricity flow.
Verify The Power Supply
No power means no light. Confirm the breaker is on and not tripped. Check the fuse box for blown fuses. Use a voltage tester to ensure power reaches the switch box.
Inspect The Light Fixture
The fixture itself might cause issues. Check the bulb for damage or burn out. Replace bulbs with the correct type and wattage. Look for loose fixture wires or corrosion.
Look For Grounding Problems
Proper grounding is key for safety and function. Ensure the ground wire connects to the switch box and fixtures. A missing ground can cause shocks or switch failure.

Credit: www.realpars.com
Frequently Asked Questions
How Do I Wire A Double Switch Light?
To wire a double switch light, connect the power source to the common terminal. Attach each switch terminal to separate light fixtures. Ensure all neutral wires are linked together. Turn off power before starting for safety. Test switches after wiring to confirm correct setup.
Can I Replace A Single Switch With A Double Switch?
Yes, you can replace a single switch with a double switch if wiring allows. Make sure the electrical box fits the double switch. Properly connect power, switch terminals, and neutral wires. Turn off electricity before replacing. Test functionality after installation.
What Tools Are Needed For Double Switch Installation?
Common tools include a screwdriver, wire stripper, voltage tester, and electrical tape. A wire cutter and pliers may also be helpful. Always use insulated tools for safety. Having these tools ensures a smooth and safe double switch installation process.
Is It Safe To Install A Double Switch Light Myself?
Installing a double switch light is safe if you follow safety rules. Turn off the circuit breaker before starting. Use a voltage tester to confirm no power. Follow wiring instructions carefully. If unsure, consult a licensed electrician to avoid hazards.
Conclusion
Connecting a double switch light can be simple with clear steps. Always check the power is off before starting work. Follow the wiring instructions carefully to avoid mistakes. Take your time and double-check all connections. This helps the light work properly and safely.
If unsure, ask a professional for help. Practice makes the process easier next time. Enjoy the convenience of controlling lights from two spots. A well-done job adds comfort and safety to your home.