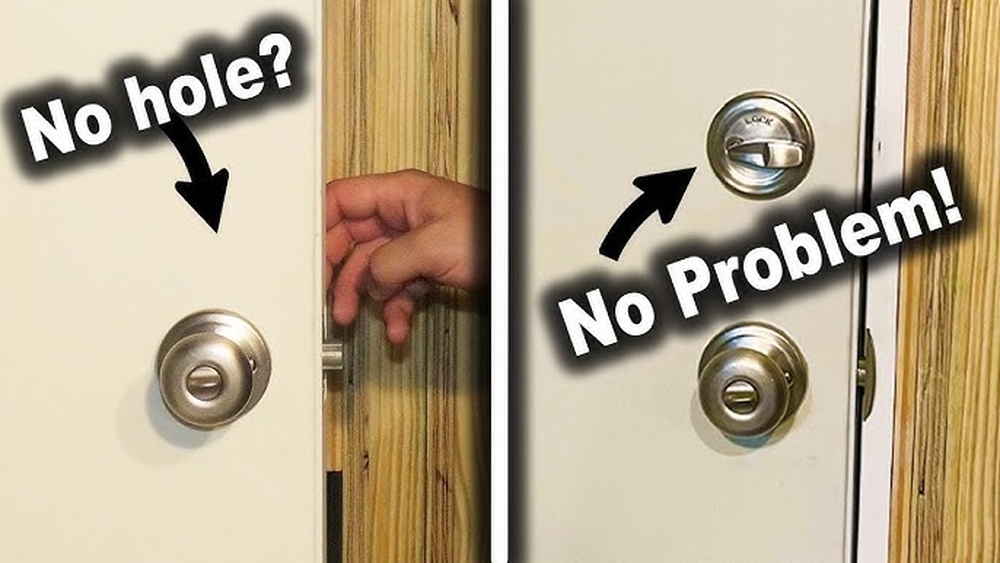
Is your old deadbolt lock stuck, rusty, or just not working like it used to? Removing it might seem tricky, but you can do it yourself with the right steps.
Imagine saving money and gaining the confidence to handle your home’s security without waiting for a locksmith. This guide will show you exactly how to remove that old deadbolt lock quickly and safely. Keep reading—you’ll be surprised how simple it can be!
Tools Needed
Removing an old deadbolt lock needs some simple tools. Having the right tools makes the job easier and faster. You can find most of these tools in a basic toolbox or at a local hardware store.
Prepare these tools before starting. It helps to avoid interruptions and frustration during the process.
Screwdriver
A screwdriver is essential for removing screws that hold the deadbolt in place. Most deadbolts use Phillips or flathead screws. Use the correct type to avoid stripping the screws.
Allen Wrench
Some deadbolts have small hex screws. An Allen wrench fits these screws perfectly. Check your lock to see if you need this tool.
Pliers
Pliers help to grip and twist parts if they are stuck. They are useful to pull out stubborn pieces carefully.
Utility Knife
A utility knife can cut away any paint or sealant around the lock. It helps to loosen the lock from the door surface.
Drill (optional)
If screws are stripped or stuck, a drill with a screwdriver bit can help remove them quickly. Use it carefully to avoid damaging the door.
Prepare The Door
Preparing the door is the first step in removing an old deadbolt lock. This stage helps make the process smooth and safe. Take your time to get everything ready before starting.
Gather Necessary Tools
Collect tools such as a screwdriver, drill, and pliers. Having these items close makes the job faster. Check if the screwdriver fits the lock screws perfectly. This avoids stripping the screw heads.
Clear The Work Area
Remove any objects near the door. Clear space inside and outside for easy access. This prevents accidents and helps you move freely. A clean area keeps small parts from getting lost.
Inspect The Door And Lock
Look at the deadbolt and door condition. Notice if the lock is rusty or stuck. Check the screws and faceplate for damage. This gives clues about how hard removal might be.
Protect The Door Surface
Use painter’s tape around the lock area. This stops scratches during the removal process. Be gentle when handling tools near the door finish. Protecting the surface keeps your door looking good.
Remove The Interior Lock
Removing the interior lock is the next step in taking out an old deadbolt. This part holds the lock mechanism from the inside of the door. You need to handle it carefully to avoid damage to the door or the lock parts. Follow these steps to remove the interior lock safely and easily.
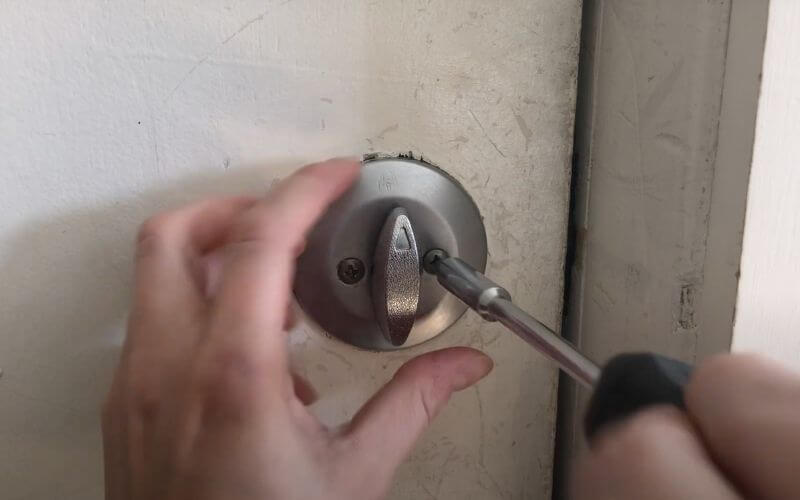
Unscrew The Mounting Screws
Locate the screws holding the interior lock plate. These screws are usually visible on the inside of the door. Use a screwdriver that fits well to avoid stripping the screws. Turn the screws counterclockwise to loosen them. Keep the screws in a safe place for reassembly or disposal. Sometimes screws can be tight, so apply steady pressure while turning.
Detach The Interior Plate
After removing the screws, gently pull the interior plate away from the door. It should come off easily without force. If it feels stuck, check for any hidden screws or clips. Set the plate aside carefully to avoid scratching the door or the plate. Removing this piece exposes the lock’s inner parts for further removal steps.
Remove The Exterior Lock
Removing the exterior lock is the first step to take out an old deadbolt. This part sits on the outside of your door and holds the keyhole and lock cylinder. Carefully removing it lets you access the inside parts.
Follow simple steps to avoid damage to your door or lock parts. Use the right tools and take your time for a smooth process.
Pull Out The Exterior Assembly
Start by locating the screws on the interior side of the door. These screws hold the exterior lock in place. Use a screwdriver to remove them.
Once screws are out, gently pull the exterior assembly away from the door. It should slide out easily. If it feels stuck, do not force it. Double-check for any hidden screws or attachments.
Handle Stuck Locks
Sometimes the exterior lock sticks due to rust or dirt. Spray a little lubricant around the edges. Let it sit for a few minutes.
Try to wiggle the lock gently while pulling. Use a flat tool to carefully pry if needed. Avoid using too much force to prevent damage.
If the lock still does not come out, check for broken parts inside the door. You might need to remove the interior lock first for better access.
Remove The Deadbolt Mechanism
Removing the deadbolt mechanism is a key step in taking out an old deadbolt lock. This part holds the bolt that keeps your door locked. Taking it out carefully makes room for a new lock or repairs. Follow the steps below to remove it safely and easily.
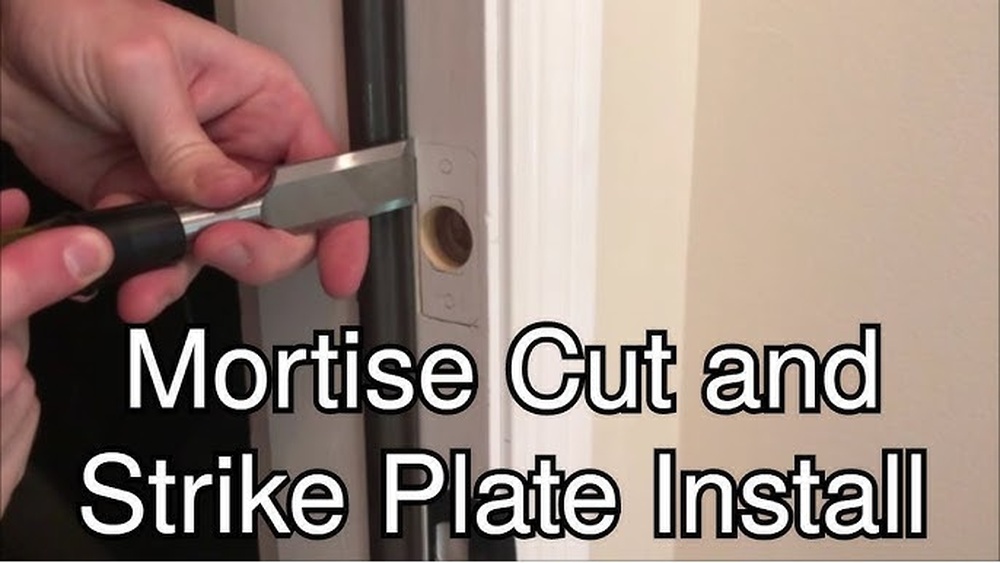
Unscrew The Faceplate
Start by opening the door. Look at the edge of the door where the deadbolt is. You will see a metal faceplate. This plate covers the bolt inside the door. Use a screwdriver to remove the screws holding the faceplate. Keep the screws in a safe place. Once the screws are out, pull the faceplate away from the door. This exposes the bolt mechanism inside.
Extract The Bolt
With the faceplate removed, the bolt is now visible. Slide or pull the bolt straight out of the door. Some bolts may need a little wiggle to come free. Avoid using force to prevent damage to the door. If the bolt is stuck, check for extra screws or parts holding it. Once free, set the bolt aside. The deadbolt mechanism is now removed from the door.

Credit: www.reddit.com
Clean The Door Surface
Cleaning the door surface is an important step after removing an old deadbolt lock. Dirt, dust, and leftover marks can stay on the door. Cleaning helps prepare the door for a new lock or a fresh coat of paint. It also makes the door look neat and well-kept.
Use the right tools and cleaning products to avoid damage. A clean surface ensures better lock installation and longer lock life. Take your time and do a thorough job.
Gather Cleaning Materials
Collect a soft cloth, mild soap, water, and a sponge. Avoid harsh chemicals that can harm the door finish. Prepare a small bucket with warm, soapy water. Have a dry towel ready for drying the surface.
Remove Dust And Loose Dirt
Wipe the door surface gently with a dry cloth first. This removes loose dust and dirt. Pay special attention to the area around the deadbolt hole. Clean corners and edges carefully to clear all debris.
Wash The Door Surface
Dip the sponge in soapy water and wring it out well. Wipe the door surface in smooth, gentle strokes. Focus on the area where the lock was. Avoid soaking the door to prevent water damage.
Rinse And Dry Thoroughly
Use a clean cloth dampened with plain water to remove soap. Wipe the door until all soap is gone. Dry the surface completely with a towel. This step stops moisture from causing rust or swelling.
Tips For Replacing Or Upgrading Locks
Replacing or upgrading locks improves home security and convenience. Choose the right lock type for your needs. Consider durability and ease of use. A secure lock adds safety and peace of mind.
Match the lock style to your door and home design. Measure door thickness before buying a new lock. Check if the new lock fits the existing holes. This saves time and effort during installation.
Choose Quality Materials
Select locks made of strong metals like brass or steel. These resist wear and break-ins better. Avoid cheap locks that can break easily. Quality materials last longer and offer better protection.
Consider Smart Lock Options
Smart locks offer keyless entry and remote control. They add convenience and modern features. Some models use codes, apps, or fingerprints. Check compatibility with your door and Wi-Fi system.
Check Lock Grade Ratings
Look for locks rated by ANSI or BHMA standards. Grade 1 is the strongest, ideal for exterior doors. Grade 2 and 3 suit interior or less critical doors. Ratings help choose locks for security needs.
Prepare Proper Tools
Use screwdrivers, drills, and measuring tape for installation. Having the right tools speeds up the process. Avoid forcing parts to prevent damage. Follow lock instructions carefully for best results.
Test Lock Functionality
Check the new lock works smoothly before final installation. Ensure the key turns easily and the latch moves freely. Test locking and unlocking several times. This avoids future issues and frustration.
Credit: www.safewise.com

Credit: diy.stackexchange.com
Frequently Asked Questions
How Do I Remove A Deadbolt Lock Safely?
First, unscrew the interior screws holding the deadbolt. Next, remove both the interior and exterior lock parts carefully. Use a screwdriver and keep screws in a safe place. Avoid forcing parts to prevent damage to the door.
What Tools Are Needed To Remove An Old Deadbolt?
You need a Phillips screwdriver, flathead screwdriver, and possibly a drill. These tools help in removing screws and loosening the lock mechanism. Having a flashlight can also help to see screws clearly inside the lock.
Can I Remove A Deadbolt Without Damaging The Door?
Yes, by unscrewing all screws gently and pulling the lock parts apart. Avoid using excessive force or prying tools. This method preserves the door’s surface and frame for reinstallation or replacement.
How Long Does It Take To Remove A Deadbolt Lock?
Removing a deadbolt lock usually takes about 10 to 20 minutes. It depends on your experience and the lock’s condition. Having the right tools ready can speed up the process.
Conclusion
Removing an old deadbolt lock is easier than it seems. With a few simple tools, you can do it yourself. Take your time and follow each step carefully. This saves money and gives you control over your home security. Now, you can replace the lock or make repairs as needed.
Stay safe and confident in handling your locks. Practice makes perfect—try it again if needed. Your home deserves the best care.