Have you ever found yourself locked out because your deadbolt won’t turn or the key just won’t work? It’s frustrating, stressful, and can make you feel helpless.
But don’t worry—there’s a way to fix this without calling a locksmith and spending a fortune. If you’re wondering, “How do I drill out a deadbolt lock? ” you’re in the right place. In this guide, you’ll learn simple, step-by-step instructions to safely and effectively drill out your deadbolt.
Keep reading, and you’ll have your door open in no time.
Tools Needed
Drilling out a deadbolt lock requires the right tools. Using proper equipment makes the job easier and safer. Choose tools that fit the task and your skill level.
Drill Types
A power drill is essential for this task. Corded drills offer steady power for tough locks. Cordless drills give more freedom of movement. Pick a drill with at least 500 watts or 18 volts.
Drill Bits
Use high-quality metal drill bits. Cobalt or titanium bits work best for hard metal locks. Start with a small bit to create a pilot hole. Then use larger bits to widen it. Keep extra bits handy in case one breaks.
Safety Gear
Wear safety glasses to protect your eyes. Use gloves to avoid cuts from metal shards. Hearing protection helps reduce noise from the drill. Always work in a well-lit space to see clearly.

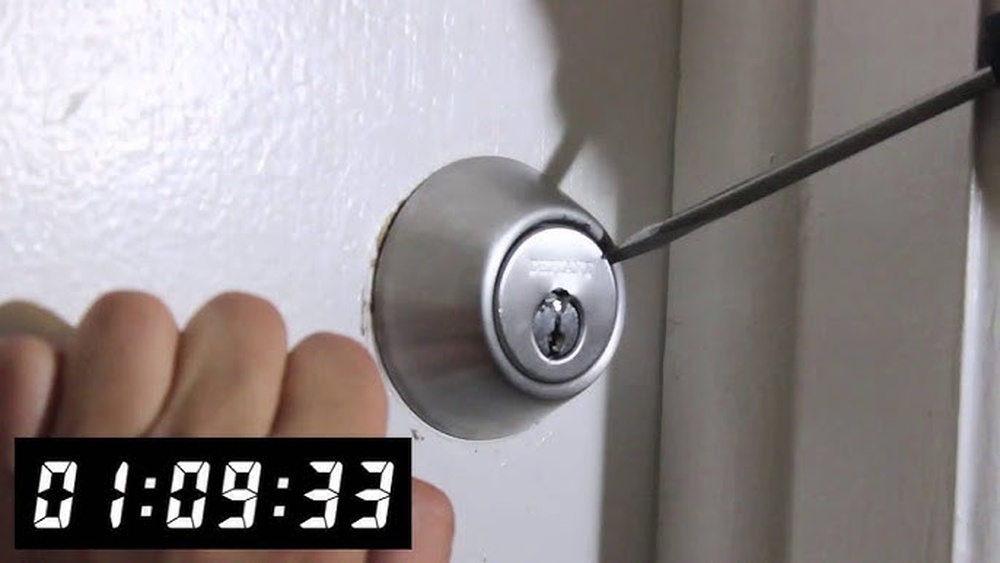
Credit: www.wikihow.com
Prepare The Lock
Preparing the lock is the first step in drilling out a deadbolt. Proper preparation makes the process safer and easier. It helps avoid damage to the door and surrounding areas. Follow clear steps to get ready before starting to drill.
Remove Door Hardware
Take off any hardware on the door near the deadbolt. This includes handles, knobs, and plates. Removing them prevents damage from flying debris or accidental contact with the drill. Use a screwdriver to carefully unscrew these parts.
Keep the screws and pieces in a safe place. You will need them when reinstalling the lock or new hardware. Clear access to the deadbolt makes drilling faster and more accurate.
Clear The Area
Clear the area around the door. Move furniture or objects that might get in the way. Protect nearby surfaces with a cloth or plastic sheet. This keeps dust and metal shavings from settling on them.
Wear safety glasses and gloves for protection. Drilling creates sparks and sharp fragments. A clean workspace reduces accidents and makes cleanup easier afterward.
Mark The Drill Points
Marking the drill points is a key step in drilling out a deadbolt lock. It helps you drill accurately and avoid damage. You must be precise to target the right areas. This step sets the foundation for a smooth drilling process.
Locate The Cylinder
The cylinder is the round part where you insert the key. Find it carefully on the lock face. This is the main part you need to drill. Use good lighting to see it clearly. Identifying the cylinder helps in marking the right drill spots.
Mark Center Spot
Use a pencil or marker to mark the center of the cylinder. This mark guides the drill bit. Make sure the spot is exactly in the middle. A centered mark prevents slipping and keeps drilling steady. Double-check the mark before you start drilling.
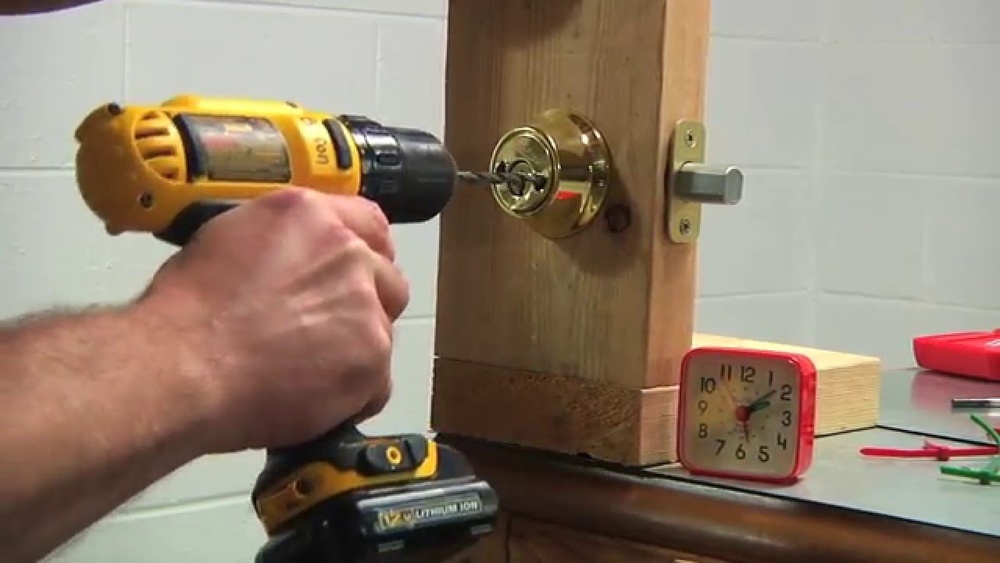
Drilling Process
Drilling out a deadbolt lock requires patience and care. The drilling process helps remove the lock mechanism when other methods fail. It is important to follow clear steps to avoid damage to the door.
Start With Small Bit
Begin by choosing a small drill bit, about 1/8 inch. This size allows precise control and reduces the chance of slipping. Drill directly into the center of the lock cylinder. Keep the drill steady and straight to avoid damage around the lock.
Increase Bit Size
After creating a small hole, switch to a larger drill bit. Move up to a 1/4 inch bit to widen the hole. Drill deeper slowly, focusing on the internal pins inside the lock. The goal is to break the pins and disable the locking mechanism.
Apply Steady Pressure
Use steady, even pressure while drilling. Press too hard, and the drill bit may break or damage the door. Press too lightly, and drilling will take longer. Maintain a firm grip and let the drill do the work. Keep checking progress to avoid mistakes.
Remove Lock Components
Removing the lock components is a key step in drilling out a deadbolt lock. This process clears the way to access the internal parts of the lock. It helps you work safely and efficiently.
Start by taking apart the external parts. This makes the deadbolt easier to handle. You will need basic tools like a screwdriver to remove screws and covers.
Extract Cylinder
The cylinder is the part where you insert the key. Removing it allows better access to the lock’s inside.
First, locate the screws holding the cylinder in place. Use a screwdriver to remove them carefully. Pull the cylinder out gently. If it feels stuck, wiggle it slightly to loosen it.
Remove Deadbolt
Next, remove the deadbolt itself. This metal piece slides into the door frame to lock it.
Unscrew the mounting screws on the door edge. Pull the deadbolt out slowly. Sometimes, it may need a little force if it is jammed. Removing the deadbolt lets you see the lock’s internal parts clearly.

Credit: www.parkavenuelocks.com
Tips For Safety
Drilling out a deadbolt lock requires care and attention. Safety is the top priority during this task. Protect yourself and others by following key safety tips. These tips help prevent injuries and damage.
Wear Eye Protection
Always wear safety goggles before starting to drill. Small metal pieces can fly off and hurt your eyes. Eye protection keeps you safe from flying debris. Never skip this simple step.
Avoid Overheating Drill
Drilling can make the drill bit very hot. Overheating can damage the drill and the lock. Take short breaks to cool the drill bit down. Use slow, steady pressure to avoid heat build-up.
Handle Sharp Edges
Drilling metal creates sharp edges around the hole. These edges can cut your skin easily. Use gloves to protect your hands while working. Clean up sharp debris carefully after drilling.
Common Mistakes To Avoid
Drilling out a deadbolt lock can be tricky. Mistakes can cause damage or make the process harder. Avoid these common errors to save time and effort.
Using Wrong Drill Bits
Choose the right drill bit for metal. A wood bit will not work well. Use a high-speed steel or cobalt bit. These bits cut through metal smoothly. Using wrong bits can break them or damage the lock.
Drilling At Incorrect Angle
Keep the drill straight and steady. Angled drilling can damage the door frame. It also makes the lock harder to remove. Hold the drill perpendicular to the lock face. This ensures a clean and effective hole.
Applying Excessive Force
Press the drill gently and steadily. Too much force can break the drill bit. It may also damage the door or lock. Let the drill do the work. Patience helps prevent accidents and saves your tools.

Credit: www.youtube.com
After Drilling
After drilling out a deadbolt lock, the job is not yet done. Proper cleanup and preparation are crucial. Removing debris ensures smooth installation of the new lock. This step keeps the door safe and functional.
Clean Up Debris
Clear out all metal shavings and dust from the drilled hole. Use a vacuum or brush to remove tiny particles. Check inside the door cavity for leftover debris. Wipe the area with a cloth to remove fine dust. A clean surface helps the new lock fit well. Debris left behind can cause problems later.
Install New Lock
Choose a lock that fits the drilled hole size. Follow the lock manufacturer’s instructions carefully. Insert the new deadbolt into the door. Secure it with screws tightly to avoid any movement. Test the lock to confirm it works smoothly. Proper installation restores your door’s security and function.
Frequently Asked Questions
How Do I Safely Drill Out A Deadbolt Lock?
To safely drill out a deadbolt, use a power drill with a metal drill bit. Start at the keyhole and drill slowly to avoid damage. Wear safety glasses and keep the drill steady. This method destroys the lock mechanism, allowing removal.
What Tools Are Needed To Drill Out A Deadbolt?
You need a power drill, metal drill bits (3/8-inch recommended), safety glasses, and a screwdriver. A center punch helps mark the drilling spot. These tools ensure efficient and safe removal of the deadbolt lock.
Can Drilling A Deadbolt Damage The Door?
Drilling a deadbolt can damage the door if not done carefully. Use the right drill bit size and drill slowly. Protect the door surface by avoiding excessive pressure. Proper technique minimizes damage and makes lock replacement easier.
How Long Does It Take To Drill Out A Deadbolt?
Drilling out a deadbolt typically takes 5 to 10 minutes. The time varies based on drill power and lock type. With the right tools and technique, the process is quick and straightforward.
Conclusion
Drilling out a deadbolt lock takes patience and care. Use the right tools and follow safety steps closely. Take your time to avoid damaging the door. This method works well when you cannot use a key. Remember to wear safety glasses to protect your eyes.
After drilling, replace the lock with a new one. This keeps your home secure and functional. Always consider calling a professional if unsure about the process. Safety and caution make the job easier and safer.