Are you looking to install a gas ventless wall heater but don’t know where to start? Connecting your heater the right way is crucial for safety and efficiency.
In this guide, you’ll learn simple, step-by-step instructions to hook up your gas ventless wall heater quickly and correctly. Whether you’re a beginner or just need a clear plan, this article will help you avoid common mistakes and keep your home warm without worry.
Keep reading to make sure your heater works safely and smoothly all winter long.

Credit: www.youtube.com
Choosing The Right Location
Choosing the right location for a gas ventless wall heater is very important. The spot you pick affects how well the heater works and keeps your home safe. This section covers key points to help you select the best place for your heater.
Clearance Requirements
Keep enough space around the heater to avoid fire risks. Check the heater’s manual for exact clearance distances. Usually, you need at least 12 inches of space on the sides and top. Do not place anything flammable near the heater. Clear space helps air flow and stops heat damage.
Avoiding Moisture And Drafts
Pick a dry place away from moisture. Moisture can damage the heater and cause safety problems. Avoid areas near windows or doors where drafts happen. Drafts can blow out the flame or lower heating efficiency. A calm, dry spot helps the heater work safely and well.
Gathering Necessary Tools
Gathering the right tools is the first step to hook up a gas ventless wall heater safely. Having everything ready saves time and avoids frustration. It also helps ensure the installation goes smoothly. Below are the main tools and safety gear needed for this job.
Essential Equipment
Start with basic hand tools. You will need a wrench set to tighten fittings and bolts. A screwdriver set is useful for screws and mounting. A drill helps make holes in the wall for mounting brackets.
Use a pipe cutter to trim gas pipes cleanly. A level ensures the heater hangs straight on the wall. Have a tape measure to check distances and clearances. A gas leak detector helps check for leaks after installation.
Safety Gear
Wear protective gloves to avoid cuts and burns. Safety goggles protect eyes from dust and debris. Use a dust mask if drilling into walls to prevent inhaling particles.
Keep a fire extinguisher nearby. It is important in case of gas leaks or sparks. Ensure good ventilation in the work area to avoid gas buildup.
Preparing The Installation Area
Preparing the installation area is the first step to hook up a gas ventless wall heater safely. This step ensures the heater works well and stays secure on the wall. A clean and clear space helps avoid problems during and after installation.
Wall Surface Preparation
Check the wall where the heater will mount. The surface must be flat and strong. Remove any paint, wallpaper, or dirt that might stop the heater from sticking properly. Use a level tool to confirm the wall is even. Fix any holes or cracks with filler and let it dry. This makes the heater stable and safe.
Checking For Obstructions
Look for pipes, wires, or studs inside the wall. These can block the heater or cause damage during installation. Use a stud finder or similar tool to locate them. Mark areas to avoid drilling or cutting. Keep the space around the heater free from furniture or curtains. This allows good airflow and safe operation.

Credit: www.esseg.eu
Connecting The Gas Supply
Connecting the gas supply to a ventless wall heater is a critical step. It ensures the heater works safely and efficiently. This process requires care and attention to prevent leaks and accidents. Follow each step closely to secure a proper gas connection.
Shutting Off Gas Main
Start by turning off the main gas valve. This stops the gas flow and keeps the area safe. Use a wrench if needed to close the valve fully. Double-check that no gas is coming out before you continue. This step protects you and your home from gas leaks.
Attaching Gas Line Safely
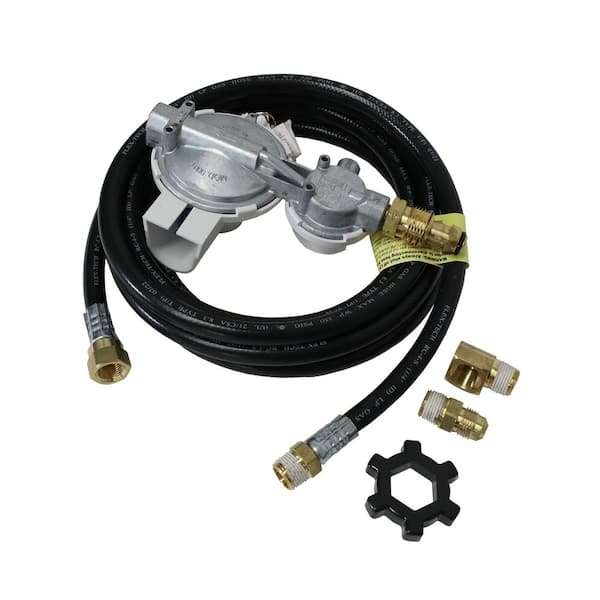
Use the correct gas line for your heater model. Connect the gas pipe to the heater’s inlet carefully. Tighten fittings with a wrench but do not over-tighten. Use pipe thread sealant or tape designed for gas connections. This prevents leaks and ensures a strong, secure fit.
Leak Testing Procedures
After connecting the gas line, test for leaks immediately. Mix water and dish soap in a spray bottle. Spray the solution on all joints and connections. Watch for bubbles forming, which signal a gas leak. If bubbles appear, tighten fittings and test again. Never skip this step for safety reasons.
Mounting The Heater
Mounting the gas ventless wall heater is a key step in the installation process. Proper mounting ensures the heater stays secure and works efficiently. It also keeps the unit safe for daily use. Follow these steps carefully to mount your heater correctly.
Securing The Unit To The Wall
Start by choosing the right spot on the wall. Check the wall material for strong support. Use screws and anchors that fit the heater’s weight. Mark the holes on the wall using the heater’s mounting bracket. Drill holes carefully and insert anchors if needed. Attach the mounting bracket securely to the wall. Hang the heater on the bracket and check if it holds tight. Double-check all screws for a firm fit.
Leveling And Alignment
Use a level tool to check the heater’s position. The unit must be straight to work well and look good. Adjust the heater until it is perfectly horizontal. Make small changes by loosening screws slightly. Once aligned, tighten all screws again. Confirm the heater does not tilt or lean. Proper alignment helps with safety and heat distribution.
Credit: www.homedepot.com
Electrical Connections
Electrical connections are a key part of installing a gas ventless wall heater. Safe and correct wiring ensures the heater works well. It also prevents electrical problems and hazards. Pay close attention to the power needs and wiring details. This helps your heater perform safely and efficiently.
Power Requirements
Most gas ventless wall heaters need a dedicated power source. Check the heater’s label for voltage and amperage. Usually, 120 volts with a 15-amp circuit is common. Some models require 240 volts. Confirm the power rating before wiring. Use a circuit breaker that matches the heater’s needs. This protects the wiring and your home.
Wiring Tips
Turn off power before starting any wiring work. Use a voltage tester to be sure wires are not live. Follow the heater’s wiring diagram exactly. Connect the hot, neutral, and ground wires carefully. Use wire nuts to secure connections. Avoid loose or exposed wires. Use electrical tape for extra safety. Keep wires neat and away from heat sources. Double-check all connections before restoring power. Proper wiring keeps your heater safe and reliable.
Final Safety Checks
Final safety checks are crucial after installing a gas ventless wall heater. These checks ensure the heater works safely and efficiently. A proper inspection reduces risks like gas leaks or fire hazards. Take your time to verify all safety features and test the heater’s operation before regular use.
Ventless Heater Safety Features
Ventless heaters include built-in safety features. An oxygen depletion sensor (ODS) stops the heater if oxygen levels drop. A flame failure device shuts off gas if the flame goes out. These features prevent dangerous conditions and protect your home. Check these sensors by following the manufacturer’s instructions carefully. Ensure no blockages or damage to the sensors.
Testing Heater Operation
Turn on the heater and watch it closely. The flame should be steady and blue, not yellow or flickering. Listen for unusual noises like hissing or popping sounds. Smell for any gas odor near the heater. If you detect gas, turn off the heater immediately. Test the oxygen depletion sensor by lowering oxygen levels slightly, if the manual allows it. The heater should shut off automatically. Confirm all controls and switches work smoothly.
Maintenance Tips
Maintaining your gas ventless wall heater is key for safety and efficiency. Regular care keeps the heater working well and prevents problems. Simple steps can extend the life of your heater and save money on repairs.
Regular Cleaning
Dust and dirt can block vents and reduce heat output. Clean the heater’s surface and vents every month. Use a soft cloth and mild soap to wipe away dust. Avoid harsh chemicals or water inside the unit. Check the air filter and clean or replace it as needed. This helps air flow and keeps the heater running smoothly.
Troubleshooting Common Issues
Sometimes, the heater may not light or produce heat. Check the gas supply and ensure the valve is open. Inspect the pilot light and clean the thermocouple if dirty. Listen for strange noises or smells that could signal a problem. If the heater shuts off unexpectedly, it may need a sensor check. Regular checks help catch issues early and keep your home warm and safe.
Frequently Asked Questions
How Do I Safely Connect A Gas Ventless Wall Heater?
To connect a gas ventless wall heater safely, turn off the gas supply first. Follow the manufacturer’s instructions precisely. Use proper fittings and secure connections. Test for leaks with a soap solution. Ensure the area is well-ventilated to prevent carbon monoxide buildup.
What Tools Are Needed For Ventless Wall Heater Installation?
Common tools include a drill, screwdriver, adjustable wrench, pipe cutter, and gas leak detector. A level and measuring tape help with accurate placement. Always wear safety gear like gloves and goggles during installation. Proper tools ensure a secure and safe setup.
Can I Install A Ventless Heater Without A Professional?
DIY installation is possible if you have plumbing and gas experience. However, hiring a licensed professional is recommended for safety and code compliance. Incorrect installation risks gas leaks and fire hazards. Always check local regulations before proceeding on your own.
How To Test For Gas Leaks After Installation?
Use a soap and water solution on all gas connections. Look for bubbles indicating leaks. Alternatively, use a gas leak detector for higher accuracy. Never use an open flame to check for leaks. If leaks are found, tighten fittings or call a professional.
Conclusion
Hooking up a gas ventless wall heater can be simple with clear steps. Always follow safety rules and local codes. Double-check all connections for leaks or damage. Use the right tools to avoid mistakes. Test the heater before full use to ensure it works well.
Proper care helps the heater last longer and stay safe. Keep these tips in mind for a warm, cozy space this winter.