Do you have a plug-in light that you wish had a switch? Imagine turning your light on and off without unplugging it every time.
Adding a switch to your plug-in light is easier than you think, and it can make your daily routine much smoother. In this guide, you’ll learn simple steps to add a switch safely and quickly. Keep reading, and soon you’ll have full control over your light with just a flick of a switch.

Credit: www.youtube.com
Tools And Materials Needed
Adding a switch to a plug-in light needs some basic tools and materials. Preparing these items before starting makes the work easier and safer.
Choosing the right tools and parts is important. It helps to get a good result and avoid problems later.
Essential Tools
You will need a few tools to complete the job. A screwdriver is necessary to open the plug and fix the switch. Wire strippers help remove the plastic cover from wires without damage. A pair of pliers is useful for bending and holding wires. A voltage tester ensures no electricity flows while working. Tape can cover exposed wires for safety.
Choosing The Right Switch
Select a switch made for electrical use. A simple toggle or rocker switch works well. The switch must match the voltage and current of the light. Check the switch’s rating on its label. Choose a switch that fits the size and style of your plug-in light. A switch with clear ON and OFF markings helps usability.
Selecting Suitable Wiring
Use wires that fit the power needs of your light. Usually, 18 or 16 gauge wires work for small lights. Make sure the wires have good insulation to prevent shocks. Copper wires are best for conductivity and safety. Cut wires long enough to connect the switch and plug without tension. Avoid old or damaged wires to keep everything safe.
Safety Precautions
Working with electricity can be risky. Safety must come first. Taking the right precautions protects you and your home. This section shows key steps to stay safe while adding a switch to a plug-in light.
Power Off Procedures
Always turn off the power before starting. Switch off the wall outlet or circuit breaker. Use a tester to check no current flows. Never rely on the switch alone. Confirm power is off to avoid shocks.
Handling Electrical Components Safely
Handle wires and parts with care. Avoid touching exposed metal parts. Use tools with insulated handles. Keep your hands dry. Work slowly and do not rush. Proper care prevents accidents and injuries.
Using Insulation And Protective Gear
Wear rubber gloves to block electricity. Use safety glasses to protect your eyes. Wrap wires with electrical tape after connecting. Use insulated wire connectors to cover joins. Proper insulation stops shorts and sparks.
Preparing The Plug And Light
Preparing the plug and light is the first step to add a switch safely. You need to handle the parts carefully. This ensures the switch will work well and the setup stays safe. Take your time to check each component before starting the wiring.
Removing The Plug Cover
Start by unplugging the light from the power source. Use a screwdriver to remove the screws on the plug cover. Keep the screws safe so you can use them later. Gently lift the cover off to see the wires inside. Avoid pulling on the wires to prevent damage.
Identifying Wiring Connections
Look closely at the wires inside the plug. Usually, there are three wires: live, neutral, and ground. The live wire is often brown or red. The neutral wire is blue or black. The ground wire is green or yellow-green. Knowing these colors helps you connect the switch correctly.
Checking The Light Fixture
Examine the light fixture for any damage or loose parts. Check the wires inside the fixture. Make sure they are not frayed or broken. Tighten any loose screws that hold the wires. A secure connection keeps the light working properly and safely.

Credit: diy.stackexchange.com
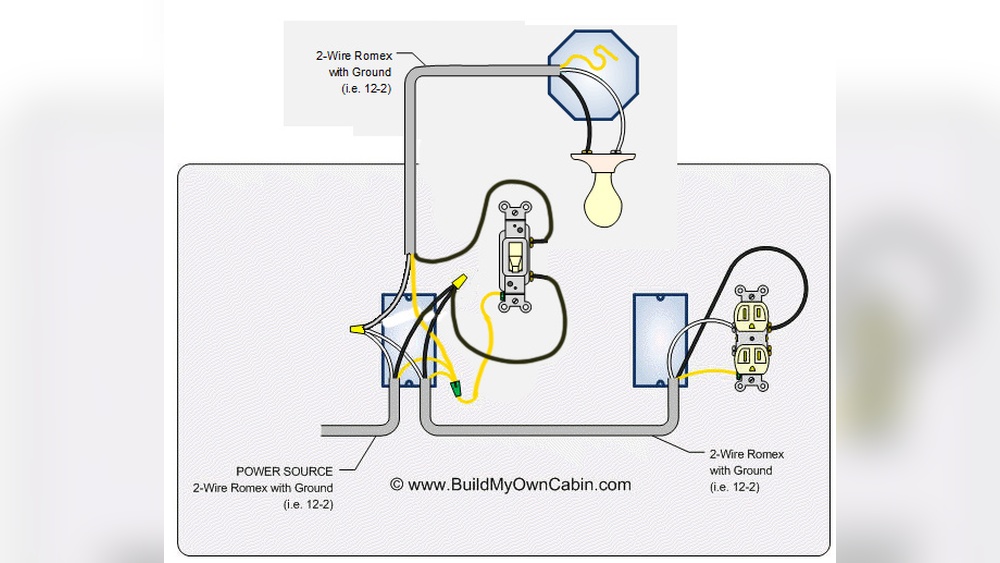
Wiring The Switch
Wiring the switch is a key step in adding control to your plug-in light. This part involves handling wires safely and making solid connections. Take your time to follow each step carefully. Proper wiring ensures your switch works well and stays safe.
Cutting And Stripping Wires
Start by cutting the cord where you want to place the switch. Use wire cutters to make a clean cut. Next, strip about one inch of the outer insulation from each cut end. Be careful not to damage the inner wires. Then, strip about half an inch of insulation from each inner wire. This exposes the copper needed for connection.
Connecting Wires To The Switch
Identify the terminals on your switch. Connect one stripped wire end to one terminal. Attach the other stripped wire end to the second terminal. Make sure the copper wires are fully wrapped around the terminals. Avoid loose or twisted wires that might cause poor contact. Tighten the screws on the terminals firmly.
Securing Wire Connections
After connecting wires, check for any loose strands. Use electrical tape to wrap the connections securely. This prevents short circuits and keeps wires in place. You may also use wire nuts for added safety. Finally, place the wires and switch inside the switch cover. Screw the cover tightly to finish the installation.
Testing The Installation
Testing the installation is a key step after adding a switch to a plug-in light. It ensures the connection works safely and correctly. This step helps avoid future problems and confirms the switch controls the light as expected.
Restoring Power
Start by turning the power back on at the circuit breaker. Make sure the area is dry and safe. Plug the light into the outlet. Check that power is flowing to the plug before testing the switch.
Checking Switch Functionality
Flip the switch on and off. Notice if the light turns on and off with the switch. The light should respond immediately to each switch movement. If it does, the installation works correctly.
Troubleshooting Common Issues
If the light does not turn on, check all connections. Make sure wires are tight and connected to the right terminals. Test the switch with a multimeter to see if it is working. Replace the switch if it is faulty. Confirm the power is still on if problems continue.

Credit: www.youtube.com
Final Assembly And Tips
After wiring the switch, focus on the final assembly. This step ensures safety and functionality. Careful assembly prevents loose parts and electrical hazards.
Follow these tips for a neat and secure finish. Proper mounting and maintenance keep your light working well.
Reassembling The Plug
Place all wires back inside the plug carefully. Avoid pinching or bending wires sharply. Tighten screws to hold wires firmly. Check that no bare wire is exposed. Close the plug cover securely to prevent dust and moisture entry.
Mounting The Switch
Choose a flat surface near the plug for the switch. Use screws or adhesive, depending on switch type. Ensure the switch is easy to reach and operate. Avoid placing it near water or heat sources. Test the switch by turning the light on and off.
Maintenance Advice
Check the switch and plug regularly for damage. Clean dust and dirt with a dry cloth only. Do not use water or wet cloths on electrical parts. Tighten any loose screws during inspections. Replace the switch if it shows signs of wear or sparks.
Frequently Asked Questions
How Do I Add A Switch To A Plug-in Light?
To add a switch, first unplug the light. Cut the live wire, connect each end to the switch terminals. Secure connections and test the switch before plugging back in.
What Tools Are Needed To Install A Switch On A Plug-in Light?
You’ll need a wire cutter, screwdriver, wire strippers, and a single-pole switch. Also, use electrical tape or wire nuts to secure connections safely.
Can I Add A Dimmer Switch Instead Of A Regular Switch?
Yes, you can add a dimmer switch if the light is compatible. Ensure the dimmer matches the bulb type and wiring for proper operation.
Is It Safe To Install A Switch On A Plug-in Light?
Yes, if you follow safety steps. Always unplug the light first and use insulated tools. Double-check connections and avoid overloading the switch.
Conclusion
Adding a switch to a plug-in light is simple and useful. It lets you control the light easily without unplugging. Always turn off power before starting work. Use the right tools for safety. Follow each step carefully to avoid mistakes.
This small change saves time and adds convenience. Try it yourself and enjoy better light control. Small projects like this build confidence and skills. Keep learning, and your home will feel smarter and safer.