Are you tired of dim rooms or dark corners in your home? Adding an extra light and switch can brighten up your space and make your daily life easier.
But you might be wondering, “Is it complicated? Can I do it myself? ” The good news is, with the right steps, you absolutely can. You’ll discover simple, clear instructions that anyone can follow. By the end, you’ll know exactly how to add that extra light and switch safely and efficiently.
Ready to transform your space with better lighting? Let’s get started!
Choosing The Right Light
Choosing the right light is key to a successful lighting upgrade. The right light improves visibility and sets the room’s mood. It also helps save energy and lowers costs. Understanding basic features guides you to pick the perfect light for your needs.
Types Of Extra Lights
There are many types of extra lights to choose from. LED lights last long and use less energy. Incandescent bulbs give warm light but consume more power. Fluorescent lights are bright and efficient but need special fixtures. Pick a type based on your room and purpose.
Brightness And Wattage
Brightness shows how much light a bulb gives. It is measured in lumens, not watts. Wattage tells how much energy the bulb uses. A higher lumen means more light. Choose brightness based on the room size and use. Avoid bulbs that are too bright or too dim.
Energy Efficiency
Energy-efficient lights save money and reduce waste. LED bulbs use the least power and last many years. Choose bulbs with an Energy Star label for quality assurance. Energy-saving lights help the environment and lower electricity bills. Pick bulbs that balance brightness and efficiency well.
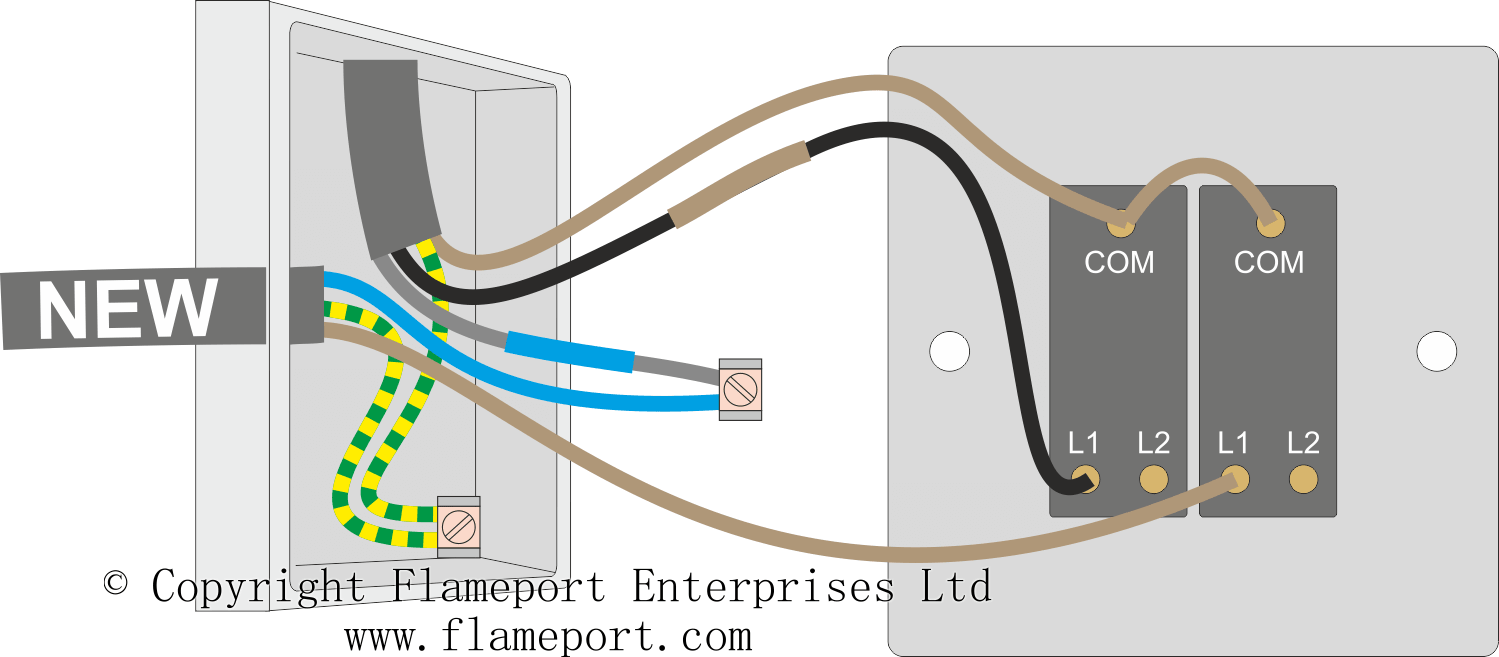
Credit: flameport.com
Selecting The Switch
Selecting the right switch is key to adding an extra light in your home. The switch controls the light’s power, so it must work well with your setup. Choosing the correct type makes your new light easy to use and safe. Think about where you want the switch and what kind of wiring you have. This helps to pick a switch that fits your needs and wiring system. Let’s explore the main points to consider when selecting a switch for your new light.
Switch Types
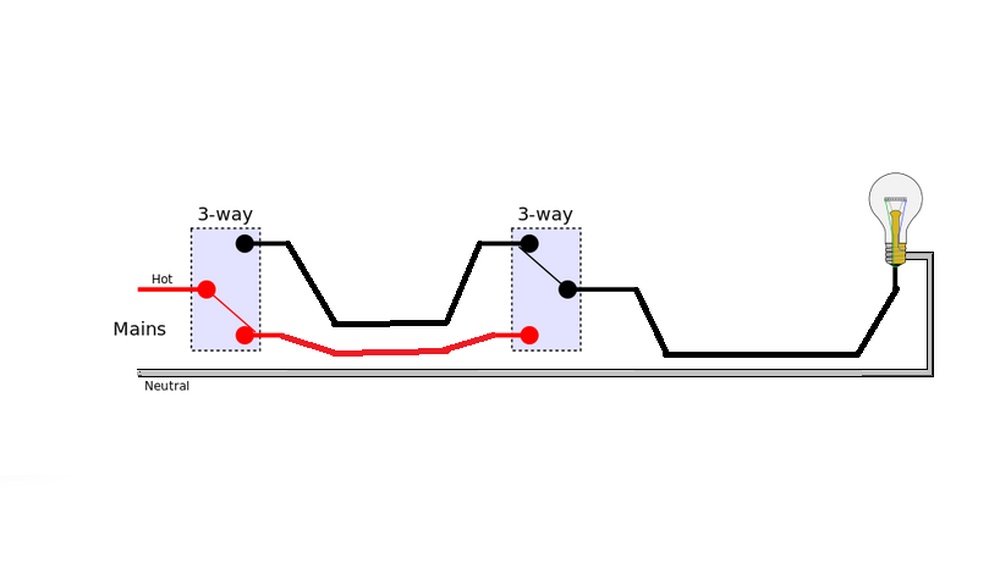
Several switch types suit different lighting needs. A single-pole switch is the simplest. It turns the light on or off from one place. A three-way switch lets you control the light from two spots. This is great for hallways or stairs. Dimmer switches adjust the brightness. They add comfort and save energy. Choose a switch type based on how you want to control the light.
Location Considerations
Place the switch where it is easy to reach. Near doors is the most common spot. Avoid places that get wet or are hard to access. Outdoor switches need to be weatherproof. Think about who will use the switch and how often. The right location makes the switch convenient and safe for everyone.
Compatibility With Wiring
Check your home’s wiring before buying a switch. Most homes use standard wiring that fits common switches. Some switches need a neutral wire, which older homes might not have. Make sure the switch matches your wiring type. Using the wrong switch can cause problems or be unsafe. If unsure, ask an electrician to help.
Gathering Tools And Materials
Before starting to add an extra light and switch, gather all necessary tools and materials. Proper preparation helps the work go smoothly. It also keeps you safe and saves time. Below are the key items to prepare for this project.
Essential Tools
Get the right tools for the job. You will need a screwdriver to open switch plates and secure wires. Wire strippers help remove insulation without damaging wires. A voltage tester checks if wires carry current. Pliers help twist wires and hold small parts. A drill may be needed to make holes for mounting. Having these tools ready makes the work easier and safer.
Safety Gear
Safety matters most when working with electricity. Wear insulated gloves to protect from shocks. Safety glasses shield your eyes from dust and sparks. Use non-slip shoes to avoid falls. Work in a well-lit area to see clearly. Having safety gear reduces risks during the project.
Materials Checklist
Prepare all materials before starting. You need a new light fixture suitable for your space. Buy a compatible switch to control the light. Electrical wires must match your home’s wiring size and type. Wire nuts help connect wires safely. Electrical tape secures wire nuts and adds protection. A junction box may be needed to hold connections. Check every item twice to avoid missing parts.
Planning The Wiring Route
Planning the wiring route is a key step to add an extra light and switch safely. It helps you understand where wires should go. Careful planning saves time and prevents problems later. You need to think about the path for the wires. Also, check how the new light will connect to your current electrical system. This process keeps your home safe and your project neat.
Tracing Existing Circuits
Start by finding the existing circuits in your home. Use a circuit tester to check which wires carry power. This helps you know where to tap the new light. Follow the wires from your breaker box to the current lights and switches. Mark these paths to avoid confusion. Knowing the circuit layout stops you from cutting power to the wrong places.
Determining Power Source
Choose a power source for the new light and switch. This source should be close to the new light’s location. Pick a circuit with enough capacity for extra load. Avoid overloading the circuit to prevent tripping breakers. You might use the same circuit as nearby lights or switches. Confirm the power source is off before you start working.
Avoiding Electrical Hazards
Safety is the top priority when planning wiring routes. Keep wires away from water pipes and heat sources. Use proper protective casing for all wires. Check for any nails or screws that might damage the wires. Use insulated tools and wear gloves while working. Turn off the main power before touching any wires. These steps prevent shocks and fire risks.
Installing The Extra Light
Installing an extra light in your home or workspace can improve visibility and safety. The process involves securely mounting the light, connecting the wires properly, and testing to make sure it works. Follow these steps to install your new light efficiently and safely.
Mounting The Light Fixture
Choose a sturdy place for your light fixture. Use a drill to make holes for screws. Attach the fixture firmly to the wall or ceiling. Make sure it is stable and points in the right direction. Double-check the fixture does not move or wobble.
Connecting Wires Safely
Turn off the power at the circuit breaker. Use a voltage tester to confirm no electricity flows. Match the wires by color: black to black, white to white, and green or bare wire to ground. Twist the wires together and secure with wire nuts. Wrap connections with electrical tape for extra safety.
Testing Light Functionality
Turn the power back on at the breaker. Flip the new light switch to test the fixture. Look for steady, bright light without flickering. If the light does not turn on, check wire connections again. Ensure the switch and fixture are working properly before finishing.

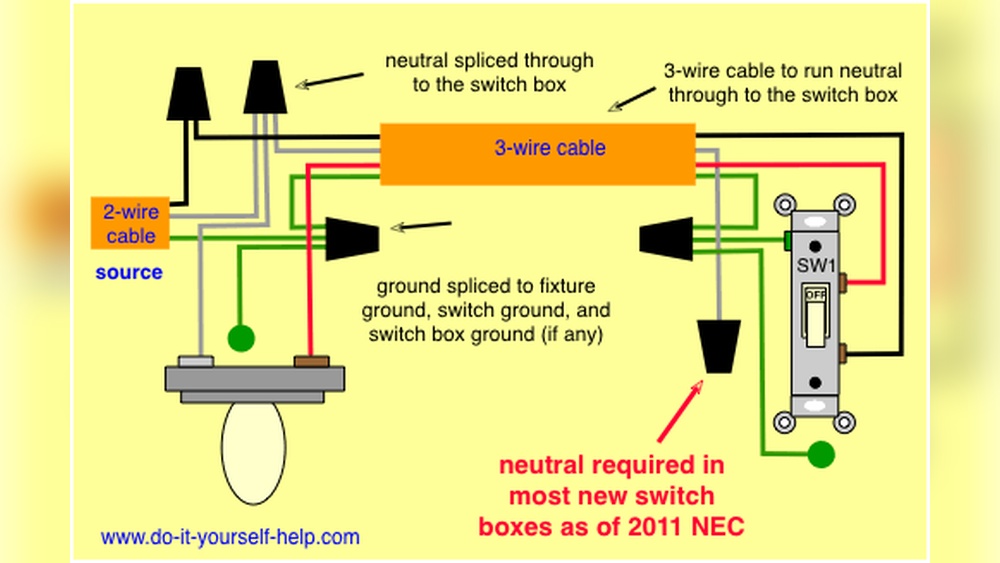
Credit: www.do-it-yourself-help.com
Wiring The Switch
Wiring the switch is a key step to add an extra light and switch. It controls the flow of electricity and turns the light on or off. This process involves preparing the switch box, connecting the wires correctly, and testing the switch to ensure it works well.
Switch Box Preparation
Start by turning off the power at the circuit breaker. Use a voltage tester to confirm no electricity flows. Remove the cover plate from the switch box. Clear out any debris or old wiring. Make sure there is enough space for the new switch and wires.
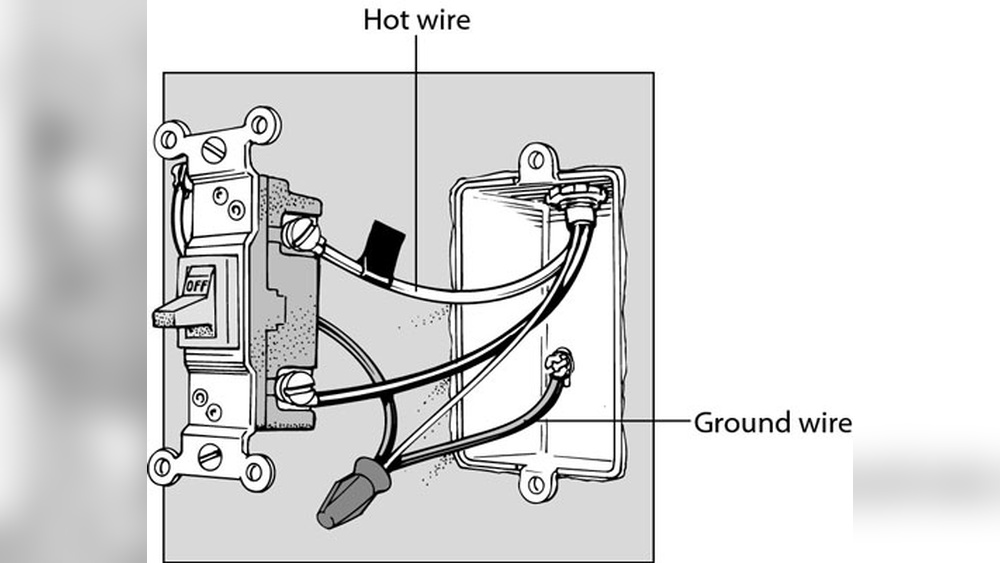
Connecting Switch Wires
Identify the hot wire, neutral wire, and ground wire. Connect the hot wire to the switch’s terminal. Attach the neutral wire to the wire bundle in the box. Connect the ground wire to the green screw on the switch. Use wire nuts to secure all wire connections tightly.
Securing And Testing The Switch
Carefully push the wires into the switch box. Screw the switch into place using the mounting screws. Attach the cover plate back on. Turn the power back on at the breaker. Flip the switch to test if the light turns on and off smoothly.
Safety Tips And Precautions
Adding an extra light and switch can brighten a room and improve convenience. Safety is very important during this task. Taking the right steps protects you and your home from electrical hazards. Follow these safety tips to work carefully and avoid accidents.
Electricity can be dangerous. Small mistakes can cause shocks or fires. Always prepare properly before starting any electrical work.
Turning Off Power
Always turn off the power at the main circuit breaker. This stops electricity from flowing to the wires you will work on. Double-check that the power is off before touching any wires or devices. Never trust that a switch alone cuts off power.
Using Voltage Testers
Use a voltage tester to confirm no electricity is present. Test the wires you plan to connect or touch. Voltage testers are easy to use and very reliable. This step gives extra safety beyond turning off the power.
Avoiding Common Mistakes
Do not connect wires without checking their colors and functions. Avoid mixing live, neutral, and ground wires. Use proper tools and secure all connections tightly. Do not skip reading instructions for your light and switch. Taking shortcuts can cause serious problems later.
Troubleshooting Common Issues
Troubleshooting is key when adding an extra light and switch. Small mistakes can stop your new light from working. Checking common problems saves time and frustration. This guide helps you find and fix issues fast.
Light Not Turning On
First, check if the bulb is working. Replace it with a new bulb if needed. Next, test the power source. Make sure the circuit breaker is on. Confirm the light fixture is properly connected. A faulty bulb or no power often causes this issue.
Switch Problems
Check if the switch clicks when you flip it. No sound may mean a broken switch. Use a voltage tester to see if power reaches the switch. Replace the switch if there is no power flow. Loose or damaged switches stop the light from working.
Loose Connections
Turn off the power before checking wires. Loose wires can stop the light or switch from working. Tighten all wire nuts and screws. Look for frayed or damaged wires. Secure connections ensure a safe and steady power flow.

Credit: www.youtube.com
Frequently Asked Questions
How Do I Safely Add An Extra Light And Switch?
Turn off power at the circuit breaker before starting. Use proper tools and follow wiring diagrams. Connect the new light and switch to the existing circuit carefully. Test the connections before restoring power to ensure safety and functionality.
What Tools Are Needed To Add An Extra Light And Switch?
You need a screwdriver, wire stripper, voltage tester, electrical tape, wire nuts, and a drill. These tools help safely cut, strip, connect, and secure wiring for the light and switch installation.
Can I Install An Extra Light Without An Electrician?
Yes, if you have basic electrical knowledge and follow safety guidelines. Always turn off power first. Use proper wiring techniques and tools. If unsure, consult a professional to avoid hazards.
How Do I Choose The Right Switch For An Extra Light?
Select a switch compatible with your light type and circuit voltage. Common options include single-pole switches for simple on/off control. Ensure the switch rating matches the electrical load for safe operation.
Conclusion
Adding an extra light and switch improves your home’s brightness. It makes rooms safer and more comfortable. The steps are simple and clear to follow. Always remember to turn off power before starting work. Using the right tools helps you finish quickly and safely.
Taking your time ensures a neat and lasting result. Now, you can enjoy better lighting in your space. Try this project to enhance your home easily.