Are you tired of dealing with a soap dispenser that keeps slipping or falling off your tile wall? Anchoring a soap dispenser securely might seem tricky, but with the right steps, you can make it stay put for good.
Imagine having your soap right where you need it—stable, handy, and neat. In this guide, you’ll learn simple, practical tips to anchor your soap dispenser firmly to your tile wall. Keep reading to discover how a few easy tricks can save you time, frustration, and keep your space looking clean and organized.
Tools And Materials Needed
Anchoring a soap dispenser to a tile wall needs the right tools and materials. Using proper equipment makes the task easier and safer. It also helps ensure the dispenser stays firmly attached.
Below are the key tools and materials needed to complete the job well. Prepare them before starting to save time and avoid interruptions.
Essential Tools
- Drill with a carbide or diamond-tipped bit for tile
- Screwdriver (manual or electric)
- Measuring tape or ruler
- Level to keep the dispenser straight
- Marker or pencil for marking drill points
- Wall anchors and screws
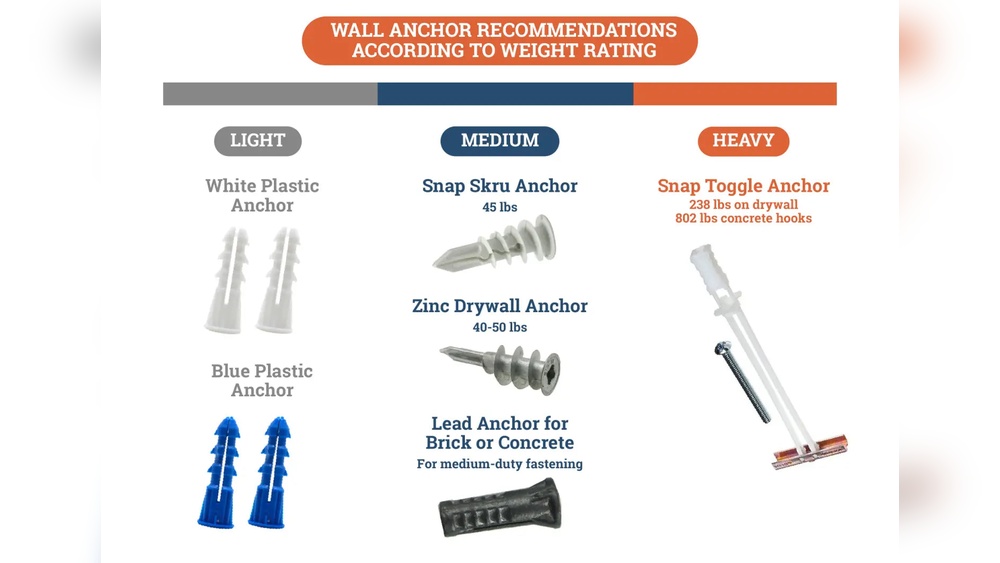
Recommended Anchors And Screws
Use anchors made for tile or masonry walls. Plastic or metal anchors work well. Choose anchors that fit the screw size and weight of the dispenser.
Stainless steel or coated screws resist rust and last longer. Pick screws about 1.5 to 2 inches long. They provide a strong hold without cracking the tile.
Safety Gear
- Safety goggles to protect eyes from dust and debris
- Dust mask to avoid inhaling tile particles
- Gloves for hand protection during drilling

Credit: kuishi.com
Preparing The Tile Wall
Preparing the tile wall is a key step before anchoring a soap dispenser. It ensures the dispenser stays secure and lasts long. Proper preparation prevents damage to the tiles and makes installation easier. Follow these simple steps to get your tile wall ready.
Choosing The Right Spot
Pick a spot that is easy to reach and use. Avoid areas near corners or edges of tiles. These spots may crack or chip during drilling. Choose a flat, stable tile surface for best results.
Cleaning The Surface
Clean the tile surface thoroughly before marking or drilling. Use a mild detergent and water to remove dirt and grease. Wipe the area dry with a soft cloth. A clean surface helps the anchor stick better and prevents slipping.
Marking Drill Points
Use a pencil or marker to mark where you will drill holes. Measure carefully to keep the dispenser level and centered. Double-check the marks before drilling. Accurate marking saves time and avoids mistakes.
Drilling Into Tile
Drilling into tile requires care and the right tools. Tiles are hard and can crack easily. Preparing properly helps keep the tile intact and creates a strong hold for your soap dispenser. Follow these steps to drill cleanly and safely.
Selecting The Drill Bit
Choose a drill bit made for tile or glass. Carbide-tipped or diamond-tipped bits work best. Avoid regular wood or metal bits. They can crack the tile or wear out quickly. Match the drill bit size to the wall anchor size for a tight fit.
Drilling Tips For Tiles
Start by marking the spot with a pencil. Use masking tape over the mark to prevent slipping. Drill slowly and keep the drill steady. Do not push hard; let the bit do the work. Pause often to cool the bit and avoid overheating.
Avoiding Tile Damage
Keep the drill speed low to reduce heat and cracks. Use water or a damp cloth to cool the drill bit. Avoid drilling near tile edges to prevent chips. If you feel the tile cracking, stop and reassess. Proper technique ensures a clean hole without damage.
Installing The Anchor
Installing the anchor is a key step in mounting a soap dispenser on a tile wall. A strong anchor holds the dispenser securely, preventing it from falling. This process requires careful choice of anchor type, precise insertion, and firm securing.
Types Of Anchors For Tile
Plastic anchors are common for light loads and simple to use. Metal anchors offer stronger support for heavier dispensers. Toggle anchors expand behind the tile, giving extra grip. Choose an anchor based on the dispenser weight and wall type.
Inserting The Anchor
Start by drilling a hole slightly smaller than the anchor. Use a drill bit designed for tile to avoid cracks. Clean dust from the hole to help the anchor fit well. Push the anchor gently into the hole until it sits flush with the tile surface.
Securing The Anchor Firmly
Insert the screw into the anchor carefully. Turn the screw slowly to expand the anchor inside the wall. Stop tightening when the anchor feels solid and does not move. Check the anchor by giving a gentle pull to ensure it is secure.
Mounting The Soap Dispenser
Mounting a soap dispenser on a tile wall needs care and precision. Proper mounting keeps the dispenser secure and easy to use. Follow clear steps to attach it safely without damaging the tiles.
Aligning The Dispenser
Start by choosing the right spot on the tile wall. Hold the dispenser against the wall. Use a level to make sure it sits straight. Mark the holes where the screws will go. Accurate marks help avoid drilling errors.
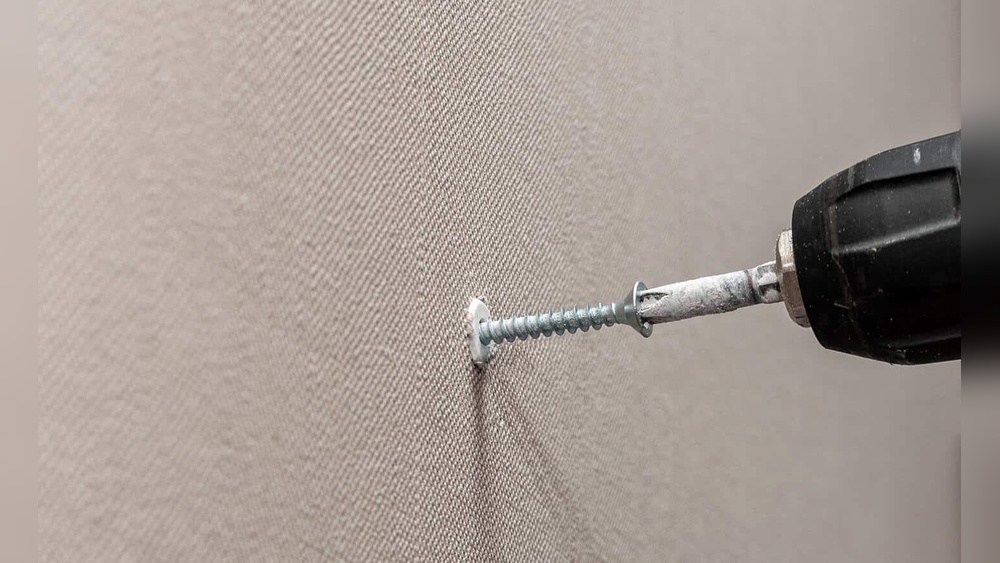
Attaching With Screws
Drill holes carefully using a masonry bit. Insert wall anchors into the holes for better grip. Place the dispenser back and align the holes. Screw it in gently to avoid cracking tiles. Tighten screws until the dispenser feels firm.
Checking Stability
Test the dispenser by pressing the pump a few times. Check if it moves or feels loose. Tighten screws more if needed. A stable dispenser lasts longer and works better every day.

Credit: kuishi.com
Maintenance Tips
Keeping your soap dispenser secure on a tile wall requires regular care. Proper maintenance helps avoid damage and extends its life. Follow simple steps to keep everything in place and working well.
Cleaning Around The Dispenser
Wipe the area around the dispenser often. Use a soft cloth with mild soap and water. Avoid harsh chemicals that can damage tiles or grout. Dry the surface completely to stop water spots and mold.
Tightening Loose Screws
Check the screws regularly for any looseness. Use a screwdriver to tighten them gently. Do not force the screws too hard to avoid cracking the tile. Secure screws keep the dispenser stable and safe to use.
Preventing Tile Cracks
Avoid hitting or leaning heavily on the dispenser. Use anchors made for tile walls to spread the weight. Do not overtighten screws, as this can cause cracks. Regular checks help spot small cracks early for quick repair.

Credit: kuishi.com
Frequently Asked Questions
How Do You Anchor A Soap Dispenser On A Tile Wall?
To anchor a soap dispenser on tile, use a drill with a masonry bit. Insert wall anchors into drilled holes. Attach the dispenser securely with screws, ensuring it’s level and stable for daily use.
What Tools Are Needed To Mount A Soap Dispenser?
You need a drill, masonry bit, screwdriver, wall anchors, and screws. A level helps position the dispenser evenly. These tools ensure a secure and professional installation on tile walls.
Can I Install A Soap Dispenser Without Drilling Tiles?
Yes, use strong adhesive strips or mounting tape designed for tiles. However, this may be less durable and not suitable for heavy dispensers. Drilling provides a more permanent and stable anchor.
How To Avoid Cracking Tiles When Drilling Holes?
Use a masonry bit and drill slowly with steady pressure. Place masking tape over drilling spots to prevent slipping. Mark the spot clearly and avoid excessive force to protect tile integrity.
Conclusion
Anchoring a soap dispenser on a tile wall is simple with the right steps. Use the correct tools and anchors for strong support. Mark the spots carefully before drilling to avoid mistakes. Take your time to keep tiles safe and prevent cracks.
A well-anchored dispenser stays secure and lasts longer. This small task improves your bathroom’s function and look. Try these tips to install your soap dispenser with confidence. You’ll enjoy a neat, tidy space every day.