Are you ready to hang your favorite pictures, plants, or decorations but unsure how to put hook screws in your wall correctly? Getting it right the first time saves you from unnecessary holes and keeps your walls looking neat.
In this guide, you’ll discover simple, step-by-step tips that anyone can follow—no special tools or experience needed. By the end, you’ll feel confident and ready to tackle your next project with ease. Let’s make your walls work for you!
Credit: todayshomeowner.com
Choosing The Right Hook Screws
Choosing the right hook screws is key to a strong and safe hold. The right hook screw fits the wall type and the object’s weight. It also lasts longer without damage. Understanding your options helps you pick the best hook screw for your project.
Types Of Hook Screws
Hook screws come in many shapes and sizes. Common types include cup hooks, screw hooks, and ceiling hooks. Cup hooks have a rounded end, good for hanging cups or light items. Screw hooks have an open curve, useful for heavier items. Ceiling hooks are designed for overhead hanging.
Matching Hook Screws To Wall Material
Different walls need different hook screws. Drywall requires anchors or special screws to hold weight. Wooden walls allow direct screwing. Masonry or concrete walls need wall plugs or anchors. Picking the right screw for the wall avoids damage and ensures safety.
Size And Weight Considerations
The size of the hook screw depends on the weight of the item. Small screws hold light objects like keys or decorations. Large, heavy-duty screws support heavy items like plants or shelves. Always check the weight limit on the hook screw package before buying.
Gathering Necessary Tools
Before you start putting hook screws in your wall, gather the right tools. Having the correct tools makes the job easier and safer. It also helps you avoid mistakes that can damage the wall.
Drill And Drill Bits
A drill is essential for making holes in the wall. Choose a drill with enough power to handle your wall type. Use drill bits that match the size of your hook screws. This ensures a snug fit and strong hold.
Wall Anchors And Plugs
Wall anchors or plugs support the hook screws in soft or hollow walls. They prevent screws from pulling out easily. Select anchors that fit your wall type and screw size. This step adds strength and stability to your hooks.
Measuring And Marking Tools
Use a tape measure or ruler to measure exact spots for your hooks. Mark these spots with a pencil for clear guidance. Accurate measuring prevents uneven or misplaced screws. This keeps your wall looking neat and organized.
Preparing The Wall
Preparing the wall is an important first step before putting hook screws in. It ensures the screws hold firmly and safely. Taking time to prepare the wall helps avoid damage and keeps the hook steady.
Locating Studs Or Solid Areas
Find studs or solid parts inside the wall. Studs are wooden or metal frames that hold the wall. Screwing into them gives the best support for heavy hooks. Use a stud finder tool or tap the wall. A solid sound means a stud is nearby.
Marking Drill Points
Mark exact points where you want to drill holes. Use a pencil to make small marks on the wall. Measure the spacing carefully. Accurate marks help place the hooks straight and balanced. This step saves time and prevents mistakes.
Checking For Electrical Wires And Pipes
Check for wires and pipes inside the wall before drilling. Drilling into them can cause injury or damage. Use a wire detector or pipe scanner to find hidden cables. Avoid marked areas to keep the wall safe. Safety first.
Drilling Pilot Holes
Drilling pilot holes is a key step before putting hook screws in the wall. These small holes guide the screw and stop the wall from cracking. They make the screwing process easier and protect your wall.
Correct pilot holes help the hook screw grip tightly. This keeps your hooks strong and safe to hold items.
Choosing The Right Drill Bit Size
Pick a drill bit slightly smaller than the hook screw’s shaft. This lets the screw threads bite into the wall. A bit too big makes the screw loose. Too small can cause the wall to split.
Match the drill bit size to the screw size for a firm hold.
Drilling At Correct Depth
Drill the hole as deep as the hook screw’s length. Mark the drill bit with tape to stop drilling too deep. Too shallow a hole makes it hard to insert the screw. Too deep wastes effort and weakens the wall.
Cleaning Drill Debris
Remove dust and debris from the hole before inserting the screw. Use a small brush or blow air into the hole. Clear holes help screws go in smoothly and hold better.
Cleaning the hole prevents weak grips and wall damage.
Inserting Anchors
Inserting anchors into a wall is a key step for hanging hook screws securely. Anchors provide extra support and keep the hook stable. They prevent the screw from pulling out, especially in drywall or hollow walls. Understanding how to use anchors helps your hooks hold heavy items safely.
Types Of Wall Anchors
There are several types of wall anchors. Plastic expansion anchors work well for light loads. They expand inside the wall when the screw goes in.
Toggle bolts have wings that open behind the wall. They hold tight in hollow spaces. Molly bolts are metal anchors that expand as you tighten the screw.
Choose the right anchor based on your wall type and the weight you want to hang.
Installing Anchors Properly
First, mark the spot for your hook screw. Drill a hole matching the anchor size. Clean out dust from the hole before inserting the anchor.
Push the anchor into the hole until it is flush with the wall. Use a hammer gently if needed. Avoid forcing the anchor, or the wall might crack.
Ensuring Secure Fit
Insert the hook screw into the anchor slowly. Turn it clockwise to tighten. The anchor will expand and grip the wall inside.
Stop tightening when the hook feels firm. Test by pulling lightly on the hook. It should not wiggle or come loose.
Proper fit keeps your items safe and your wall damage-free.

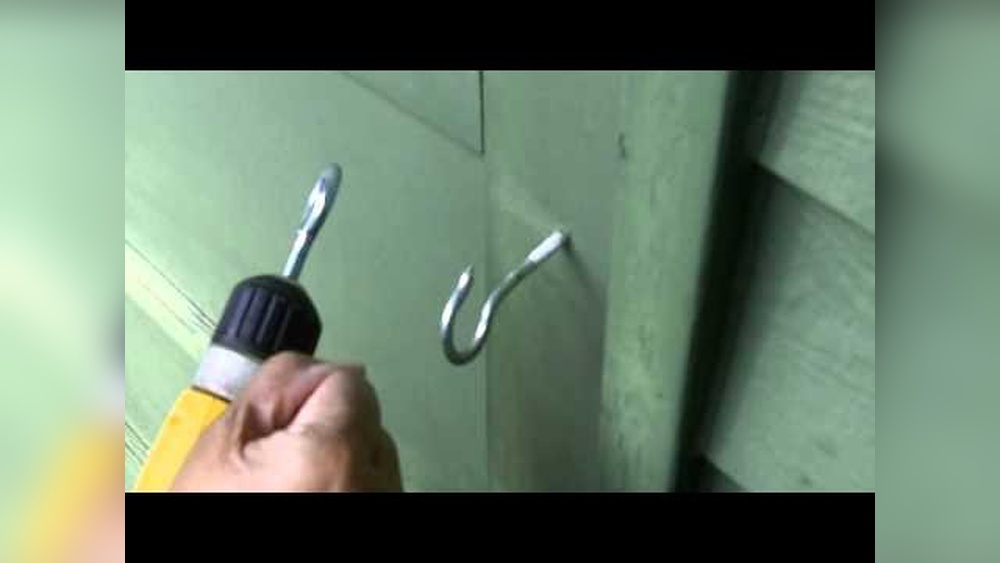
Credit: diy.stackexchange.com
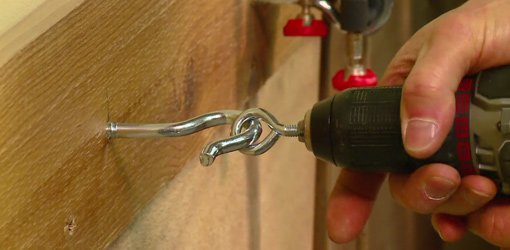
Screwing In The Hook Screws
Screwing in hook screws is a simple but important step. It ensures the hook holds strong on the wall. Doing this correctly helps prevent damage and keeps your items safe. Follow these tips for a secure fit.
Hand Vs. Power Tools
Using hand tools gives you more control. You feel the wall and screw better. It is safer for delicate walls. Power tools save time and effort. They work best for tough or thick walls. Choose based on your wall type and comfort.
Aligning The Hook Screw
Start by placing the hook screw straight. Keep it vertical to avoid weak spots. A crooked screw may not hold weight well. Use your eyes or a small level. Proper alignment means better grip and strength.
Tightening For Maximum Hold
Turn the hook screw slowly and firmly. Stop when it feels tight and secure. Avoid over-tightening, which can damage the wall. Check that the hook does not wobble. A firm hold keeps your items safe and steady.
Testing Stability
Testing the stability of hook screws is a crucial step after installation. It ensures the hook can hold the intended weight safely. This process helps avoid accidents and damage to walls or items hung.
Applying Gradual Weight
Start by hanging a light object on the hook screw. Use something lighter than the final weight. Slowly increase the weight step-by-step. Observe how the hook and wall respond to each increase.
Checking For Movement
Look closely for any wiggle or shift in the hook screw. Slight movement may show the hook is not secure. Watch the wall around the screw for cracks or damage. Any sign of movement means the hook needs attention.
Adjusting Or Reinforcing If Needed
If the hook moves or the wall shows stress, fix it right away. Tighten the screw carefully without overdoing it. Use wall anchors or plugs for extra support. Choose the right anchor for your wall type. Re-test stability after making adjustments.
Safety Tips And Best Practices
Putting hook screws in the wall needs care and safety. Following best practices protects you and keeps your work strong. This section shares key safety tips and simple rules to follow. Use these ideas to work safely and get good results.
Protective Gear
Wear safety glasses to protect your eyes from dust and debris. Gloves protect your hands from sharp screw tips and tools. Use a dust mask if drilling creates fine dust. Closed-toe shoes protect feet from dropped tools or screws. Dress in comfortable clothes that cover your arms and legs.
Avoiding Common Mistakes
Check the wall for pipes or wires before drilling. Use a stud finder to find solid support for the hook screw. Do not force the screw if it feels stuck; try a smaller pilot hole. Choose the right screw size for the weight you want to hang. Avoid twisting the screw too hard to prevent wall damage.
Maintaining Hook Screws Over Time
Check hook screws regularly for looseness or rust. Tighten loose screws carefully without over-tightening. Clean screws to remove dust and dirt for better grip. Replace any damaged or rusty screws quickly. Keep the hanging item’s weight within the screw’s limit to avoid accidents.

Credit: www.wikihow.com
Frequently Asked Questions
How Do I Choose The Right Hook Screw Size?
Select a hook screw based on the weight and size of the object. Use thicker screws for heavier items. Match the screw length to wall thickness for secure holding. Always check the packaging for weight limits and screw dimensions before purchase.
What Tools Are Needed To Install Hook Screws?
You need a drill, screwdriver, pencil, wall anchors, and a measuring tape. A drill helps make pilot holes. Anchors provide extra support in drywall. Use a pencil to mark the spot. Screwdrivers help insert the hook screw securely.
Can I Put Hook Screws In Drywall Without Anchors?
Hook screws can hold light items in drywall without anchors. For heavier objects, anchors are necessary to prevent damage. Anchors distribute weight and improve stability. Always assess the object’s weight before skipping anchors to avoid wall damage.
How Do I Prevent Wall Damage When Installing Hook Screws?
Use a drill to create a pilot hole before inserting the screw. Choose the correct wall anchors for your wall type. Avoid over-tightening the screw to prevent cracking. Mark the spot carefully to avoid unnecessary holes. This ensures secure, damage-free installation.
Conclusion
Putting hook screws in a wall is simple with the right steps. Start by choosing the right spot and tools. Mark the spot, drill a small hole, then screw in the hook carefully. Check that the hook feels secure before hanging anything.
Taking your time helps avoid mistakes and keeps things safe. Practice makes it easier each time you try. Now, you can hang pictures, plants, or other items neatly on your wall. Enjoy your space with your new hooks in place!