Are you ready to add a hook to your wall but not sure where to start? Screwing a hook into a wall might seem simple, but doing it the right way can save you time, effort, and damage to your walls.
Whether you want to hang a picture, a plant, or your keys, this guide will walk you through each step clearly and easily. By the end, you’ll feel confident and ready to tackle the job like a pro. Keep reading, and let’s get that hook securely in place!
Choose The Right Hook
Choosing the right hook is the first step to hang items safely and securely. Different hooks serve different purposes. Picking the correct one makes the process easier. It also protects your walls from damage. Knowing the types of hooks and their weight limits helps you make a smart choice.
Types Of Hooks
Hooks come in many shapes and sizes. Some are simple metal hooks. Others have adhesive backs or special designs. Common types include cup hooks, screw-in hooks, and picture hooks. Cup hooks work well for hanging cups or small items. Screw-in hooks are strong and fit into wood or drywall. Picture hooks have a small nail and a hook to hold frames.
Weight Capacity
Each hook has a weight limit. This limit shows how much weight the hook can hold safely. Small hooks often hold only a few pounds. Larger, heavy-duty hooks can support more weight. Check the packaging or product details to find this limit. Choosing a hook with a suitable weight capacity avoids accidents. It also keeps your items secure on the wall.
Select The Best Wall Spot
Selecting the best spot on the wall for your hook is important. It ensures strong support and safety for hanging items. A good spot prevents damage to the wall and holds your hook firmly. Take time to check the wall before drilling. This step makes the whole process easier and more effective.
Finding Studs
Studs are wooden beams inside the wall. They provide strong support for heavy items. Use a stud finder tool to locate studs behind the wall. Move the tool slowly and mark where it detects a stud. Hooks drilled into studs hold better and last longer. Avoid drywall alone when hanging heavy objects.
Avoiding Hazards
Walls hide wires and pipes that can be dangerous. Use a wire detector or pipe finder before drilling. Avoid spots near electrical outlets and switches. Check the area visually for any signs of plumbing. Drilling into wires or pipes can cause injury or damage. Choose a safe spot to protect yourself and your home.
Gather Necessary Tools
Gathering the right tools makes screwing a hook into a wall much easier. Having everything ready helps you work faster and cleaner. It also reduces mistakes and keeps the wall safe from damage. Here’s a list of what you need and what might help.
Required Tools
- Hook screw – Choose the right size and type for your wall.
- Drill or screwdriver – To insert the hook securely.
- Wall anchors – Use for drywall or hollow walls for extra support.
- Measuring tape – To mark the exact spot for the hook.
- Pencil – For marking the drill point on the wall.
Optional Helpers
- Stud finder – Helps locate wooden studs behind the wall.
- Level – Ensures your hook is straight.
- Hammer – Useful for tapping in wall anchors gently.
- Safety glasses – Protect your eyes from dust and debris.
- Step stool or ladder – Helps reach high spots safely.
Prepare The Wall Surface
Preparing the wall surface is the first step to screw a hook firmly. A clean and well-marked wall helps the hook stay secure. Taking time now makes the process easier and prevents mistakes later.
Cleaning The Area
Start by wiping the wall with a dry cloth. Remove dust, dirt, and grease from the spot. Use a damp cloth if needed, then let it dry completely. A clean surface helps the hook hold better. Avoid using harsh chemicals that can damage the paint or wall.
Marking The Spot
Choose the exact place to screw the hook. Use a pencil to mark a small dot on the wall. Make sure the spot is level and at the right height. Accurate marking prevents holes in the wrong place. Double-check before drilling or screwing to avoid errors.
Drill Pilot Holes
Drilling pilot holes is an important step before screwing a hook into a wall. It helps guide the screw and prevents the wall from cracking. A pilot hole makes it easier to insert the screw straight and tight. This process saves time and keeps your hook secure.
Choosing Drill Bits
Select a drill bit slightly smaller than the screw’s diameter. This size creates a hole that fits the screw snugly. Use a wood bit for wooden walls and a masonry bit for brick or concrete walls. Avoid using a drill bit that is too large, or the screw will not hold well.
Drilling Techniques
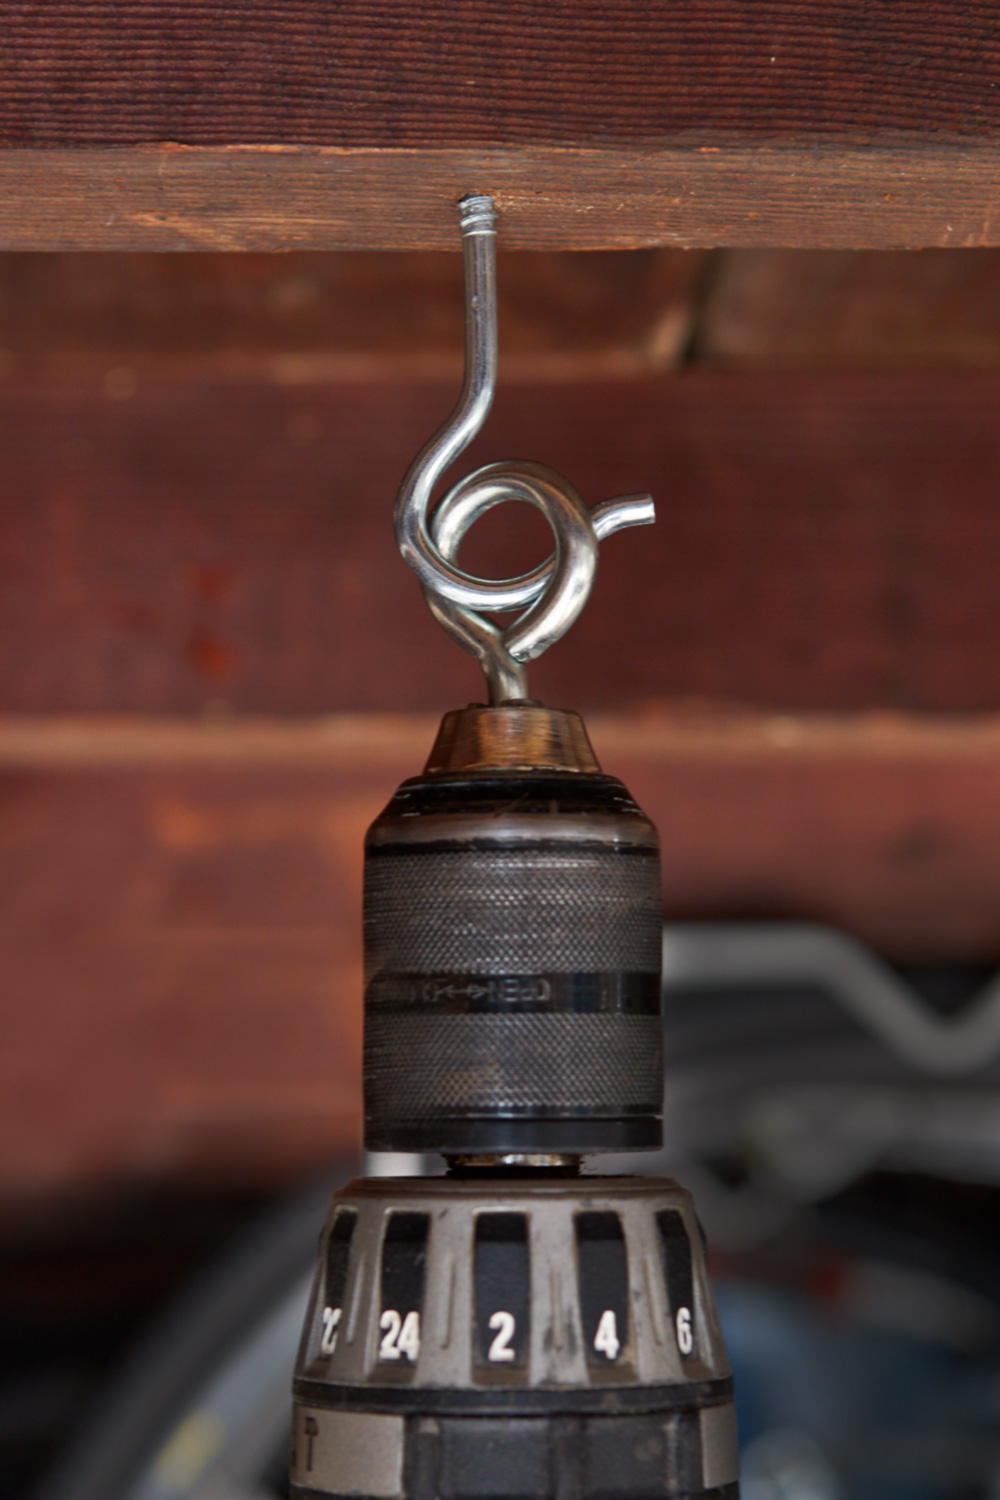
Hold the drill steady and straight at the marked spot. Start drilling slowly to avoid slipping. Apply gentle pressure and let the drill do the work. Drill to the depth of the screw’s length. Clean out any dust from the hole before inserting the screw.
Credit: www.manmadediy.com
Insert Anchors If Needed
Inserting anchors is important for strong support when screwing hooks into walls. Anchors help hold the hook firmly, especially on drywall or hollow walls. They prevent the hook from pulling out or making the wall weak.
Types Of Anchors
Plastic anchors suit light to medium loads. They expand inside the wall for a firm grip. Metal anchors handle heavier weights and last longer. Molly bolts spread behind the wall for extra support. Toggle bolts use wings that open inside the wall for strong hold.
Proper Installation
Choose the right anchor size for your hook and wall type. Drill a hole slightly smaller than the anchor. Push the anchor into the hole until it is flush with the wall. Insert the screw through the hook and into the anchor. Tighten the screw carefully to avoid damaging the wall or anchor.
Screw In The Hook
Screwing a hook into a wall is a simple task that anyone can do. It just needs some care and the right tools. This step is important to make sure the hook stays strong and holds what you hang on it safely.
Hand Vs. Power Tools
Using your hand to screw in a hook works well for small hooks. It gives you control and feels safer. But it takes more effort and time.
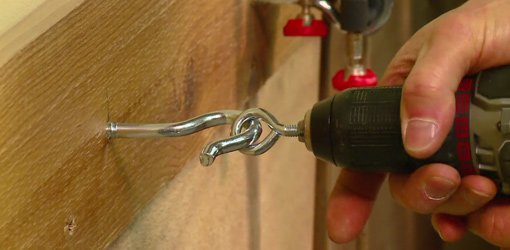
Power tools make the job faster and easier. They are great for larger hooks or harder walls. Be gentle with power tools to avoid damage.
Securing The Hook
Start by turning the hook slowly. Push it into the wall while turning. Keep the hook straight to avoid bending.
Turn until the hook feels tight and does not move. Test the hook by pulling it lightly. If it feels loose, keep tightening carefully.
Credit: todayshomeowner.com
Test Hook Stability
Testing the stability of your hook is important after installation. A secure hook prevents damage and keeps items safe. This step helps you check if the hook holds weight well. It also shows if any changes are needed for better support.
Weight Testing
Start by hanging a light object on the hook. Use something similar in weight to what you plan to hang. Check if the hook stays firm and does not move. Increase the weight gradually to test its strength. Stop if the hook feels loose or wobbly.
Adjustments
If the hook moves or feels weak, remove the item. Tighten the screw or use a larger anchor for better grip. Make sure the hook is straight and fully secured in the wall. Repeat the weight test after any adjustments. A stable hook means it is ready for use.
Tips For Different Wall Types
Different walls need different approaches for screwing a hook. Each wall type has unique features that affect how hooks hold. Knowing the right method keeps the hook secure and the wall safe. Here are tips for drywall, plaster, and concrete walls.
Drywall
Drywall is soft and easy to damage. Use a wall anchor for better hold. Drill a small pilot hole first. Insert the anchor gently into the hole. Screw the hook into the anchor slowly. This stops the drywall from cracking or crumbling.
Plaster
Plaster walls are hard but brittle. Avoid drilling too deep or fast. Make a small pilot hole with a masonry bit. Use a plastic or metal anchor for support. Screw the hook carefully to avoid cracking. Anchors spread the load and prevent damage.
Concrete
Concrete walls are very hard and dense. Use a hammer drill to make a hole. Choose a concrete anchor or sleeve anchor for strong hold. Clean dust from the hole before inserting the anchor. Screw the hook tightly into the anchor. This method keeps the hook firm and secure.

Credit: www.youtube.com
Frequently Asked Questions
How Do I Choose The Right Hook For My Wall?
Select a hook based on wall type and weight load. Use plastic anchors for drywall, and metal anchors for masonry. Choose hooks rated for the item’s weight to ensure safety and durability.
What Tools Do I Need To Screw A Hook Into A Wall?
You need a drill, screwdriver, wall anchors, a hook, and a pencil. A stud finder helps locate studs for better support. A level ensures the hook is straight.
How Do I Find The Best Spot To Install A Hook?
Use a stud finder to locate studs for heavy items. For lighter items, anchors work well in drywall. Mark the spot with a pencil before drilling.
Can I Screw A Hook Directly Into Drywall?
You can, but use wall anchors for extra support. Drywall alone may not hold heavy items securely. Anchors distribute weight and prevent damage.
Conclusion
Screwing a hook into a wall is simple with the right steps. Start by choosing the right hook and tools. Mark the spot clearly before drilling or screwing. Take your time to avoid mistakes and ensure safety. A well-installed hook holds items firmly and lasts longer.
Now, you can hang pictures, keys, or decorations easily. Practice makes the process quicker and more confident. Enjoy a neat and organized space with your new hook!