Are you tired of flicking a single switch and wishing you had control over your lights from another spot? Connecting a 3-way switch to your light lets you do just that—turn your lights on or off from two different places.
Whether it’s for convenience in a hallway, staircase, or large room, this simple upgrade can make your daily life easier. In this guide, you’ll discover clear, step-by-step instructions to help you wire a 3-way switch safely and confidently. Keep reading, and by the end, you’ll have the skills to take control of your lighting like a pro.
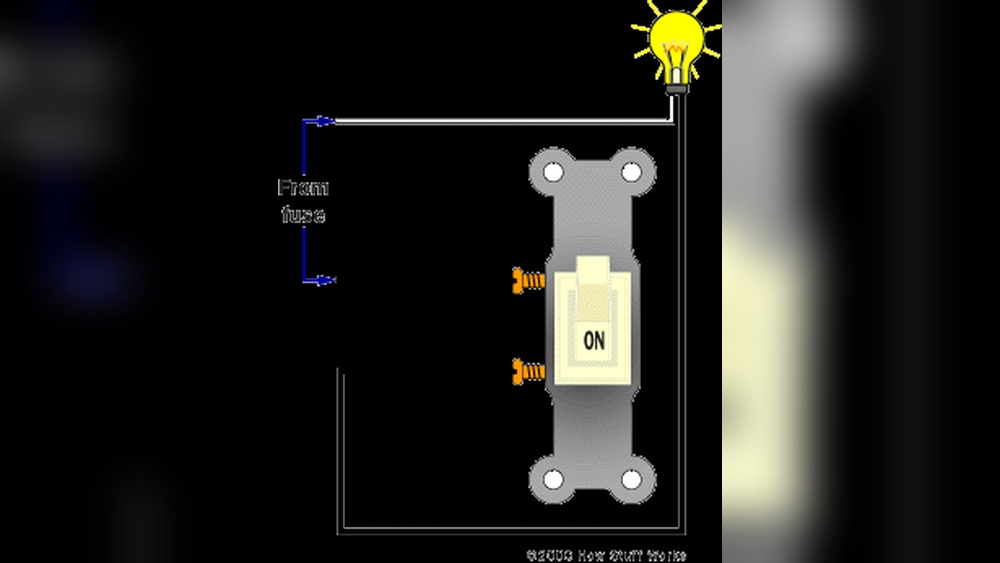
What Is A 3 Way Switch
A 3 way switch controls a light from two different locations. It is common in hallways, staircases, and large rooms. This switch setup adds convenience and flexibility.
You can turn the light on or off from either switch. It helps when you enter a room from different doors. The wiring is different from a regular single switch.
What Does A 3 Way Switch Look Like?
A 3 way switch has three terminals for wires. Two are called traveler terminals, and one is the common terminal. The switch does not have an ON or OFF label.
How Does A 3 Way Switch Work?
The switch connects and disconnects wires to control the light. The traveler wires carry current between the two switches. Flipping either switch changes the light’s state.
Where Are 3 Way Switches Used?
They are used in places with two entrances or exits. Examples include long hallways, staircases, and large rooms. They make controlling lights easier and safer.

Credit: mepacademy.com
Tools And Materials Needed
To connect a 3-way switch to a light, having the right tools and materials is important. These items make the job safer and easier. Preparing everything before starting saves time and reduces mistakes.
Gathering the right tools helps you work with wires and switches correctly. The right materials ensure the electrical connections are strong and last long. Both are key to a successful installation.
Essential Tools
- Screwdriver set – flathead and Phillips for screws
- Wire stripper – removes insulation from wires
- Voltage tester – checks if wires have power
- Needle-nose pliers – bends and holds wires
- Electrical tape – insulates wire connections
- Drill – for mounting switches if needed
- Flashlight – helps see inside dark boxes
Required Materials
- 3-way switches – two switches for this setup
- Light fixture – the light you want to control
- Electrical wire – usually 14/3 or 12/3 cable
- Wire nuts – connect and secure wires together
- Electrical box – holds the switches and wires
- Switch cover plates – finishes the look and protects
Safety Equipment
- Insulated gloves – protect from electric shocks
- Safety glasses – shield your eyes from debris
- Work boots – protect your feet during work
Safety Precautions
Working with electrical wiring can be risky. Safety precautions protect you from shocks and accidents. Follow these rules strictly before starting your project.
Turn Off Power Supply
Switch off the circuit breaker that controls the light. Use a voltage tester to confirm no power flows. Never trust the switch position alone.
Use Proper Tools And Equipment
Choose insulated tools made for electrical work. Wear rubber-soled shoes to reduce shock risk. Avoid metal jewelry or watches during wiring.
Understand Wiring Layout
Study the wiring diagram carefully before touching wires. Know which wire is live, neutral, and ground. Incorrect connections cause shorts or damage.
Work In A Dry Environment
Keep your work area dry and clean. Water and electricity do not mix. Avoid working in damp or wet places.
Double-check Connections
After wiring, inspect all connections for tightness. Loose wires can cause sparks or fire. Use wire nuts and electrical tape securely.
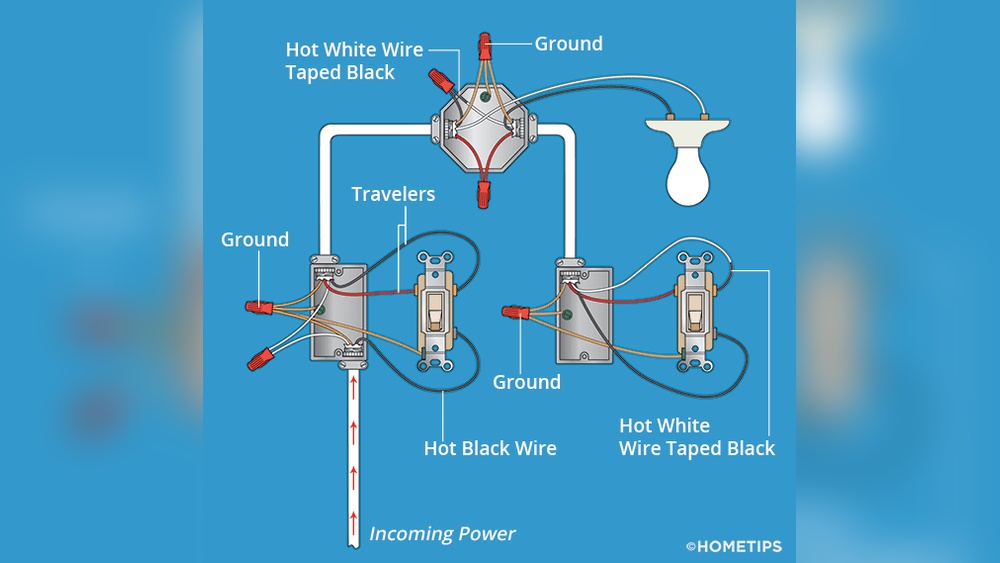
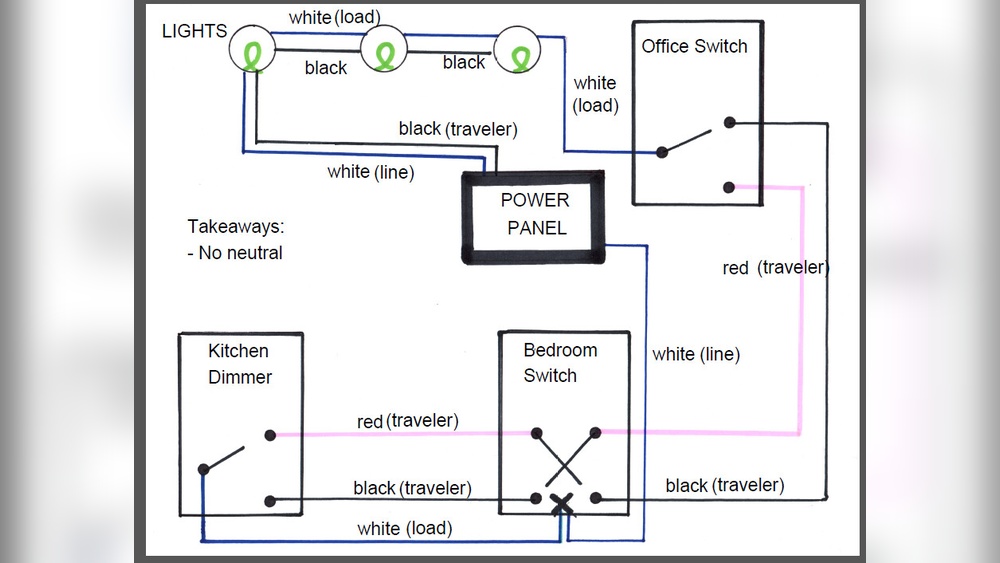
How 3 Way Switch Wiring Works
A 3 way switch lets you control a light from two different places. This is useful in hallways, large rooms, or stairs. The wiring is different from a regular switch. It uses two switches connected by special wires.
Each switch can turn the light on or off. The switches work together by sending electricity through different paths. This makes the light respond to either switch.
Components Of A 3 Way Switch System
A 3 way switch system has two switches and one light fixture. The switches have three terminals. Two are called traveler terminals. One is the common terminal.
The traveler terminals connect the two switches. The common terminal connects to the power source or the light fixture.
Traveler Wires And Their Role
Two traveler wires run between the two switches. They carry electricity in different ways. These wires allow either switch to change the light’s state.
When you flip a switch, it changes the path electricity takes. This either turns the light on or off.
The Common Terminal Explained
The common terminal is key to the switch’s function. On one switch, it connects to the power source. On the other, it connects to the light fixture.
This setup lets electricity flow correctly through the circuit. It controls whether the light receives power.
How Electricity Flows In A 3 Way Circuit
Electricity flows from the power source to the first switch. It travels through traveler wires to the second switch. Then it moves to the light fixture.
Changing either switch flips the flow of electricity. This action turns the light on or off.
Step 1: Turn Off Power
Start by switching off the power at the circuit breaker. This step keeps you safe while working on the wiring. Always double-check that the power is off before touching any wires.
Why Turning Off Power Is Crucial
Working with electrical wiring can be dangerous. Turning off the power stops electricity from flowing. This protects you from shocks and injuries. Always make safety your first priority before starting any electrical work.
How To Turn Off Power Safely
Go to your home’s main electrical panel. Find the circuit breaker that controls the light or switch you will work on. Flip the breaker to the OFF position. This cuts power to the entire circuit.
Double-check Power Is Off
Use a voltage tester or a simple non-contact voltage detector. Touch it to the wires or switch terminals. If no light or signal appears, the power is off. Never skip this step. It confirms your safety before handling wires.

Credit: nassaunationalcable.com
Step 2: Identify Wires
Step 2 is crucial for wiring a 3 way switch correctly. You must identify all wires before making any connections. This helps avoid mistakes and ensures the switch works properly.
Each wire has a specific role. Knowing which wire is which makes the process smoother and safer. Carefully check the wires inside the switch box.
Recognize Common Wire Colors
Most homes use standard colors for wiring. Black wires are usually “hot” and carry power. White wires act as neutral, returning electricity to the panel. Red wires often serve as travelers between switches. Ground wires are green or bare copper and provide safety.
Locate The Traveler Wires
Traveler wires connect the two switches in a 3 way setup. They carry current back and forth to control the light. These wires are often red and black. Identifying them is key to proper wiring.
Identify The Common Terminal Wire
The common terminal holds a special wire. It either brings power from the source or sends power to the light. This wire is usually black but can differ. Look closely to find which wire connects to the common terminal on the switch.
Check The Ground Wire
Ground wires ensure safety by preventing shocks. They are green or bare copper. Connect all ground wires together and attach them to the switch’s grounding screw. Do not skip this step.
Step 3: Connect The First Switch
Start by turning off the power to avoid shocks. Connect the wires to the first switch terminals carefully. Make sure the common wire is attached to the right terminal.
Identify The Wires On The First Switch
Start by turning off the power at the circuit breaker. Safety first.
Remove the switch cover to see the wires clearly. Usually, you will see three wires: one common and two travelers.
The common wire is often darker or marked differently. The other two are traveler wires that connect to the second switch.
Connect The Common Wire
Attach the common wire to the common terminal on the switch. It is usually marked as “COM” or a black screw.
This wire carries power from the source or to the light fixture. Make sure the connection is tight and secure.
Attach The Traveler Wires
Connect the two traveler wires to the remaining terminals. These terminals are usually brass or lighter colored screws.
Traveler wires allow the switches to control the light from two locations. Ensure the wires do not touch each other or the ground.
Secure The Ground Wire
Connect the ground wire to the green grounding screw on the switch. This is important for safety.
If there is no ground wire, check local codes or consult a professional. Grounding helps prevent electrical shocks.
Test The First Switch Connections
Before closing the switch box, turn the power back on. Test the switch by toggling it on and off.
The light may not work yet because the second switch is not connected. This step ensures the first switch wiring is correct.
Step 4: Connect The Second Switch
Next, attach the wires to the second switch’s terminals. Connect the traveler wires and the common wire securely. Ensure all connections are tight for safety and proper function.
Identify The Terminals On The Second Switch
Start by examining the second switch. Notice the three terminals. One is common, and two are traveler terminals. The common terminal usually has a different color screw. This helps to connect the wires correctly.
Connect The Traveler Wires
Take the two traveler wires from the first switch. Attach each to one of the traveler terminals on the second switch. Make sure the connections are tight. Loose wires can cause the switch to fail.
Attach The Common Wire
Find the wire coming from the light fixture. Connect this wire to the common terminal on the second switch. This completes the circuit between the switches and the light.
Secure The Ground Wire
Connect the ground wire to the green screw on the switch. This ensures safety by grounding the switch. If there is no ground wire, check local electrical codes.
Step 5: Connect The Light Fixture
Step 5 involves connecting the light fixture to the 3-way switch setup. This step is key to making sure your light works properly from both switches. Connecting the fixture needs care and attention to detail.
Start by turning off the power at the breaker. Safety first. Then, find the wires coming from the switch setup and the wires on your light fixture. These will connect to each other to complete the circuit.
Identify The Fixture Wires
Most light fixtures have three wires: black, white, and green or bare copper. The black wire is hot, the white is neutral, and the green or bare is ground. Knowing these helps in making the right connections.
Connect The Hot Wire
Connect the black wire from the light fixture to the black or traveler wire from the 3-way switch circuit. This wire carries the current to the light. Use a wire nut to secure the connection tightly.
Connect The Neutral Wire
Join the white wire from the light fixture to the white neutral wire in the circuit. This completes the return path for electricity. Make sure the connection is firm and covered with a wire nut.
Attach The Ground Wire
Connect the green or bare copper wire from the fixture to the ground wire in the switch box. This is important for safety. A secure ground wire helps prevent electrical shocks.
Secure The Light Fixture
After wiring, carefully tuck the wires into the electrical box. Mount the light fixture to the wall or ceiling. Ensure it is tight and stable before restoring power.
Step 6: Test The Switches
Step 6 is crucial in connecting a 3 way switch to a light. Testing the switches ensures the wiring works correctly. It confirms the light turns on and off from both switches. Testing also helps spot any wiring errors early. Safety depends on proper testing before finalizing the setup.
Turn On The Power
First, restore power at the circuit breaker. Do not skip this step. Check that power is fully back on before testing. Use a voltage tester if unsure. This keeps the process safe and accurate.
Test Switch One
Flip the first switch up and down. Watch the light for any changes. The light should turn on and off smoothly. If it does not, recheck the wiring connections.
Test Switch Two
Next, flip the second switch up and down. Again, watch the light carefully. It must turn on and off from this switch too. Failure means a wiring mistake or loose connection.
Check Both Switches Together
Flip both switches in various combinations. The light should respond correctly every time. This confirms the 3 way switch wiring works fully. If issues persist, re-inspect each wire and terminal.
Use A Helper For Faster Testing
Ask someone to watch the light. You operate the switches from different spots. This helps test without moving back and forth. It saves time and makes issues easier to spot.
Troubleshooting Common Issues
Troubleshooting common issues with a 3 way switch can save time and frustration. Problems often occur due to wiring errors or faulty parts. Checking each step carefully helps find the cause. This guide covers the most frequent problems and how to fix them.
Clear understanding and simple tests can restore your light’s function quickly. Keep tools ready and follow safety rules while working on electrical switches.
Checking For Loose Or Wrong Connections
Loose wires cause flickering or no light. Turn off power before touching wires. Tighten any loose screws on terminals. Make sure wires connect to the correct terminals. Use a wiring diagram to match wires properly.
Testing The Switches For Faults
Switches can wear out or break inside. Remove the switch cover and test with a voltage tester. Replace any switch that shows no continuity or irregular reading. Using a new switch often solves the problem.
Identifying Issues With The Traveler Wires
Traveler wires carry current between switches. Damaged or swapped travelers stop the circuit from working. Check for broken or cut wires inside the wall. Swap traveler wires on terminals if the light does not turn on from both switches.
Verifying Power Supply And Circuit Breakers
Power may be off due to a tripped breaker or blown fuse. Check the breaker panel for any switches in the off position. Reset the breaker if needed. Confirm power returns before testing the switches again.
Tips For Maintenance And Upgrades
Maintaining and upgrading a 3-way switch system keeps your lighting safe and efficient. Regular checks prevent problems before they start. Upgrades can improve performance and add new features.
Simple steps help you care for your 3-way switches. Small improvements extend their life and save energy.
Check Switch Connections Regularly
Loose wires cause flickering lights or failure. Turn off power before inspecting. Tighten all screws and terminals. Look for signs of wear or damage. Replace worn parts quickly to avoid hazards.
Use Quality Replacement Parts
Choose switches and wires from trusted brands. Cheap parts may fail fast or cause shorts. Match wire size to the original for safety. Use parts designed for 3-way switch setups.
Upgrade To Smart Switches
Smart switches offer remote control and automation. They fit most 3-way switch systems. Install according to the manufacturer’s guide. Smart switches add convenience without rewiring your home.
Clean Switches And Surroundings
Dust and dirt reduce switch life. Wipe switch plates and nearby areas gently. Avoid water or harsh cleaners near electrical parts. Clean switches work smoothly and look better.
Test Functionality After Maintenance
Always test switches after work. Check that lights turn on and off from both switches. Confirm no flickering or delays. Testing ensures safe and proper operation.

Credit: mepacademy.com
Frequently Asked Questions
What Is A 3 Way Switch And How Does It Work?
A 3 way switch controls one light from two locations. It uses two switches connected by traveler wires. This setup allows turning the light on or off from either switch, enhancing convenience in large or multi-entry rooms.
How Do You Wire A 3 Way Switch To A Light?
Connect the common terminal of the first switch to the power source. Link traveler terminals between both switches. Connect the common terminal of the second switch to the light fixture. Ensure ground wires are connected properly for safety.
Can I Replace A Single Switch With A 3 Way Switch?
Yes, but you need to add a second switch and traveler wires. This allows control of the light from two locations. Proper wiring and safety measures are essential to avoid electrical hazards.
What Tools Are Needed To Install A 3 Way Switch?
You need a screwdriver, wire stripper, voltage tester, and electrical tape. These tools help safely remove old switches, strip wires, and test circuits. Always turn off power before starting installation.
Conclusion
Connecting a 3-way switch to a light is simple with clear steps. Always turn off power before starting work. Follow wiring instructions carefully to avoid mistakes. Double-check connections to ensure the light works from both switches. Taking time and care leads to a safe, functional setup.
Now you can control your light from two places easily. This skill saves time and adds convenience at home. Keep practicing, and wiring will feel easier each time.