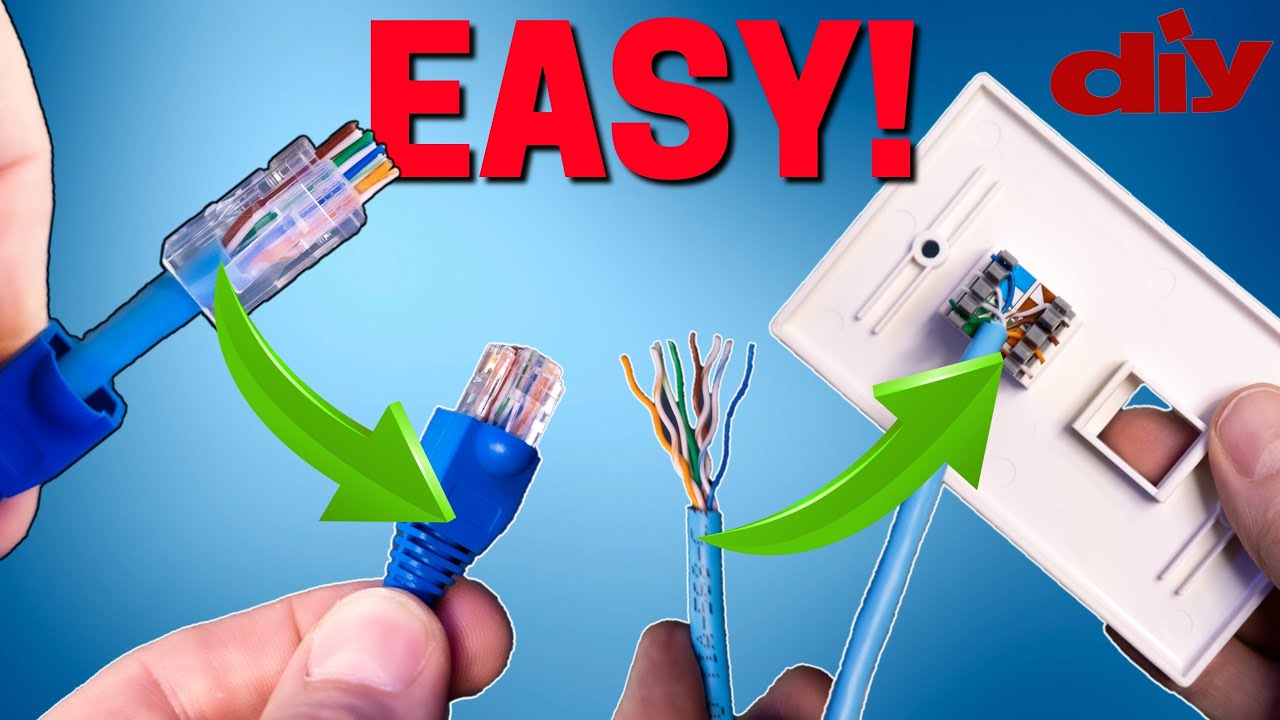
Are you looking to connect your Cat5 cable to a wall plate but don’t know where to start? You’re not alone.
Many people find this task tricky, but it’s easier than you think. With the right steps, you can set up a clean, reliable network connection right from your wall. In this guide, you’ll learn exactly how to hook up your Cat5 cable to a wall plate quickly and correctly.
Keep reading, and you’ll have your network running smoothly in no time.
Credit: www.youtube.com
Tools And Materials Needed
Setting up a Cat5 cable to a wall plate needs the right tools and materials. These help you work faster and avoid mistakes. Knowing what to use makes the job easier and the result better. Below are the key items you will need to complete this task.
Cat5 Cable Types
Cat5 cables come in two main types: solid and stranded. Solid cables have a single wire per conductor. They work well for long, fixed runs inside walls. Stranded cables have many small wires twisted together. They are more flexible and good for short connections. Choose the type that fits your setup and wall plate.
Wall Plate Options
Wall plates vary by style and function. Some have one port, others have multiple. You can find plates with keystone jacks or punch-down blocks. Some plates come with built-in connectors for Cat5 cables. Pick a plate that matches your cable type and installation needs.
Essential Tools
You need a few basic tools to hook up Cat5 cables. A wire stripper helps remove the cable jacket cleanly. A punch-down tool presses wires into the wall plate connectors. Cable testers check if the connection works well. A screwdriver is often needed to mount the wall plate. Having these tools ready saves time and effort.
Preparing The Cat5 Cable
Preparing the Cat5 cable is the first step to connect it properly to a wall plate. This process ensures the cable is the right length and the wires inside are ready for connection. Proper preparation helps avoid issues like poor signals or loose connections.
Measuring And Cutting
Start by measuring the distance from your device to the wall plate. Use a tape measure for accuracy. Cut the Cat5 cable a little longer than the measured length. This extra length helps during installation and adjustments.
Stripping The Outer Jacket
Use a cable stripper or a sharp knife to remove the outer jacket. Be careful not to cut the inner wires. Strip about one inch of the jacket to expose the twisted pairs inside. This step is important for easy access to the wires.
Organizing The Wires
Inside the cable, there are four twisted pairs of wires. Untwist each pair gently and straighten the wires. Arrange them in the correct order based on the wiring standard you use. Proper organization ensures a reliable connection and good signal quality.
Choosing The Wiring Standard
Choosing the right wiring standard is important when hooking up Cat5 cable to a wall plate. It ensures your network works properly and avoids connection problems. Two common wiring standards exist. Each uses a specific color code for the cable wires. Knowing these helps you make the correct connections. This section explains the differences and color codes for each standard.
T568a Vs T568b
T568A and T568B are two wiring standards for Ethernet cables. Both work well for most home and office networks. The main difference is the order of the colored wires inside the cable. T568A is often used in government and residential wiring. T568B is more common in commercial installations. You must use the same standard on both ends of the cable. Mixing them causes network issues and poor performance.
Color Coding Details
The color coding for T568A starts with white/green and green wires. It then uses white/orange and blue wires. The last pairs are white/blue and orange, followed by white/brown and brown. T568B swaps the orange and green pairs. It starts with white/orange and orange wires. Then comes white/green and blue, followed by white/blue and green. The final pair is white/brown and brown. Always follow the color order exactly for a stable connection.

Credit: infinity-cable-products.com
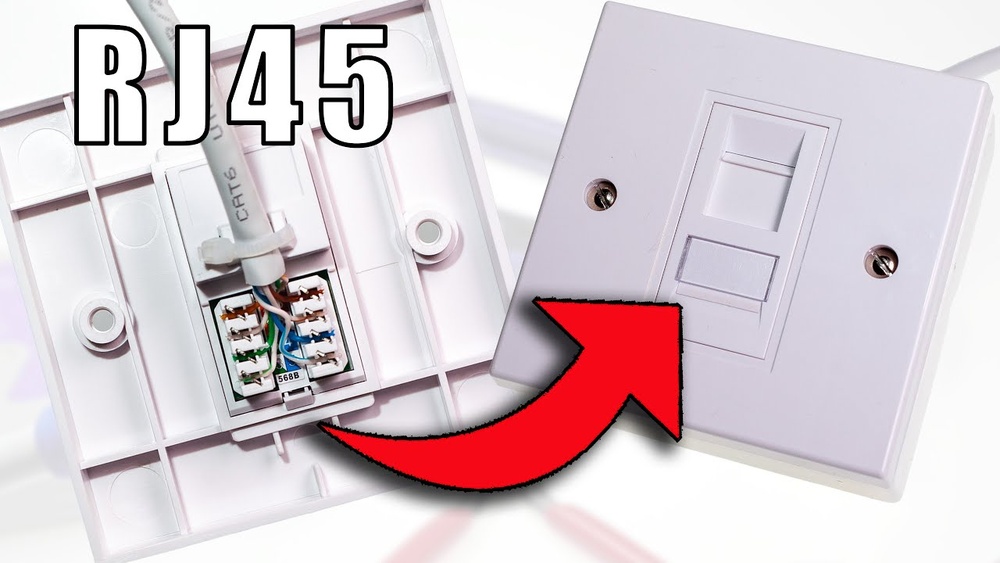
Connecting Wires To The Wall Plate
Connecting wires to the wall plate is a key step in setting up a Cat5 network cable. It ensures proper data flow and strong network signals. This process involves organizing wires, securing them in the terminals, and verifying each connection. Careful work here prevents future network issues and helps maintain good speed.
Aligning Wires With Terminals
Start by sorting the Cat5 cable wires by color. Each wire matches a specific terminal on the wall plate. Follow the color code printed on the plate for accuracy. Hold wires flat and straight to avoid crossing. Align each wire tip with its terminal slot carefully. Proper alignment makes the next step easier and more secure.
Punching Down The Wires
Use a punch-down tool to push wires into the terminals. Press firmly to ensure each wire fits tightly. The tool cuts off extra wire length while securing the wire. Work on one wire at a time, pressing it fully down. This action locks the wire in place and creates a strong electrical connection.
Checking Connections
After punching down, check each wire visually. Look for loose or poorly placed wires. Gently tug each wire to confirm it is secure. Use a network tester to verify the connection quality. A good connection shows no signal loss or errors. Fix any problems before mounting the wall plate.
Mounting The Wall Plate
Mounting the wall plate is a key step in connecting Cat5 cables. This step keeps the cable secure and organized. It also protects the wiring from damage and makes your setup look neat. Proper mounting ensures the connection works well for a long time.
Securing To The Wall Box
Start by aligning the wall plate with the wall box. The wall box holds the plate firmly in place. Use screws to attach the plate to the box. Tighten the screws gently. Avoid over-tightening to prevent cracking the plate.
Check that the plate sits flat on the wall. A secure fit stops the plate from moving. It also prevents strain on the cable connections behind it.
Testing The Connection
After mounting, test the Cat5 cable connection. Use a network cable tester for this task. Plug one end into the wall plate and the other into the tester. The tester checks if all wires connect correctly.
Look for green lights or signals on the tester. This shows the cable is working well. If the tester shows errors, recheck the wiring inside the wall plate.
Troubleshooting Tips
Troubleshooting is key when hooking up Cat5 cable to a wall plate. Small errors can cause big issues like no connection or slow speeds. Knowing how to spot and fix problems saves time and frustration. This section covers common mistakes and useful tools for testing your setup.
Common Mistakes
One frequent mistake is mixing up wire colors. Each wire must follow the correct color order. Another error is not stripping the cable properly, which can damage wires inside. Some people fail to push wires fully into the connectors. Loose connections cause poor signal or no connection. Avoid cutting the cable too short, which leaves no slack for adjustments. Not checking the wall plate fit can lead to bad contact points. Take your time and double-check each step.
Testing Tools To Use
A cable tester is the most helpful tool. It checks continuity and wiring order quickly. A tone generator helps find cable ends inside walls. A multimeter can test voltage and continuity for advanced troubleshooting. Using these tools ensures your cable and connections work correctly. Testing before final installation prevents future issues. Keep these tools handy during any Cat5 cable project.

Credit: www.wikihow.com
Frequently Asked Questions
How Do I Prepare Cat5 Cable For Wall Plate Connection?
Strip about 1 inch of the outer jacket carefully. Untwist pairs and align wires by the T568B standard. This ensures proper signal transmission and easy termination on the wall plate.
What Tools Are Needed To Hook Up Cat5 Cable?
You need a wire stripper, punch-down tool, and a cable tester. These tools help strip, connect, and verify the cable for reliable network performance.
How To Identify The Correct Wiring Scheme For Cat5 Cable?
Use the T568B wiring standard for most residential setups. This standard ensures compatibility and consistent network speed across devices.
Can I Reuse An Old Cat5 Cable With A New Wall Plate?
Yes, if the cable is undamaged and the wiring colors are intact. Inspect carefully and re-terminate using the correct wiring scheme for proper connection.
Conclusion
Connecting Cat5 cable to a wall plate is simple and clear. Follow the steps carefully to ensure a strong connection. Use the right tools and check the cable pairs before attaching. Keep wires neat to avoid problems later. A good setup helps your internet work faster and more stable.
Take your time, and you will do well. This small task can improve your home or office network easily.