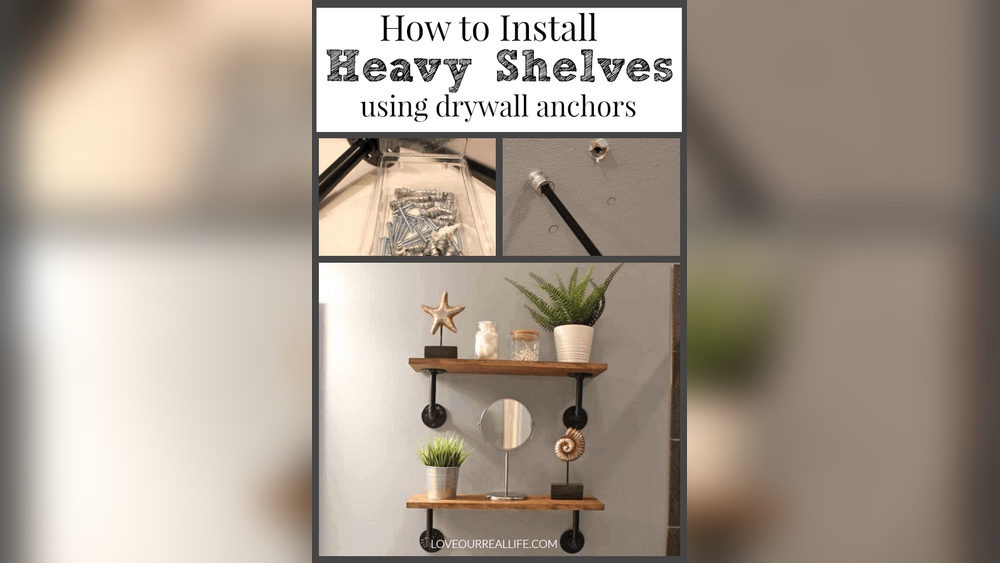
Are you tired of watching your shelves sag or fall off the wall? Installing shelves with wall anchors is the secret to making sure your shelves stay strong and secure, no matter what you put on them.
Whether you want to display your favorite books, plants, or decorations, knowing how to use wall anchors will save you time, money, and frustration. In this guide, you’ll discover simple, step-by-step instructions that anyone can follow—even if you’ve never done it before.
Ready to transform your space with sturdy shelves that last? Keep reading, and you’ll have the confidence to get the job done right.

Credit: www.wikihow.com
Choosing The Right Wall Anchors
Choosing the right wall anchors is key for safe and sturdy shelves. The right anchor keeps shelves strong and prevents damage to your walls. Different walls and shelf weights need different anchors. Understanding your options helps you pick the best one for your project. This guide explains types of anchors, matching them to walls, and weight limits.
Types Of Wall Anchors
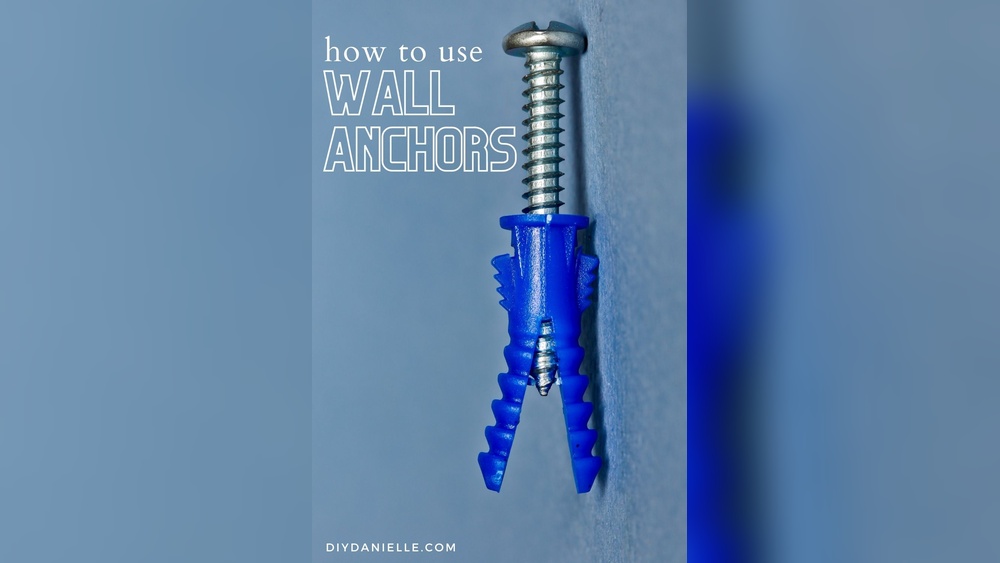
There are several types of wall anchors. Plastic expansion anchors are common for light loads. They expand inside the wall when you insert a screw. Toggle bolts have wings that open inside hollow walls. They hold heavy items well. Molly bolts are metal and provide strong support in drywall. Self-drilling anchors screw directly into drywall without pre-drilling.
Matching Anchors To Wall Material
Walls vary. Drywall, plaster, brick, or concrete all need different anchors. Plastic anchors work best in drywall. Toggle bolts fit hollow walls and provide strong hold. Masonry anchors suit brick or concrete walls. Using the wrong anchor causes weak support or wall damage. Check your wall type before choosing.
Weight Capacity Considerations
Each anchor has a weight limit. Light anchors hold a few pounds. Heavy-duty anchors support more weight. Estimate your shelf load with items included. Choose an anchor rated higher than your shelf’s weight. Overloading anchors causes shelves to fall. Safety starts with correct weight capacity.

Credit: diy.stackexchange.com
Gathering Required Tools And Materials
Before starting to install shelves with wall anchors, gather all necessary tools and materials. Having everything ready saves time and avoids interruptions. It also helps you work safely and efficiently. Below is a clear list of what you will need.
Tools Checklist
- Electric drill or screwdriver
- Drill bits (size depends on anchors)
- Measuring tape
- Level
- Pencil
- Hammer
- Stud finder (optional but helpful)
- Safety goggles
Materials Needed
- Wall anchors (choose type based on wall type)
- Screws matching the anchors
- Shelf brackets
- Shelves
- Wall plugs (if needed)
Preparing The Wall And Shelf
Preparing the wall and shelf is a key step before installation. This process ensures the shelf stays strong and looks neat. Taking time to prepare prevents mistakes and saves effort later. Two main tasks help prepare well: measuring and marking anchor points, and leveling the shelf.
Measuring And Marking Anchor Points
Start by choosing the right spot on the wall for your shelf. Use a tape measure to find the exact position. Measure twice to avoid errors. Mark the points with a pencil where the wall anchors will go. These marks guide drilling holes accurately. Check the wall type to pick suitable anchors. Proper marking prevents uneven shelves and loose fittings.
Leveling The Shelf
Place the shelf against the wall after marking anchor points. Use a spirit level to check if the shelf is straight. Adjust the shelf until the bubble sits in the center of the level. Mark the shelf edges lightly to keep it in place. Leveling keeps the shelf balanced and items safe. A crooked shelf can lead to falling objects and damage.
Drilling Holes For Anchors
Drilling holes for wall anchors is a crucial step in installing shelves securely. Accurate holes ensure the anchors hold tight and support the shelf’s weight. Taking care during this process prevents damage to walls and keeps your shelves stable.
Selecting Drill Bit Size
Choose a drill bit that matches the size of your wall anchors. Check the anchor packaging for recommended drill bit size. Using a bit too small makes the hole too tight. Using a bit too large causes loose anchors and weak support.
Measure the drill bit diameter before starting. Match it exactly to the anchor’s width. This helps the anchor fit snugly in the wall.
Drilling Techniques For Different Walls
Different walls need different drilling methods. For drywall, drill gently to avoid breaking the surface. Stop when the hole reaches the right depth for the anchor.
For concrete or brick walls, use a masonry drill bit. Drill slowly with steady pressure. Let the drill do the work without forcing it.
In wooden walls, drill straight and steady. Avoid pushing hard to prevent splitting the wood. Keep the hole clean of dust for better anchor grip.
Installing Wall Anchors
Installing wall anchors is a key step for mounting shelves safely. They hold the screws firmly in drywall or plaster. This prevents shelves from falling or wobbling. Choose the right anchor type based on your wall and shelf weight.
Inserting Plastic Anchors
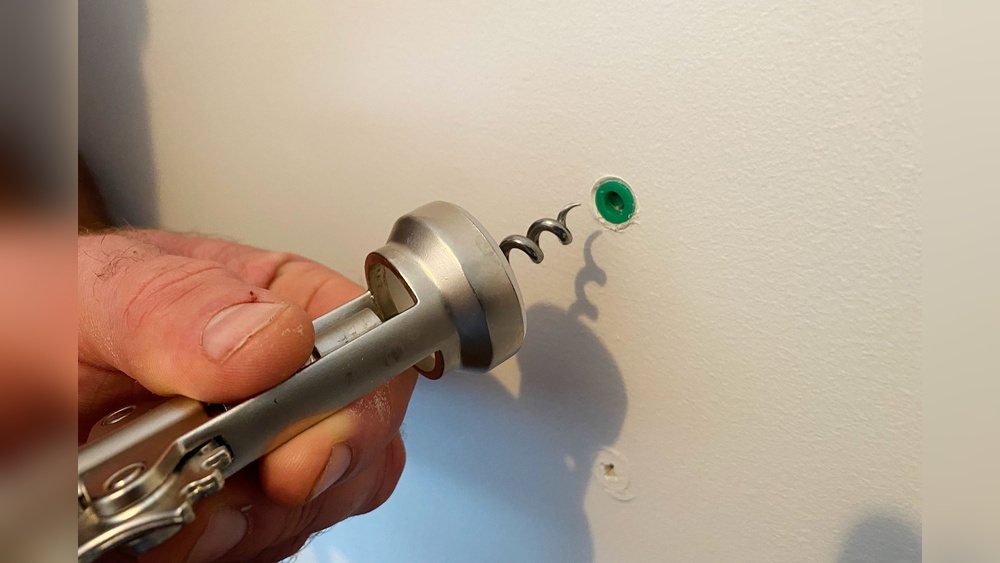
Plastic anchors are simple and work well for light shelves. Begin by drilling a hole matching the anchor size. Push the plastic anchor into the hole. Use a hammer gently if needed. Insert the screw into the anchor slowly. Tighten until secure but avoid over-tightening. The plastic anchor expands inside the wall for a strong grip.
Installing Toggle And Molly Bolts
Toggle and molly bolts hold heavier shelves. Drill a hole slightly bigger than the bolt. For toggle bolts, fold the wings and push through the hole. Wings open behind the wall. Pull back gently to lock in place. Insert and tighten the screw.
Molly bolts expand inside the wall as you tighten the screw. This creates a firm hold. Both bolts spread the shelf weight evenly. They are ideal for drywall and hollow walls.
Mounting The Shelf Securely
Mounting the shelf securely is key to keeping your items safe. Proper mounting stops the shelf from falling or tilting. It also makes the shelf look neat and strong. Follow these steps carefully for a safe, steady shelf.
Aligning Shelf Brackets
Start by placing the brackets where you want the shelf. Use a level to check if they are straight. Brackets must be at the same height on both sides. Mark the spots for the wall anchors through the bracket holes. This ensures your shelf stays balanced and strong.
Tightening Screws Properly
Insert the screws into the wall anchors after placing the brackets. Tighten screws firmly, but do not over-tighten. Over-tightening can strip the anchor or damage the wall. The screws should hold the bracket tightly without wobbling. Check the shelf for firmness before placing items on it.
Testing Shelf Stability
Testing shelf stability is an important step after installing shelves with wall anchors. It ensures the shelf can hold weight safely without falling. This process helps avoid damage to walls or items placed on the shelf. Take time to check the shelf carefully before using it fully.
Applying Weight Gradually
Start by placing light objects on the shelf. Add weight slowly in small amounts. This helps the wall anchors adjust to the load. Watch the shelf closely for any signs of strain. Do not place heavy items all at once. Gradual loading reduces the risk of damage.
Checking For Movement
Look for any wobbling or shifting of the shelf. Gently press on the shelf to test its firmness. If the shelf moves, tighten the screws or anchors. Small movements can mean the shelf is not secure. Fix any issues before adding more weight.

Credit: www.uglyducklinghouse.com
Tips For Long-lasting Mounts
Ensuring shelves stay strong and secure over time requires some care. Proper use of wall anchors helps, but regular attention keeps mounts safe. Small steps can prevent damage and avoid accidents. Follow these tips for durable shelf installations.
Regular Inspection
Check your shelves often. Look for any signs of loosening or cracks. Tighten screws if they feel loose. Watch for wall damage near the anchors. Early fixes stop bigger problems later.
Avoiding Overloading
Do not put too much weight on your shelves. Follow the weight limits recommended for your anchors. Heavy items can pull anchors out of the wall. Use multiple anchors for heavier loads. Keep shelf contents light and balanced.
Frequently Asked Questions
What Tools Are Needed To Install Shelves With Wall Anchors?
You need a drill, wall anchors, screws, a screwdriver, a level, and a pencil. These tools ensure secure and accurate shelf installation.
How Do Wall Anchors Support Heavy Shelves?
Wall anchors distribute weight evenly and prevent screws from pulling out. They provide strong support in drywall or hollow walls.
Can I Install Shelves Without Wall Studs?
Yes, using appropriate wall anchors allows shelf installation without studs. Anchors grip drywall securely, supporting moderate shelf weight safely.
How To Choose The Right Wall Anchors For Shelves?
Select anchors based on wall type and shelf weight. Plastic anchors suit light loads; metal or toggle bolts handle heavier shelves.
Conclusion
Installing shelves with wall anchors is simple and effective. Choose the right anchors for your wall type. Measure and mark carefully before drilling holes. Insert anchors firmly to hold weight securely. Attach brackets and place shelves steadily. This method keeps shelves strong and safe.
Enjoy organizing your space with confidence. Take your time, and the results will last. Shelves look neat and support items well. Easy steps lead to a sturdy setup. Now, your shelves are ready for use.