Have you ever tried to remove a deadbolt only to find no visible screws? It’s frustrating, isn’t it?
You might feel stuck, wondering how to get it off without damaging your door. Don’t worry—this is a common problem, and there’s a simple way to handle it. You’ll learn the exact steps to remove your deadbolt safely and easily, even when you don’t see any screws.
Keep reading, and you’ll have your deadbolt off in no time!

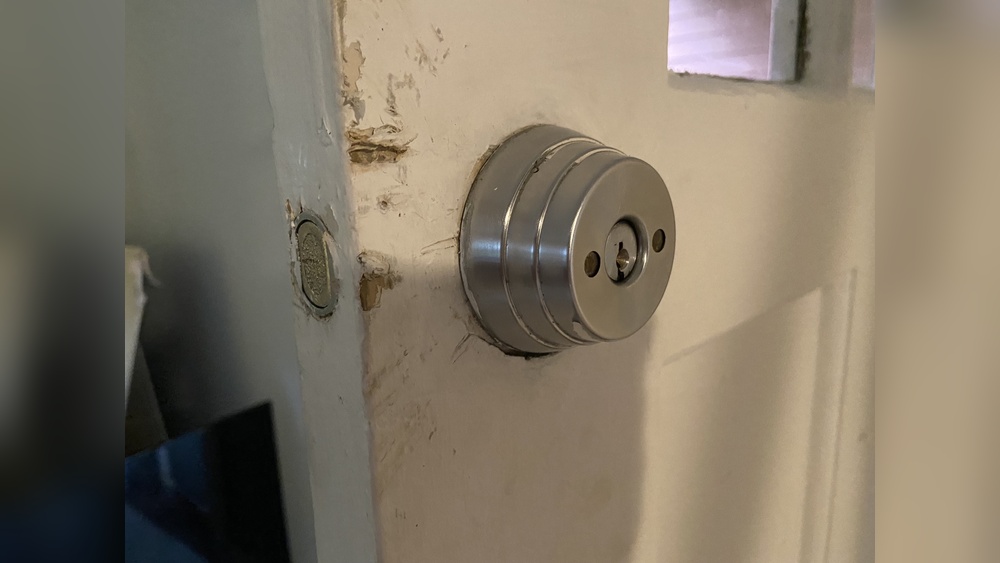
Credit: diy.stackexchange.com
Identify The Deadbolt Type
Before removing a deadbolt, identifying its type is important. Deadbolts come in different styles and designs. Each type has a unique way of attaching to the door. Knowing the deadbolt type helps find the right removal method. It also saves time and avoids damage.
Common Deadbolt Designs
Most deadbolts fall into a few common designs. Single-cylinder deadbolts have a keyhole outside and a thumb turn inside. Double-cylinder deadbolts need a key on both sides. Some deadbolts have a plate covering the screws. Others have a simple faceplate with visible screws. Recognizing these designs helps locate the screws or release mechanisms.
Hidden Vs Visible Screws
Visible screws are easy to spot on the deadbolt’s faceplate or inside the door. They usually hold the lock in place. Hidden screws are covered by a decorative plate or trim. These covers often snap or slide off. Look for small gaps or edges to pry the cover gently. Identifying hidden screws is key to removing deadbolts without visible fasteners.
Gather Necessary Tools
Removing a deadbolt without visible screws requires the right tools. Gathering these tools first saves time and effort. Different deadbolts need different tools. Knowing which tools to have helps you work smoothly.
Tools For Hidden Screws
Some deadbolts hide screws under the faceplate or a cover. A thin flathead screwdriver helps pry off these covers. A flashlight reveals hidden screws in dark spots. A small Phillips or flathead screwdriver works for most screws. Magnetic screwdrivers hold screws tightly for easy removal.
Tools For Snap-in Or Twist-off Models
Snap-in or twist-off deadbolts do not use screws. A thin putty knife or plastic pry tool helps release snap-in parts. Needle-nose pliers grip small parts to twist off covers. A rubber mallet can gently tap to loosen stuck pieces. These tools help avoid damage during removal.
Locate Hidden Screws Or Release Mechanisms
Removing a deadbolt without visible screws can feel tricky. Many deadbolts hide their screws or use special release methods. Finding these hidden parts helps you take the lock apart safely. This section guides you through common spots to check and simple tools to use.
Check The Faceplate And Edges
Start by examining the deadbolt’s faceplate closely. Sometimes screws hide under small covers or plastic caps. Look for tiny slots or seams along the edges of the lock. These covers can usually be popped off with a thin tool or fingernail.
Also, scan the sides of the lock on the door. Some deadbolts have screws that are flush with the surface or painted over. Gently press around the edges to feel for any loose parts or hidden screws.
Use A Flathead Screwdriver To Find Release Tabs
Many modern deadbolts use release tabs instead of screws. Slip a flathead screwdriver between the lock parts. Wiggle it gently to find small tabs or clips inside.
Press or slide these tabs while pulling the lock apart. This method frees the lock without damaging it. Take your time. The tabs can be tight and need steady pressure to release.
Remove The Deadbolt Exterior
Removing the deadbolt exterior can be tricky without visible screws. Many deadbolts hide their fasteners to keep a clean look and add security. This step is important to access the inner parts of the lock. You need to be gentle and patient.
Start by examining the exterior plate closely. Look for any signs it might twist or slide off. If no screws show, the cover might snap or lock into place.
Twisting Or Sliding The Exterior Plate
Try to twist the exterior plate. Hold it firmly and turn it counterclockwise. Some plates unlock with a simple twist. If it doesn’t turn, try sliding it up or down. Sliding plates often have hidden clips. Move slowly to avoid damage.
Prying Off The Cover Carefully
Use a flat tool like a thin screwdriver or a putty knife. Insert it gently between the plate and door. Pry slowly to lift the cover. Avoid using too much force to prevent scratching. Work around the edges until the plate pops off.
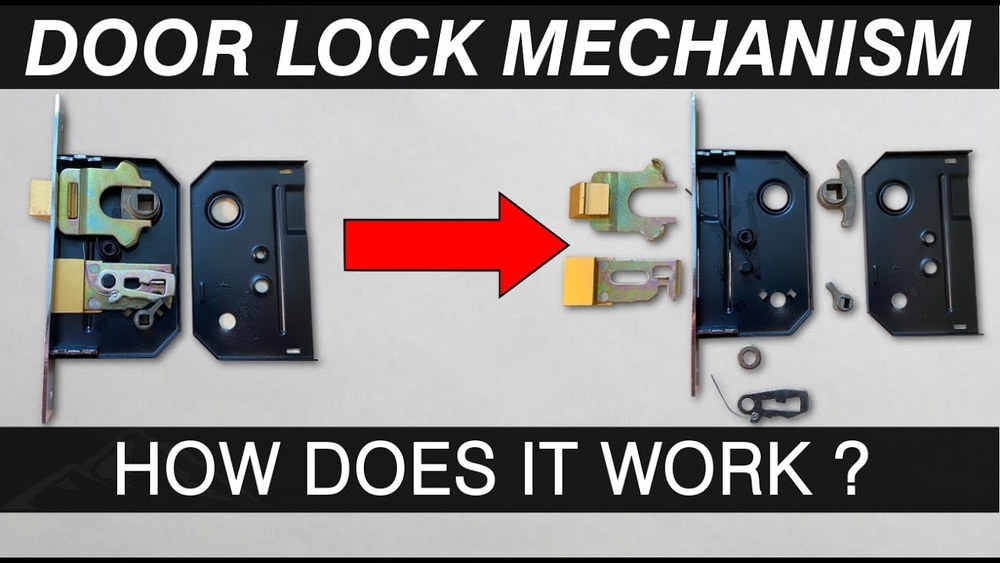
Disassemble The Interior Mechanism
Disassembling the interior mechanism of a deadbolt without visible screws can be tricky. The key is to focus on the parts you can access, starting with the thumb turn. This step reveals hidden screws or clips holding the lock together. Taking your time here prevents damage to the lock and door. Follow each step carefully for safe removal.
Remove The Thumb Turn
The thumb turn is the small knob on the inside of the door. Look closely for a small slot or indentation on its side. Use a flathead screwdriver or a thin tool to press into the slot. This action releases the thumb turn from the lock assembly. Gently pull the thumb turn straight out. Avoid twisting or forcing it. Once removed, the interior mechanism becomes easier to access.
Unscrew The Interior Plate
After removing the thumb turn, check the interior plate for hidden screws. Sometimes screws hide beneath a cover or inside the hole left by the thumb turn. Use a screwdriver to remove these screws carefully. Keep all screws in a safe place. The plate should then come off smoothly. This exposes the deadbolt mechanism inside, ready for full removal or repair.
Extract The Deadbolt From The Door
Extracting the deadbolt from the door is the next step after locating no visible screws. This part requires some care and patience. You must understand how the bolt mechanism fits into the door. The deadbolt often slides or pulls out once the right parts are loosened or removed. Knowing the exact way to remove it prevents damage to your door and lock.
Slide Out The Bolt
First, try to slide the bolt out carefully. Use gentle force to avoid breaking anything. The bolt might move smoothly if there are no locks holding it. Sometimes, pushing or pulling the bolt from the edge of the door works well. Use a flat tool like a screwdriver to help nudge the bolt if it feels stuck. Work slowly to find the direction where the bolt moves freely.
Check For Additional Fasteners
Look closely for hidden screws or clips holding the bolt inside. These fasteners can be small and hard to see. Check along the edges of the bolt and inside the door frame. Some bolts have covers that hide screws underneath. Use a flashlight to see better in tight spaces. Removing these fasteners is key to freeing the deadbolt completely. Don’t force the bolt out if it feels stuck; there may be a hidden lock or pin.
Troubleshooting Stuck Deadbolts
Deadbolts can get stuck for several reasons. Dirt, rust, or lack of use often causes this problem. Removing a deadbolt without visible screws may seem hard. Understanding how to troubleshoot stuck deadbolts helps you fix them easily. Patience and the right steps are key to avoid damage.
Lubrication Tips
Use a graphite-based lubricant for best results. Spray it inside the keyhole and on the bolt mechanism. Avoid oily lubricants; they attract dust and worsen the problem. Let the lubricant sit for a few minutes. Then, gently turn the key or knob to spread it. Repeat this process if the deadbolt remains stiff. Proper lubrication often frees up stuck parts.
When To Use Force
Apply gentle force first to test movement. Sudden or hard force can break the lock or door. Use a rubber mallet or similar tool for tapping. Tap near the lock to loosen internal parts slightly. Do not pull or twist the bolt with excessive power. If the lock still does not move, consider professional help. Using too much force can cause costly damage.

Credit: www.youtube.com
Replace Or Reinstall The Deadbolt
After removing a deadbolt without visible screws, the next step is to replace or reinstall it. This process ensures your door stays secure and the lock works smoothly. Proper alignment and tight screws are key. Take time with each step to avoid damage or malfunction.
Aligning Components Correctly
Start by placing the deadbolt parts in their correct positions. The latch must fit into the door edge hole. The exterior and interior pieces should line up through the door. Check the bolt slides smoothly into the strike plate on the frame. Misalignment causes the lock to stick or fail.
Securing Screws And Testing
Once aligned, fasten the screws tightly. Use the screws that came with your deadbolt. Tight screws hold the lock firmly in place. Avoid over-tightening to prevent stripping the holes. After securing, test the lock by turning the key and thumb turn. The bolt should move freely and lock securely.

Credit: www.aspire-doors.co.uk
Frequently Asked Questions
How To Remove A Deadbolt Without Visible Screws?
Most deadbolts with no visible screws use hidden fasteners. Look for a small slot or hole on the faceplate. Use a flathead screwdriver or paperclip to release the lock cylinder and remove the deadbolt.
Why Can’t I Find Screws On My Deadbolt?
Some deadbolts have concealed screws for aesthetic reasons. The screws may be under the trim plate or inside the lock cylinder. Check for removable covers or use the key to unlock and access hidden fasteners.
Can I Remove A Deadbolt With A Hex Or Allen Key?
Yes, some deadbolts use hex or Allen screws hidden under the trim. Check for a small hole or slot on the side or faceplate. Insert the appropriate key to loosen and remove the deadbolt.
What Tools Are Needed To Remove A Screwless Deadbolt?
You may need a flathead screwdriver, paperclip, or Allen key. Some locks require a pin to press into a release hole. Ensure you have the correct size tools to avoid damage.
Conclusion
Removing a deadbolt without visible screws can seem tricky. Start by looking closely for hidden covers or plates. Use a flat tool to gently pry them off. Remember to keep tools steady and avoid damage. Once covers are removed, the screws become visible.
Unscrew carefully and pull the deadbolt apart. Take your time and stay patient. This simple process helps you remove deadbolts safely. Now, you can replace or repair your lock with ease.