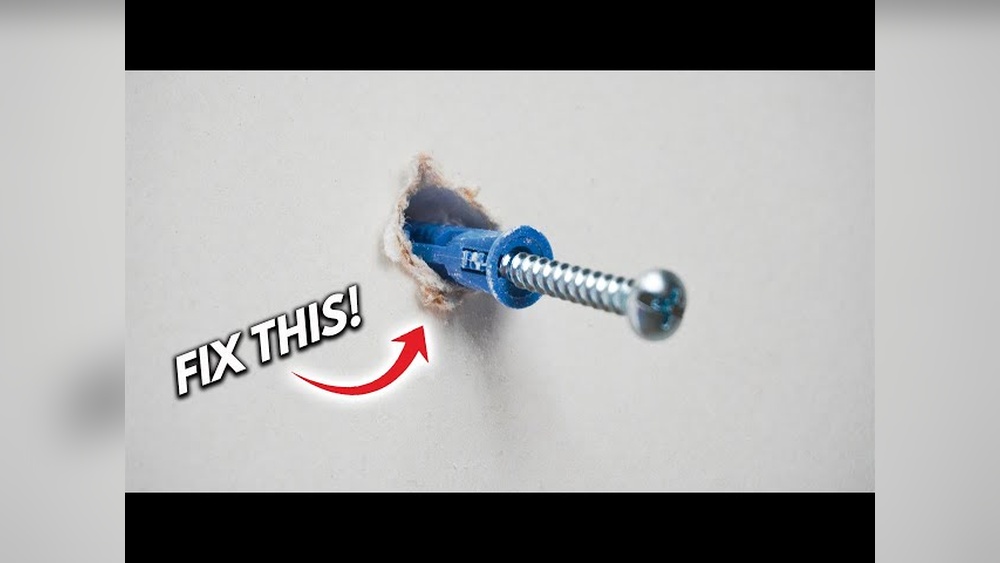
Are you struggling to hang something heavy on a hollow wall? Knowing how to install a hollow wall drive anchor can make all the difference.
This simple tool helps you secure shelves, mirrors, and other items safely without damaging your walls. In this guide, you’ll learn step-by-step how to use a hollow wall drive anchor quickly and effectively. By the end, you’ll feel confident tackling your next wall project with ease.
Keep reading to discover the easy tricks that professionals use every day.
Credit: www.youtube.com
Choosing The Right Anchor
Choosing the right hollow wall drive anchor is important for a strong hold. Different anchors suit different walls and weights. Picking the correct anchor prevents damage and keeps your items safe. Understanding the types and uses helps you make the best choice.
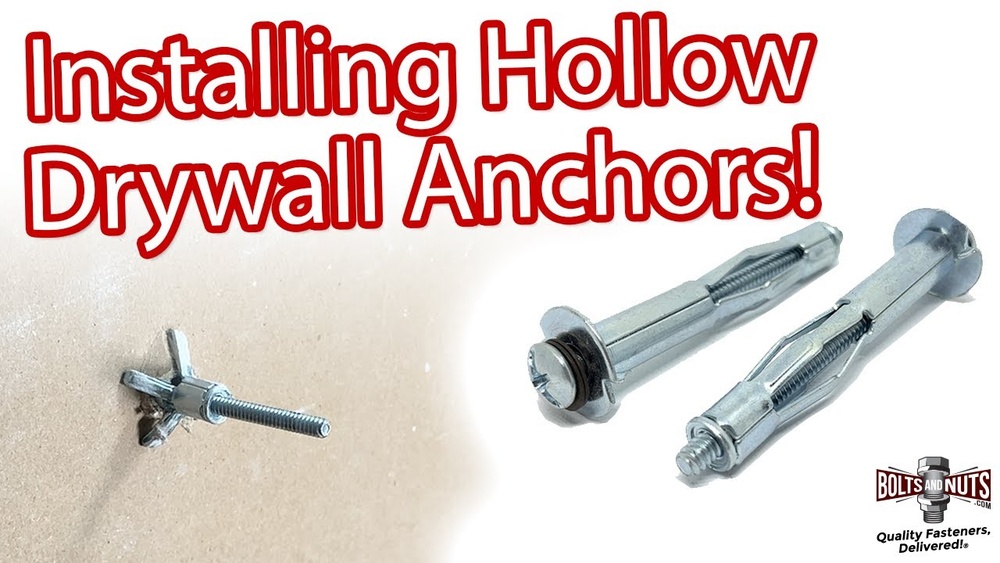
Types Of Hollow Wall Anchors
There are several types of hollow wall anchors. Plastic anchors are light and good for small items. Metal anchors offer more strength and hold heavier objects. Toggle bolts spread the load behind the wall for very heavy items. Each type works differently and fits certain needs.
Selecting Based On Wall Material
Walls can be drywall, plaster, or hollow block. Drywall needs anchors that expand or toggle behind it. Plaster walls require anchors that can grip without cracking. Hollow block walls often need stronger anchors that fit inside the cavity. Match the anchor type to your wall for a firm fit.
Weight Capacity Considerations
Every anchor has a weight limit. Check the anchor’s label or instructions for its capacity. Choose an anchor that can hold more than your item’s weight. Overloading an anchor can cause it to fail and damage the wall. Always select anchors with enough strength for safety.
Gathering Necessary Tools
Before installing a hollow wall drive anchor, gather all necessary tools. Having everything ready saves time and avoids frustration. This step helps ensure a smooth and safe installation process.
Required Tools List
Start with a drill and drill bits suitable for your wall type. A screwdriver is needed to drive the anchor into the wall. A tape measure helps you mark the correct spot. Use a pencil to mark drilling points clearly. A hammer may be required to tap the anchor in place gently. Finally, have a level to check that the anchor aligns properly.
Safety Equipment
Protect your eyes with safety goggles during drilling. Wear gloves to avoid hand injuries. A dust mask helps prevent inhaling wall dust. Ear protection is useful if drilling makes loud noise. These safety tools keep you safe and comfortable while working.
Preparing The Wall
Preparing the wall is an important first step for a strong hold. It helps avoid mistakes and ensures safety. Taking time here makes the installation smooth and effective.
Marking The Drill Spot
Start by choosing the right spot on the wall. Use a pencil to mark the exact point. Measure twice to be sure. The mark guides your drill and keeps the anchor in place.
Check the height and alignment with what you want to hang. A small error can cause problems later. Use a level tool if needed to keep the mark straight.
Checking For Obstructions
Look inside the wall for pipes, wires, or studs. Drilling into these can cause damage or injury. Use a stud finder or wall scanner to detect hidden objects.
Move the mark if you find anything behind the wall. Clear space ensures a safe hole and strong anchor hold. Never guess what is inside the wall.

Credit: www.do-it-yourself-help.com
Drilling The Hole
Drilling the hole is the first and most important step to install a hollow wall drive anchor. The hole must be the right size and depth. A perfect hole makes sure the anchor fits tightly and holds well. Careful drilling avoids damage to the wall or anchor. Follow these tips for a clean, precise hole.
Choosing The Drill Bit Size
Pick a drill bit that matches the anchor size. Check the anchor package for the recommended drill bit size. The bit should be the same diameter as the anchor body. Too small a hole makes it hard to insert the anchor. Too big a hole causes the anchor to loosen.
Use a high-quality drill bit for clean holes. A masonry bit works best for concrete or brick walls. For drywall, a standard twist bit is enough. Match the drill bit length to the wall thickness to avoid drilling too deep.
Drilling Techniques For Hollow Walls
Mark the spot clearly before drilling. Hold the drill steady and start slowly. Let the drill bit do the work. Push gently to avoid cracking the wall surface.
Drill straight into the wall, not at an angle. Use a level if needed to keep the drill steady. Stop drilling once the hole reaches the required depth. Clean the hole by removing dust with a brush or air blower. This helps the anchor grip the wall better.
Installing The Anchor
Installing a hollow wall drive anchor is simple and effective. This process helps secure items to hollow walls like drywall or plaster. Follow each step carefully for a strong hold.
Inserting The Anchor Into The Hole
First, drill a hole that matches the anchor size. Clean the hole from dust and debris. Gently push the anchor into the hole. Make sure it fits snugly without forcing it.
Expanding The Anchor
Use a screwdriver or hammer to drive the anchor pin. This action expands the anchor inside the wall. The anchor arms spread out to grip the inside surface. This expansion creates a firm hold in the hollow space.
Securing The Anchor In Place
Check the anchor to ensure it is tight and secure. Avoid moving it after expansion. Now, you can attach screws or hooks to the anchor. This holds your items firmly on the wall.
Attaching Fixtures
Attaching fixtures to a hollow wall drive anchor is a key step. It ensures your items are secure and stable. This process is simple but needs care. Follow the steps closely for the best results.
Aligning The Fixture
Place the fixture over the anchor hole. Make sure the holes on the fixture line up with the anchor. Check that the fixture sits flat against the wall. This helps spread the weight evenly. Proper alignment prevents damage and keeps things steady.
Tightening The Screw
Insert the screw into the anchor through the fixture hole. Turn the screw slowly using a screwdriver. Tighten it until the fixture feels firm on the wall. Avoid over-tightening to stop the anchor from breaking. The screw should hold the fixture snugly without moving.
Troubleshooting Common Issues
Troubleshooting common issues with hollow wall drive anchors can save time and effort. Problems often arise during or after installation. Knowing how to fix these issues keeps your project on track. Below are solutions for the most frequent problems.
Anchor Loose Or Pulling Out
An anchor that feels loose or pulls out lacks grip. Check if the hole is too big. A bigger hole reduces the anchor’s hold. Use a smaller drill bit next time. Make sure the anchor expands fully inside the wall. Tighten the screw slowly to allow proper expansion. Avoid overtightening, which can damage the anchor or wall.
Damaged Wall Surface
Wall damage can happen during drilling or anchor insertion. Cracks or crumbling around the hole weaken support. Use a sharp drill bit to make clean holes. Drill carefully to avoid pushing too hard. If damage occurs, patch the wall first. Let the patch dry before installing a new anchor. This ensures better hold and a neat finish.
Maintenance Tips
Maintaining hollow wall drive anchors is key for safety and durability. Regular care prevents damage and keeps the anchors strong. Simple checks and fixes can save time and cost later. Follow these easy tips to maintain your anchors properly.
Regular Inspection
Check anchors often for signs of wear or damage. Look for cracks, rust, or any movement in the wall. Use a flashlight to see inside the hole clearly. Early detection helps avoid accidents and costly repairs.
Reinforcing Loose Anchors
Loose anchors reduce holding strength and can cause objects to fall. Tighten screws gently to secure the anchor. If still loose, remove the anchor and fill the hole with filler. Let it dry, then install a new anchor for a firm hold.

Credit: vittacalzados.cl
Frequently Asked Questions
What Tools Are Needed To Install A Hollow Wall Drive Anchor?
You need a drill, drill bit, hammer, screwdriver, and the hollow wall drive anchor itself. These tools ensure proper installation and secure mounting.
How Do You Prepare The Wall For A Hollow Wall Anchor?
First, mark the drilling spot on the wall. Use the correct drill bit size for the anchor. Drill a clean hole without damaging the wall.
Can Hollow Wall Anchors Support Heavy Objects?
Yes, hollow wall anchors can support moderate weights like shelves or mirrors. Always check the anchor’s weight rating before use for safety.
How Do You Insert A Hollow Wall Drive Anchor Correctly?
Insert the anchor into the drilled hole flush with the wall surface. Then, use a hammer to drive it in fully for a secure fit.
Conclusion
Installing a hollow wall drive anchor is simple and effective. Start by choosing the right size for your wall. Drill a hole carefully and insert the anchor straight. Tighten the screw to expand the anchor inside the wall. This keeps your item firmly in place.
These anchors work great for light to medium loads. They save time and avoid wall damage. With practice, you will feel confident using them. Try it yourself and see how easy it can be. Solid support is just a few steps away.