Are you staring at that old deadbolt on your door, wondering how to get it off without a hassle? Removing an old deadbolt might seem tricky, but with the right steps, you can do it yourself quickly and safely.
Imagine finally upgrading your lock or fixing that stubborn deadbolt that just won’t budge. In this guide, you’ll find simple, clear instructions that anyone can follow. Keep reading, and by the end, you’ll have the confidence and know-how to remove your old deadbolt like a pro.
Tools Needed
Removing an old deadbolt requires a few basic tools. Having the right tools makes the job easier and faster. Most of these tools are common and easy to find.
Screwdriver
A screwdriver is the main tool for this task. Use a flathead or Phillips screwdriver. It depends on the screws in your deadbolt. This tool helps remove the screws holding the lock in place.
Pliers
Pliers come in handy to grip and pull parts. They help remove stubborn screws or pieces. Needle-nose pliers work well in tight spaces.
Allen Wrench
Some deadbolts use hex screws. An Allen wrench fits these screws perfectly. Check your lock to see if this tool is needed.
Drill (optional)
A drill speeds up the process. Use it to remove screws quickly. Choose a drill bit that matches your screws.
Tape
Tape helps protect the door surface. Place it around screws before unscrewing. It prevents scratches and damage.
Prepare The Door
Preparing the door is an important first step to remove an old deadbolt. It helps make the process easier and safer. This section explains what you need to do before taking out the deadbolt. Follow these simple steps to get ready.
Gather Necessary Tools
Collect all tools needed for the job. Usually, a screwdriver and a drill are enough. Keep a flashlight handy if the area is dark. Having the right tools close saves time and effort.
Clear The Work Area
Remove any objects near the door. This gives you space to work freely. Clear both sides of the door. A tidy area helps avoid accidents and lost parts.
Check The Door Condition
Look at the door around the deadbolt. Note any cracks or damage. This helps you handle the door with care. Strong doors make removal easier and safer.
Unlock And Open The Door
Make sure the door is unlocked. Open it wide to access the deadbolt. A closed door makes it hard to reach screws. Open space helps you work without strain.
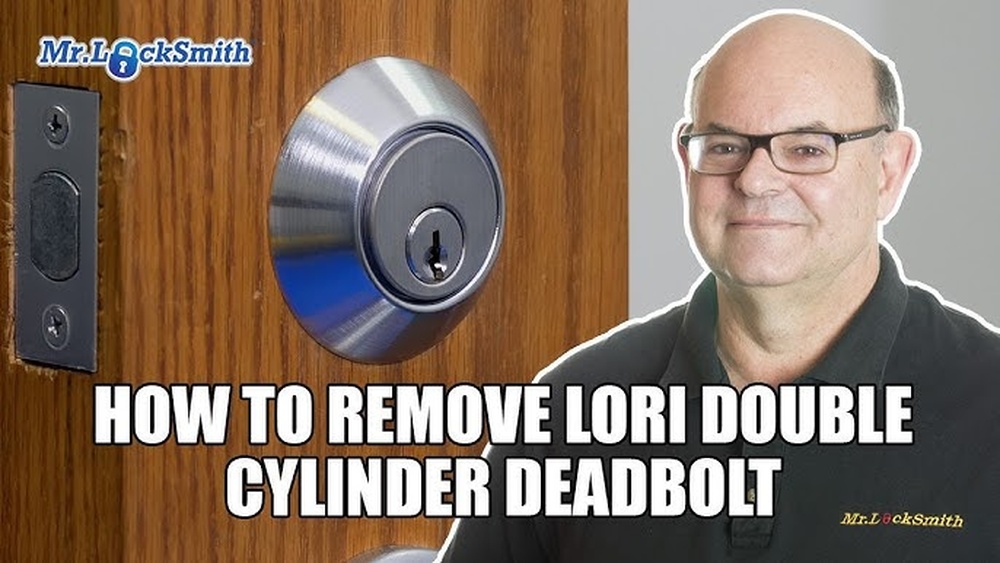
Remove The Exterior Cylinder
Removing the exterior cylinder is an important step in taking out an old deadbolt. This part is the keyhole side that you see on the outside of your door. You need to remove it carefully to avoid damage.
It may seem tricky, but with the right tools and steps, you can do it yourself. Focus on loosening the screws and gently pulling the cylinder out. This will prepare you for the next steps in the removal process.
Locate The Cylinder Retaining Screw
Start by opening the door. Look on the edge of the door near the lock. Find the small screw that holds the exterior cylinder in place. This screw is usually on the side of the door, aligned with the lock.
Use a screwdriver to remove this screw. Keep it safe for later use or disposal. Removing this screw allows the cylinder to slide out.
Slide Out The Exterior Cylinder
Hold the key in the cylinder. Turn it slightly to align the cylinder cam inside the lock. This alignment helps the cylinder to slide free.
Gently pull the cylinder straight out from the door. Do not force it. If it sticks, check the retaining screw again. The cylinder should come out smoothly.
Check For Any Additional Fixings
Sometimes, extra screws or clips hold the cylinder in place. Inspect around the cylinder area carefully. Remove any extra fixings you find.
This step ensures the cylinder is completely free and ready to be removed. After this, the exterior part of the deadbolt will be off.

Credit: diy.stackexchange.com
Take Out The Interior Plate
Removing the interior plate is an important step in taking out an old deadbolt. This plate covers the screws and the lock mechanism inside the door. Taking it off gives you access to the screws that hold the deadbolt in place. Without removing the interior plate, you cannot fully remove the deadbolt. The process is simple and requires only a few tools.
Gather Necessary Tools
Use a screwdriver that fits the screws on the interior plate. Usually, a Phillips head screwdriver works best. Have a small container ready to hold the screws once removed. This keeps them safe and prevents loss during the process.
Locate And Remove Screws
Look closely at the interior plate. You will see two or more screws holding it in place. Turn the screws counterclockwise to loosen them. Remove all screws carefully. Set them aside in the container to avoid misplacing them.
Gently Pry Off The Interior Plate
After removing the screws, the plate may stick to the door. Use your fingers or a flat tool to gently lift it off. Avoid using too much force to prevent damage to the door or plate. Once loose, pull the plate away from the door completely.
Extract The Deadbolt Mechanism
Extracting the deadbolt mechanism is a key step in removing an old deadbolt. This part controls the lock’s bolt and allows the door to lock and unlock. Removing it carefully helps prepare the door for a new lock installation.
Deadbolt mechanisms are often held in place by screws or small plates. These parts keep the mechanism secure inside the door. Removing them requires patience and the right tools.
Locate And Remove The Screws
First, find the screws on the edge of the door. These screws hold the deadbolt mechanism in place. Use a screwdriver to remove them. Keep the screws safe for later use or disposal.
Pull Out The Deadbolt Mechanism
After removing the screws, gently pull the deadbolt mechanism from the door edge. It should slide out smoothly. If it feels stuck, wiggle it slightly to loosen it.
Check For Additional Fasteners
Sometimes, small plates or clips hold the mechanism. Look for these and remove them carefully. This step ensures the mechanism comes out fully without damage.
Inspect The Door Cavity
Once the mechanism is out, look inside the door cavity. Clean any debris or dust. This helps the new deadbolt fit properly and work smoothly.
Check The Door Alignment
Checking the door alignment is an important step before removing an old deadbolt. A door that is not aligned correctly can cause problems when taking out the lock. It may also make installing a new deadbolt difficult. Ensuring the door fits well in its frame helps the lock work smoothly.
Misaligned doors can cause the deadbolt to stick or not turn properly. This can lead to damage to the lock or door. Checking the alignment first saves time and effort during removal and replacement.
How To Check Door Alignment
Start by closing the door slowly. Watch if the door hits the frame evenly. Look for gaps between the door and frame. Gaps that are too wide or uneven mean the door is misaligned.
Adjusting The Door For Proper Fit
Use a screwdriver to tighten or loosen the hinges slightly. This can help shift the door up, down, or sideways. Make small adjustments and check the fit often. Proper alignment helps the deadbolt come out easily.
Signs Of Door Misalignment Affecting The Deadbolt
The deadbolt may not slide smoothly into the strike plate. You might see scratches or wear marks around the lock area. The key could be hard to turn. These signs show that the door needs adjustment before removal.
Install The New Deadbolt
Installing a new deadbolt is an important step after removing the old one. It keeps your door secure and works smoothly. Follow these simple steps to fit the new deadbolt perfectly.
Insert The Bolt
First, slide the bolt into the door’s edge hole. Make sure the bolt’s flat side faces the door frame. Push it in until it fits flush with the door surface. This part locks and unlocks when you turn the key or thumb turn.
Attach Interior And Exterior Parts
Next, place the exterior part with the keyhole outside the door. Align it with the bolt mechanism inside. Then, fit the interior part with the thumb turn on the inside. Both parts should line up through the door holes for smooth operation.
Secure With Screws
Finally, use the screws provided to hold both parts tightly. Tighten each screw evenly to avoid misalignment. Check that the deadbolt moves freely after tightening. Properly secured screws keep the lock sturdy and safe.
Test The New Lock
Testing the new lock is a key step after installation. It ensures everything works smoothly before you finish the job. This step helps avoid problems with locking or unlocking later. Always take time to test thoroughly.
Turn The Key
Insert the key into the new deadbolt. Turn it slowly to the locked position. You should feel smooth resistance without sticking. Turn the key back to unlock the door. The key should move easily both ways. Test several times to confirm consistent action.
Check The Handle
Try the door handle after locking and unlocking. The handle should move freely without force. Make sure the latch slides fully into the strike plate. The door must open and close without catching. This check ensures the lock and handle work well together.
Troubleshooting Tips
Removing an old deadbolt can sometimes be tricky. Problems can happen even with simple tools. These tips help you solve common issues fast. Stay calm and follow each step carefully. This way, the process becomes easier and safer.
Check For Hidden Screws
Old deadbolts often have screws under covers. Look closely for small plates or caps. Use a flathead screwdriver to pop them off. Sometimes screws hide behind the lock face or inside the keyhole. Removing these screws frees the lock for easy removal.
Use Penetrating Oil For Stuck Parts
Rust or dirt can make screws and bolts hard to turn. Spray a little penetrating oil on these spots. Let it sit for 10 to 15 minutes. This loosens rust and helps you unscrew parts without breaking them.
Apply Gentle Force When Needed
Some deadbolts may stick due to age or damage. Tap the lock gently with a rubber mallet or handle of a screwdriver. Avoid using too much force to prevent damage. Gentle taps help loosen tight parts for removal.
Keep Track Of All Parts
Take pictures or notes while removing the deadbolt. This helps you remember where each part goes. Organize screws and pieces in a small container. Keeping parts safe prevents loss and saves time during installation of a new lock.

Credit: www.youtube.com

Credit: www.reddit.com
Frequently Asked Questions
How Do I Remove An Old Deadbolt Lock Easily?
To remove an old deadbolt, first unscrew the interior screws. Remove the interior and exterior plates. Then, pull out the latch and bolt assembly carefully. Use a screwdriver and follow the lock’s components step-by-step for safe removal.
What Tools Are Needed To Remove A Deadbolt Lock?
You need a Phillips screwdriver, flathead screwdriver, and possibly pliers. Some deadbolts require an Allen wrench or drill. Having a flashlight can help see screws clearly during removal.
Can I Replace A Deadbolt Without Professional Help?
Yes, replacing a deadbolt is a simple DIY task. Follow removal instructions carefully, then install the new deadbolt using the included guide. Basic tools and patience are enough for a successful replacement.
How Long Does It Take To Remove An Old Deadbolt?
Removing an old deadbolt usually takes 10 to 20 minutes. Time varies with lock type and your experience. Taking time to avoid damage ensures a smooth removal process.
Conclusion
Removing an old deadbolt is easier than it seems. With the right tools and steps, you can do it yourself. Take your time and follow each step carefully. This helps avoid damage and ensures safety. After removal, you can install a new lock or make repairs.
Simple tasks like this save money and build confidence. Ready to try? Your door will thank you.