Hanging pictures might seem simple, but if you don’t anchor them properly, they can slip, fall, or damage your walls. You want your favorite photos and art to stay put and look great for years.
So, how do you make sure your pictures are safely and securely anchored? You’ll discover easy steps and smart tips to help you hang your pictures like a pro. Keep reading, and you’ll never worry about crooked or falling frames again.

Credit: www.frontierbasementsystems.com
Choosing The Right Wall Anchor
Choosing the right wall anchor is key to hanging pictures securely. The right anchor holds the weight and fits the wall type. This prevents damage and keeps your picture safe. Understanding anchors helps you pick the best one for your wall and picture size.
Types Of Wall Anchors
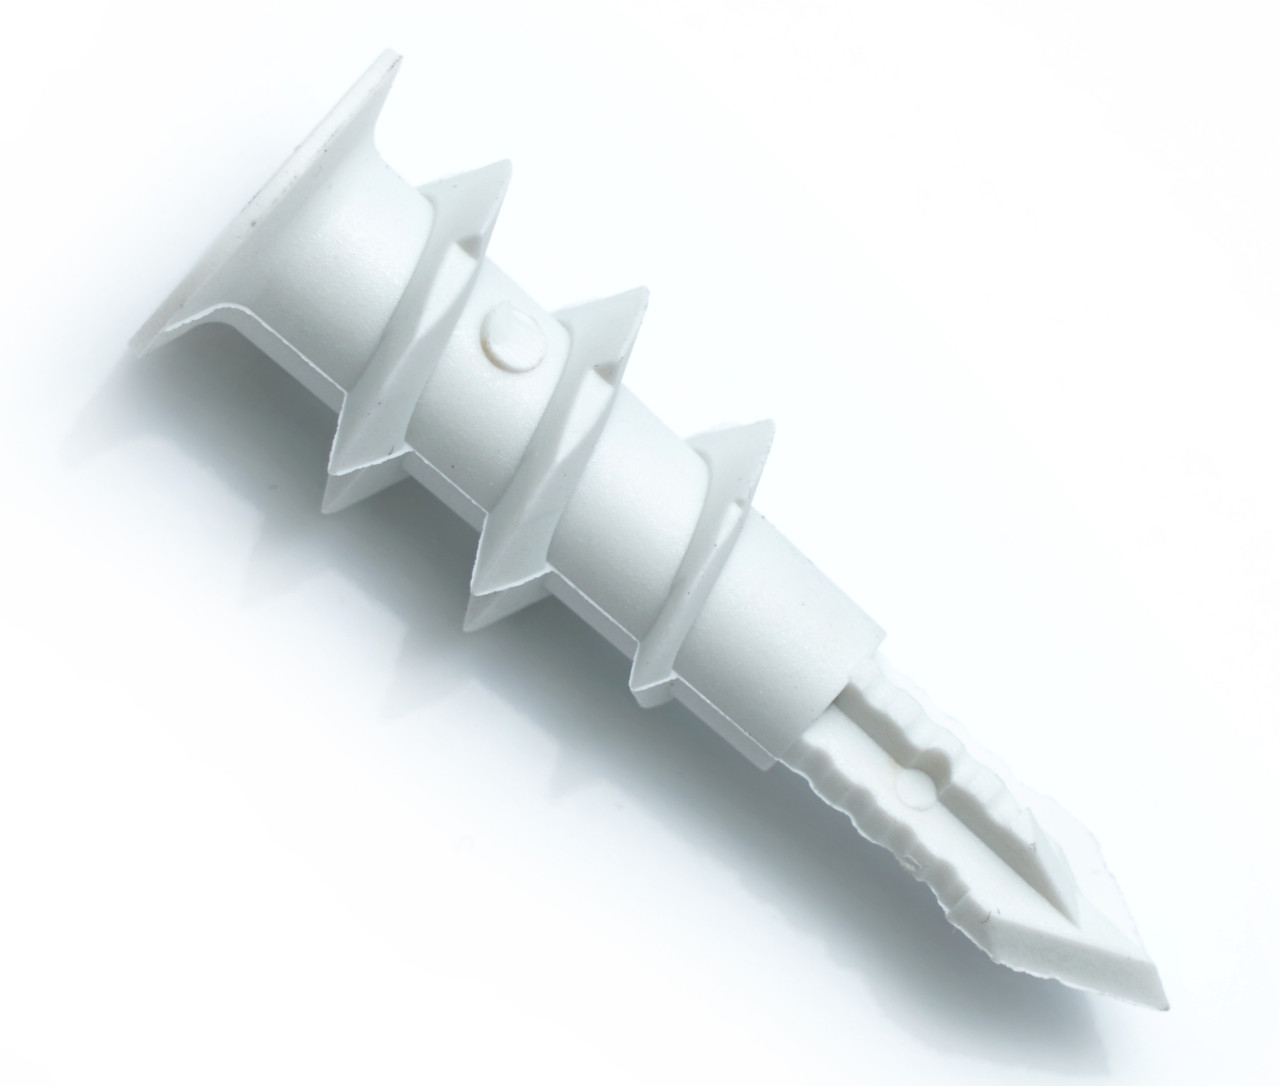
There are several types of wall anchors. Plastic expansion anchors work well for light pictures. They expand inside the wall to hold tight. Metal anchors are stronger and good for heavier items. Toggle bolts have wings that open inside the wall for strong support. Molly bolts offer a secure hold in drywall by expanding behind the wall.
Matching Anchors To Wall Materials
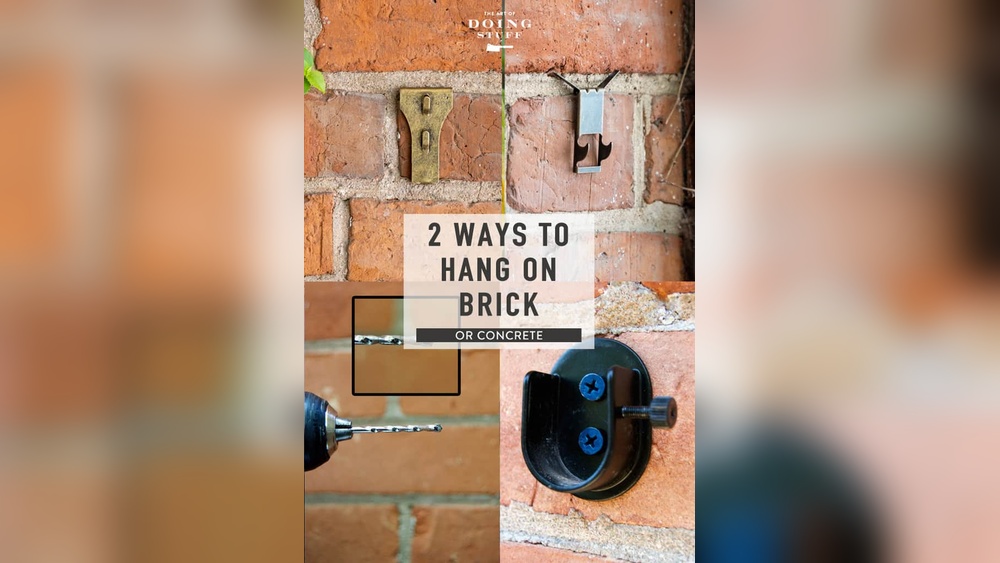
Different walls need different anchors. Drywall is soft and needs anchors that expand or spread inside. For plaster walls, use anchors that grip firmly without cracking. Concrete and brick walls require special masonry anchors or screws. Matching the anchor to the wall ensures a firm hold and prevents damage.
Weight Limits And Safety
Each anchor has a weight limit. Use anchors rated for more than your picture’s weight. Overloading anchors can cause them to fail. Check packaging or product details for weight guidelines. Safety matters. Correct anchors keep pictures from falling and damaging walls or people.
Gathering Essential Tools
Before hanging pictures on your wall, gathering the right tools is important. These tools make the job easier and safer. They help you place pictures straight and keep them secure.
Taking time to prepare your workspace also matters. A tidy space helps you work faster and avoid mistakes. Let’s explore what tools you need and how to get your area ready.
Tools You’ll Need
You will need a few basic tools to anchor pictures properly. A tape measure helps you find the right spot on the wall. A pencil marks where to put the anchor. A level makes sure your picture hangs straight.
Wall anchors or screws hold the picture securely. A drill or screwdriver is needed to put anchors in the wall. Safety glasses protect your eyes while drilling. Having all these ready saves time and effort.
Preparing Your Workspace
Clear the area around the wall where you want to hang your picture. Remove any furniture or objects that may block your work. Lay down a cloth or newspaper to catch dust and debris.
Good lighting helps you see marks and holes clearly. Keep tools within reach to avoid moving too much. Taking these steps makes the process smoother and safer.
Marking The Wall Correctly
Marking the wall correctly is the first step to hang pictures safely and straight. It helps avoid mistakes that can damage the wall or ruin the picture’s look. Take your time to mark the spots carefully before drilling or nailing.
Clear and precise marks make the whole process easier. Follow these steps to mark your wall right.
Finding The Perfect Spot
Choose a spot where the picture looks best. Think about eye level and wall space. Avoid places with direct sunlight or moisture. Check for studs or pipes inside the wall. Use a stud finder to locate strong support if needed. The right spot keeps your picture secure and attractive.
Measuring And Leveling
Measure the width and height of your picture. Use a tape measure to find the center point. Mark the wall lightly with a pencil. Use a level to ensure the marks are straight. A crooked picture spoils the room’s look. Double-check measurements before moving on.
Marking Anchor Points
Mark the exact points for anchors based on the frame’s hangers. Use small dots that are easy to see but not too big. These marks guide where to drill or hammer. Make sure the points match the picture’s weight and size. Correct anchor points keep the picture stable and prevent falls.
Credit: www.concretefasteners.com
Installing Wall Anchors
Installing wall anchors is a key step to hang pictures securely. Anchors help hold screws tightly in drywall or plaster. They prevent damage and keep your picture steady. Follow these simple steps for a strong hold.
Drilling Pilot Holes
Start by marking where the anchor will go. Use a pencil for a clear spot. Choose a drill bit that matches the anchor size. Drill slowly to avoid cracking the wall. Make the hole just deep enough for the anchor.
Inserting Anchors Properly
Push the anchor into the hole gently. Tap lightly with a hammer if needed. The anchor should sit flush with the wall surface. Avoid forcing it too deep or leaving it sticking out. Proper fit ensures the best grip.
Securing The Anchors
Place the screw into the anchor carefully. Turn the screw slowly using a screwdriver. The anchor expands behind the wall as the screw goes in. Tighten until the screw feels firm but not too tight. This keeps your picture safe and stable.
Hanging Your Picture
Hanging a picture on the wall seems simple but needs care. The right steps protect your walls and keep pictures steady. This guide helps you hang pictures safely and neatly.
Choosing The Right Hooks Or Screws
Select hooks or screws that match your picture’s weight. Small frames use lightweight hooks. Heavy frames need strong screws or wall anchors. Use plastic anchors for drywall to avoid damage. Metal hooks suit plaster or wood walls. Pick the right size to keep pictures secure and level.
Attaching Hardware To Frames
Check your picture frame before hanging. Most frames have D-rings, wire, or sawtooth hangers. Attach a wire between D-rings for easy hanging. Sawtooth hangers fix directly on the back. Use small nails or screws to secure hardware tightly. Make sure the hardware is centered for balance.
Mounting The Picture Safely
Mark the wall where the picture will hang. Use a pencil and level for accuracy. Insert screws or hooks into the wall firmly. Hang the picture on the hardware carefully. Adjust it to hang straight and flat. Double-check stability to avoid falls. Use two hooks for wider or heavier frames.
Troubleshooting Common Issues
Troubleshooting common problems can help you anchor pictures to walls securely. Small issues often cause big problems like crooked frames or damaged walls. Fixing these problems early saves time and effort. Here are some solutions for common challenges.
Dealing With Uneven Walls
Uneven walls make it hard for pictures to hang flat. Use wall spacers behind the frame to balance it. Foam pads work well for this job. Measure the wall surface before drilling holes. This step ensures the anchor fits properly.
Fixing Loose Anchors
Loose anchors fail to hold weight and cause frames to fall. Remove the anchor and check the hole size. Use a larger anchor for bigger holes. Filling the hole with wood filler or putty can help tighten it. Wait for the filler to dry before re-anchoring.
Avoiding Wall Damage
Wall damage happens from wrong anchors or heavy frames. Choose the right anchor for your wall type. Drywall anchors suit drywall, while masonry anchors fit brick or concrete. Avoid over-tightening screws. This prevents cracks and holes in the wall.
Tips For Multiple Pictures
Hanging multiple pictures on a wall can create a beautiful display. It makes the room more lively and personal. Knowing how to arrange and anchor these pictures is important. This section shares tips to help you hang several pictures neatly and safely.
Creating A Gallery Wall
Choose a wall with enough space. Lay your pictures on the floor first. Try different shapes and sizes together. Find a pattern that looks balanced. Use paper cutouts of the frames to plan on the wall. This helps avoid extra holes. Pick anchors that fit your wall type. Drywall anchors work well for most homes. For brick or concrete, use masonry anchors. Secure each picture tightly to prevent falls.
Spacing And Alignment Tricks
Keep equal space between pictures. About 2 to 3 inches works well for most walls. Use a level to keep pictures straight. Measure the distance from the floor or ceiling for uniform height. Group pictures by theme or color to make it look neat. Step back often to check the overall look. Adjust spacing if some pictures seem crowded. Proper spacing and alignment create harmony on the wall.

Credit: www.do-it-yourself-help.com
Frequently Asked Questions
What Tools Are Needed To Anchor Pictures To A Wall?
You need a drill, wall anchors, screws, a screwdriver, a level, and a measuring tape. These tools ensure secure and precise picture hanging on various wall types.
How Do You Choose The Right Wall Anchors?
Select anchors based on wall type and picture weight. Use plastic anchors for drywall and metal anchors for masonry walls. Proper anchors prevent damage and keep pictures stable.
Can I Hang Pictures Without Drilling Holes?
Yes, use adhesive hooks or strips for lightweight pictures. They avoid wall damage but are unsuitable for heavy frames. Always check weight limits before use.
How High Should Pictures Be Anchored On A Wall?
Hang pictures at eye level, typically 57-60 inches from floor to center. This height creates a balanced and visually appealing display in most rooms.
Conclusion
Anchoring pictures to a wall is simple with the right steps. Choose the proper anchor for your wall type. Use tools carefully and measure twice before drilling. Secure your picture firmly to avoid accidents. This method keeps your walls safe and your art steady.
Practice these tips to hang pictures with confidence. Enjoy decorating your space with ease and style.