Have you ever tried to remove a metal wall anchor and ended up frustrated or stuck? If so, you’re not alone.
These anchors are designed to hold tight, which can make taking them out tricky. But don’t worry—getting that stubborn metal anchor out doesn’t have to be a headache. You’ll discover simple, effective steps that anyone can follow to safely remove metal wall anchors without damaging your walls.
Ready to make your next DIY project easier? Keep reading and learn exactly how to get that metal wall anchor out with confidence.
Tools Needed
Removing a metal wall anchor requires the right tools. Using proper tools makes the job easier and safer. Some tools are common in many homes. Others are made for this specific task.
Knowing which tools to use helps avoid damage to the wall. It also saves time and effort. Below, you will find two groups of tools to help you remove metal wall anchors quickly and cleanly.
Common Household Tools
Many people have these tools at home. A pair of pliers can grip and pull the anchor. A screwdriver helps to loosen or pry it out. A hammer can tap the anchor gently to loosen it. A drill with a small bit can also help with stuck anchors. These tools are easy to find and simple to use.
Specialized Removal Tools
These tools are designed for anchor removal. An anchor removal tool grips anchors tightly for easy pull-out. A stud finder helps locate wall studs to avoid damage. A wall anchor extractor is a tool made just for this job. These tools make removal safer and cleaner, especially for tough anchors.
Safety Precautions
Removing a metal wall anchor can be tricky and sometimes risky. Following safety precautions keeps you safe and protects your walls. Taking a few simple steps before you start makes the job easier and safer. Always put safety first.
Protective Gear
Wear safety glasses to protect your eyes from dust and metal bits. Use gloves to avoid cuts and scrapes on your hands. A dust mask helps prevent breathing in small particles. Dress in clothes that cover your skin. Safety gear reduces injury risks during the removal process.
Workspace Preparation
Clear the area around the wall anchor. Remove furniture and objects that may get in the way. Place a drop cloth or old sheet on the floor to catch debris. Ensure good lighting to see the anchor and tools clearly. Keep a first aid kit nearby for emergencies. A clean and well-prepared space helps you work safely and efficiently.
Assessing The Anchor Type
Before removing a metal wall anchor, knowing its type is important. Different anchors need different removal methods. Assessing the anchor type helps avoid damage to the wall. It also makes the process faster and safer.
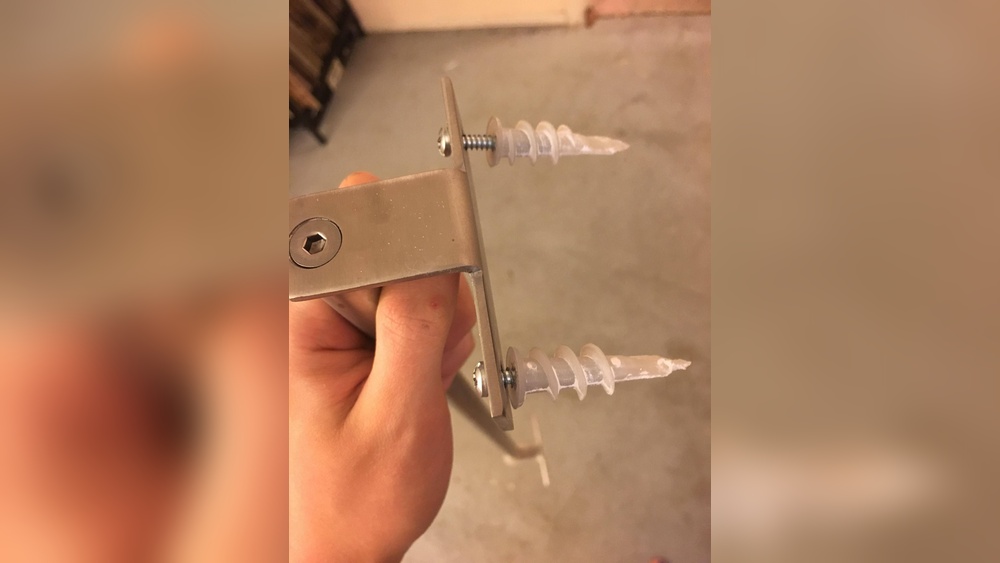
Identifying Metal Wall Anchors
Metal wall anchors come in various shapes and sizes. Some are sleeve anchors, others are toggle bolts or molly bolts. Sleeve anchors have a cylindrical metal sleeve that expands inside the wall. Toggle bolts have a spring-loaded wing that opens behind the wall. Molly bolts have a metal sleeve with legs that spread out inside the wall. Look closely at the anchor’s shape and how it sits in the wall. This will help identify the type.
Determining Anchor Condition
Check the anchor’s condition before removal. Is it rusty or loose? A rusty anchor might break during removal. A loose anchor may pull out easily. Also, see if the wall around the anchor is damaged. Cracks or holes can make removal tricky. Knowing the condition helps choose the best removal method. It also reduces the risk of wall damage.

Credit: www.youtube.com
Method 1: Prying Out
Method 1: Prying Out is a simple way to remove a metal wall anchor. This method works well for anchors that are not deeply embedded or stuck. You use tools to gently lift and pull the anchor out of the wall. This method causes minimal damage to your wall.
Using A Flathead Screwdriver
Start by placing the flathead screwdriver under the edge of the metal anchor. Push the handle down carefully to lift the anchor slightly. Move the screwdriver around the anchor to loosen it. Pull the anchor out slowly with steady force. This tool is easy to use and often found in most toolboxes.
Leveraging With Pliers
Grab the metal anchor with a pair of pliers. Hold it tightly near the wall. Pull the anchor straight out with slow, steady pressure. If the anchor moves, continue pulling gently until it comes free. Pliers give a strong grip and help remove stubborn anchors.
Method 2: Unscrewing The Anchor
Method 2: Unscrewing the Anchor is a common way to remove metal wall anchors. This method works best if the anchor is still tight inside the wall. You can try to turn and pull it out without damaging the wall surface.
This technique requires some simple tools and a careful hand. It is less likely to leave large holes or marks on your wall. Let’s explore how to do this step by step.
Using A Screwdriver Or Drill
Start by selecting a screwdriver or drill that fits the anchor’s screw head. Insert the tool into the screw and turn it counterclockwise. Keep turning gently to loosen the anchor.
If the anchor starts to come out, pull it slowly with pliers or your fingers. Avoid forcing it as this may damage the wall. Sometimes, the anchor will unscrew like a bolt.
Use steady pressure. If the screw turns but the anchor does not move, stop and try another method.
When Unscrewing Is Not Possible
Sometimes the anchor is stuck or the screw head is stripped. Unscrewing may not work in these cases. Avoid using too much force to prevent wall damage.
Try to grip the anchor body with pliers and wiggle it gently. If it still won’t budge, you may need to push it deeper into the wall or patch the hole.
This approach can leave small holes but keeps the wall intact for future repairs. Always work slowly and carefully for the best results.

Credit: www.aspenfasteners.com
Method 3: Drilling Out The Anchor
Method 3: Drilling Out the Anchor is a practical way to remove stubborn metal wall anchors. This method works best when the anchor is stuck or damaged. It uses a drill to break or remove the anchor from the wall. It requires some care to avoid damaging the wall surface.
Choosing The Right Drill Bit
Pick a drill bit slightly smaller than the anchor’s diameter. A high-speed steel (HSS) bit works well for metal anchors. For tough anchors, a cobalt or titanium bit may be better. Make sure the bit is sharp to drill smoothly. Using the wrong bit can damage the wall or drill.
Drilling Technique Tips
Start drilling slowly to avoid slipping or damaging the wall. Keep the drill steady and straight to target the anchor’s center. Apply light pressure; let the drill do the work. Drill until the anchor loosens or breaks apart. Clean out any metal fragments before patching the hole. Safety glasses protect your eyes from flying debris.
Fixing The Wall After Removal
Removing a metal wall anchor leaves holes that need fixing. Repairing the wall properly helps it look smooth again. It also prepares the area for new anchors. This section explains how to patch small holes and get the wall ready for new anchors.
Patching Small Holes
Start by cleaning the hole from dust and loose debris. Use a putty knife to apply spackle or wall filler. Press the filler inside the hole firmly. Smooth the surface so it is even with the wall. Let the filler dry completely before sanding it gently. Sand until the patch blends well with the wall. If needed, apply a second layer of filler. Finish by painting over the patched area to match the wall color.
Preparing For New Anchors
Choose a new spot near the patched area for the anchor. Mark the spot using a pencil for accuracy. Drill a pilot hole that matches the anchor size. Avoid drilling into the patched area to keep it strong. Check the wall type to select the correct anchor. Test the anchor in the pilot hole for a snug fit. This step ensures your new anchor holds firmly and safely.

Credit: www.youtube.com
Preventing Anchor Removal Issues
Preventing problems with metal wall anchors starts before installation. Choosing the right anchor and installing it properly reduces the chance of damage. It saves time and effort when removing or replacing anchors later. Simple steps can make a big difference in the durability of your walls and fixtures.
Selecting The Right Anchor
Pick an anchor that matches the wall type and weight of the object. Drywall anchors differ from those made for concrete or brick. Use heavier anchors for heavier items. Avoid using anchors that are too small or weak. This prevents anchors from getting stuck or breaking inside the wall.
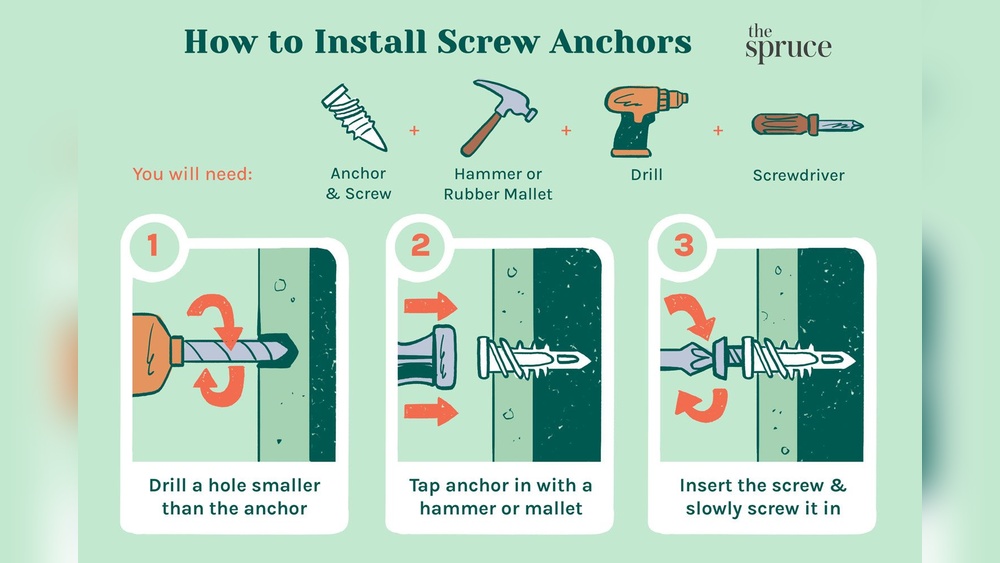
Proper Installation Tips
Drill a hole that fits the anchor size exactly. Too small a hole can cause the anchor to bend or break. Too large a hole makes the anchor loose and unstable. Insert the anchor gently without forcing it. Tighten screws slowly to avoid stripping the anchor. These steps keep anchors secure and easier to remove if needed.
Frequently Asked Questions
How Do I Remove A Metal Wall Anchor Safely?
To remove a metal wall anchor safely, first unscrew any attached fixtures. Then, use pliers to grip and gently pull the anchor out. If it’s stuck, carefully widen the hole with a drill before removal. Always wear safety goggles to protect your eyes.
What Tools Are Needed To Extract Metal Wall Anchors?
You’ll need pliers, a screwdriver, and possibly a drill with a bit slightly larger than the anchor. A hammer and a small pry bar can also help loosen stubborn anchors. Safety goggles are recommended to protect your eyes during the process.
Can I Reuse A Metal Wall Anchor After Removal?
Metal wall anchors are generally not reusable once removed. They often get bent or damaged during extraction. It’s best to use a new anchor to ensure a secure hold when rehanging items or repairing the wall.
What If The Metal Wall Anchor Breaks Inside The Wall?
If the anchor breaks, use needle-nose pliers or a small drill bit to carefully remove the fragments. Avoid pushing the pieces further inside. If removal isn’t possible, consider filling the hole with spackle and installing a new anchor nearby.
Conclusion
Removing a metal wall anchor can be simple with the right steps. Take your time and use the proper tools. Avoid damaging your wall by working carefully. Small mistakes can cause big problems. Practice patience and follow the guide closely.
Soon, your wall will look clean and ready for new fixtures. Keep these tips in mind for future projects. Getting rid of anchors does not have to be hard. You can do it safely and neatly every time.