If your Sears floor jack isn’t working right, it can quickly turn a simple task into a frustrating experience. You rely on this tool to lift heavy loads safely and easily, so when it fails, you need a fix fast.
But don’t worry—fixing your floor jack might be simpler than you think. In this guide, you’ll discover clear, step-by-step solutions to get your jack back in top shape. Keep reading, and you’ll save time, avoid costly repairs, and get your projects moving again with confidence.

Credit: us.amazon.com
Common Sears Floor Jack Issues
Sears floor jacks are strong tools. They help lift heavy vehicles easily. But like all tools, they face some common problems. Knowing these issues helps you fix them fast. It saves time and money. Below are common Sears floor jack issues to watch for.
Leaks And Hydraulic Problems
Hydraulic leaks cause the jack to lose pressure. This makes it hard to lift or hold weight. Leaks often come from worn seals or damaged hoses. Dirt and rust can also damage hydraulic parts. Check oil levels regularly. Replace seals if you see oil around the jack. Using clean hydraulic fluid helps keep parts working well.
Handle And Pump Malfunctions
The handle may feel loose or fail to pump. This happens from worn or broken parts inside the pump. Rust or dirt buildup can block smooth handle movement. Tighten loose bolts and clean the pump area. Lubricate moving parts to keep the handle working easily. Replace broken parts to restore full function.
Lift Arm And Saddle Wear
The lift arm and saddle hold the vehicle. They wear out over time from heavy use. Cracks, bends, or worn pads reduce safety. Inspect these parts often for damage. Replace worn saddle pads to avoid slipping. Straighten bent arms or change them if needed. Proper care extends the jack’s life and keeps you safe.
Tools And Materials Needed
Fixing a Sears floor jack needs the right tools and materials. Having everything ready saves time and avoids frustration. This section covers the basic items required for a smooth repair process.
Essential Repair Tools
Start with a good set of wrenches. Adjustable wrenches work well for different bolt sizes. A flathead and Phillips screwdriver are necessary for screws and small parts. Pliers help grip and turn tough components. A hammer can loosen stuck parts gently. Use a clean cloth to wipe dirt and oil from parts. A flashlight helps to see inside small spaces clearly.
Replacement Parts And Fluids
Floor jacks often need new seals or O-rings. Check the jack’s manual for exact part numbers. Hydraulic fluid is key for smooth lifting. Use the fluid type recommended by Sears. A small container helps to pour fluid without spills. Keep extra rags handy to clean up leaks. Using the right parts and fluids keeps your jack working safely and well.
Diagnosing The Problem
Diagnosing the problem is the first step in fixing your Sears floor jack. It helps you find what part needs repair. This saves time and avoids guesswork. Careful inspection is key to understanding the issue. Start by looking closely at different parts of the jack.
Checking For Hydraulic Fluid Leaks
Hydraulic fluid leaks are a common problem. Look under the jack for any wet spots or puddles. Check around seals and hoses for cracks or damage. A low fluid level can cause the jack to fail. If you find leaks, the fluid needs refilling or parts may need replacement.
Inspecting Pump And Release Valve
The pump moves fluid to lift the jack. Test if the pump handle moves smoothly. If it feels stiff, dirt or damage might be inside. The release valve controls pressure. Make sure it opens and closes fully. A stuck valve can stop the jack from lifting or lowering properly.
Evaluating Structural Damage
Look at the frame and lifting arm for bends or cracks. Damage here can make the jack unsafe. Check the wheels and base for wear or breakage. Bent parts can cause misalignment and poor performance. Repair or replace any broken pieces to ensure safety.
Credit: www.youtube.com
Fixing Hydraulic Fluid Leaks
Fixing hydraulic fluid leaks is important for a Sears floor jack to work well. Leaks reduce the jack’s power and can cause damage. Finding and stopping leaks keeps the jack safe and reliable. This section helps you fix hydraulic fluid leaks step-by-step.
Locating Leak Sources
Check the jack carefully for wet spots or puddles. Look near the pump, cylinder, and hose connections. Use a clean cloth to wipe areas and watch for fresh fluid. Small cracks or damaged seals often cause leaks. Mark any spots where fluid appears to find the exact leak source.
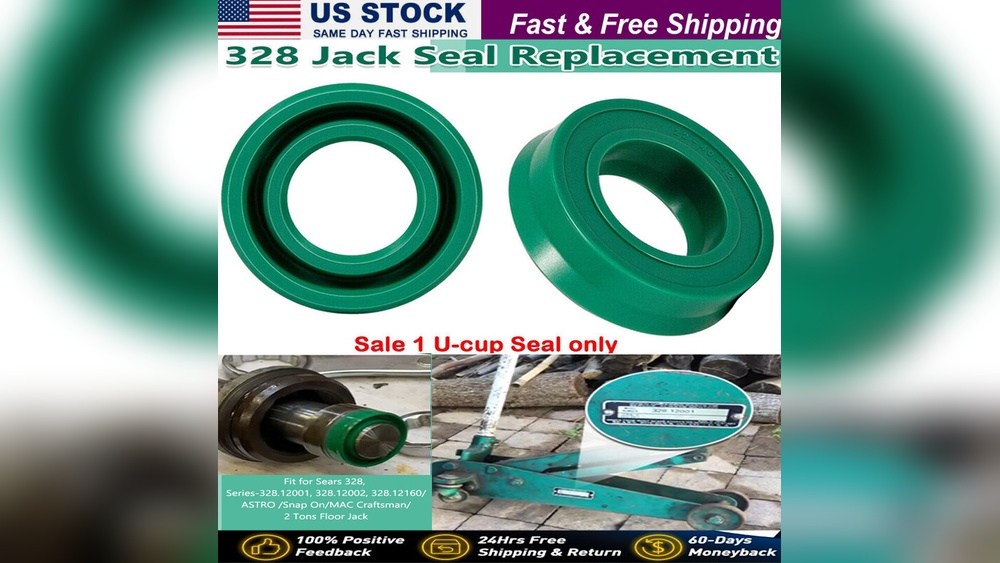
Replacing Seals And O-rings
Remove the parts near the leak carefully. Old seals and O-rings can wear out or break. Take them out and replace with new ones of the same size. Use a small amount of hydraulic fluid on new seals to fit them easily. Reassemble the parts tightly to stop leaks from returning.
Refilling Hydraulic Fluid
Open the fluid reservoir cap after fixing the leak. Use the recommended hydraulic fluid for your Sears floor jack. Pour slowly to avoid spills and fill to the proper level. Check for leaks again after refilling. Proper fluid level helps the jack lift safely and smoothly.
Repairing Handle And Pump Issues
Repairing handle and pump issues is key to restoring your Sears floor jack’s function. These parts often face wear and tear from regular use. Fixing them can extend the jack’s life and improve safety. Simple steps like tightening, replacing parts, and lubricating can solve most problems.
Tightening Loose Components
Loose screws and bolts cause handle wobble and pump failure. Check all fasteners around the handle and pump. Use a wrench to tighten any loose nuts. This restores stability and smooth operation. Loose parts also cause leaks and reduce jack strength.
Replacing Worn Pump Parts
Pump seals and valves wear out over time. This leads to poor lifting power or no pressure build-up. Identify worn parts by checking for leaks or weak pumping action. Order replacement seals or valves made for Sears floor jacks. Swap old parts carefully following the manual’s steps. This fixes leaks and restores pump strength.
Lubricating Moving Parts
Friction slows down the handle and pump. Apply light machine oil to moving joints and the pump piston. Lubrication reduces wear and makes pumping easier. Use oil sparingly to avoid dirt buildup. Regular lubrication keeps your floor jack smooth and reliable.

Credit: www.youtube.com
Restoring Lift Arm And Saddle Function
Restoring the lift arm and saddle function is key to fixing your Sears floor jack. These parts handle the heavy lifting and need to work smoothly. Fixing them improves safety and performance. Follow simple steps to make your jack reliable again.
Adjusting Lift Arm Alignment
Start by checking the lift arm’s position. It should move up and down without wobbling. If it is off-center, loosen the bolts slightly. Shift the arm until it aligns with the jack body. Tighten the bolts firmly to keep it steady. Proper alignment helps the jack lift evenly and safely.
Replacing Worn Saddles
The saddle is the part that holds the load. Over time, it can wear out or crack. Remove the old saddle by unscrewing it carefully. Buy a replacement that fits your floor jack model. Screw the new saddle in place securely. A good saddle prevents slipping and damage during use.
Ensuring Smooth Operation
Lubricate the lift arm and saddle joints with light oil. Check for rust or dirt and clean it off. Move the arm up and down to spread the lubricant. Test the jack by lifting a small load. Smooth operation means less effort and safer lifting.
Testing And Safety Checks
Testing and safety checks are vital after fixing your Sears floor jack. These steps make sure the jack works well and keeps you safe. Skipping tests can cause accidents or damage.
Follow the steps carefully. Use simple tools and take your time. Check every part of the jack before using it again.
Performing Load Tests
Start by testing the jack with a light load. Use a safe weight under the jack’s limit. Lift the load slowly and watch for any unusual sounds or movements.
If the jack holds the weight without dropping, it is working well. Try raising and lowering the load a few times. This shows if the jack operates smoothly under pressure.
Checking For Proper Lifting Height
Measure the highest point the jack can lift. Compare this with the specifications from the manual. The jack should reach the correct height for your vehicle or task.
Do not force the jack beyond its limit. Check if the lifting arm moves evenly. Uneven movement can signal a problem with the mechanism.
Ensuring Stability And Safety
Place the jack on a flat, solid surface. Check if it stays steady without wobbling. Stability is key to safe lifting and preventing accidents.
Look at the wheels and base for any damage. Replace worn parts before use. Always use jack stands after lifting for extra safety.
Maintenance Tips For Longevity
Proper care helps your Sears floor jack last longer. Regular upkeep keeps it working smoothly and safely. Small actions prevent big problems and costly repairs. Follow these simple maintenance tips to extend your jack’s life.
Regular Cleaning And Lubrication
Keep your floor jack clean after each use. Wipe off dirt, dust, and grease with a cloth. Dirt can damage moving parts and cause rust. Lubricate all joints and wheels regularly. Use light machine oil or grease. This reduces friction and makes lifting easier.
Scheduled Hydraulic Fluid Changes
Hydraulic fluid is vital for jack performance. Over time, fluid gets dirty and loses power. Change the fluid every 6 to 12 months. Use the type recommended in the user manual. Drain old fluid completely before refilling. Clean fluid ensures smooth and safe lifting.
Storage Recommendations
Store your floor jack in a dry, cool place. Avoid damp areas that cause rust and corrosion. Keep it covered to protect from dust and debris. Lower the jack to its lowest position before storing. This reduces pressure on seals and parts.
Frequently Asked Questions
How Do I Troubleshoot A Sears Floor Jack Not Lifting?
Check hydraulic fluid levels and refill if low. Inspect for leaks or damaged seals. Ensure the release valve is fully closed. Lubricate moving parts and test the jack again to confirm proper lifting function.
Why Is My Sears Floor Jack Leaking Oil?
Oil leaks often indicate worn seals or loose fittings. Inspect the jack for visible oil around joints. Replace damaged seals and tighten bolts. Regular maintenance prevents leaks and ensures smooth hydraulic operation.
How Can I Reset The Release Valve On A Floor Jack?
Locate the release valve near the handle base. Turn it clockwise to close tightly. This action restores pressure for lifting. Avoid over-tightening to prevent damage. Test the jack after adjustment to ensure proper function.
What Safety Checks Should I Perform Before Using A Floor Jack?
Always inspect for cracks, leaks, or rust. Ensure the jack is rated for your vehicle’s weight. Use on a flat, stable surface. Engage the parking brake and chock wheels before lifting. Safety prevents accidents and equipment damage.
Conclusion
Fixing a Sears floor jack takes patience and care. Follow each step slowly to avoid mistakes. Check parts often to find problems early. Use the right tools and clean parts well. Testing the jack after repairs keeps you safe. Small fixes can save money and extend use.
Keep your floor jack ready for any job. Repairing it yourself feels good and saves time. Stay safe and work carefully every time. Your jack will work better with simple care.