Are you tired of wall anchors that stick out and ruin the look of your walls? Getting wall anchors flush with the surface is easier than you think—and it makes a huge difference in the final result.
Whether you’re hanging shelves, pictures, or heavy mirrors, a clean, smooth finish not only looks professional but also keeps your items secure. In this guide, you’ll discover simple, practical steps to make your wall anchors sit perfectly flush every time.
Keep reading to transform your DIY projects and impress everyone with your flawless walls.

Credit: www.picturehangsolutions.com
Choosing The Right Wall Anchor
Choosing the right wall anchor is key to a secure and flush fit. Not all anchors work the same. Picking the correct type helps hold weight and keeps the anchor flush with the wall surface. This section explains common types and how to match them to your wall material.
Types Of Wall Anchors
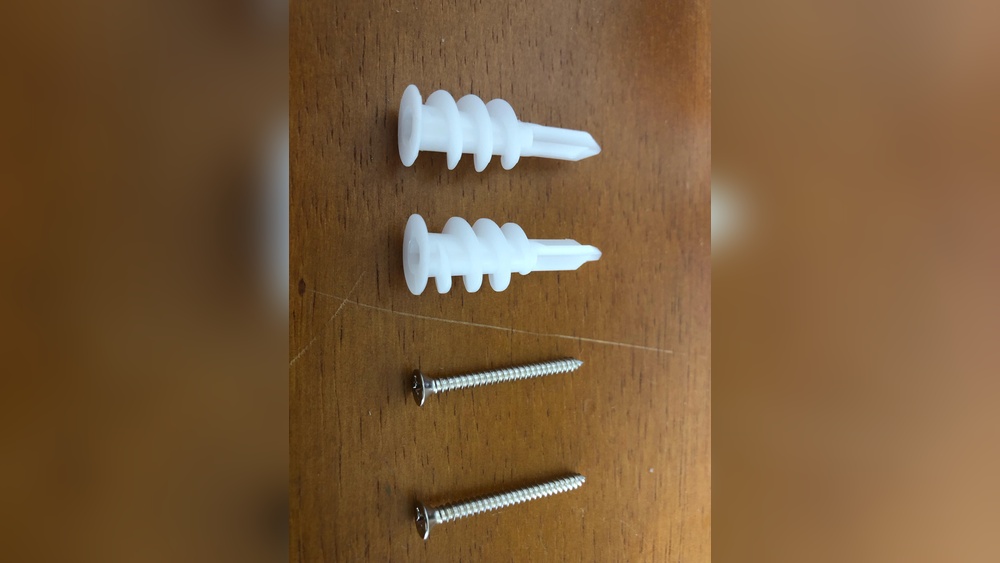
Plastic expansion anchors are common and fit light loads. They expand when a screw is inserted. Molly bolts spread inside the wall for stronger hold. Toggle bolts use metal wings that open behind the wall. Threaded anchors screw directly into drywall. Each type suits different wall thickness and weight needs.
Matching Anchors To Wall Material
Drywall needs lightweight anchors like plastic or threaded ones. For plaster, use molly bolts to prevent cracks. Concrete and brick require heavy-duty anchors like sleeve or wedge anchors. Knowing your wall type helps you pick the best anchor. This ensures the anchor stays flush and supports your fixture safely.
Tools Needed For Installation
Getting wall anchors flush with the surface needs the right tools. Using proper tools ensures a clean, strong installation. It also helps prevent damage to the wall or the anchor. Below is a list of tools that make the job easier and more precise.
Essential Tools List
- Drill with the correct bit size
- Wall anchors suitable for your wall type
- Screwdriver or screw gun
- Hammer for tapping anchors gently
- Measuring tape or ruler for accurate placement
- Level to keep anchors straight
Optional Tools For Precision
- Depth stop or drill bit collar to control hole depth
- Chisel for cleaning out rough edges inside holes
- Utility knife for trimming anchor edges
- Small file to smooth anchor surfaces
- Stud finder to locate wall studs if needed
Preparing The Wall Surface
Preparing the wall surface is the first step to get wall anchors flush. A smooth and clean wall ensures the anchors sit tight and hold well. Careful preparation makes the installation easier and stronger. Follow these steps for the best results.
Cleaning And Marking
Clean the wall area with a dry cloth to remove dust and dirt. Dust can stop anchors from fitting properly. Mark the exact spot for the anchor with a pencil. Use a level to keep marks straight. Clear markings help drill holes in the right place.
Drilling Accurate Holes
Choose a drill bit size that matches the anchor. Drill slowly and straight into the wall. Avoid making the hole too big or too deep. Accurate holes make anchors fit snugly. This prevents wobbling and helps the anchor stay flush.

Credit: www.amazon.sa
Installing Anchors Flush
Installing wall anchors flush with the surface creates a clean, professional look. It also ensures the anchor holds tightly without causing damage. Proper installation helps avoid loose fittings and uneven surfaces. Follow simple steps to place anchors perfectly flush every time.
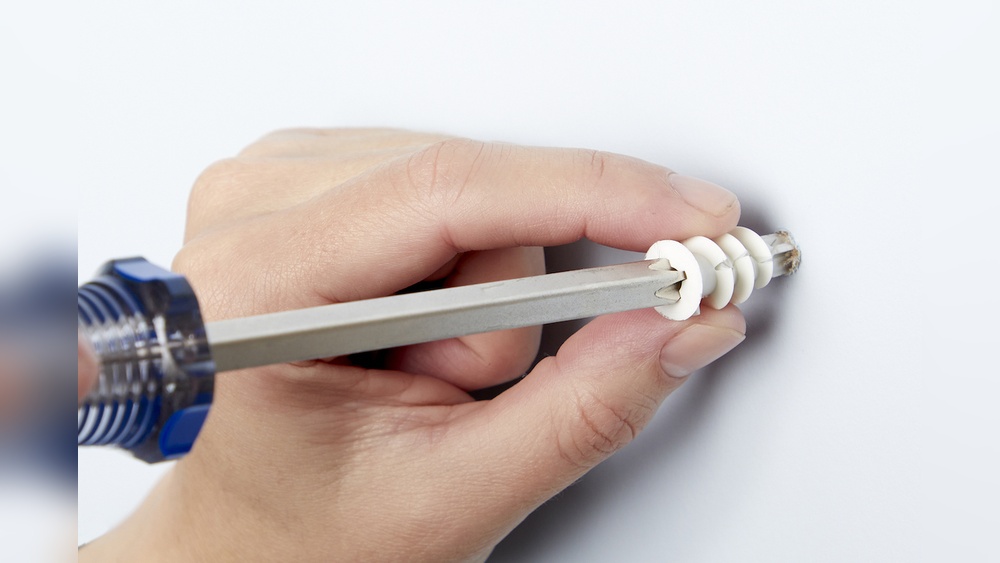
Inserting The Anchor Correctly
Begin by drilling a hole that matches the anchor size. The hole must be straight and deep enough to fit the anchor fully. Gently push the anchor into the hole. Use a hammer lightly if needed, but avoid forcing it in.
The anchor should sit snugly without sticking out. Check that it does not go deeper than the wall thickness. A flush anchor prevents gaps and strengthens your fixture.
Adjusting Depth For Flush Finish
After inserting, test the anchor depth by placing your fixture on the wall. If the anchor sticks out, remove it carefully. Trim the anchor’s edge with a utility knife if needed.
For hollow walls, use anchors designed to expand behind the drywall. These anchors often have adjustable collars for depth control. Tighten or loosen the collar until the anchor sits flush.
Double-check by pressing the fixture against the wall. The anchor should not push the fixture away. A flush anchor ensures stability and a clean look.
Tips For Troubleshooting
Troubleshooting wall anchors is key to getting them flush with the wall. Small problems can cause anchors to sit loose or stick out. Fixing these issues keeps your shelves and fixtures stable and safe.
Simple steps can fix most common problems quickly. Knowing what to do saves time and effort. The right approach makes your wall anchors secure and neat.
Fixing Loose Anchors
Loose anchors happen when the hole is too big or the anchor is weak. Try pushing the anchor deeper with a hammer. If it still moves, remove it and fill the hole with wood filler or toothpaste. Let it dry, then drill a smaller hole for a new anchor. Use a larger anchor if the hole is too wide. Tighten screws slowly to avoid loosening the anchor again.
Dealing With Over-drilled Holes
Over-drilled holes cause anchors to fall inside the wall. Fill the hole with a strong filler like epoxy or drywall compound. Wait for it to harden fully. Drill a new hole slightly smaller than before. Insert the correct size anchor carefully. Avoid drilling too deep or wide next time. This keeps anchors flush and secure.
Finishing Touches
Finishing touches make your wall anchors look clean and neat. These small steps improve the overall appearance. They hide any imperfections around the anchor.
Taking time to finish well shows care and skill. It also helps the anchor blend with the wall. Let’s explore the key steps to finish like a pro.
Filling Gaps And Seams
Fill any gaps between the wall and the anchor. Use a putty knife to apply spackle or filler. Press it gently to cover holes and cracks.
Remove extra filler with the knife’s edge. Let the filler dry completely before moving on. This creates a smooth surface and hides flaws.
Sanding And Painting For Perfection
Sand the dried filler with fine-grit sandpaper. Sand lightly until the surface feels even and soft. Wipe away dust with a clean cloth.
Next, paint over the filled area to match the wall color. Use a small brush for precision. This step camouflages the anchor and finishing work.

Credit: pro-bel.com
Frequently Asked Questions
What Tools Are Needed To Get Wall Anchors Flush?
You need a drill, screwdriver, wall anchors, and a hammer. A level and pliers help ensure proper alignment. These tools make installation smooth and accurate.
How Do You Install Wall Anchors Flush With Drywall?
Drill a hole slightly smaller than the anchor. Insert the anchor and tap gently with a hammer. Screw in slowly until the anchor sits flush with the wall.
Can Wall Anchors Be Flush On Uneven Surfaces?
Yes, but prep is crucial. Use a filler or patch to smooth the surface first. This ensures the anchor fits snugly and holds firmly.
Why Is It Important For Wall Anchors To Be Flush?
Flush anchors provide better load distribution and prevent damage. They ensure your mounted items are secure and look neat. This improves safety and aesthetics.
Conclusion
Getting wall anchors flush makes your project look neat and strong. Use the right tools and take your time. Gently push or tap the anchor until it sits flat with the wall. Avoid forcing it, as this can damage the wall or anchor.
Practice on scrap materials if you can. A flush anchor holds better and looks cleaner. Keep these simple steps in mind for your next project. A smooth finish is always worth the effort.