Are you tired of your shelves or pictures falling off the wall? Knowing how to put wall anchors in sheetrock can make all the difference.
It’s a simple skill that ensures your items stay securely in place, no matter their weight. In this guide, you’ll discover easy steps to install wall anchors quickly and correctly. Whether you’re a beginner or just need a refresher, you’ll gain the confidence to tackle your next project with ease.
Keep reading—you’re just moments away from mastering a handy trick that will save you time and frustration.

Credit: www.youtube.com
Choosing The Right Wall Anchors
Choosing the right wall anchors is important for a secure hold in sheetrock. Different anchors serve different purposes and weights. Picking the wrong type can cause your item to fall or damage the wall. Understanding the types and matching them to your needs helps ensure a safe and strong mount.
Types Of Wall Anchors
Plastic expansion anchors are common and easy to use. They work well for light items like picture frames. Toggle bolts are stronger and better for heavier objects. They spread the load behind the wall for extra support. Molly bolts expand inside the wall for a firm grip. Self-drilling anchors screw directly into the drywall without pre-drilling. Each type fits specific weight limits and wall conditions.
Matching Anchors To Weight And Wall Type
Check the weight of the object before choosing anchors. Light items need simple plastic anchors. Medium-weight items require toggle or molly bolts. Heavy items need heavy-duty anchors or screws into a stud. Consider the wall type too. Sheetrock is fragile and needs anchors that spread weight. Avoid using anchors meant for solid walls. Matching the anchor to both weight and wall type keeps mounts safe and steady.
Tools And Materials Needed
Before starting to put wall anchors in sheetrock, gather all tools and materials. Having everything ready saves time and avoids mistakes. It also makes the job easier and safer. Below are the key items needed for the task.
Essential Tools
You need a drill with a proper drill bit size. The drill bit must match the wall anchor size. A screwdriver is necessary for tightening the anchor screw. A tape measure helps mark the exact spot on the wall. A pencil is useful for marking the drill point. A level ensures your anchor is straight. A hammer may be needed for some types of anchors. These tools make the job smooth and accurate.
Safety Equipment
Wear safety glasses to protect your eyes from dust and debris. Use gloves to protect your hands from sharp edges. A dust mask keeps you safe from inhaling fine particles. Wearing proper shoes protects your feet from dropped tools. Safety gear is important for preventing injuries. Always prioritize safety during any home project.
Preparing The Wall
Preparing the wall is the first step before placing wall anchors in sheetrock. It helps ensure the anchors hold well and the item stays secure. Taking time to prepare the wall properly can save you from future damage or repairs.
Locating Studs And Marking Spots
Find the studs behind the sheetrock using a stud finder or tapping method. Studs are the wooden beams that hold the wall firmly. Anchors work best near or between these studs for strong support.
Mark the exact spots on the wall where you want to place the anchors. Use a pencil to make small, clear marks. These marks guide you to drill or insert anchors accurately.
Checking For Obstructions
Before drilling, check for any pipes or wires inside the wall. Use a wire detector or look at building plans if available. Avoid drilling near electrical wires or plumbing to prevent accidents.
Clear the area of dust or loose paint. Clean walls help anchors stick better and last longer. Prepare the surface by wiping gently with a dry cloth.
:max_bytes(150000):strip_icc()/how-to-use-and-discard-anchor-screws-1822671-Final-ec8091ccf65241b1b1f888549f25003a.jpg)
Credit: www.thespruce.com
Drilling The Hole
Drilling the hole is a key step in placing wall anchors in sheetrock. It sets the stage for a secure fit and strong hold. The hole must be the right size and cleanly drilled. This helps the anchor grip the wall without damage.
Selecting The Drill Bit Size
Choose a drill bit that matches the anchor size exactly. The hole should be slightly smaller than the anchor’s widest part. This ensures a tight fit and stops the anchor from slipping out. Check the anchor package for size recommendations. Using the wrong size can cause weak support or wall damage.
Drilling Techniques For Clean Holes
Hold the drill steady and straight to the wall. Start drilling slowly to avoid cracking the sheetrock. Apply gentle pressure and let the bit do the work. Stop drilling as soon as you reach the needed depth. A clean hole prevents the anchor from breaking or wobbling.
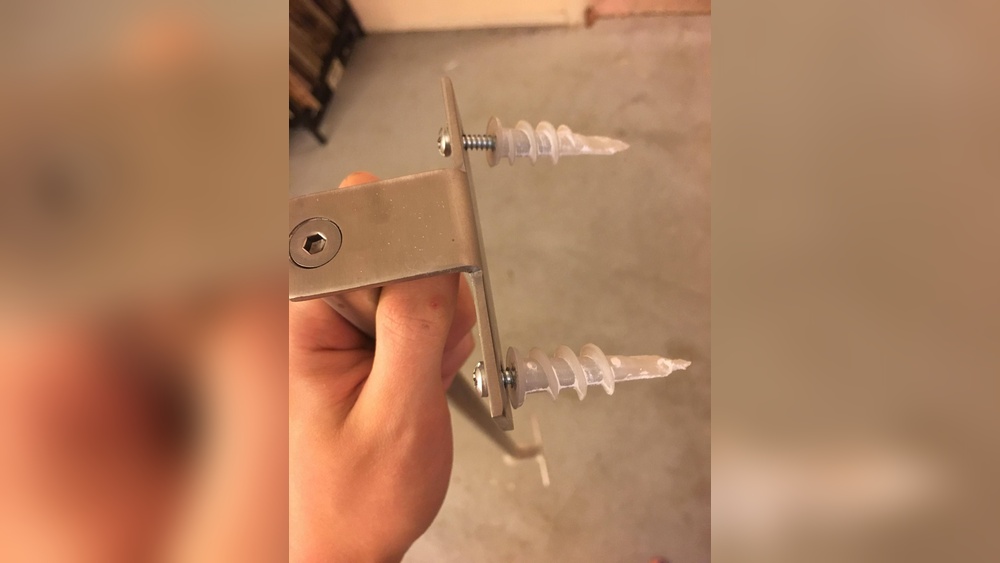
Installing Different Types Of Anchors
Installing wall anchors in sheetrock ensures a strong hold for your fixtures. Different anchors suit different weights and wall conditions. Choosing the right type helps avoid damage and keeps things secure. Below are common types of anchors and how to install each.
Plastic Expansion Anchors
Plastic expansion anchors work well for light loads. First, drill a hole slightly smaller than the anchor. Push the anchor into the hole until flush with the wall. Insert the screw and tighten it slowly. The anchor expands, gripping the drywall firmly.
Toggle Bolts
Toggle bolts hold heavier items securely. Drill a hole big enough for the closed toggle. Thread the bolt through the fixture and the toggle. Push the toggle through the hole; it opens behind the wall. Tighten the bolt carefully to clamp the fixture.
Molly Bolts
Molly bolts provide strong support in hollow walls. Drill a hole matching the bolt size. Insert the molly bolt and tap it gently until flush. Tighten the screw to expand the anchor inside the wall. Remove the screw, attach your fixture, then reinsert and tighten the screw.
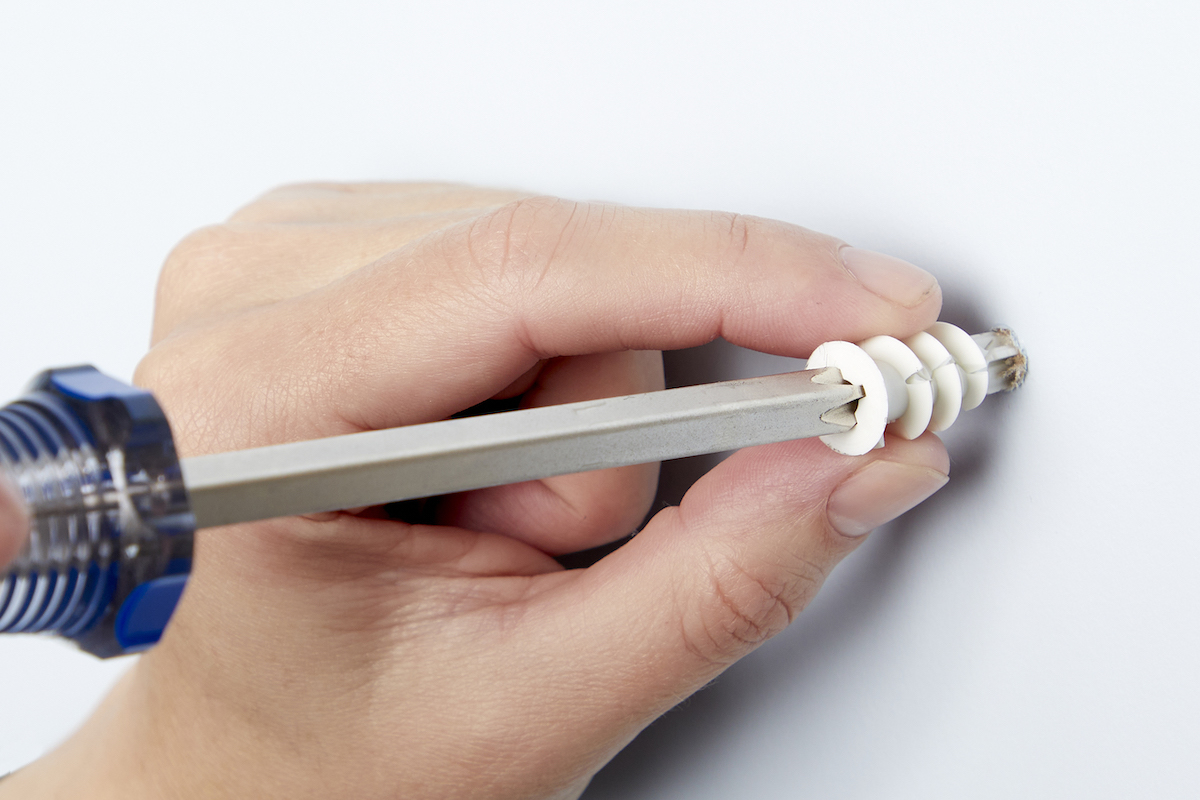
Self-drilling Anchors
Self-drilling anchors are easy and fast to install. No pre-drilling needed. Place the tip on the wall and screw it in using a screwdriver. Insert the screw into the anchor and tighten. These anchors work well for medium-weight objects.
Credit: www.bobvila.com
Securing The Fixture
Securing the fixture to the wall is the final step after placing wall anchors in sheetrock. This step ensures your item stays put and holds strong. Proper attachment prevents damage and keeps your walls safe. Follow simple steps to align and tighten the fixture correctly.
Aligning And Attaching Items
First, hold the fixture close to the wall. Match the holes on the fixture with the wall anchors. Check that the fixture sits flat against the wall. Push the fixture gently to keep it steady. Insert screws through the fixture holes into the anchors. This locks the fixture firmly in place.
Tightening Without Damaging
Use a screwdriver to tighten the screws slowly. Stop as soon as you feel resistance. Over-tightening can strip the wall anchors or damage the sheetrock. Tighten just enough to hold the fixture firmly. Test the fixture by giving it a slight tug to ensure it is secure.
Testing Anchor Strength
Testing the strength of wall anchors in sheetrock ensures your installation is safe and reliable. This step confirms the anchor can hold the weight intended. It also helps avoid damage or accidents later. Proper testing gives you confidence in your work.
Applying Load Gradually
Start by adding a small weight to the anchor. Increase the load slowly and watch for any movement. Pull gently on the fixture to check if it stays firm. Avoid sudden force that might damage the sheetrock or anchor. Gradual loading shows how much weight the anchor can hold safely.
Signs Of Secure Installation
The anchor should not wiggle or pull loose from the wall. No cracks or bulges should appear around the anchor site. The attached object must stay steady and level. If the anchor holds steady under load, it is secure. Weak anchors will shift, loosen, or cause wall damage.
Tips For Durable Wall Anchor Installation
Installing wall anchors in sheetrock needs care for strong support. Good installation stops anchors from falling out or causing wall damage. Small steps during setup can make your anchors last longer and hold more weight. Focus on simple tips for better results.
Use the right tools and materials. Follow instructions exactly. These habits help keep anchors firm and safe over time. Keep reading for useful tips on durable wall anchor installation.
Avoiding Common Mistakes
Choose the correct anchor type for your wall and load. Avoid using anchors that are too small or weak. Drill the hole size that matches the anchor exactly. Too big or too small holes cause poor grip. Insert anchors straight into the hole without forcing them.
Do not overtighten screws. Screws that are too tight break anchors or damage the wall. Stop tightening once the anchor feels secure. Check the wall condition before starting. Avoid placing anchors near cracks or damaged spots.
Maintaining Anchors Over Time
Check anchors regularly for looseness or wall damage. Tighten screws lightly if they feel loose. Replace anchors if the wall shows cracks or if the anchor moves. Avoid hanging heavier items than the anchor can hold.
Keep the area around anchors dry. Water weakens sheetrock and causes anchors to fail. Clean dust and debris from anchor holes if you remove screws. Well-maintained anchors keep your walls safe and strong.
Frequently Asked Questions
What Tools Do I Need To Install Wall Anchors In Sheetrock?
You need a drill, drill bit, screwdriver, wall anchors, and a pencil. These tools help create precise holes and secure anchors for strong support in sheetrock.
How Do I Choose The Right Wall Anchor For Sheetrock?
Select anchors based on weight capacity and wall thickness. Plastic anchors suit light loads, while metal or toggle anchors hold heavier items securely.
Can I Reuse Wall Anchors In Sheetrock?
No, reusing wall anchors is not recommended. They lose grip and strength after removal, risking instability when reused in sheetrock.
How Deep Should I Drill Holes For Wall Anchors?
Drill holes slightly deeper than the anchor length. This ensures the anchor fits snugly and provides maximum holding power in sheetrock.
Conclusion
Putting wall anchors in sheetrock is simple with the right steps. Choose the correct anchor for your wall and weight. Drill a hole carefully, then insert the anchor firmly. Tighten the screw to secure your item safely. This method keeps your wall strong and stable.
Taking time to do it right saves future repairs. Now, hanging shelves, pictures, or hooks feels easier and safer. Practice a few times, and it will become second nature. Trust the process and enjoy your sturdy walls.