If your Sears 950145 floor jack isn’t working like it used to, you don’t have to replace it. You can bring it back to life with a simple rebuild.
Imagine saving money and getting your trusted jack running smoothly again. In this guide, you’ll find easy steps to rebuild your floor jack, even if you’re not a mechanic. By the end, you’ll have the confidence and know-how to fix your jack yourself.
Keep reading to discover how to make your floor jack strong and reliable once more.
Tools And Materials Needed
Rebuilding a Sears 950145 floor jack requires the right tools and materials. These help you fix the jack safely and correctly. Using proper tools saves time and avoids damage. Materials ensure the jack works like new.
Gather everything before starting. This makes the process smooth and easy. Here is a list of what you need.
Hand Tools
Basic hand tools are essential. You will need wrenches, screwdrivers, and pliers. A socket set helps with nuts and bolts. A hammer can assist with stubborn parts. These tools allow you to open and take apart the jack.
Replacement Parts
Parts wear out over time. You may need seals, O-rings, and gaskets. A new hydraulic fluid helps the jack lift properly. Check for worn or broken parts before rebuilding. Buying correct parts ensures the jack works well.
Cleaning Supplies
Cleaning is key during rebuilding. Use rags and brushes to remove dirt. A degreaser cleans old oil and grease. Clean parts fit together better and last longer. Keep your workspace tidy for safety.
Lubricants And Hydraulic Fluid
Lubricants reduce friction in moving parts. Use grease for joints and pins. Hydraulic fluid is needed for lifting power. Use the correct type as per the jack’s manual. Proper lubrication keeps the jack smooth and strong.

Credit: www.hcrcnow.com
Preparing The Floor Jack
Preparing the floor jack is the first step to a successful rebuild. This step helps ensure safety and improves the jack’s performance. You must handle the jack carefully and prepare it properly before taking it apart.
Start by making the jack clean and free from dirt. Then, remove the old hydraulic fluid. These actions make the rebuild process easier and prevent damage to parts.
Cleaning The Jack
Use a cloth to wipe off dirt and grease from the jack’s surface. Clean all moving parts gently to avoid damage. Use a mild cleaner and a soft brush for stubborn dirt. Make sure the jack is dry before moving to the next step.
Draining Hydraulic Fluid
Place a container under the jack to catch the old fluid. Open the release valve slowly to drain the fluid. Allow all fluid to flow out for a complete drain. Dispose of the old hydraulic fluid safely. This step avoids contamination and prepares the jack for new fluid.
Disassembling The Jack
Disassembling the Sears 950145 floor jack is the first step in rebuilding it. This process helps you inspect each part closely. Removing parts carefully prevents damage and makes reassembly easier. Keep tools ready and work on a clean surface. Follow each step to ensure safe and effective disassembly.
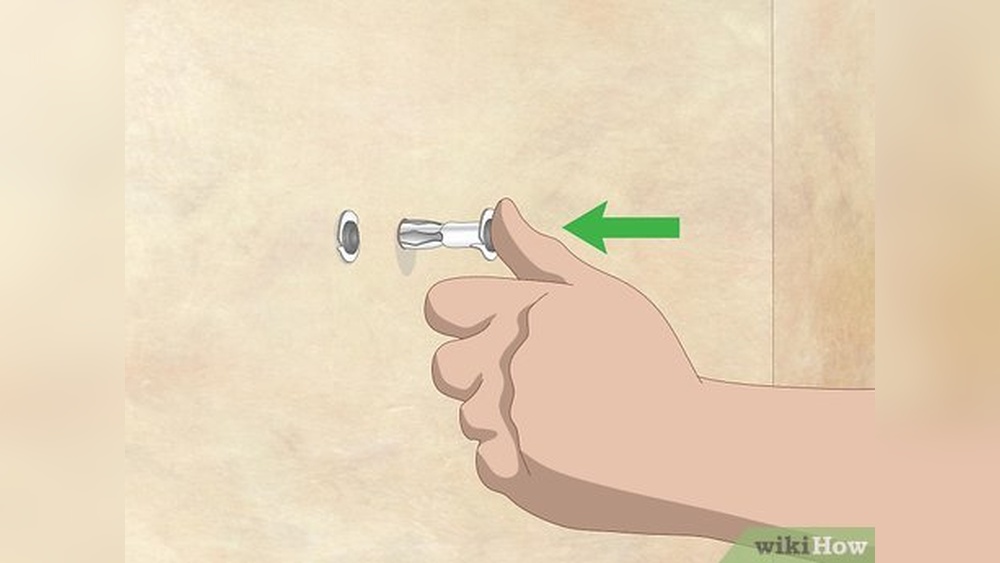
Removing The Handle
Start by detaching the handle from the jack. Locate the handle pin holding it in place. Use pliers or a hammer to push the pin out gently. Pull the handle upward to remove it. Set the handle and pin aside safely. This step gives access to internal parts.
Detaching The Hydraulic Cylinder
Next, focus on the hydraulic cylinder. Unscrew the bolts connecting it to the base. Be careful with the hydraulic fluid inside the cylinder. Drain the fluid into a container to avoid spills. Lift the cylinder away from the jack frame slowly. This step lets you work on the cylinder’s internal parts.
Taking Apart The Release Valve
Locate the release valve near the handle area. Use a wrench to unscrew the valve carefully. Remove the spring and valve components one by one. Keep track of how each part fits together. Clean each piece before inspecting for wear or damage. Proper valve care ensures smooth jack operation.

Credit: www.ebay.com
Inspecting Components
Inspecting the components of your Sears 950145 floor jack is a crucial step in the rebuilding process. This step ensures that every part is in good condition and will work safely and efficiently. Careful inspection helps prevent future problems and extends the life of your jack.
Checking For Wear And Damage
Start by looking closely at all moving parts. Look for cracks, rust, or bends in the metal. Check the lifting arm and base for signs of wear. Worn or damaged parts can cause the jack to fail. Replace any parts that show visible damage. Pay special attention to the wheels and pins. These parts often wear out first and affect the jack’s performance.
Replacing Seals And O-rings
Seals and O-rings keep the hydraulic fluid inside the jack. Over time, they can become dry, cracked, or brittle. Remove old seals carefully and compare them to new ones. Use the exact size and type for replacements. New seals help maintain pressure and prevent leaks. Always clean the seal grooves before installing new parts. Proper sealing is key to smooth jack operation.
Rebuilding The Hydraulic Cylinder
Rebuilding the hydraulic cylinder is a key step in fixing your Sears 950145 floor jack. The hydraulic cylinder controls the lifting power by moving oil through seals and valves. Over time, seals wear out or dirt builds up, causing leaks and poor performance. Careful cleaning, replacing seals, and reassembling the cylinder restores smooth lifting action.
Cleaning Cylinder Parts
Start by removing all parts from the cylinder. Use a clean cloth to wipe away old oil and dirt. Soak metal parts in a mild cleaner to remove grime. Use a soft brush to clean small grooves and corners. Dry every part completely to avoid rust. Clean parts help the jack work smoothly and last longer.
Installing New Seals
Old seals lose their grip and cause oil leaks. Replace all seals with new ones made for your model. Apply a thin layer of hydraulic oil to seals before fitting. This helps them slide into place without damage. Press seals gently into their grooves until they fit snugly. Proper seal installation keeps oil inside the cylinder.
Reassembling The Cylinder
Put all cleaned parts back into the cylinder in the right order. Start with the piston, then install seals carefully. Make sure each piece fits tightly to avoid leaks. Use light oil to lubricate moving parts during assembly. Check that the piston moves smoothly inside the cylinder. Tighten all screws and bolts firmly but don’t over-tighten.
Reassembling The Floor Jack
Reassembling the floor jack is a careful process. Each part must fit perfectly for the jack to work safely. Take your time and follow the steps closely. This part of the rebuild brings everything together.
Reinstalling The Hydraulic Cylinder
Start by placing the hydraulic cylinder back into its spot. Align it with the base and the lifting arm. Use bolts or pins to hold it firmly. Tighten them just enough to keep the cylinder steady. Avoid over-tightening, which can cause damage.
Reattaching The Release Valve
Next, connect the release valve to the cylinder. The valve controls the jack’s lifting and lowering. Screw it in gently and secure it with a wrench. Check that it opens and closes smoothly. A stuck valve can cause the jack to fail.
Securing The Handle
Finally, attach the handle to the jack body. Slide the handle into its socket or bracket. Fasten it using the original pins or bolts. Make sure the handle moves freely. This allows you to pump the jack and release pressure easily.
Refilling Hydraulic Fluid
Refilling the hydraulic fluid is a key step in rebuilding your Sears 950145 floor jack. The fluid helps the jack lift heavy loads smoothly. Without enough fluid, the jack can fail or work poorly. Proper refilling makes sure the jack works safely and lasts longer.
Careful refilling also prevents air from getting trapped inside the hydraulic system. Air bubbles can cause the jack to feel soft or slow. This part of the rebuild needs patience and attention to detail.
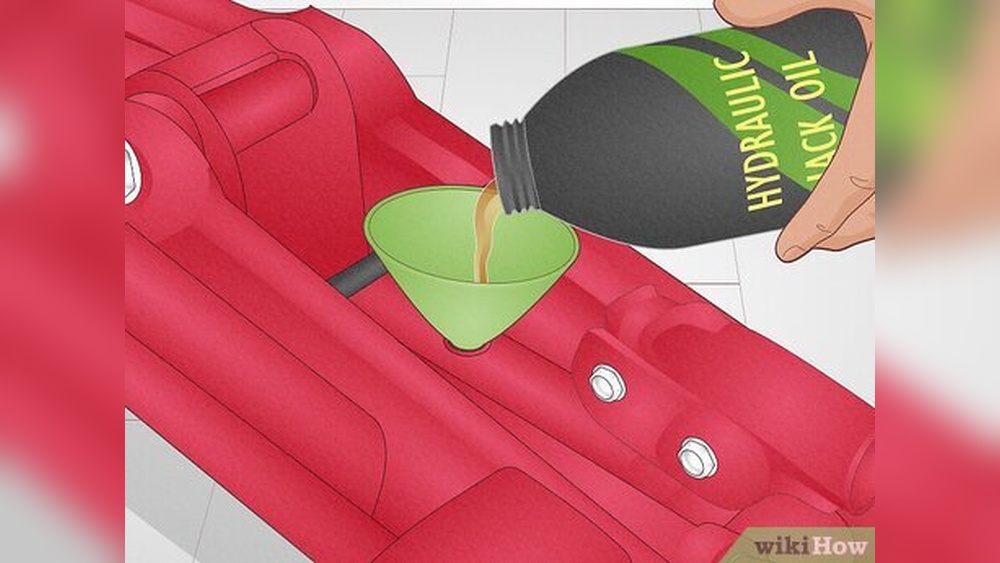
Choosing The Right Fluid
Use the fluid type recommended by Sears. Most floor jacks use hydraulic oil with a specific weight. Avoid using car engine oil or other types. These can harm the seals and parts inside the jack.
Check the user manual or product label for the exact fluid type. If you cannot find it, use a high-quality hydraulic jack oil. This keeps the system clean and working well.
Filling And Bleeding Air
First, open the fill plug on the jack. Slowly pour the hydraulic fluid into the reservoir. Fill it until the fluid level is just below the plug hole.
Next, close the fill plug tightly. Pump the jack handle several times. This action helps push air out of the system.
Repeat the filling and pumping process if the jack still feels soft. Watch for air bubbles in the fluid. Keep working until the jack lifts smoothly and holds pressure.

Credit: www.ebay.com
Testing And Adjusting
Testing and adjusting your Sears 950145 floor jack is key after rebuilding. It ensures the jack lifts safely and works smoothly. Start by checking how well it lifts weight. Then, adjust the pressure and release valves to get the right balance.
Checking Lift Performance
Place the jack under a solid, flat surface. Pump the handle to lift the load. Watch how high it rises and how steady it feels. The jack should lift smoothly without jerks or slipping.
Lower the load slowly and check for any sudden drops. If the jack fails to lift fully, it may need more adjustment. Test several times to confirm consistent lifting power.
Adjusting Pressure And Release Valve
Locate the pressure valve near the pump mechanism. Turn it slightly to increase or decrease the lifting force. Small adjustments can make a big difference.
Next, check the release valve. It controls how fast the jack lowers. Turn it gently to slow down or speed up the descent. Make sure the release valve seals well to avoid leaks.
After adjustments, test the jack again. Repeat until the jack lifts steadily and lowers safely. Proper valve settings improve performance and safety.
Maintenance Tips For Longevity
Proper maintenance keeps your Sears 950145 floor jack working well for years. Regular care prevents damage and costly repairs. Simple habits extend the jack’s life and keep it safe to use.
Follow these tips to maintain your floor jack and avoid common problems. Each step helps the jack stay strong and reliable for every job.
Check And Change Hydraulic Fluid
Hydraulic fluid powers the lifting mechanism. Check fluid levels often. Add fluid if levels are low. Change the fluid yearly to avoid dirt buildup. Clean fluid keeps the jack lifting smoothly.
Inspect And Lubricate Moving Parts
Moving parts need lubrication to reduce wear. Use light machine oil on joints and wheels. Do this monthly or after heavy use. Proper lubrication stops squeaks and prevents rust.
Clean The Jack After Use
Dirt and debris can damage the jack. Wipe the jack clean after every use. Pay attention to the wheels and lifting arm. A clean jack works better and lasts longer.
Check For Leaks And Damage
Look for oil leaks around seals and valves. Check for cracks or bent parts. Fix small issues before they become big problems. Safety depends on a jack in good condition.
Store The Jack Properly
Keep the jack in a dry, covered place. Avoid damp or dusty areas. Lower the lifting arm fully before storage. Proper storage prevents rust and part damage.
Frequently Asked Questions
How Long Does It Take To Rebuild A Sears 950145 Floor Jack?
Rebuilding a Sears 950145 floor jack typically takes 2 to 4 hours. This depends on your experience and tool availability. Proper cleaning, part replacement, and reassembly are key steps. Taking your time ensures safety and functionality. Follow the manual closely for best results.
What Tools Are Needed To Rebuild A Sears 950145 Floor Jack?
You will need wrenches, screwdrivers, pliers, a jack stand, and hydraulic fluid. A cleaning brush and seal kit are also essential. Having these tools ready speeds up the rebuild process. Proper tools help avoid damage and ensure a smooth rebuild.
How Do I Know When To Rebuild My Floor Jack?
Signs to rebuild include slow lifting, oil leaks, or loss of pressure. If the jack won’t hold weight or feels unstable, it’s time. Regular maintenance can prevent major issues. Rebuilding restores safety and performance effectively.
Can I Rebuild The Hydraulic System Myself?
Yes, you can rebuild the hydraulic system with basic mechanical skills. Follow the step-by-step guide and use the correct seals and fluid. Take safety precautions to avoid accidents. DIY rebuild saves money and extends jack life.
Conclusion
Rebuilding a Sears 950145 floor jack takes time and care. Follow each step slowly and carefully. Check all parts for damage or wear. Use the right tools for best results. Keep the jack clean and well-oiled. Test it safely before use.
This helps your jack work like new again. Regular upkeep will extend its life. A well-maintained floor jack keeps your work safe. Small efforts bring long-lasting repair success.