Are you looking to boost your home’s security with a sturdy deadbolt lock but don’t know where to start? Putting together a deadbolt lock might seem tricky at first, but with the right steps, you can do it yourself quickly and easily.
Imagine having the confidence that your door is locked tight, giving you and your loved ones peace of mind. In this guide, you’ll find clear, simple instructions that take the guesswork out of the process. Keep reading to learn how to put together a deadbolt lock like a pro and make your home safer today.
Credit: www.youtube.com
Choosing The Right Deadbolt
Choosing the right deadbolt is important for your home’s safety. The right lock keeps your door secure and gives peace of mind. Different deadbolts offer various levels of protection and style. Knowing what to pick helps you make a smart choice for your door.
Types Of Deadbolts
Single-cylinder deadbolts use a key outside and a thumb turn inside. They are common and easy to use. Double-cylinder deadbolts need a key on both sides. They add extra security but can be tricky in emergencies. Lockable thumb-turn deadbolts let you lock the thumb turn with a key. This option adds control over who can lock or unlock the door.
Material And Finish Options
Deadbolts come in various materials like brass, steel, and bronze. Steel is strong and resists wear well. Brass looks good and resists rust. Finishes include polished brass, satin nickel, and oil-rubbed bronze. Choose a finish that matches your door and home style. Good material and finish help the lock last longer.
Security Features To Consider
Look for deadbolts with hardened steel inserts. They resist cutting and sawing. Anti-drill plates protect the lock from drilling attacks. Some locks have bump-resistant designs. Pick a deadbolt with a long bolt, at least one inch. This makes it harder to force the door open. Extra features improve security and protect your home better.

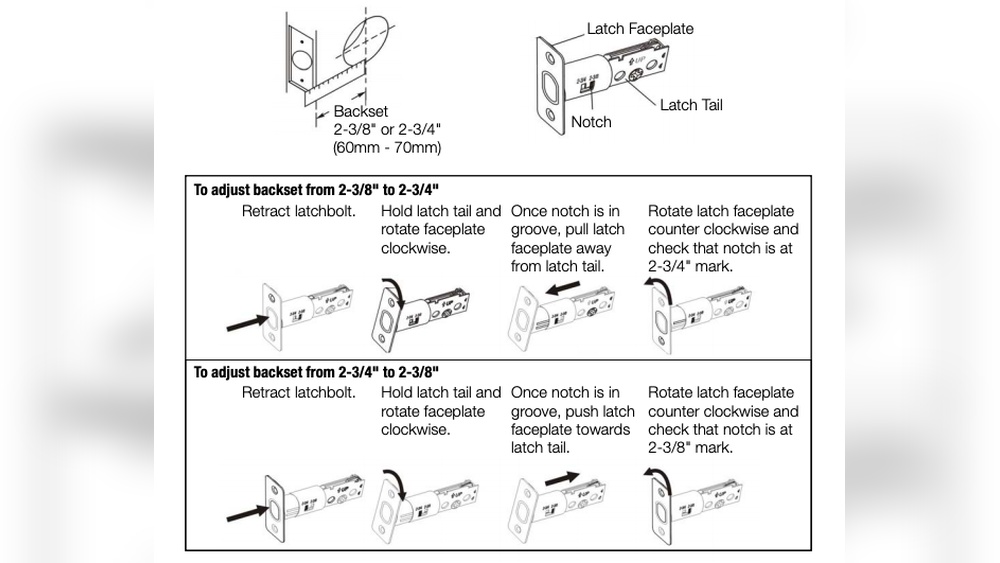
Credit: www.chicagolocksmiths.net
Tools And Materials Needed
Putting together a deadbolt lock requires the right tools and materials. Having everything ready makes the process smoother. It also helps avoid delays or mistakes. Below is a list of what you need to gather before starting the installation.
Essential Tools For Installation
You will need a screwdriver, usually a Phillips head, to fasten screws. A drill is necessary to make holes in the door. Use a drill bit that matches the size of the lock parts. A tape measure helps with accurate placement of the lock. A pencil is useful to mark spots for drilling. A chisel can adjust the door’s edge for the lock plate. Lastly, a hammer will assist in chiseling or securing parts.
Additional Supplies
Have the deadbolt lock kit ready, including the lock, strike plate, and screws. Wood filler may be needed to fix any holes or gaps. Sandpaper helps smooth any rough edges after chiseling. Extra screws are good to have in case some get lost or damaged. A template or instruction manual guides the correct placement of the lock parts.
Safety Gear
Wear safety glasses to protect your eyes from dust and debris. Gloves protect your hands while handling sharp tools or rough surfaces. Ear protection is important if you use loud power tools. Use a dust mask if you create a lot of dust during drilling or chiseling. Taking safety precautions keeps the job safe and comfortable.
Preparing The Door
Preparing the door is the first step to install a deadbolt lock correctly. It sets the base for a secure and smooth fitting. Careful preparation avoids mistakes and makes the process easier. Follow these steps to get your door ready.
Measuring And Marking
Start by measuring the correct height for the deadbolt. Usually, it goes about 6 to 12 inches above the doorknob. Use a tape measure for accuracy. Mark the spot clearly with a pencil. Double-check the marks to avoid errors. Accurate marking ensures the lock fits perfectly.
Drilling Holes
Choose a drill bit that matches the lock size. Drill the hole for the lock cylinder through the door. Drill slowly to keep the hole clean and straight. Next, drill the edge of the door for the latch. Make sure both holes line up well. Proper drilling prevents damage and fits the lock parts.
Cleaning The Workspace
Remove wood shavings and dust after drilling. Use a brush or cloth to clean the holes and door surface. A clean workspace helps the lock fit tightly. It also protects the lock parts from dirt. Keep your tools organized for the next steps.
Installing The Deadbolt Mechanism
Installing the deadbolt mechanism is a key step to secure your door properly. It involves placing the lock components in the right position and fixing them tightly. This process ensures your deadbolt works smoothly and protects your home.
Inserting The Deadbolt
Start by sliding the deadbolt into the door’s edge hole. Make sure the bolt faces the correct way, with the angled side pointing toward the door frame. Push it in until it fits flush with the door surface. Check that it moves freely by turning the thumb turn or key.
Securing The Lock Cylinder
Next, insert the lock cylinder into the hole on the door’s front. Align it so the tailpiece goes through the deadbolt mechanism. Hold the cylinder steady while attaching the mounting screws. Tighten the screws evenly to keep the cylinder firm and straight.
Attaching The Strike Plate
Place the strike plate on the door frame where the deadbolt extends. Align it with the bolt’s position and mark the screw holes. Use a chisel to create a shallow recess for the plate. Screw the strike plate tightly to ensure the bolt locks securely into the frame.
Testing And Adjustments
Testing and adjusting your deadbolt lock is a key step. This ensures the lock works smoothly and safely. A well-fitted lock keeps your home secure and easy to use. Take time to check every part after installation.
Checking Lock Functionality
Turn the key or thumb turn to test the lock. The bolt should slide in and out without sticking. Try locking and unlocking from both sides of the door. Listen for any unusual sounds like grinding or catching. If it feels stiff, the lock might need adjusting or lubrication.
Aligning The Strike Plate
The strike plate is where the bolt fits into the door frame. Check if the bolt lines up with the hole in the plate. Close the door slowly to see if the bolt enters smoothly. Misalignment causes the lock to jam or stay unlocked. Adjust the strike plate by loosening screws and moving it slightly. Tighten the screws once the bolt fits perfectly.
Making Necessary Adjustments
Adjust the lock or strike plate based on your tests. Sometimes, small shifts in the lock position improve function. Use a screwdriver to tighten or loosen screws. Sand or chisel the door frame if the bolt sticks. Test the lock again after each adjustment. Repeat until the deadbolt works easily and securely every time.
Maintenance Tips For Longevity
Keeping a deadbolt lock in good shape ensures it works well for a long time. Regular care helps avoid problems and keeps your home safe. Simple maintenance steps can make a big difference.
Lubrication Recommendations
Use a graphite-based lubricant for the deadbolt. Avoid oil sprays that attract dust and dirt. Apply the lubricant inside the keyhole and on the bolt. This keeps the lock moving smoothly. Do this at least twice a year.
Regular Inspection
Check the lock for signs of wear or damage. Look for loose screws or parts. Test the lock by turning the key and handle. Tighten any loose parts to prevent problems. Inspect the lock every three months.
Troubleshooting Common Issues
If the key sticks or the lock jams, clean the key and lock. Use compressed air to remove dust. Lubricate the lock if it feels stiff. Replace worn keys or parts quickly. Early action stops bigger problems.

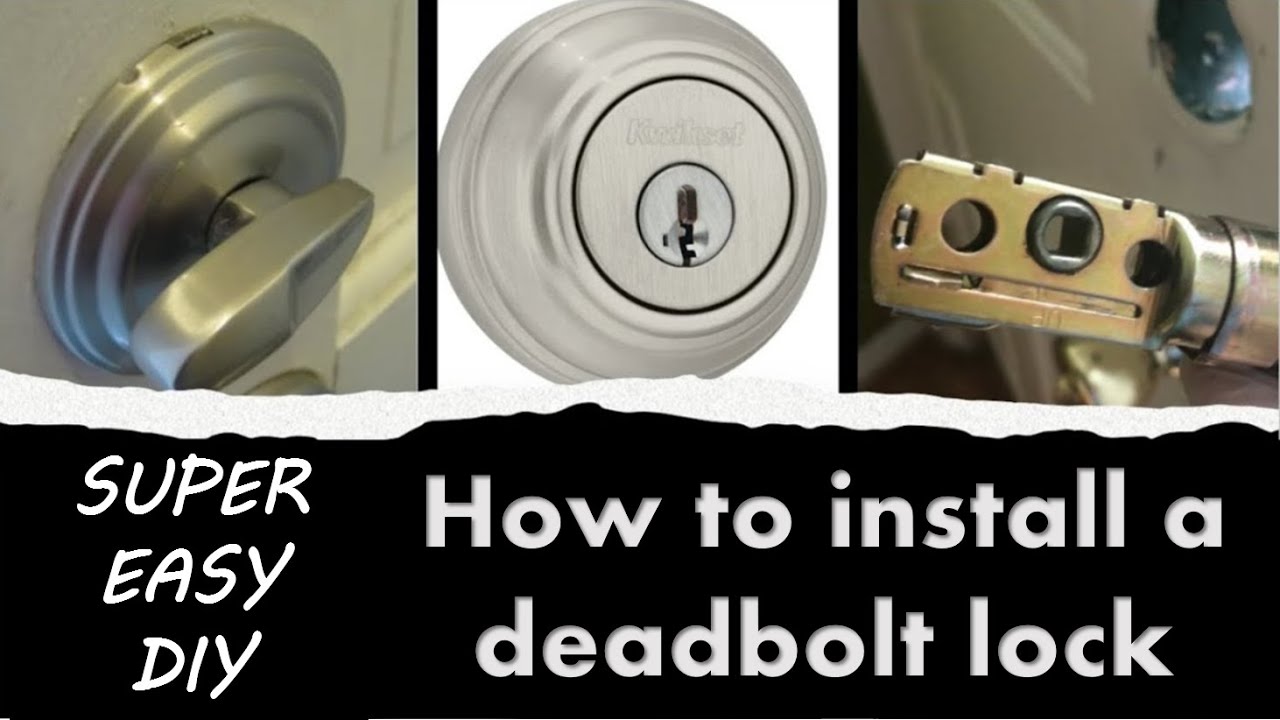
Credit: www.youtube.com
Frequently Asked Questions
What Tools Do I Need To Install A Deadbolt Lock?
You need a drill, screwdriver, tape measure, pencil, chisel, and the deadbolt lock kit. These tools help you measure, drill, and secure the lock properly.
How Do I Align The Deadbolt With The Door Frame?
Mark the door frame for the strike plate to align with the deadbolt. Drill holes accurately and install the strike plate securely for smooth locking.
Can I Install A Deadbolt On Any Door Type?
Most doors can accommodate a deadbolt, but ensure the door is solid wood or metal. Hollow doors might require additional reinforcement for security.
How Long Does It Take To Put Together A Deadbolt Lock?
Installation typically takes 30 to 60 minutes for beginners. It depends on your experience and whether you need to modify the door.
Conclusion
Putting together a deadbolt lock can be simple and quick. Follow each step carefully to ensure a strong lock. Use the right tools and check your work often. A well-installed deadbolt adds safety to your home. Take your time and stay patient throughout the process.
Soon, your door will feel much more secure. Enjoy the peace of mind that comes with it. Keep your lock maintained for lasting protection. You have what it takes to do this right.