If you rely on a hydraulic floor jack, you know how important it is to keep it working smoothly and safely. Over time, air can get trapped inside the jack, making it less effective or even risky to use.
Knowing how to purge a hydraulic floor jack can save you time, money, and frustration. In this guide, you’ll learn simple steps to get your jack back to peak performance quickly. Keep reading, and you’ll discover how easy it is to maintain your jack so it works perfectly every time you need it.

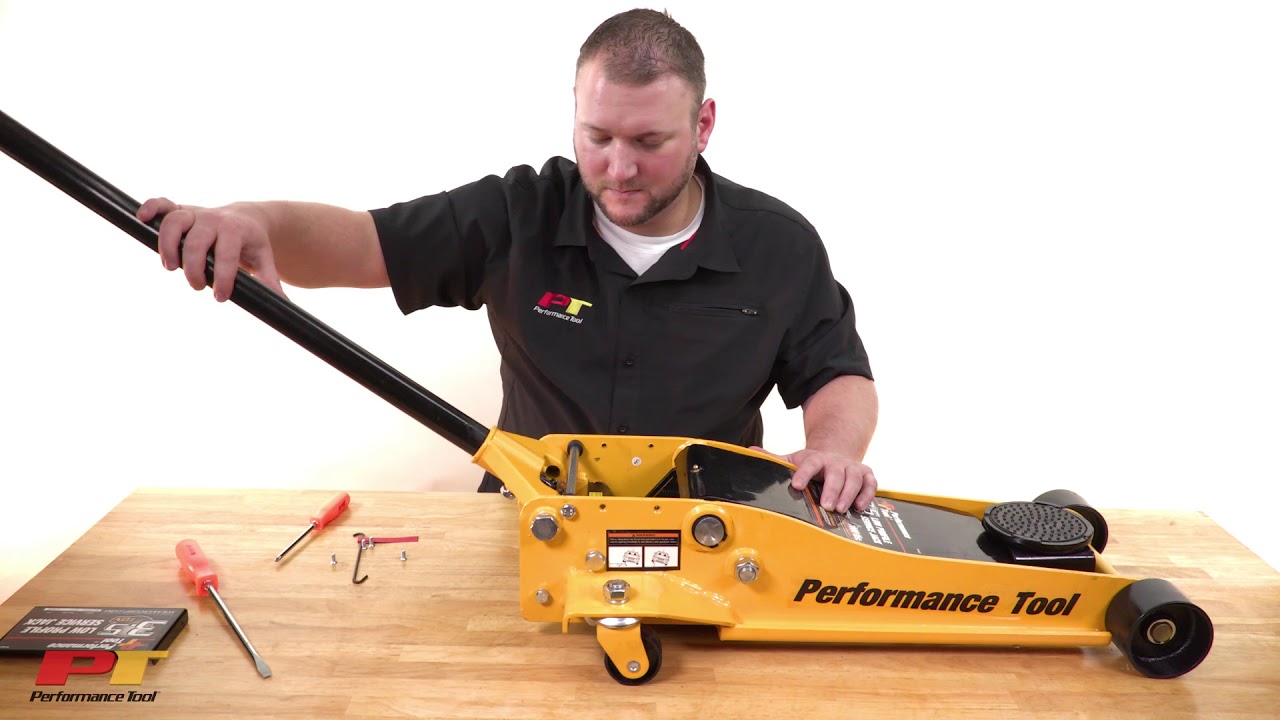
Credit: www.powerbuilt.com
Why Purge A Hydraulic Floor Jack
Purging a hydraulic floor jack is an important maintenance step. It helps keep the jack working smoothly and safely. Air can get trapped inside the hydraulic system. This air causes problems that affect the jack’s performance. Knowing why to purge the jack helps you avoid these issues.
Signs Of Air In The System
Air inside the hydraulic system makes the jack feel spongy. The handle may move without lifting the load. The jack might not reach full height. Sometimes, it leaks fluid or makes strange noises. These signs mean air is trapped. Purging removes this air and restores proper function.
Benefits Of Purging
Purging improves the jack’s lifting power. It makes the lifting smooth and steady. The jack becomes safer to use. Purging also extends the life of the jack by preventing damage. It keeps the hydraulic fluid clean and effective. Regular purging saves time and money on repairs.
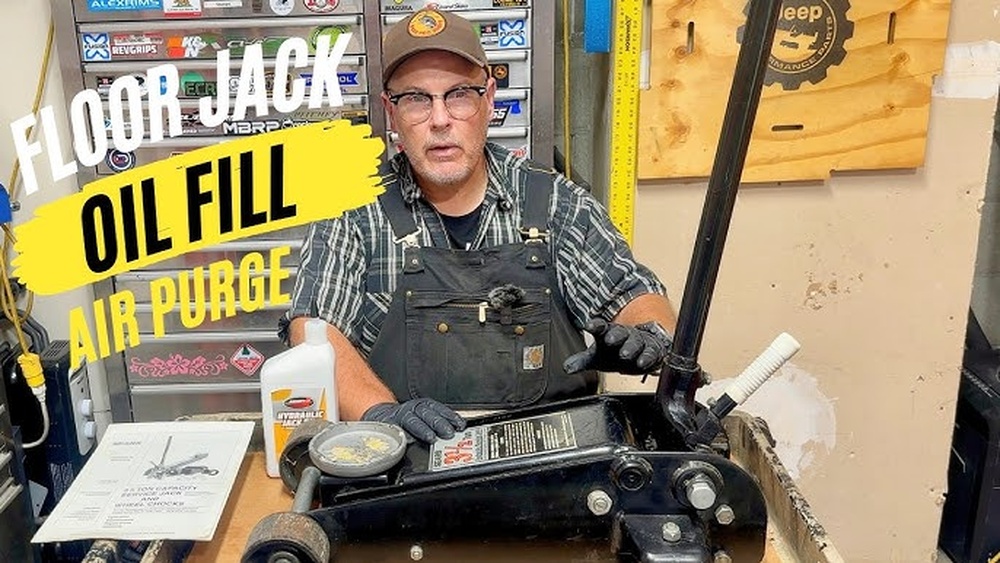
Credit: www.youtube.com
Tools And Materials Needed
Before purging a hydraulic floor jack, gather all necessary tools and materials. This preparation helps complete the task smoothly and safely. Having the right equipment ensures no damage to the jack or injury to yourself. Below is a list of items you need to collect.
Essential Tools
- Hydraulic fluid or jack oil, specific to your jack type
- Wrench set for opening drain plugs and valves
- Clean container to catch old hydraulic fluid
- Funnel to pour new fluid without spills
- Rags or paper towels for wiping spills
- Flathead screwdriver for prying or adjusting parts
- Small brush for cleaning dirt around openings
Safety Gear
- Protective gloves to avoid skin contact with fluid
- Safety glasses to protect eyes from splashes
- Work apron or old clothes to keep clean
- Well-ventilated workspace to avoid inhaling fumes
Preparing The Floor Jack
Preparing the floor jack is an important step before purging. It ensures the process goes smoothly and safely. Taking time to prepare helps avoid damage and keeps the jack working well.
Start by making sure the jack is clean and free of dirt. Then, position the jack correctly for purging. These steps make the purging process easier and more effective.
Cleaning The Jack
Wipe the floor jack with a clean cloth. Remove all dirt, grease, and dust from its surface. Clean around the pump and release valve carefully. This prevents dirt from entering the hydraulic system during purging. Use a mild cleaner if the jack is very dirty. Dry the jack completely before starting the purge.
Positioning For Purging
Place the floor jack on a flat, stable surface. Keep it in a low position with the handle down. This helps air bubbles escape during purging. Make sure the release valve is closed tightly. Position the jack so you can easily reach the pump handle. Proper positioning improves safety and purging results.
Step-by-step Purging Process
Purging a hydraulic floor jack is essential to keep it working smoothly and safely. This process removes old fluid and trapped air that can cause the jack to lose pressure. Follow these simple steps to purge your jack properly.
Releasing Pressure
Start by lowering the jack completely. Turn the release valve counterclockwise. This lets any built-up pressure escape. Pump the handle a few times to remove leftover pressure. Ensure the jack is fully relaxed before moving on.
Removing The Hydraulic Fluid
Place a container under the fluid reservoir. Open the reservoir cap carefully. Use a turkey baster or syringe to suck out the old fluid. Dispose of it safely, following local guidelines. Remove as much fluid as possible for a clean refill.
Bleeding Air From The System
Close the release valve tightly. Pump the handle slowly several times. This action pushes air bubbles out of the system. Open the release valve slightly to let air escape. Repeat pumping and releasing until no more air appears.
Refilling With Fresh Fluid
Pour new hydraulic fluid into the reservoir. Fill it up to the recommended level. Close the reservoir cap securely. Pump the handle to circulate the fresh fluid. Check for smooth lifting and no leaks before use.
Testing After Purging
Testing after purging your hydraulic floor jack is important. It ensures the jack works well and safely. After removing air and replacing fluid, check the jack’s performance. This step prevents problems during lifting tasks. Follow clear steps to confirm your jack is ready.
Checking For Smooth Operation
Start by pumping the jack handle slowly. Watch if the jack lifts smoothly without jerks. The handle should move with little effort. No strange noises should come from the jack. Lower the jack carefully and see if it descends evenly. Smooth action means the hydraulic system is working right.
Confirming No Air Bubbles
Look inside the fluid reservoir if possible. The fluid should be clear and free from bubbles. Air bubbles cause the jack to feel spongy or weak. Pump the handle and observe the fluid movement. If bubbles appear, more purging might be needed. Clear fluid means the hydraulic system is sealed well.
Maintenance Tips For Longevity
Maintaining a hydraulic floor jack is key to making it last long. Proper care keeps it working smoothly and safely. Simple actions can prevent damage and costly repairs.
Regular Fluid Checks
Check the hydraulic fluid level often. Low fluid can cause poor jack performance. Use the type of fluid recommended by the manufacturer. Look for signs of dirt or leaks in the fluid. Change the fluid if it looks dark or cloudy. This helps keep the jack lifting properly and extends its life.
Storage Recommendations
Store the jack in a clean, dry place. Avoid damp areas that can cause rust and corrosion. Keep the jack lowered when not in use to reduce pressure on seals. Cover it to protect from dust and dirt. Proper storage prevents damage and keeps the jack ready for use.

Credit: www.powerbuilt.com
Frequently Asked Questions
How Do I Know When To Purge A Hydraulic Floor Jack?
You should purge your jack if it lifts slowly or feels spongy. Air trapped inside causes these issues. Regular maintenance ensures smooth operation and extends the jack’s life.
What Tools Are Needed To Purge A Hydraulic Floor Jack?
You will need a wrench, clean rags, hydraulic jack oil, and a bleeding valve tool. These help remove air and replace old fluid for optimal performance.
How Long Does It Take To Purge A Hydraulic Floor Jack?
Purging usually takes about 15 to 30 minutes. This includes draining old fluid, bleeding air, and refilling with fresh hydraulic oil to restore proper function.
Can I Use Any Oil To Purge My Hydraulic Jack?
No, always use the manufacturer-recommended hydraulic jack oil. Using the wrong oil can damage seals and impair jack performance. Check your manual before purging.
Conclusion
Purge your hydraulic floor jack regularly to keep it working well. Air trapped inside can cause poor lifting power. Follow the steps carefully to remove air and old fluid. Use the right tools and clean fluid for best results. This simple maintenance saves money and keeps your jack safe.
Remember, a well-maintained jack lifts smoothly and lasts longer. Take a little time now to avoid big problems later. Your floor jack will thank you with better performance every time.