Are you tired of nails that don’t hold and pictures that keep falling? Learning how to put anchor screws in your wall can change that for good.
With the right technique, you’ll secure shelves, frames, and hooks firmly—no more worrying about damage or accidents. In this guide, you’ll discover simple steps that anyone can follow, even if you’ve never done it before. Keep reading, and you’ll gain the confidence to hang anything safely and professionally in your home.

Credit: www.do-it-yourself-help.com
Choosing The Right Anchor Screws
Choosing the right anchor screws is key to a strong and safe hold. The wall type, weight of the item, and screw material all matter. Picking the wrong anchor can cause damage or failure. Understand the options before starting your project.
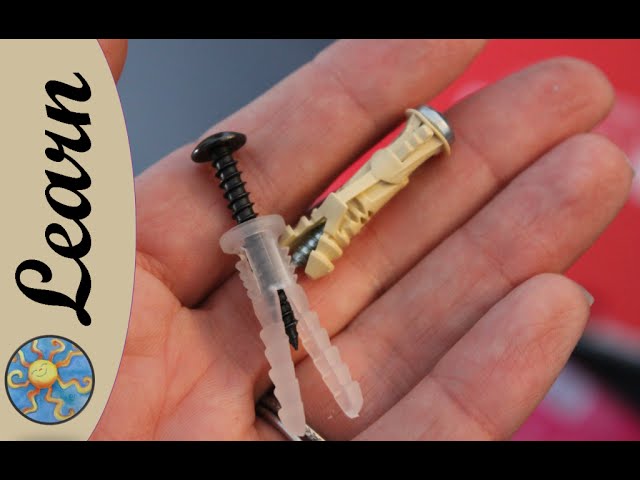
Types Of Anchor Screws
There are several types of anchor screws for different walls. Plastic anchors suit drywall and light items. Metal anchors work well in stronger materials like concrete. Toggle bolts expand behind the wall for heavy loads. Choose the type that fits your wall and item weight.
Material Considerations
Anchor screws come in plastic, zinc, steel, or brass. Plastic anchors are cheap but less strong. Steel anchors resist rust and hold heavy items. Zinc anchors suit indoor use and resist corrosion. Match the material to the environment and load for best results.
Weight Capacity
Each anchor screw has a weight limit. Check the product label for weight ratings. Never exceed the recommended weight. Heavier items need bigger or stronger anchors. Safety depends on using anchors that support the item’s weight fully.
Tools And Materials Needed
To put anchor screws in a wall, you need the right tools and materials. These help make the job safe and easy. Having everything ready saves time and stops mistakes. Let’s look at the basics you will need.
Essential Tools
You will need a drill with the correct drill bits. A screwdriver or a power driver is useful for tightening screws. A hammer might be needed to tap the anchor into the wall. A tape measure helps to mark the exact spot. A pencil is good for marking. A level ensures the anchors go in straight.
Safety Gear
Wear safety goggles to protect your eyes from dust and debris. Use gloves to protect your hands from sharp edges. A dust mask helps if you drill into drywall or concrete. Closed-toe shoes keep your feet safe. Make sure your clothes fit well and do not get caught in tools.
Preparing The Workspace
Clear the area of furniture and items that can get damaged. Lay down a drop cloth to catch dust and debris. Make sure the wall surface is clean and dry. Check for wires and pipes inside the wall using a detector. Good lighting helps you see clearly while working.
Preparing The Wall
Preparing the wall is the first step for a secure anchor screw installation. Proper preparation ensures your screws hold tight and your items stay safe. It also prevents damage to the wall or hidden pipes and wires. This section guides you through the essential preparation steps.
Locating Studs And Avoiding Hazards
Find studs for the strongest hold. Use a stud finder or tap the wall to hear a solid sound. Avoid drilling near electrical wires or plumbing. These hazards can cause serious damage or injury. Always check carefully before drilling.
Marking Drill Points
Mark the exact spots for drilling with a pencil. Measure twice to keep marks even and level. Clear, visible marks help you drill straight and accurate holes. This step saves time and keeps your project neat.
Checking Wall Material
Identify the wall type before drilling. Drywall, plaster, or concrete require different anchors. Use anchors designed for your wall material. This prevents cracks and ensures a strong hold. Knowing the material helps pick the right tools and screws.
Drilling Pilot Holes
Drilling pilot holes is an important step before inserting anchor screws into a wall. It helps prevent the wall from cracking and makes it easier to insert the screw. Doing this step correctly ensures the anchor holds tightly and safely. Let’s break down how to drill pilot holes the right way.
Selecting The Right Drill Bit
Choose a drill bit that matches the size of your anchor screw. The bit should be slightly smaller than the anchor’s diameter. This creates a snug fit for the anchor. Using a bit that is too big will make the hole loose. A bit too small can cause the wall to crack.
Drilling Techniques
Hold the drill steady and straight to the wall. Start drilling slowly to avoid slipping. Apply gentle pressure as you drill deeper. Pull the drill out occasionally to clear dust from the hole. This keeps the hole clean and precise. Stop drilling once you reach the needed depth.
Ensuring Proper Hole Depth
Mark the drill bit with tape to guide your depth. The hole should be as deep as the anchor’s length. A shallow hole won’t hold the anchor well. Too deep a hole wastes effort and weakens the wall. Checking depth carefully helps the anchor screw fit perfectly.
Inserting Anchor Screws
Inserting anchor screws into a wall is a key step for strong support. This process helps fix objects securely without damaging the wall. Follow clear steps to place anchors safely and correctly.
Positioning The Anchor
Start by marking the exact spot on the wall. Use a pencil or tape to avoid mistakes. Choose a place away from studs or pipes. Drill a hole that matches the anchor size. Keep the drill straight for a clean hole.
Securing The Anchor
Push the anchor into the hole gently. Use a hammer if needed, but do not force it. The anchor should fit snugly and sit flush with the wall. Tighten the screw slowly to expand the anchor inside. This locks the anchor firmly in place.
Avoiding Common Mistakes
Do not use a hole that is too large or small. Avoid over-tightening screws as it can break the anchor. Make sure the anchor is flush, not sticking out. Avoid drilling into electrical wires or pipes. Check your wall type before choosing anchors.
Testing The Fixing
Testing the fixing is a key step after installing anchor screws in your wall. It confirms that the screw holds tight and supports the weight you need. Without proper testing, your item might fall and cause damage or injury.
Test the fixing carefully. Start with light pressure and increase slowly. Watch for any movement or looseness. This process helps you find out if the screw is secure or needs adjustment.
Checking Stability
Gently pull or push the fixed item to check its hold. Use your hand to feel any wobble or shift. If the anchor screw stays firm, it is stable. Stability means the screw can carry the load safely.
Look closely at the wall around the screw. Cracks or gaps show poor fixing. Stability also depends on the wall type and anchor used. Solid walls and correct anchors improve holding power.
Adjusting If Necessary
If the fixing feels loose, do not ignore it. Tighten the screw a little using a screwdriver. Avoid overtightening, which can damage the anchor or wall.
Sometimes, you may need to remove the anchor and try again. Use a stronger anchor for heavy items. Correct placement and depth also improve the fix.
Repeat the stability check after each adjustment. Secure fixing ensures safety and peace of mind.
Tips For Long-lasting Fixings
Ensuring anchor screws stay secure and reliable over time requires careful steps. Proper installation is only the start. Regular care and choosing the right method for your wall type help keep fixings strong.
Small actions make a big difference in the life of your anchors. These tips focus on maintaining the strength and safety of your fixtures.
Maintenance Advice
Check anchor screws regularly for any movement or looseness. Tighten screws gently if needed to keep them firm. Avoid over-tightening, which can damage the wall or anchor. Clean around the screws to prevent dirt buildup. Dust and debris can weaken the hold over time. Replace worn or rusted anchors to maintain safety.
Handling Different Wall Types
Identify your wall type before inserting anchors. Drywall needs special anchors designed to spread weight evenly. Masonry walls require heavy-duty anchors that grip firmly in concrete or brick. For plaster walls, use anchors that reduce cracking risk. Adjust screw length and anchor size to suit the wall material. Matching anchors to your wall ensures a stronger, longer-lasting hold.
Credit: www.youtube.com

Credit: www.youtube.com
Frequently Asked Questions
What Tools Do I Need For Installing Anchor Screws?
You need a drill, drill bit, hammer, screwdriver, and anchor screws. Choose drill bits matching the anchor size for precise holes. A hammer helps insert anchors, while a screwdriver secures screws tightly. These tools ensure a strong and safe installation.
How Deep Should I Drill For Anchor Screws?
Drill a hole slightly deeper than the anchor length. This allows the anchor to fit fully without obstruction. Check the anchor package for exact depth recommendations. Proper depth ensures a secure hold and prevents wall damage or loose fittings.
Can I Install Anchor Screws On Drywall?
Yes, anchor screws work well on drywall. Use drywall-specific anchors for better support. Avoid just screwing directly into drywall as it lacks strength. Anchors distribute weight and prevent damage, making them ideal for hanging items on drywall walls.
How Do I Choose The Right Anchor Screw Size?
Select an anchor screw size based on the weight of the object. Check the anchor packaging for weight limits and wall compatibility. Using the correct size ensures safety and prevents anchors from pulling out or damaging the wall.
Conclusion
Putting anchor screws in a wall is simple with the right steps. Start by choosing the correct anchor for your wall type. Drill a hole carefully, then insert the anchor firmly. Screw in the screw straight to keep it secure.
Taking your time helps avoid mistakes and damage. With practice, this task becomes quick and easy. Now, you can hang shelves, pictures, or other items safely on your walls. Give it a try and see the difference proper anchor installation makes.