If you’ve ever tried hanging something heavy on a hollow wall, you know it’s not as simple as using a regular nail or screw. That’s where hollow wall anchors come in.
They give you the strength and support you need without damaging your walls. But how do you put them in the right way? In this guide, you’ll learn step-by-step how to install hollow wall anchors quickly and securely. By the end, you’ll have the confidence to hang shelves, mirrors, or anything else with ease.
Keep reading, and make your walls work for you!

Credit: www.karujarve.ee
Types Of Hollow Wall Anchors
Hollow wall anchors hold objects on walls without studs. Different types suit different wall materials and weights. Choosing the right anchor helps your project stay secure and safe. Below are common types of hollow wall anchors.
Plastic Expansion Anchors
Plastic expansion anchors fit small holes in drywall or plaster. Insert the anchor, then push the screw in. The anchor expands inside the wall, gripping tightly. These anchors work best for light items like picture frames.
Metal Toggle Bolts
Metal toggle bolts have spring-loaded wings that open behind the wall. Drill a hole large enough for the folded wings. Insert the bolt, then tighten the screw. The wings hold the bolt firmly against the wall. These anchors support heavier objects like shelves.
Self-drilling Anchors
Self-drilling anchors cut their own hole in drywall. Turn the anchor with a screwdriver to screw it in. They do not need pre-drilling. These anchors hold medium-weight items and are quick to install.
Tools And Materials Needed
To install hollow wall anchors, you need specific tools and materials. Having the right items makes the job easier and safer. This section lists the basic tools required for this task.
Drill And Drill Bits
A drill helps create holes in the wall for anchors. Use a drill bit size matching the anchor. This ensures a tight fit and strong hold.
Screwdriver
A screwdriver fastens the screw into the anchor. Choose a type that fits the screw head. It can be a flathead or Phillips screwdriver.
Measuring Tape
Measuring tape helps find the right spot on the wall. Measure carefully to place anchors evenly and avoid mistakes.
Level
A level checks that your installation is straight. It prevents crooked holes and keeps your items balanced. Use it after marking the wall.
Choosing The Right Anchor
Choosing the right hollow wall anchor is important for a strong hold. The anchor must fit the weight of the item and the type of wall. Picking the wrong anchor can cause damage or make the item fall.
Weight Capacity Considerations
Check the weight of the item before selecting an anchor. Each anchor has a limit on how much weight it can hold. Use an anchor that supports more than the item’s weight. This prevents the anchor from pulling out or breaking.
Heavy items need stronger anchors like toggle bolts or metal anchors. Light objects can use plastic or nylon anchors. Always match the anchor strength to the load for safety.
Wall Material Compatibility
Different walls need different anchors. Drywall, plaster, and hollow concrete block walls each work best with certain anchors. Plastic expansion anchors fit well in drywall. Metal anchors suit plaster walls better.
Consider the wall thickness and condition too. Some anchors do not work well in thin or damaged walls. Choose anchors designed for your wall type to ensure a secure fit.
Preparing The Wall
Preparing the wall is the first important step before installing hollow wall anchors. It ensures the anchors hold firmly and safely. Taking time to prepare correctly saves effort and prevents damage. You need clear marks and proper holes for the anchors.
Marking Anchor Positions
Start by deciding where to place the anchors. Use a pencil to mark exact spots on the wall. Measure carefully to keep marks level and evenly spaced. Use a spirit level for straight lines. Clear marks guide drilling and make installation easier.
Drilling Pilot Holes
Choose a drill bit that fits the anchor size. Drill pilot holes exactly on the marked spots. Drill slowly to avoid cracking the wall. Make holes deep enough for the entire anchor. Clean out dust from holes before inserting anchors. Proper holes help anchors grip tightly.
Installing Plastic Expansion Anchors
Installing plastic expansion anchors is a simple way to secure items on hollow walls. These anchors expand inside the wall to hold screws firmly. They work well with drywall and plaster walls. The process involves two main steps: inserting the anchor and securing the screw.
Inserting The Anchor
Start by drilling a hole that matches the anchor size. Insert the plastic anchor into the hole gently. Push it until it sits flush with the wall surface. Avoid forcing it too hard to prevent damage. The anchor should fit tightly, ready to expand when the screw goes in.
Securing The Screw
Place the screw into the anchor carefully. Turn the screw slowly using a screwdriver. As the screw enters, the anchor expands inside the wall. This expansion grips the wall firmly. Stop tightening when the screw feels secure. Do not over-tighten to avoid breaking the anchor.
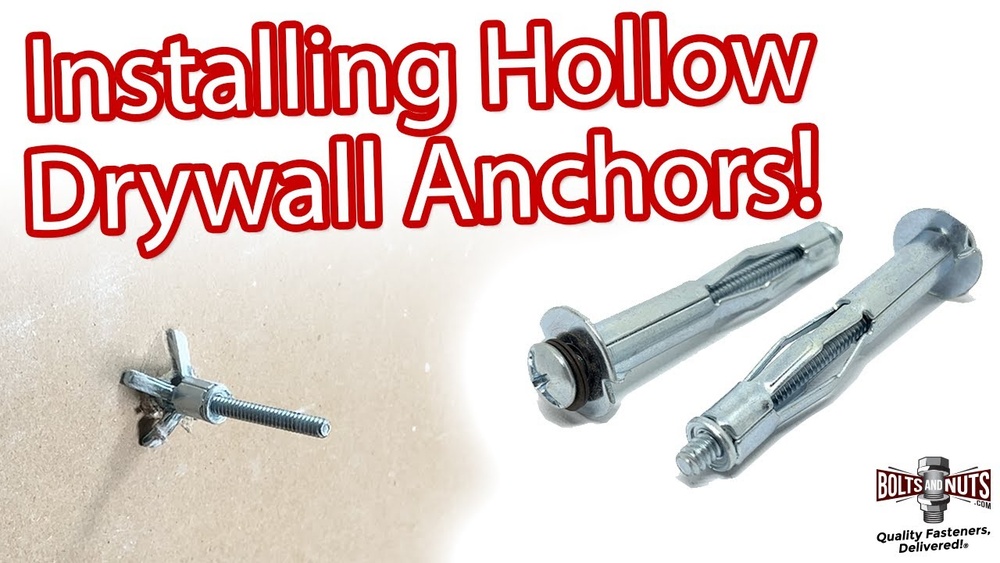
Installing Metal Toggle Bolts
Installing metal toggle bolts is a reliable way to secure heavy items to hollow walls. These bolts expand behind the wall, creating a strong grip. The process involves folding the toggle, inserting it through the hole, and then tightening the bolt.
Folding The Toggle
Start by folding the metal wings of the toggle bolt toward the bolt shaft. Keep the wings tight and aligned with the bolt. This makes the toggle small enough to fit through the drilled hole.
Inserting And Tightening
Push the folded toggle through the hole in the wall carefully. Once inside, the wings will open automatically. Pull back gently to ensure the wings hold against the wall’s back side. Finally, tighten the bolt by turning it clockwise until secure. Do not overtighten to avoid damaging the wall.
Installing Self-drilling Anchors
Installing self-drilling anchors is a simple way to secure objects to hollow walls. These anchors do not need a pre-drilled hole. They create their own path as you twist them into the wall. This makes the process faster and easier, especially for beginners.
Self-drilling anchors hold firmly in drywall or plaster without extra tools. They spread the load across a larger area, reducing wall damage. The key is to place and drive them correctly for a strong hold.
Positioning The Anchor
Start by marking the spot where the anchor goes. Choose a place that can support the object’s weight. Hold the anchor against the wall at the mark. Make sure it is straight and flat. This helps the anchor enter the wall cleanly. If the angle is wrong, the anchor may not hold well.
Driving The Anchor
Use a screwdriver to twist the anchor into the wall. Turn it clockwise with steady pressure. The sharp tip cuts into the drywall as you go. Keep twisting until the anchor’s flange is flush with the wall. Stop turning once it is tight and secure. Avoid overtightening to prevent wall damage. The anchor is now ready to hold screws or hooks firmly.
Tips For Strong Support
Strong support is key to a safe and lasting hold with hollow wall anchors. Proper steps ensure the anchor stays secure and the wall does not get damaged.
Follow these tips for better strength and reliability in your wall mounting projects.
Avoid Over-tightening
Tighten the anchor just enough to hold it firmly. Too much force can damage the wall or strip the anchor’s grip. Use steady, gentle pressure to avoid breaking the anchor or making the hole larger.
Check Anchor Stability
After installing, test the anchor by gently pulling or wiggling it. It should not move or feel loose. A stable anchor holds weight better and prevents the mounted item from falling.
Common Mistakes To Avoid
Putting hollow wall anchors seems simple but can go wrong fast. Small mistakes can cause anchors to fail or damage walls. Avoiding common errors helps secure your items safely. Focus on the right tools and techniques.
Wrong Anchor Size
Choosing the wrong size anchor weakens the hold. Too small anchors cannot support heavy objects. Too large anchors can crack or split the wall. Measure the item weight and wall thickness. Match the anchor size to the job for strong support.
Ignoring Wall Material
Different walls need different anchors. Drywall, plaster, and hollow blocks vary in strength. Using the wrong anchor type leads to poor grip and damage. Check the wall material before buying anchors. Use anchors designed for your specific wall type.

Credit: www.do-it-yourself-help.com

Credit: www.youtube.com
Frequently Asked Questions
What Tools Do I Need For Hollow Wall Anchors?
You need a drill, screwdriver, tape measure, and a hollow wall anchor kit. These tools help you install anchors securely.
How Do Hollow Wall Anchors Work?
They expand behind the wall when inserted. This expansion creates a strong grip in hollow spaces.
Can Hollow Wall Anchors Hold Heavy Items?
Yes, but weight limits vary by anchor type. Always check manufacturer guidelines for safe load capacity.
How Do I Choose The Right Anchor Size?
Measure the item’s weight and wall thickness. Select an anchor that matches both for secure mounting.
Conclusion
Hollow wall anchors hold objects firmly on drywall. Choose the right anchor for your project. Drill a hole carefully and insert the anchor straight. Tighten the screw to secure it in place. Always check the weight limit before use. With practice, installation becomes quick and easy.
These anchors help hang shelves, pictures, and more. Trust this simple method for strong wall support. Try it yourself and see the difference.