Are you ready to bring your latch hook wall hanging to life and give it that perfect, polished look? Finishing your project can feel tricky, but with the right steps, you’ll transform your work into a stunning piece you’ll be proud to display.
In this guide, you’ll discover simple, clear instructions that make finishing your latch hook wall hanging easy and enjoyable. Stick with me, and by the end, you’ll have the confidence to complete your creation beautifully every time. Let’s get started!
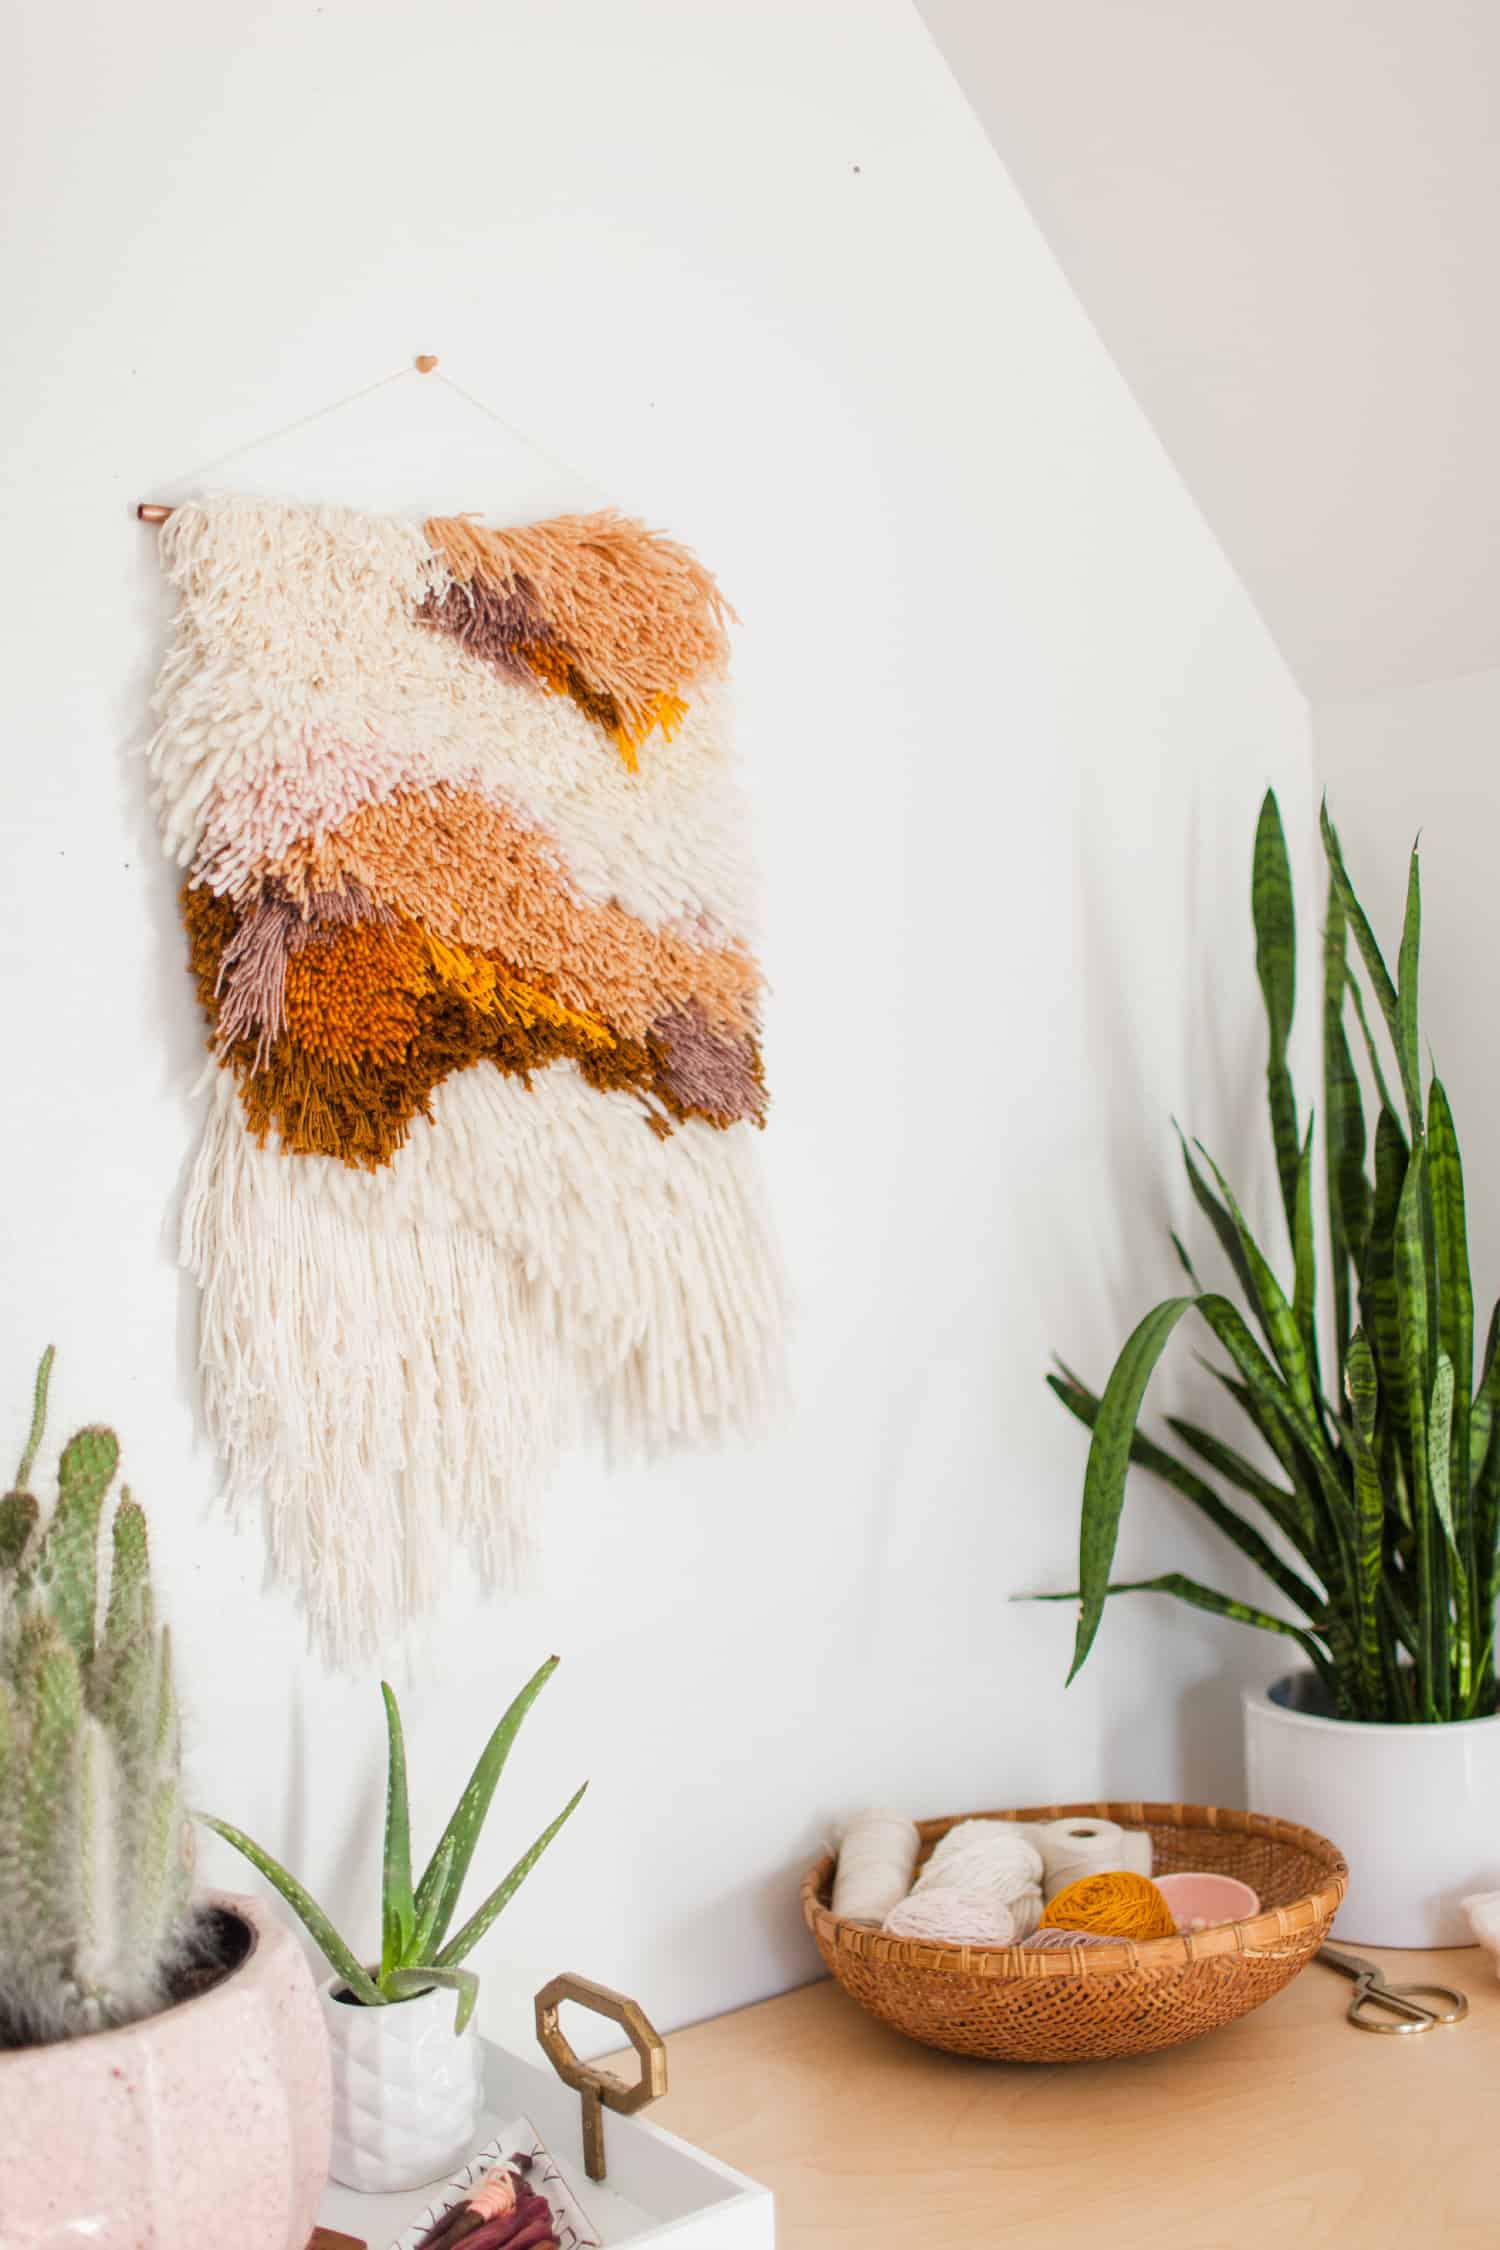
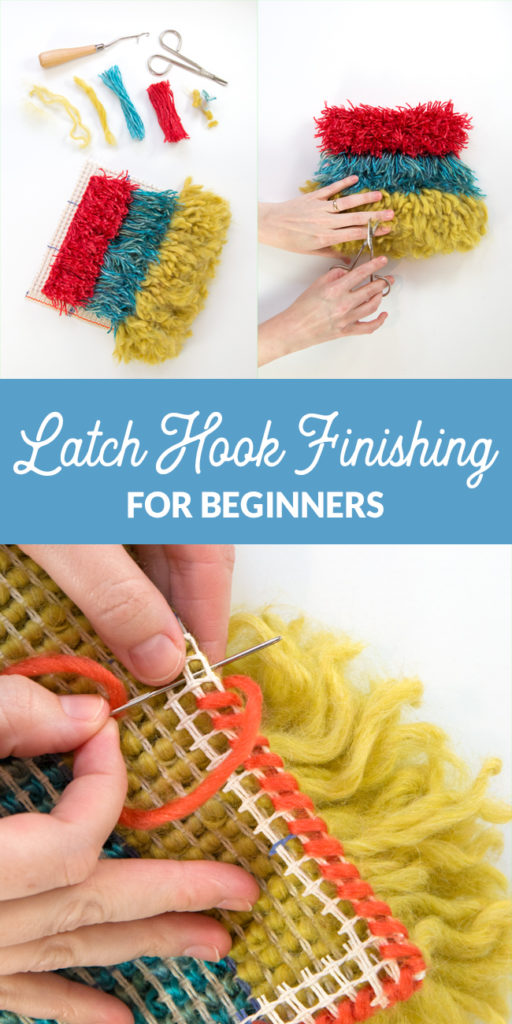
Credit: abeautifulmess.com
Preparing Your Wall Hanging
Preparing your latch hook wall hanging is an important step before finishing. This stage helps you check your work and gather everything needed for a neat final look. Taking time now makes your wall hanging last longer and look great.
Careful preparation also prevents problems later. It ensures the piece is ready for framing or hanging. Follow the steps below to prepare your latch hook wall hanging properly.
Gathering Essential Tools
Start by collecting the tools you need. A pair of sharp scissors is important for trimming loose yarn ends. A ruler or measuring tape helps check the size of your project. You may also want a comb or brush to gently smooth the yarn. A flat surface for working will keep your piece clean and even.
Inspecting The Completed Design
Look closely at your finished design. Check for any missed knots or loose yarn pieces. Trim any long or uneven ends carefully. Make sure the yarn is secure and tight. Fix any small mistakes to improve the overall look. This careful inspection helps your wall hanging stay beautiful over time.
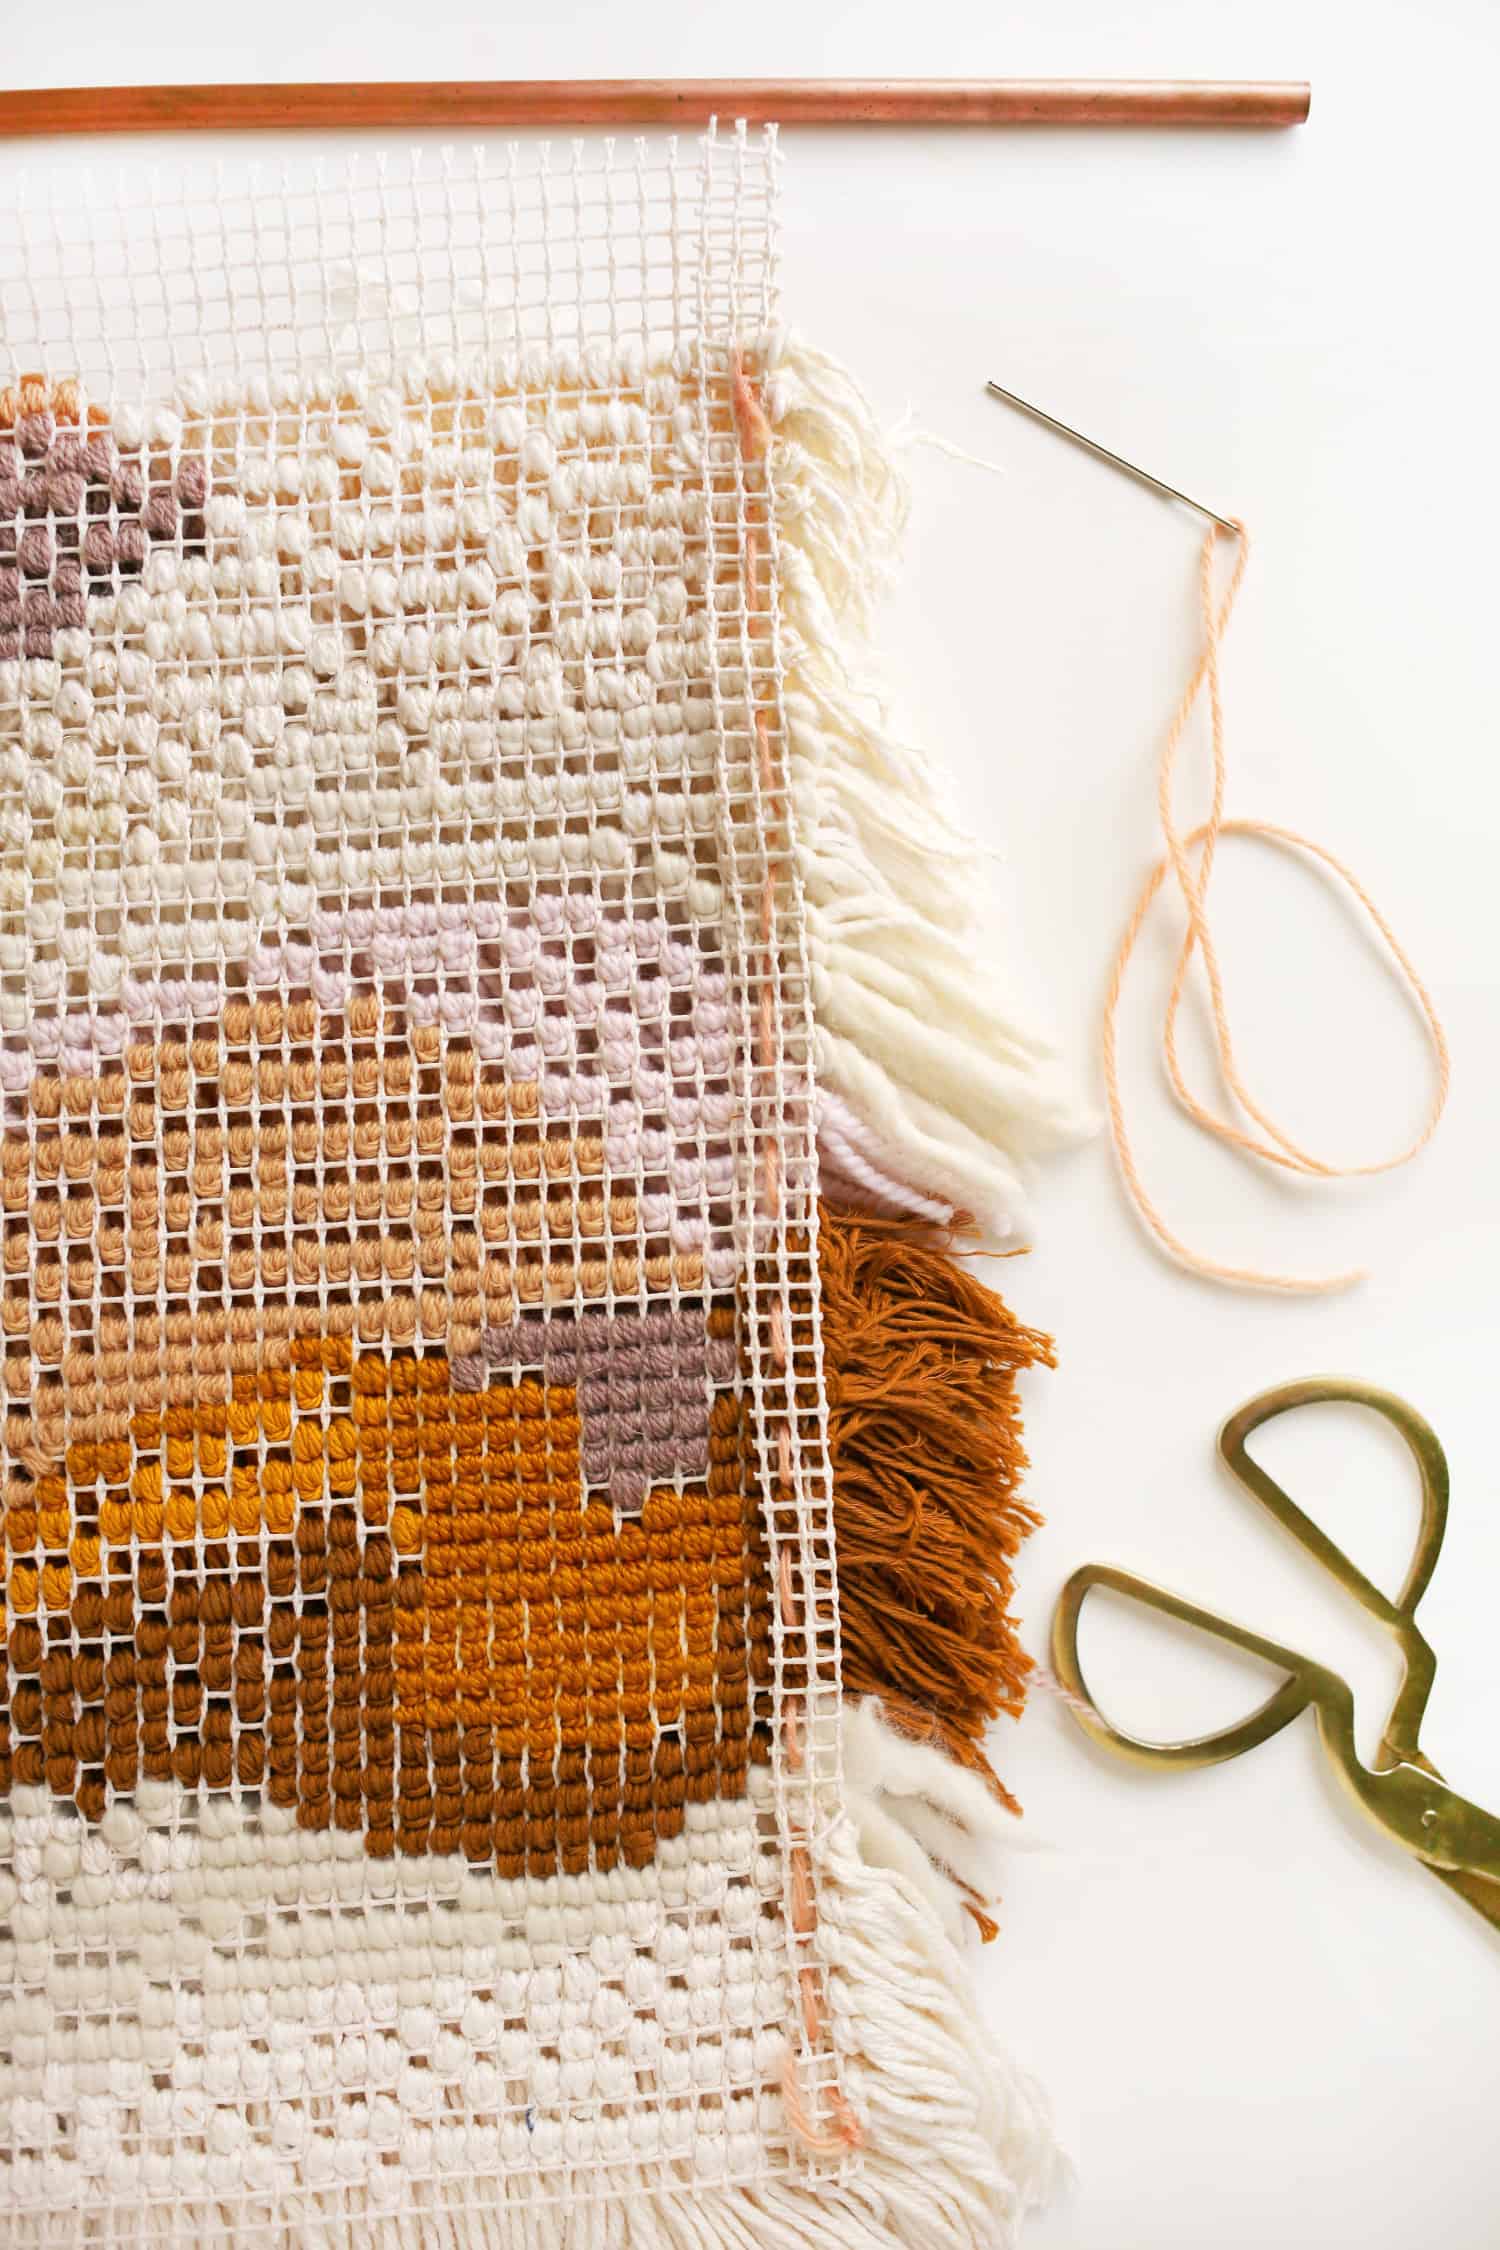
Credit: abeautifulmess.com
Securing Loose Ends
Securing loose ends is a key step to finish your latch hook wall hanging. It keeps the yarn pieces tight and neat. Loose ends can make the project look messy or come apart over time. Proper finishing gives your wall hanging a clean, polished look. Follow simple steps to manage and secure the yarn ends.
Trimming Excess Yarn
Start by trimming extra yarn carefully. Use sharp scissors for clean cuts. Cut close to the base but not too close. Leaving a little length helps prevent unraveling. Trim all yarn pieces to the same length. This creates a uniform and tidy surface on your wall hanging.
Tying And Knotting Techniques
Use tying or knotting to secure yarn ends firmly. Tie knots at the base of each yarn piece. Double knots add extra strength. Make sure knots are tight but not too tight to damage yarn. Tuck loose ends under nearby yarn strands. This hides them and keeps the surface smooth. These simple techniques keep your wall hanging strong and neat for years.
Adding A Backing
Adding a backing to your latch hook wall hanging gives it a neat, finished look. It also protects the knots and keeps the piece sturdy. The right backing fabric can make your wall hanging last longer. It helps the art hang flat against the wall without curling or sagging.
Choosing The Right Fabric
Select a fabric that feels strong but not too thick. Cotton or felt works well because they are soft and easy to sew. Avoid slippery fabrics like satin, which can slide off the latch hooks. Choose a color that matches or complements your design. This hides any stray yarn ends and keeps the back tidy.
Attaching The Backing Securely
Start by cutting the backing fabric slightly larger than the latch hook canvas. Pin it carefully along the edges to hold it in place. Use a needle and thread or a sewing machine to stitch the fabric around the edges. Sew close to the edge but not too tight to avoid puckering. You can also use fabric glue for a no-sew option. Press the edges flat with an iron to finish the look.
Framing Options
Finishing a latch hook wall hanging involves choosing the right frame or display method. Framing helps protect your work and gives it a polished look. It also makes hanging easier and can match your room decor.
Selecting Suitable Frames
Pick a frame that fits your wall hanging size perfectly. Wooden frames add warmth and a natural touch. Simple black or white frames keep the focus on the art. Deep shadow box frames give depth and protect the yarn. Make sure the frame has enough space for the thick texture.
Mounting Without A Frame
Frames are not the only way to display latch hook art. You can use a wooden dowel or curtain rod to hang it. Sew a pocket on top of the fabric to slide the rod through. This method is lightweight and easy to change. Another option is to use fabric glue on a stiff backing board. Attach hooks or velcro strips to hang the piece directly on the wall.
Hanging Methods
Hanging your latch hook wall hanging properly keeps it safe and shows it off well. Choose a method that fits your space and style. Here are two common ways to hang your art easily and securely.
Using Rods And Dowels
Rods and dowels provide strong support and a classic look. Slide a wooden dowel through the top loops of your latch hook. This spreads weight evenly and keeps the piece flat.
Attach hooks or brackets to your wall to hold the rod. Choose a dowel that matches the width of your hanging. This method works well for larger or heavier pieces.
Using rods also makes it easy to remove and clean your wall hanging. It looks neat and adds a simple frame effect without extra work.
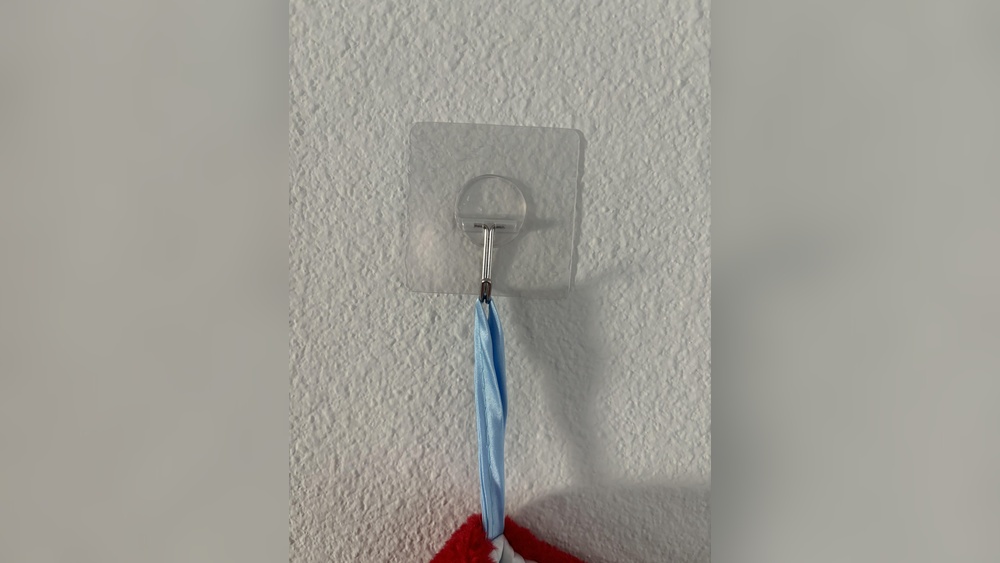
Wall Hooks And Adhesives
Wall hooks offer a quick and easy way to hang your latch hook. Use small hooks or nails that fit the hanging loops. This method needs minimal tools and effort.
Adhesive hooks are another option. They stick to the wall and hold lightweight hangings securely. Make sure the surface is clean before applying them.
These hooks avoid damage to walls and allow for flexible placement. Perfect for renters or temporary displays.
Credit: www.handsoccupied.com
Maintaining Your Wall Hanging
Maintaining your latch hook wall hanging keeps it looking fresh and beautiful. Proper care helps the colors stay bright and the fibers strong. Simple steps can protect your artwork for years. Follow these tips to enjoy your wall hanging longer.
Cleaning Tips
Dust your wall hanging regularly using a soft brush or cloth. Gently shake it outside to remove loose dirt. Avoid using water or harsh cleaners that may damage the yarn. For stains, spot clean with a damp cloth and mild soap. Always test a small area first to check for colorfastness.
Preventing Damage Over Time
Keep your wall hanging away from direct sunlight to prevent fading. Avoid placing it near heat sources or damp areas. Use a backing board to support the piece and keep its shape. Handle your wall hanging with clean hands to avoid oils and dirt. Store it flat or rolled gently if you need to put it away.
Frequently Asked Questions
How Do You Secure Edges On A Latch Hook Wall Hanging?
To secure edges, fold the canvas edges inward and sew them tightly. This prevents unraveling and gives a neat finish to your wall hanging.
What Materials Are Needed To Finish A Latch Hook Project?
You need a latch hook tool, scissors, yarn, a needle, and a sturdy backing fabric for finishing your latch hook wall hanging.
How To Add A Backing To A Latch Hook Wall Hanging?
Cut backing fabric to size, then sew or glue it onto the canvas’s back. This adds durability and a clean look.
Can You Frame A Latch Hook Wall Hanging?
Yes, framing protects your piece and enhances its display. Choose a shadow box or deep frame to avoid crushing the yarn.
Conclusion
Finishing a latch hook wall hanging is simple with the right steps. Tie the yarn securely to keep it from unraveling. Trim the edges to give a neat look. Add a backing if you want extra support. Hang your creation proudly on the wall.
This craft brings color and warmth to any room. Enjoy the process and the beautiful result you made. Keep practicing to improve your skills and try new designs. Your latch hook art will brighten your home for years.