Are you ready to upgrade your home security with a Kwikset Electronic Deadbolt? Installing one might seem tricky, but it’s easier than you think—and you don’t need to be a DIY expert.
Imagine having keyless entry at your fingertips, giving you full control over who enters your home. In this guide, you’ll discover simple, step-by-step instructions to install your Kwikset Electronic Deadbolt quickly and confidently. Stick with me, and you’ll have your new lock working smoothly in no time.
Let’s get started!
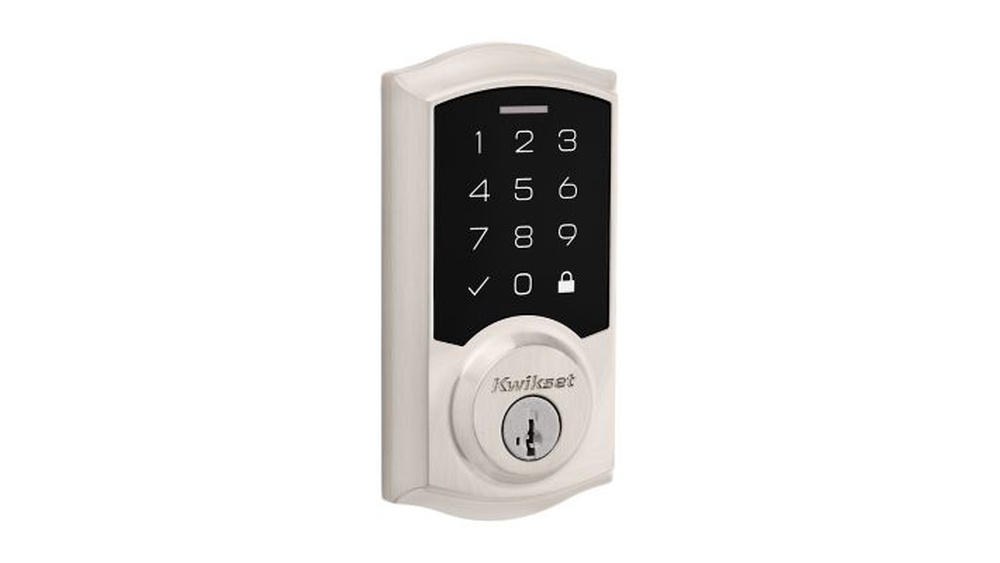
Credit: www.kwikset.com
Tools And Materials Needed
Installing a Kwikset electronic deadbolt requires some basic tools and materials. Preparing these items before starting helps the process go smoothly. You avoid interruptions and frustration.
Most tools are common and easy to find. The materials include the parts that come with the lock. Having everything ready saves time and effort.
Tools Needed
- Phillips screwdriver for screws
- Flathead screwdriver for prying
- Power drill with drill bits
- Measuring tape for accuracy
- Level to ensure straight installation
- Pencil to mark holes
- Safety glasses to protect eyes
Materials Needed
- Kwikset electronic deadbolt lock kit
- Batteries (usually included in the kit)
- Strike plate and screws
- Door template for drilling
Optional Items
- Wood filler for fixing old holes
- Sandpaper to smooth edges
- Masking tape to protect the door surface
Prepare The Door
Preparing the door is an important step before installing a Kwikset electronic deadbolt. It ensures the new lock fits properly and works well. Take time to get the door ready for a smooth installation. Follow these steps carefully to avoid problems later.
Remove Existing Deadbolt
First, remove the old deadbolt from the door. Unscrew the interior and exterior parts of the lock. Keep the screws in a safe place. Pull out the deadbolt mechanism from the edge of the door. Make sure the hole in the door is clean and free of debris.
Check Door Compatibility
Check if the door fits the Kwikset electronic deadbolt. The door thickness should be between 1 3/8 inches and 2 inches. The backset, or distance from the edge of the door to the center of the hole, should match the lock’s specifications. Also, check the door frame for proper alignment. A good fit helps the lock work smoothly and last longer.
Install The Deadbolt Hardware
Installing the deadbolt hardware is a key step in securing your door with the Kwikset electronic deadbolt. This process involves attaching the latch, mounting the keypad outside, and setting up the interior parts. Each step must be done carefully to ensure the lock works smoothly and safely.
Follow the instructions below to fit the hardware correctly. Use the tools that came with your lock or a simple screwdriver. Take your time to avoid mistakes.
Attach The Deadbolt Latch
Start by inserting the deadbolt latch into the door edge. The latch faceplate should fit flush with the door. Use screws to secure it tightly. Make sure the latch moves freely by sliding it in and out. Proper latch installation helps the lock to work properly.
Mount The Exterior Keypad
Place the keypad on the outside of the door. Align it with the latch mechanism. Feed the connecting cable through the hole in the door. Hold the keypad firmly and attach it using the screws provided. Check that the keypad is level and secure.
Install The Interior Assembly
On the inside of the door, connect the cable to the interior assembly. Align the assembly with the mounting plate on the door. Secure it with screws, making sure it fits tightly. Attach the battery cover last. Test the lock by turning the thumb turn to confirm smooth operation.
Secure The Deadbolt
Securing the deadbolt is a crucial step in installing your Kwikset electronic deadbolt. Properly securing it ensures your door locks tightly and works smoothly. This step helps protect your home and keeps your lock lasting longer.
Tighten Screws Properly
Use a screwdriver to tighten all screws firmly. Avoid over-tightening, which can strip the screws or damage the lock. Make sure the lock sits flush against the door without any gaps. Check each screw to confirm it is secure and stable.
Test Deadbolt Movement
Turn the thumb turn or use the keypad to move the deadbolt. The bolt should slide out and retract smoothly without sticking. Test locking and unlocking several times to ensure consistent operation. Adjust screws if the bolt feels tight or loose.
Program The Electronic Features
Programming the electronic features of your Kwikset deadbolt makes your home more secure. It lets you control who enters and when. This part of installation is easy and fast. Follow the steps carefully to set up your lock.
Set User Codes
Start by creating user codes for people who need access. Press the program button on the lock’s interior. Enter a new code using the keypad. Make sure the code has 4 to 8 digits. Press the lock button to save the code. Repeat for each user you want to add. Each code is unique to keep your home safe.
Configure Lock Settings
Adjust settings to fit your needs. Use the menu on the keypad to find options. You can set auto-lock time, sound alerts, and keypad brightness. Choose a setting and press the lock button to confirm. Change settings anytime to improve convenience and security. Simple tweaks make your lock easier to use daily.

Credit: www.youtube.com
Troubleshooting Tips
Troubleshooting helps fix common problems with your Kwikset electronic deadbolt. Simple checks often solve most issues. This saves time and avoids extra costs.
Below are key tips for common problems. Follow these steps to keep your lock working well.
Check The Battery Power
Weak batteries cause many lock issues. Replace old batteries with fresh ones. Use the correct battery type. Test the lock after changing batteries.
Reset The Lock Properly
Resetting can fix software glitches. Follow the reset instructions in the manual carefully. Hold buttons for the right time. Do not skip steps for a full reset.
Inspect The Installation
Loose screws or misaligned parts cause problems. Tighten screws around the lock. Make sure the deadbolt moves smoothly. Check the strike plate on the door frame.
Verify User Codes
Wrong codes prevent access. Delete old codes you do not use. Add new codes carefully. Make sure you enter codes correctly during use.
Test The Lock’s Motor
Listen for sounds when locking or unlocking. No sound may mean a motor problem. Try resetting the lock. Contact support if the motor still does not work.
Maintenance And Battery Replacement
Keeping your Kwikset Electronic Deadbolt working well takes simple care. Regular maintenance and timely battery changes keep the lock secure and reliable. This section explains easy steps to maintain your lock and replace its battery.
Checking The Battery Life
Check the battery status often. Most Kwikset locks warn you with a beep or light. Replace batteries when you see these signals. Do this before the battery dies completely.
How To Replace The Battery
Open the battery cover on the inside of the lock. Remove old batteries carefully. Insert new AA batteries in the right direction. Close the cover firmly.
Cleaning The Lock
Use a soft cloth to clean the lock surface. Avoid water or harsh chemicals. Dust and dirt can block the keypad. Keep the buttons clean for easy use.
Testing The Lock After Maintenance
Test the lock after battery replacement or cleaning. Press the keypad and listen for normal sounds. Turn the knob to check smooth operation. Fix any issues before using the lock regularly.

Credit: www.youtube.com
Frequently Asked Questions
How Do I Install A Kwikset Electronic Deadbolt?
First, remove your old deadbolt. Align the new Kwikset deadbolt with your door. Secure it with screws, then install the interior keypad. Connect the batteries, and program your access codes following the manual instructions. Test the lock for proper function before finishing.
What Tools Are Needed For Kwikset Deadbolt Installation?
You will need a Phillips screwdriver, a tape measure, and a pencil. A power drill may help with pilot holes. These tools ensure accurate placement and secure installation of your Kwikset electronic deadbolt, making the process smooth and efficient.
How To Program The Kwikset Electronic Deadbolt?
After installation, press the program button inside the lock. Follow the manual to enter your master code and new user codes. Ensure each code is unique and saved properly. This process secures access and customizes your Kwikset deadbolt for convenience.
Can I Install Kwikset Deadbolt On Any Door?
Kwikset electronic deadbolts fit most standard doors 1-3/8 to 2 inches thick. Check your door’s thickness before installation. They are designed for residential use and work on wood and metal doors, ensuring wide compatibility and security.
Conclusion
Installing a Kwikset electronic deadbolt can be simple and quick. Follow each step carefully for the best results. Make sure all parts fit well and work smoothly. Test the lock before using it daily. This adds safety and ease to your home.
With practice, installation feels easier next time. Enjoy the comfort of keyless entry and secure locking. Your home stays protected with this smart upgrade.