Are you tired of struggling with screws that just won’t hold in your walls? Installing plastic anchors can be the simple solution you need to keep your shelves, pictures, or hooks secure.
But if you’ve never done it before, the process might seem tricky or confusing. Don’t worry—this guide will walk you through every step, using clear, easy instructions that anyone can follow. By the end, you’ll have the confidence to install plastic anchors like a pro and make your walls stronger and more reliable.
Keep reading to discover how to get it right the first time!

Credit: www.wikihow.com
Choosing The Right Plastic Anchors
Choosing the right plastic anchors is important for a strong hold and safe installation. Different anchors work best for different walls and weights. Knowing the types and sizes helps you pick the perfect one. This guide explains how to choose anchors that fit your project.
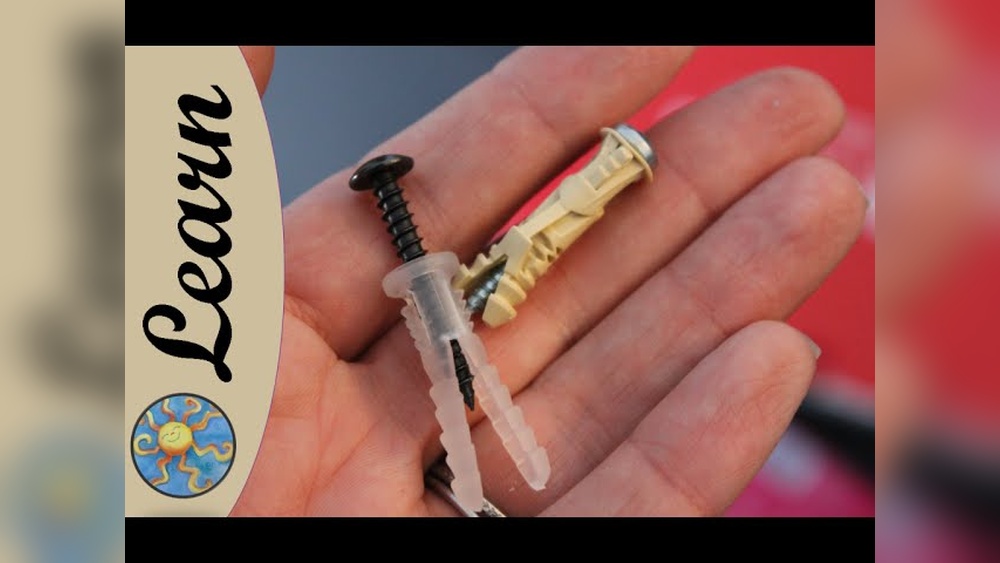
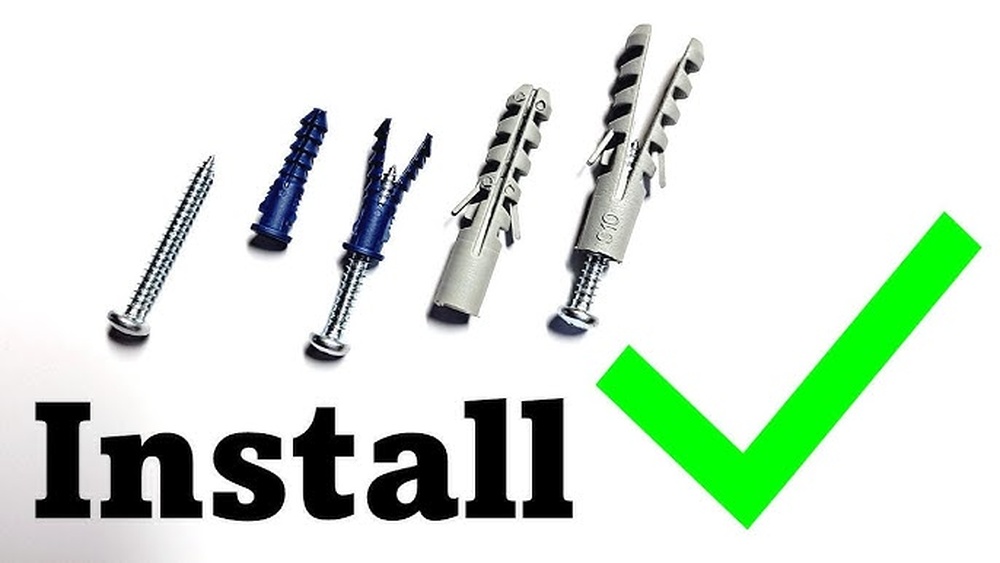
Types Of Plastic Anchors
Plastic anchors come in various types. The most common are expansion anchors, which spread out inside the wall. Another type is the toggle anchor, which has wings that open behind the wall. Some anchors are self-drilling, making installation faster. Each type fits different wall conditions and loads.
Selecting Based On Wall Material
Wall material affects which anchor you should use. Drywall needs lightweight anchors that won’t damage it. Concrete or brick walls require stronger, heavy-duty anchors. Plaster walls need anchors that do not crack the surface. Matching the anchor to the wall ensures a firm hold.
Anchor Size And Weight Capacity
Anchors come in many sizes. Bigger anchors hold more weight. Check the weight of the item you want to hang. Choose an anchor with a weight rating higher than your item. Using the right size prevents accidents and wall damage.

Credit: www.youtube.com
Tools And Materials Needed
Installing plastic anchors into a wall needs some basic tools and materials. Having the right items makes the job easier and ensures a strong hold. Gather these tools before starting your project.
Drill And Drill Bits
A drill is essential to make holes in the wall for the anchors. Choose a drill bit that matches the size of the plastic anchor. Using the correct drill bit helps the anchor fit tightly and hold well.
Screwdriver And Screws
You need a screwdriver to insert screws into the plastic anchors. Pick screws that fit the anchor size. The right screws keep your items secure on the wall without damage.
Measuring Tools And Markers
Measuring tools help mark where to drill. Use a tape measure or ruler for accuracy. A pencil or marker shows the exact spot to place the anchor. This step prevents mistakes and keeps your project neat.
Preparing The Wall
Preparing the wall is the first step to install plastic anchors safely and correctly. It helps ensure the anchors hold strong and the item stays secure. Taking time to prepare avoids mistakes and damage to your wall.
Locating The Anchor Spot
Find the exact spot where you want to install the anchor. Use a tape measure or ruler to measure the correct height and position. Check that the spot is solid and suitable for holding weight.
Marking Drill Points
Mark the drill points clearly with a pencil. Small dots work best to guide your drilling. Make sure the marks are visible but easy to erase later if needed.
Checking For Obstacles
Look behind the wall for pipes, wires, or studs before drilling. Use a stud finder or tap the wall to listen for hollow spots. Avoid drilling where obstacles may cause damage or danger.
Drilling The Hole
Drilling the hole is a key step when installing plastic anchors into a wall. It creates the right space for the anchor to fit tightly. A proper hole ensures the anchor holds firmly and supports the weight of your item. Taking care during this step prevents damage to the wall and makes the installation easier.
Choosing The Drill Bit Size
Select a drill bit that matches the anchor’s diameter. Using a bit too small makes it hard to insert the anchor. A bit too large causes the anchor to be loose. Check the anchor package for the recommended drill bit size. This step guarantees a snug fit for the anchor.
Drilling At The Correct Depth
Drill the hole just as deep as the anchor’s length. Drilling too shallow will not hold the anchor securely. Going too deep wastes effort and weakens the wall. Mark the drill bit with tape to control depth. This simple trick keeps the hole perfect for the anchor.
Cleaning Out Debris
Remove dust and debris from the hole after drilling. Use a small brush or blow air into the hole. Cleaning ensures the anchor fits well without obstruction. Debris inside the hole can stop the anchor from gripping tightly. A clean hole improves the anchor’s hold and your project’s safety.
Inserting The Plastic Anchor
Inserting the plastic anchor is a key step for a secure hold. This process ensures your anchor fits well inside the wall. A proper insertion prevents damage and keeps your fixture stable. Follow these simple steps to place the anchor correctly.
Aligning The Anchor
Hold the plastic anchor straight with the hole. Make sure it lines up with the drilled hole in the wall. A straight anchor fits better and grips the wall firmly. Avoid tilting or angling the anchor during insertion.
Tapping The Anchor Into Place
Use a hammer or mallet to tap the anchor gently. Tap until the anchor is mostly inside the wall. Do not hit too hard to avoid breaking the anchor. Small, light taps work best for a smooth fit.
Ensuring A Flush Fit
The anchor should sit flush with the wall surface. Check that no part sticks out or is too deep inside. A flush fit allows screws to enter easily and hold tight. Adjust the anchor by tapping lightly if needed.
Securing The Screw
Securing the screw into a plastic anchor is a key step for a strong hold. This process ensures the anchor expands and grips the wall tightly. Correct screw installation keeps your fixture stable and safe.
Selecting The Right Screw
Choose a screw that fits the plastic anchor size. The screw should be long enough to go through the object and fully enter the anchor. Avoid screws that are too thick or thin. Thick screws may crack the anchor. Thin screws may not hold well.
Driving The Screw Into The Anchor
Start by placing the screw tip into the anchor opening. Use a screwdriver or drill to turn the screw slowly. Keep the screw straight to avoid damaging the anchor. The screw pulls the anchor tighter inside the wall. Stop when you feel resistance.
Avoiding Over-tightening
Stop tightening as soon as the screw feels firm. Over-tightening can break the anchor or strip the hole. This weakens the hold and may cause the fixture to fall. Tighten just enough to secure the object firmly.
Testing The Hold Strength
Testing the hold strength of plastic anchors is important for safety and durability. It helps ensure the anchor will keep your item secure on the wall. This step avoids damage or accidents later.
Follow simple checks after installing anchors. These checks help confirm the anchor’s grip inside the wall.
Applying Weight Gradually
Start by adding a small weight to the anchor. Increase the weight slowly. This method prevents sudden stress on the anchor. It shows how much load the anchor can handle without slipping.
Checking For Movement
Look closely for any shaking or shifting. Use your hand to feel if the anchor moves. Movement means the hold is weak. No movement means the anchor fits well and is secure.
Reinforcing If Necessary
If you notice movement, do not ignore it. Remove the item and check the anchor hole. Use a larger anchor or fill the hole with wall filler. Let it dry before trying again. This strengthens the hold and improves safety.

Credit: www.youtube.com
Common Mistakes To Avoid
Installing plastic anchors into a wall seems simple. Many make mistakes that cause weak holds or damage. Avoid these errors to ensure a strong and safe installation. Understanding common pitfalls helps you fix anchors right the first time.
Incorrect Drill Bit Size
Using the wrong drill bit size leads to poor anchor fit. A hole too big makes the anchor loose. A hole too small can break the anchor or wall. Always match the drill bit size to the anchor instructions. Measure carefully before drilling.
Ignoring Wall Material
Not all walls are the same. Drywall, plaster, or concrete need different anchors. Using the wrong anchor weakens the hold. Check the wall type before choosing anchors. This step prevents damage and ensures strength.
Using Wrong Anchor Type
Plastic anchors come in various types for different uses. Using a basic anchor on a heavy object causes failure. Heavy items need specialized anchors like toggle bolts. Match the anchor type with the weight and wall material. This avoids falls and accidents.
Frequently Asked Questions
What Tools Do I Need To Install Plastic Anchors?
You need a drill, drill bit, hammer, screwdriver, and plastic anchors. Choose the drill bit size matching the anchor diameter. These tools ensure a secure and easy installation.
How Do I Choose The Right Plastic Anchor Size?
Select an anchor size based on the screw and wall thickness. Check the weight of the item you want to hang. Proper sizing ensures a strong hold and prevents wall damage.
Can Plastic Anchors Be Used On Drywall?
Yes, plastic anchors work well on drywall. They provide extra grip and prevent screws from pulling out. Use anchors rated for drywall thickness and weight for best results.
How Deep Should I Drill For Plastic Anchors?
Drill a hole slightly deeper than the anchor length. This allows the anchor to fit fully without resistance. Proper depth ensures a firm hold and easy screw insertion.
Conclusion
Installing plastic anchors into a wall is simple and quick. Choose the right anchor size for your task. Drill a hole that matches the anchor diameter. Push the anchor gently into the hole until flush with the wall. Then, insert and tighten the screw carefully.
This method holds objects firmly and prevents wall damage. Practice a few times to build confidence. Soon, you will hang shelves, pictures, or hooks with ease. Small steps lead to big results. Give it a try today!