If your Craftsman Professional Floor Jack 50136 isn’t lifting like it used to, you don’t have to replace it just yet. You can bring it back to life with a few simple steps.
Imagine saving money and getting your jack working smoothly again, all by yourself. In this guide, you’ll learn exactly how to rebuild your floor jack quickly and safely. Keep reading, because by the end, you’ll have the confidence to handle this project on your own—and keep your tools in top shape for years to come.
Tools And Materials Needed
Rebuilding a Craftsman Professional Floor Jack 50136 requires specific tools and materials. Having the right items ready saves time and prevents frustration. This section lists everything needed for a smooth rebuild process.
Each tool and material plays a key role in ensuring the jack works safely and efficiently. Prepare all items before starting the project.
Basic Hand Tools
Start with essential hand tools like wrenches and screwdrivers. A set of metric and standard wrenches helps remove bolts. Flathead and Phillips screwdrivers are necessary for screws and small parts.
Hydraulic Fluid
Use the correct hydraulic fluid for your floor jack. This fluid allows smooth lifting and lowers wear. Avoid using other liquids to prevent damage.
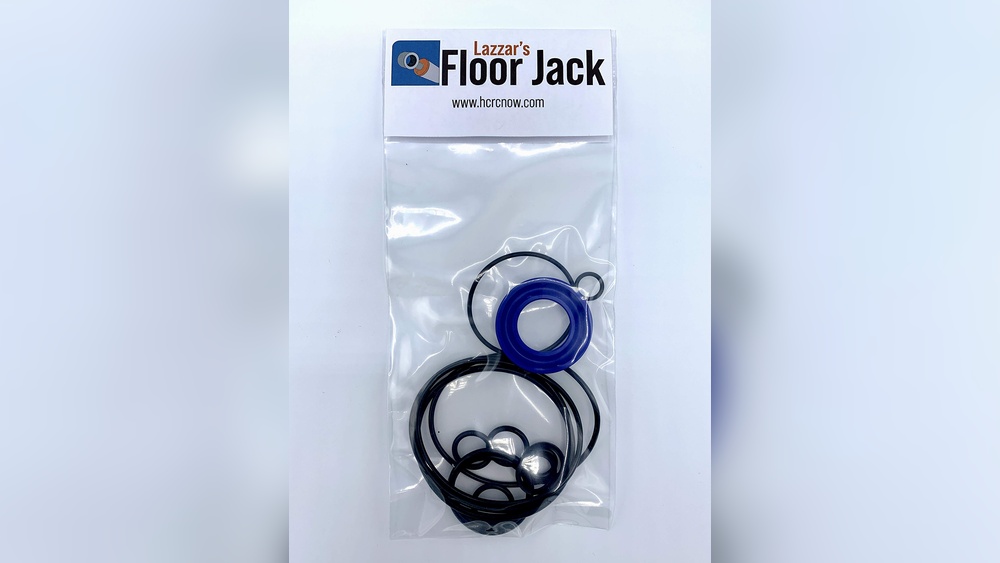
Replacement Seals And O-rings
Seals and O-rings wear out over time. Replace them to prevent leaks and maintain pressure. Purchase a rebuild kit specific to the Craftsman 50136 model for best fit.
Cleaning Supplies
Clean parts thoroughly before reassembly. Use rags, brake cleaner, or degreaser. Clean surfaces ensure proper seal and smooth operation.
Lubricants
Apply grease or light oil to moving parts. Lubricants reduce friction and wear. Choose products safe for hydraulic tools.
Safety Gear
Wear gloves and safety glasses to protect yourself. Handling hydraulic fluid and tools requires caution. Safety gear keeps you safe during the rebuild.

Credit: www.amazon.com
Safety Precautions
Working on your Craftsman Professional Floor Jack 50136 needs care and attention. Safety comes first to avoid injuries and damage. Follow these precautions closely to protect yourself and your tools.
Wear Protective Gear
Always wear safety glasses to shield your eyes from debris. Gloves protect your hands from sharp parts and dirt. Use sturdy shoes to prevent foot injuries.
Work On A Stable Surface
Place the floor jack on a flat, hard surface. Avoid soft or uneven ground that can cause slipping. Stability reduces the risk of accidents.
Release Pressure Safely
Before starting, release all hydraulic pressure carefully. This step stops sudden movements of the jack. Work slowly to keep control.
Keep Tools Organized
Arrange all tools and parts neatly nearby. Messy workspaces increase chances of losing parts or tripping. Stay organized for smooth rebuilding.
Follow Manufacturer Instructions
Use the floor jack manual as your guide. Instructions show correct rebuilding steps and safety tips. Do not skip any warnings.
Disassembling The Floor Jack
Disassembling the Craftsman Professional Floor Jack 50136 is the first step to rebuild it effectively. This process helps you access all the parts that may need repair or replacement. Take your time and work carefully to avoid damage.
Start by clearing a clean workspace. Lay down some cloth or paper to keep small parts safe. Have your tools ready, such as wrenches, screwdrivers, and pliers. Now, you are ready to begin disassembly.
Removing The Handle And Pump Assembly
Begin by loosening the retaining pin that connects the handle to the jack. Pull the handle out gently. Next, detach the pump assembly by removing the bolts or screws holding it in place. Carefully lift the pump out, keeping track of any washers or seals. Set these parts aside safely for later inspection.
Taking Apart The Hydraulic Unit
Locate the hydraulic unit inside the jack’s body. Remove the cover plate by unscrewing the bolts. Slowly pull out the hydraulic cylinder. Be cautious with the seals and O-rings; they are fragile and easy to lose. Inspect the piston and cylinder for wear or damage. Keep all parts organized for easy reassembly.
Separating The Frame Components
Remove the bolts that connect the main frame pieces. Gently pull apart the base and upper frame. Check for rust or cracks on the metal surfaces. Clean all parts thoroughly before moving to the next step. This separation allows full access to internal components for repair or replacement.
Inspecting Parts For Damage
Inspecting parts for damage is a crucial step in rebuilding your Craftsman Professional Floor Jack 50136. This process helps ensure the jack works safely and efficiently. Careful inspection prevents future breakdowns and saves money on repairs.
Each part of the jack has a specific role. Any damage can affect its performance. Take time to check every component closely. Look for signs of wear, cracks, or leaks. Identifying issues early makes fixing easier.
Checking Seals And O-rings
Seals and O-rings stop hydraulic fluid from leaking. Over time, they can dry out or crack. Look for any tears or hard spots on these parts. Replace damaged seals to keep the jack working smoothly. A good seal keeps pressure steady during lifting.
Examining Hydraulic Fluid
Hydraulic fluid powers the lifting mechanism. Check the fluid level in the jack’s reservoir. The fluid should be clean and clear. Dark or dirty fluid means contamination. Old fluid reduces the jack’s strength. Drain and refill with fresh hydraulic oil if needed.
Assessing Structural Components
Structural parts include the frame, handle, and lifting arm. Check for cracks, bends, or rust spots. Damaged parts can cause failure during use. Tighten any loose bolts and nuts. Replace parts that show serious damage. A strong structure keeps your floor jack safe to use.
Cleaning Components
Cleaning the components of your Craftsman Professional Floor Jack 50136 is a key step in rebuilding it. Dirt, rust, and old oil can block parts and stop the jack from working well. Proper cleaning helps the jack lift smoothly and last longer. This process takes time but keeps your jack safe and strong.
Removing Rust And Debris
Start by wiping off loose dirt with a dry cloth. Use a wire brush to remove rust from metal parts. Soak small parts in a rust remover solution for better results. Rinse and dry all parts completely to avoid new rust. Clear out debris from hard-to-reach areas with a small brush or compressed air. Keep parts clean to prevent damage during use.
Cleaning Hydraulic Passages
Hydraulic passages must be clean to allow smooth fluid flow. Use a clean cloth to wipe the outside of the passages. Flush the passages with clean hydraulic fluid or a special cleaner. Avoid using water, as it can cause rust inside. Repeat flushing until the fluid runs clear. Dry the passages using compressed air to remove any leftover cleaner or moisture.

Credit: www.ebay.com
Replacing Worn Or Damaged Parts
Replacing worn or damaged parts is key to keeping your Craftsman Professional Floor Jack 50136 working well. Over time, seals and O-rings wear out. They cause leaks and reduce lifting power. Fixing these parts brings back smooth operation.
Hydraulic fluid can get dirty or low. It needs refilling to keep pressure steady. Clean, fresh fluid helps the jack lift safely and easily. This section shows how to install new seals and O-rings and refill the hydraulic fluid properly.
Installing New Seals And O-rings
First, remove the old seals and O-rings carefully. Use a small pick or screwdriver to avoid damage. Clean the area well to remove dirt and oil. Take your new seals and O-rings and apply a thin layer of hydraulic fluid on them. This helps them slide in smoothly. Press each seal or O-ring into place gently but firmly. Make sure they fit snugly with no gaps. Check all parts before reassembling the jack. Proper sealing stops leaks and keeps pressure strong.
Refilling Hydraulic Fluid
Locate the fill plug on the jack’s reservoir. Remove the plug and use a clean funnel to add hydraulic fluid. Pour slowly to avoid air bubbles. Fill until the fluid reaches the correct level. Check the owner’s manual for the right fluid type and level. After filling, replace the plug tightly. Pump the jack a few times to remove air inside. This restores full lifting power and smooth action.
Reassembling The Floor Jack
Reassembling the Craftsman Professional Floor Jack 50136 requires careful steps. This process ensures the jack works safely and properly. Take your time to put each part back in order. Follow clear instructions to avoid mistakes. Proper reassembly helps extend the jack’s life and maintains its strength.
Reinstalling The Hydraulic Unit
Start by placing the hydraulic unit into the main frame. Make sure it fits snugly without forcing. Align the hydraulic piston with the pump mechanism. Secure the unit with bolts and tighten them well. Check for smooth movement by manually operating the piston. This step is key for the jack’s lifting power.
Attaching The Handle And Pump
Insert the handle into its socket on the frame. Attach the pump lever to the hydraulic unit. Use the pins or clips to hold the handle firmly. Test the pump action by moving the handle up and down. The handle should move smoothly without sticking. Proper attachment controls the flow of hydraulic fluid.
Securing Frame Parts
Place the side panels and base plate back on the frame. Use all screws and bolts removed earlier. Tighten each fastener evenly to keep the structure solid. Check all moving parts for free and easy motion. Secure frames prevent wobbling and ensure safe lifting. Double-check each connection before using the jack again.
Testing And Adjusting
Testing and adjusting your Craftsman Professional Floor Jack 50136 ensures it works safely and well. This step checks if the jack lifts properly and releases smoothly. Careful testing helps avoid accidents and keeps your jack in good shape. Follow these simple checks to confirm your jack’s performance.
Checking Lift Capacity
Start by verifying the jack can lift its rated weight. Place a heavy object close to the jack’s maximum load. Pump the handle slowly and watch the lift rise steadily. If it struggles or stops, the jack needs adjustment. Confirm the jack holds the weight without lowering or slipping. This test shows if the jack’s hydraulic system is working right.
Adjusting Release Valve
Locate the release valve on the jack’s handle or body. Turn it slightly to control how fast the jack lowers. If the jack drops too quickly, tighten the valve a bit. Too slow? Loosen the valve carefully. Test the release several times to find the right speed. Proper adjustment keeps the lowering smooth and safe.
Ensuring Smooth Operation
Check the jack’s movement by pumping the handle. It should lift without jerks or noise. Lower the jack and watch for smooth descent. Lubricate moving parts if needed to reduce friction. Clear any dirt or debris that blocks motion. Smooth operation protects your jack and makes lifting easier.
Maintenance Tips For Longevity
Maintaining your Craftsman Professional Floor Jack 50136 is key to its long life. Regular care keeps it working smoothly and safely. Small steps can prevent big problems. Follow these simple tips to protect your floor jack.
Check And Change The Hydraulic Fluid
Hydraulic fluid moves the jack up and down. Dirty or low fluid causes poor lifting. Check fluid levels often. Replace the fluid every six months. Use the type recommended in the manual. Clean fluid means better performance.
Clean The Jack After Use
Dirt and dust can damage parts. Wipe the jack with a clean cloth after each use. Avoid water on the hydraulic system. Keep the wheels and handles free from grime. Clean jacks last longer and work better.
Inspect For Wear And Damage
Look closely at all parts regularly. Check for cracks, rust, or leaks. Pay attention to the lifting arm and wheels. Replace worn or broken parts quickly. Early fixes stop bigger damage later.
Lubricate Moving Parts
Oil the wheels, hinges, and joints monthly. Use light machine oil for best results. Proper lubrication reduces friction and wear. Smooth moving parts make lifting easier and safer.
Store Properly In A Dry Place
Keep the jack away from moisture and dirt. Store it indoors on a flat surface. Cover it to prevent dust buildup. Dry storage prevents rust and damage.

Credit: www.ebay.com
Frequently Asked Questions
How Do I Disassemble A Craftsman Professional Floor Jack?
To disassemble, first release all hydraulic pressure. Remove the handle and side cover. Then, carefully detach the lifting arm and base components. Keep track of small parts and springs for reassembly.
What Tools Are Needed To Rebuild Craftsman 50136 Jack?
You need wrenches, screwdrivers, pliers, a hammer, and seal kits. A hydraulic fluid replacement and cleaning supplies are also essential for a complete rebuild.
How Do I Replace The Hydraulic Seals On My Floor Jack?
Drain the hydraulic fluid first. Remove the hydraulic cylinder assembly. Replace worn seals carefully, then reassemble and refill with fresh hydraulic oil for proper function.
How Often Should I Rebuild The Craftsman 50136 Floor Jack?
Rebuild the jack every 2-3 years or when you notice leaks or loss of lifting power. Regular maintenance extends the jack’s lifespan and ensures safety.
Conclusion
Rebuilding your Craftsman Professional Floor Jack 50136 takes time and care. Follow each step slowly and check your work often. Use the right tools and parts to avoid damage. Keep the jack clean and well-oiled for smooth use. This guide helps you save money and extend the jack’s life.
Practice safety at all times during the rebuild. A working floor jack makes your projects easier and safer. Take pride in doing the repair yourself. You can handle this task with patience and focus.